NEC TOPAZ User manual

LATOP-009
Hybrid Telephone System
Paging / Doorphone
Interface Card
(
2PGDU
)
Guide
Issue : 1.0
Date : April, 2005

Revision History
Issue No. Date Reason of Change
1.0
April, 2005
New Issue
Liability Disclaimer
Nothing contained in this manual shall be deemed to be, and this manual does not constitute, a warranty of, or
representation with respect to, any of the equipment covered. This manual is subject to change without notice
and NEC Unified Solutions, Inc. has no obligation to provide any updates or corrections to this manual.
Further, NEC Unified Solutions, Inc. also reserves the right, without prior notice, to make changes in
equipment design or components as it deems appropriate. No representation is made that this manual is
complete or accurate in all respects and NEC Unified Solutions, Inc. shall not be liable for any errors or
omissions. In no event shall NEC Unified Solutions, Inc. be liable for any incidental or consequential damages
in connection with the use of this manual. This document contains proprietary information that is protected by
copyright. All rights are reserved. No part of this document may be photocopied or reproduced without prior
written consent of NEC Unified Solutions, Inc.
© 2005 by NEC Unified Solutions, Inc.
All Rights Reserved.
Paging / Doorphone Interface Card (2PGDU) Guide 1

Contents
What is the 2PGDU Card?....................................................................................................................................3
System Connection Diagram...............................................................................................................................4
Installation Procedure..........................................................................................................................................5
1- Required Items..................................................................................................................................................5
2- Install the 2PGDU Card....................................................................................................................................6
3- Door Phones and Door Locks.........................................................................................................................8
Connect the Door Phone Unit ............................................................................................................................8
Configure the Ring Assignment for the Door Phone Units.................................................................................9
Connect the Door Lock Unit .............................................................................................................................11
4- External Paging ..............................................................................................................................................13
Connect the External Paging System ..............................................................................................................13
5- External Music on Hold..................................................................................................................................15
Music on Hold Options .....................................................................................................................................15
Connect the External Music System ................................................................................................................16
Assign the System’s Music on Hold .................................................................................................................17
Assign the Music on Hold to a Trunk ...............................................................................................................18
Assign the Music on Hold to an ISDN DDI Number.........................................................................................19
Topaz Configuration Mode ................................................................................................................................22
User Guide...........................................................................................................................................................24
Door Phone & Door Lock Release ...................................................................................................................24
External Page...................................................................................................................................................25
2 Topaz 2PGDU Guide

What is the 2PGDU Card?
The 2PGDU card provides:
•2 connections for NEC Infrontia door phones.
Each connected via a separate RJ11 plug.
•2 audio ports that can be configured for either external paging, external music input or background music.
Each connected via a separate 3.5mm jack plug.
•2 Relay contacts. These can be assigned to any of the door phones or audio ports of the 2PGDU card.
Both relay contacts are connected via a single RJ11 plug.
You can install one 2PGDU card into each of the Topaz main or expansion units giving a total of three cards.
Audio ports Door phones Relays
2 1 2 1 1&2
Topaz 2PGDU Guide 3

System Connection Diagram
External
Paging
System
Topaz
External
Music
Source
Door Phone
Unit and Door
Lock
Each Topaz unit can have a 2PGDU card installed.
4 Topaz 2PGDU Guide

Installation Procedure
Unpack the 2PGDU
Power off the Topaz and install
the 2PGDU card
Power on the Topaz
Configure the 2PGDU ports
Connect the external device(s)
1- Required Items.
The 2PGDU card is required with:
Additional Items
•You will need a door phone unit (part code 6DBM) for each door entry point connected via a single pair
cable terminated with an RJ11 plug to connect to the PGDU card.
•You will need an external door lock device that is compatible with a normally open contact. The control for
the door lock unit must be connected via a single pair cable terminated with an RJ11 plug.
•You will need an external music device connected by a single pair cable terminated with a 3.5mm mono
jack plug for each BGM/External Music Source.
Cross head screwdriver.
Small cutters or pliers.
Optional Items
•NEC Infrontia Door phone unit.
•Cable to connect the door phone unit:
Single pair (2 wire) standard telephone cable.
Maximum cable length: 150 meters with 0.5mm diameter conductor.
•Cable to connect the external audio devices:
Single pair audio cable. Refer to the instructions supplied with the external device for cable type.
Maximum cable length may also be determined by the instructions supplied with the external device. If not,
keep the cable length as short as possible.
Topaz 2PGDU Guide 5

Install the 2PGDU Card
2- Install the 2PGDU Card
! Observe anti-static precautions when handling the 2PGDU card.
•Wear a suitable anti-static strap connected to an Earth point.
The 2PGDU card is installed onto the base board within the Topaz main or expansion units.
One 2PGDU card can be installed into each main/expansion unit.
!When installing the 2PGDU card the installation order below shows the port assignment:
Order of 2PGDU
card installed. Door Phone
numbers Audio Port
numbers
First 1 & 2 1 & 2
Second 3 & 4 3 & 4
Third 5 & 6 5 & 6
The port assignment is determined when the system is powered on, after the 2PGDU card is installed.
1 Power off the Topaz system You must also power off each Topaz expansion unit if you have any
installed.
2 Remove the sub cover and
main cover of the Topaz unit
that will have the 2PGDU card
installed.
3 Set the door phone switch to
the correct mode.
The 2PGDU is compatible with
two types of door phone unit.
The door phone unit used with
the Topaz is the 270Ωtype.
Set switch SW1 to the 270Ωsetting.
4 Fit the 2PGDU card Using the guides fit the 2PGDU card into the Topaz unit and push
firmly onto the connector marked CN4.
Lift off
the
main
cover
Set switch SW1 to
270Ω
Remove the sub cover
Loosen the 2
screws
6 Topaz 2PGDU Guide

Install the 2PGDU Card
5 Before you refit the main cover
break out the panels for the
door phone sockets.
6 Re-fit the main and sub covers
7 Power on the Topaz system If you have any expansion units installed you must power these on
first.
The 2PGDU card will be automatically configured and assigned door
phone and audio port numbers.
To determine the port numbers refer to the relevant section in this
guide (door phones, external paging or external music input)
!System Start Up – Retain Customer Configuration
This is the normal operation for powering the Topaz on.
Before you power on the system check that the NORMAL switch is set
to ON. This will ensure that the system memory retains your
configuration.
The NORMAL switch is located to the right of the ST connector on the
main unit, refer to the Getting Started Guide supplied with the Topaz
for further information.
Remove the
break out for
the door
phone sockets
Topaz 2PGDU Guide 7

Door Phones and Door Locks
3- Door Phones and Door Locks
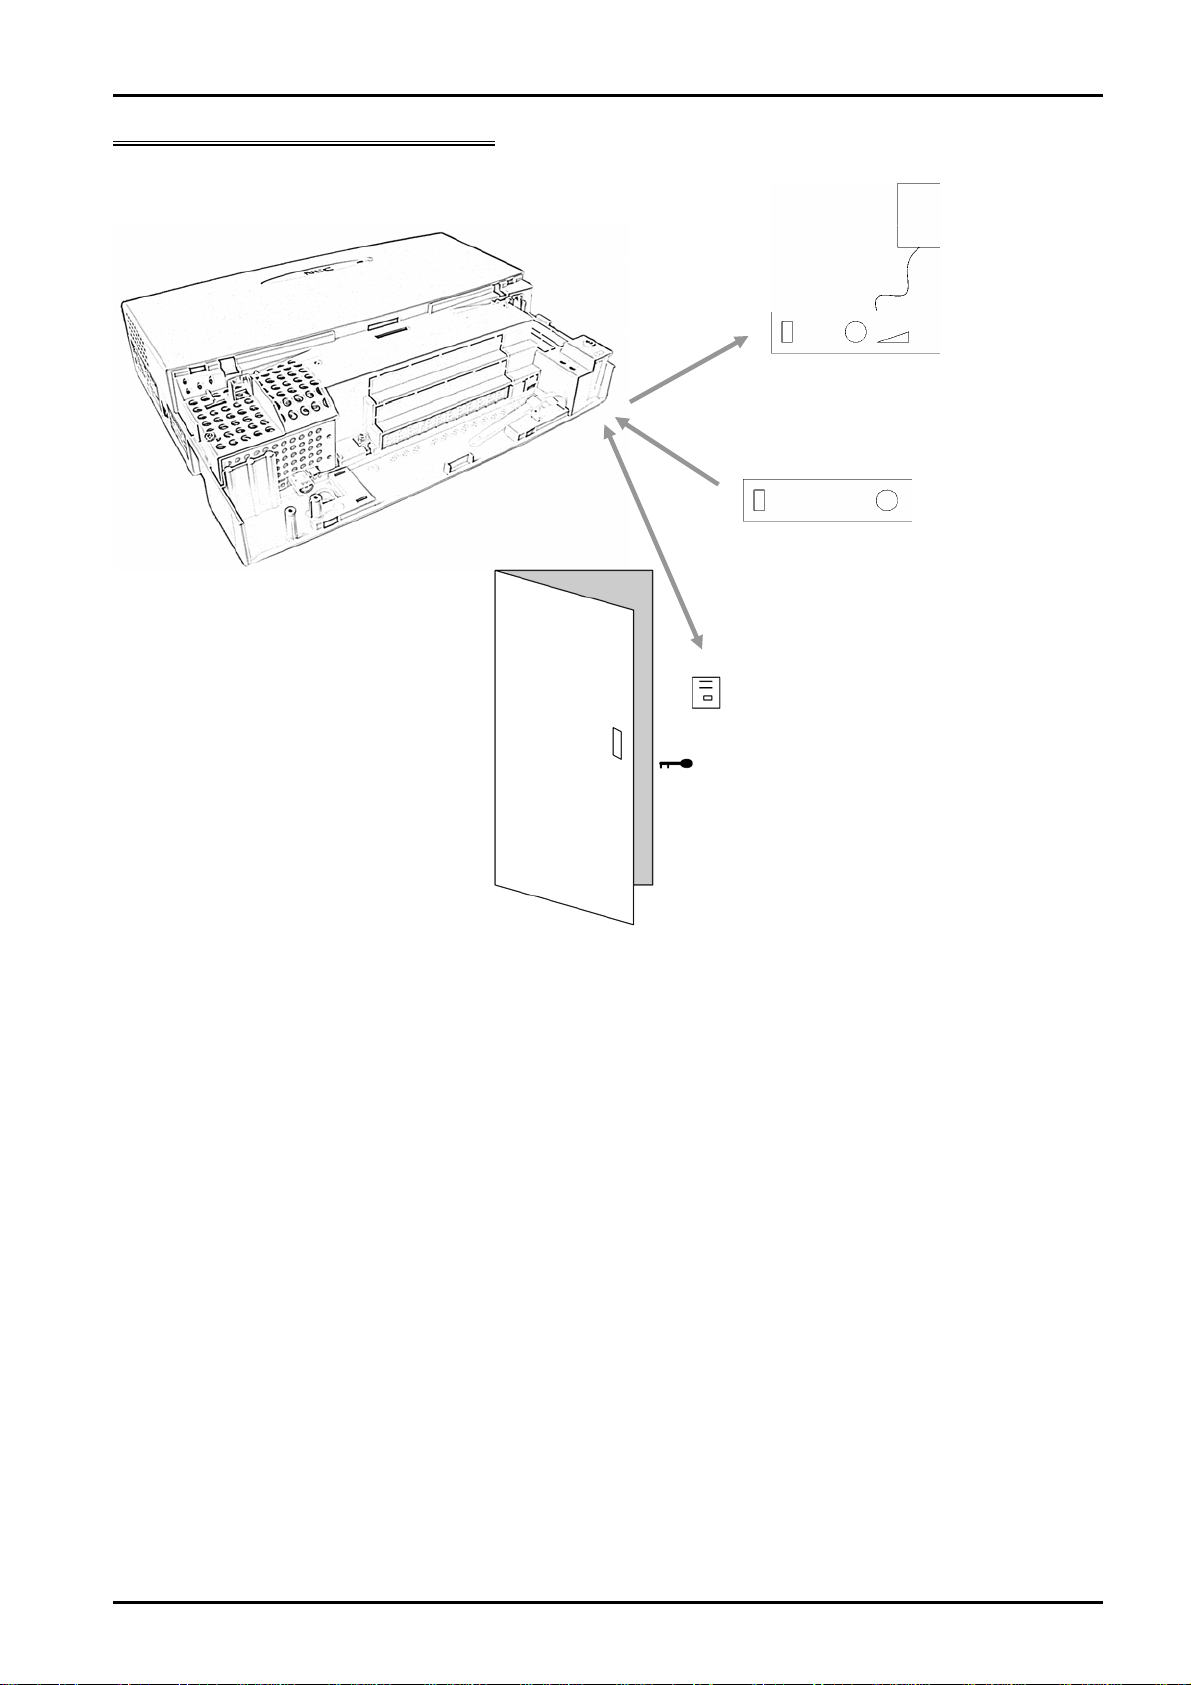
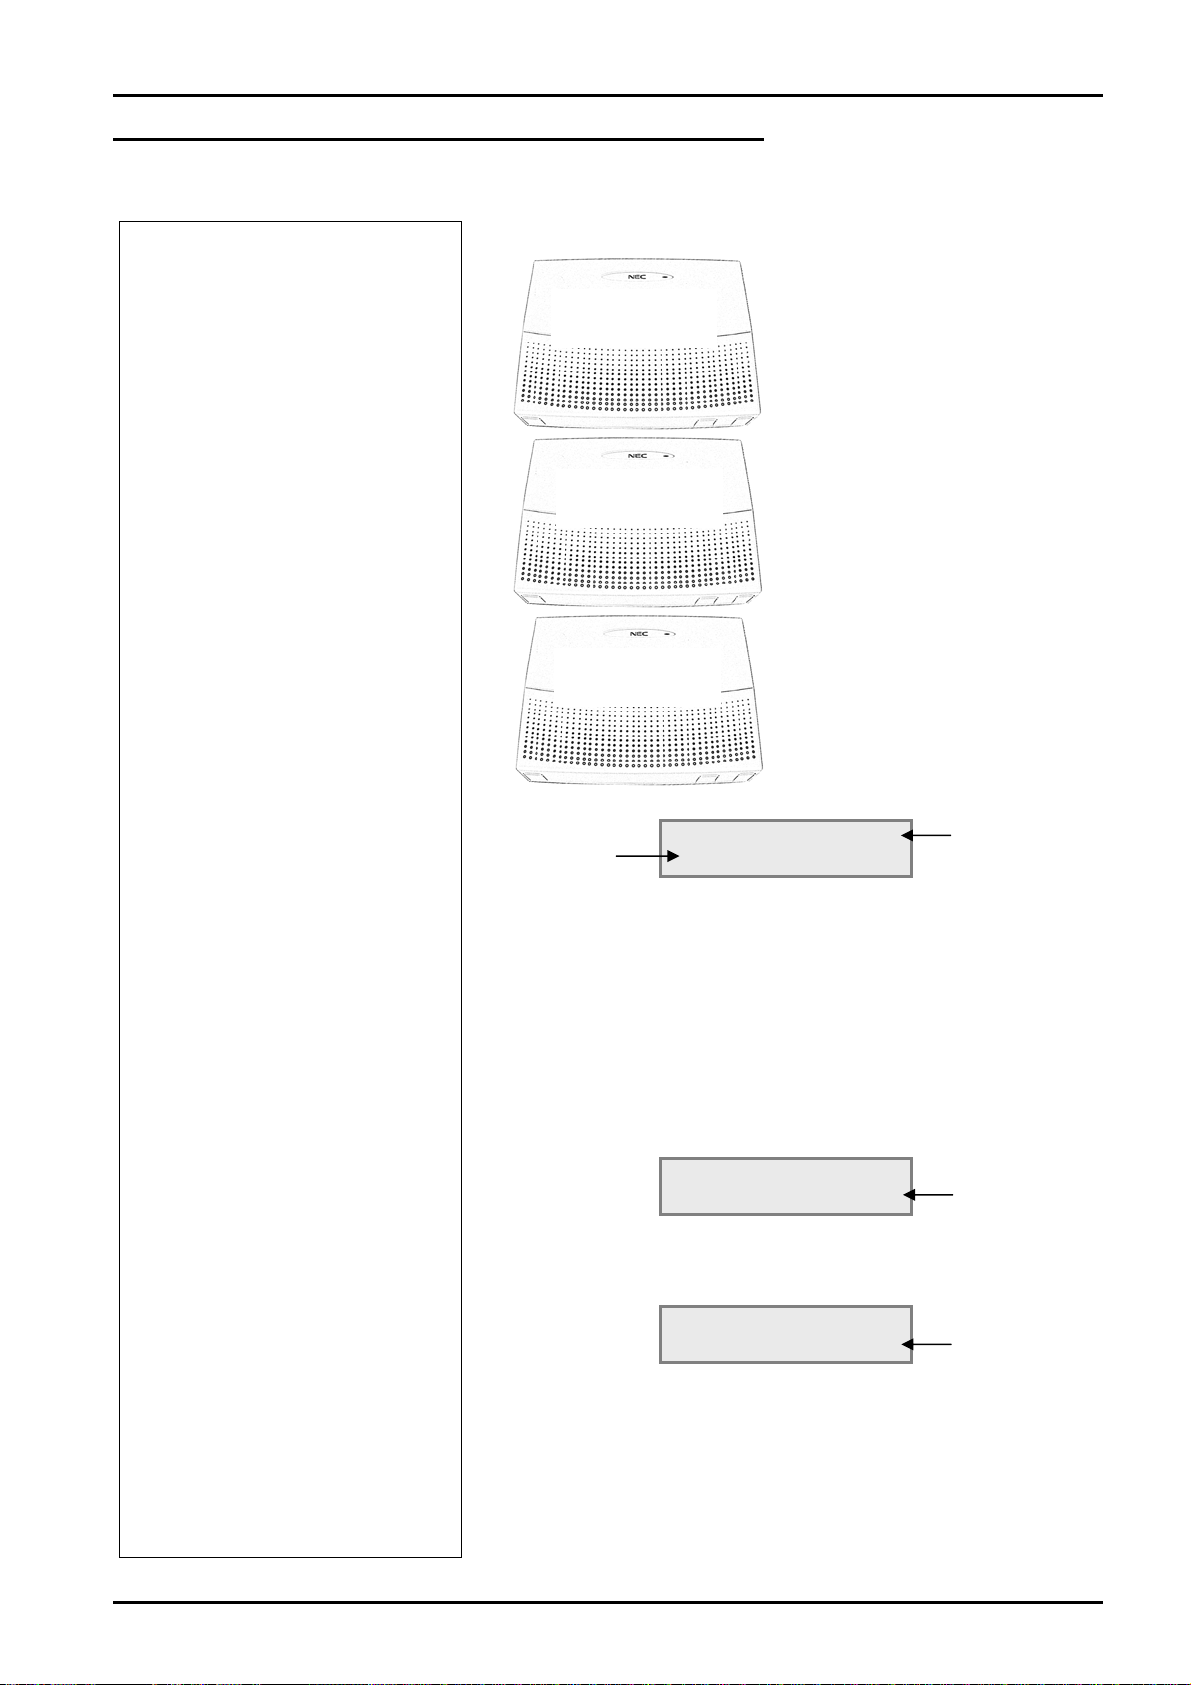
The door phone unit has a push button, built in loudspeaker and microphone. The
door phone unit is installed close to the outside of the door where you have visitors to
your building.
The visitor can push the button to alert a group of telephones that they at the door,
similar to a conventional door bell. You can answer the door phone call and have a
conversation with the visitor. (There is also an option to connected a door lock device
to the Topaz, you can then release the door lock and allow the visitor to enter, refer to
the Door Lock section within this guide).
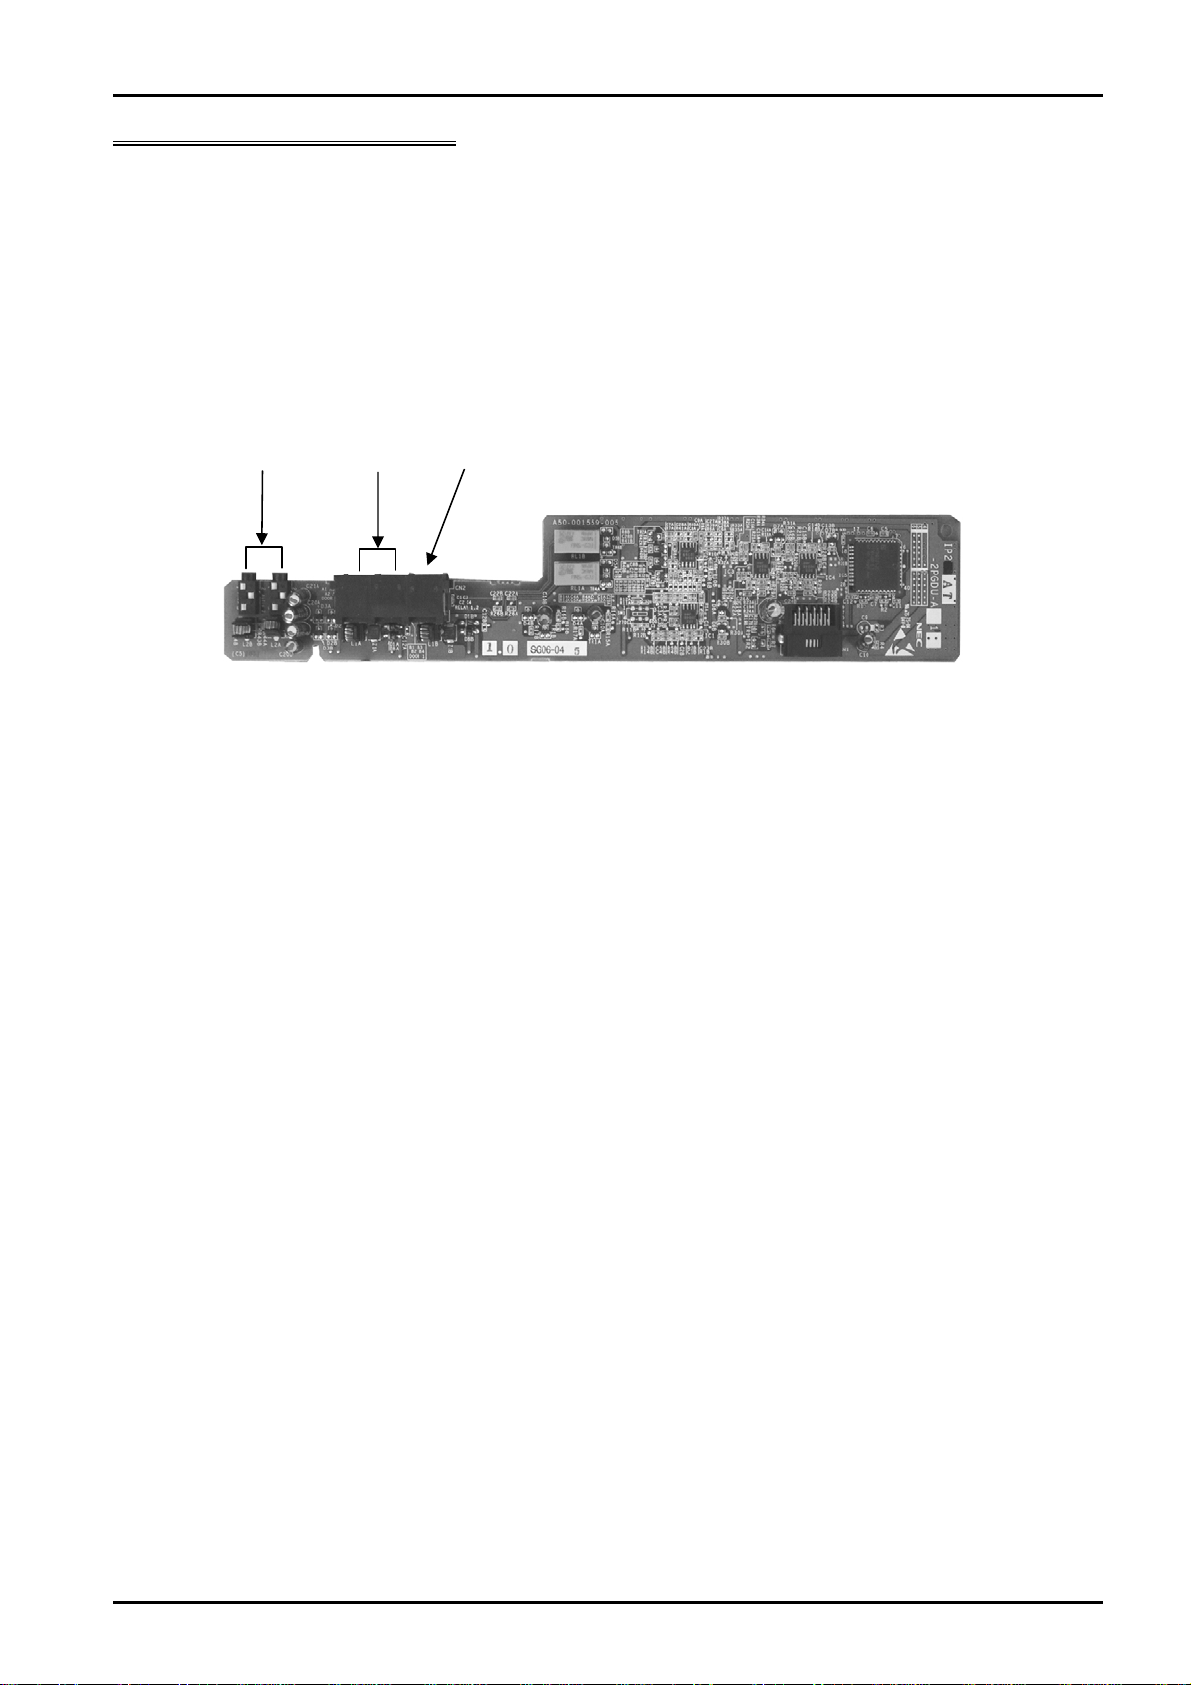
At default the door phone connections of the 2PGDU are enabled, when the button of the door phone is
pressed the call will alert telephone 200. The call will ring for 30 seconds.
The Topaz can have up to 6 door phones connected (2 per Topaz unit).
You can assign a group of phones to each door phone and adjust the ring duration used by all door phones.
Connect the Door Phone Unit
Installation Considerations:
•The maximum cable length to the door unit is 150 meters with 0.5mm diameter conductor.
Environmental Considerations:
•Ensure the door unit is not installed where it will exposed to water or extreme weather conditions.
•The door unit is not weather proof.
•The door unit is not vandal proof.
Door Unit specification:
•Temperature: -20oC to +60oC (-4oF to +140oF)
•Humidity: 20 to 80% (non condensing)
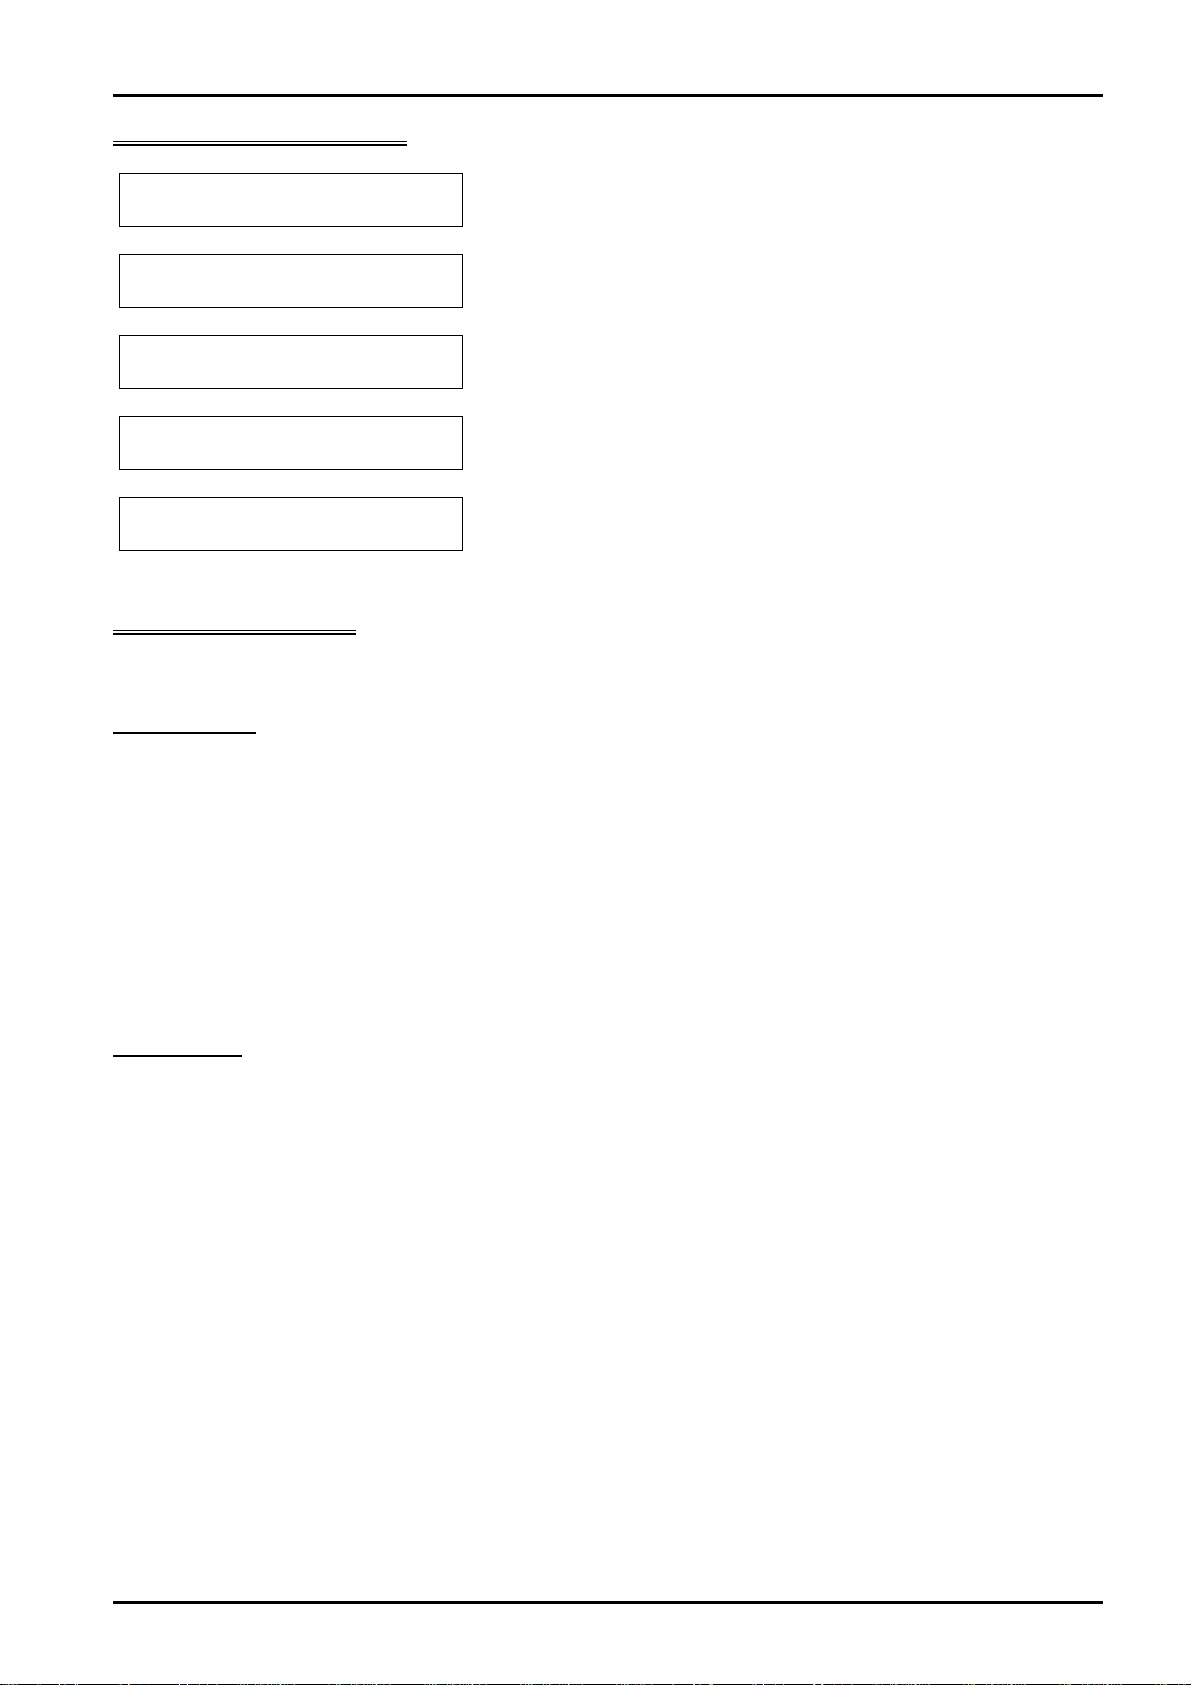
1 Wall mount the door unit.
Remove the wall mount plate
by loosening the screw at the
bottom of the door unit.
Break out one of the cable
access points on the wall
mount plate.
Fix the wall mount plate to the
wall.
There are 2 screws supplied,
you will need wall plugs if
fixing onto brick etc.
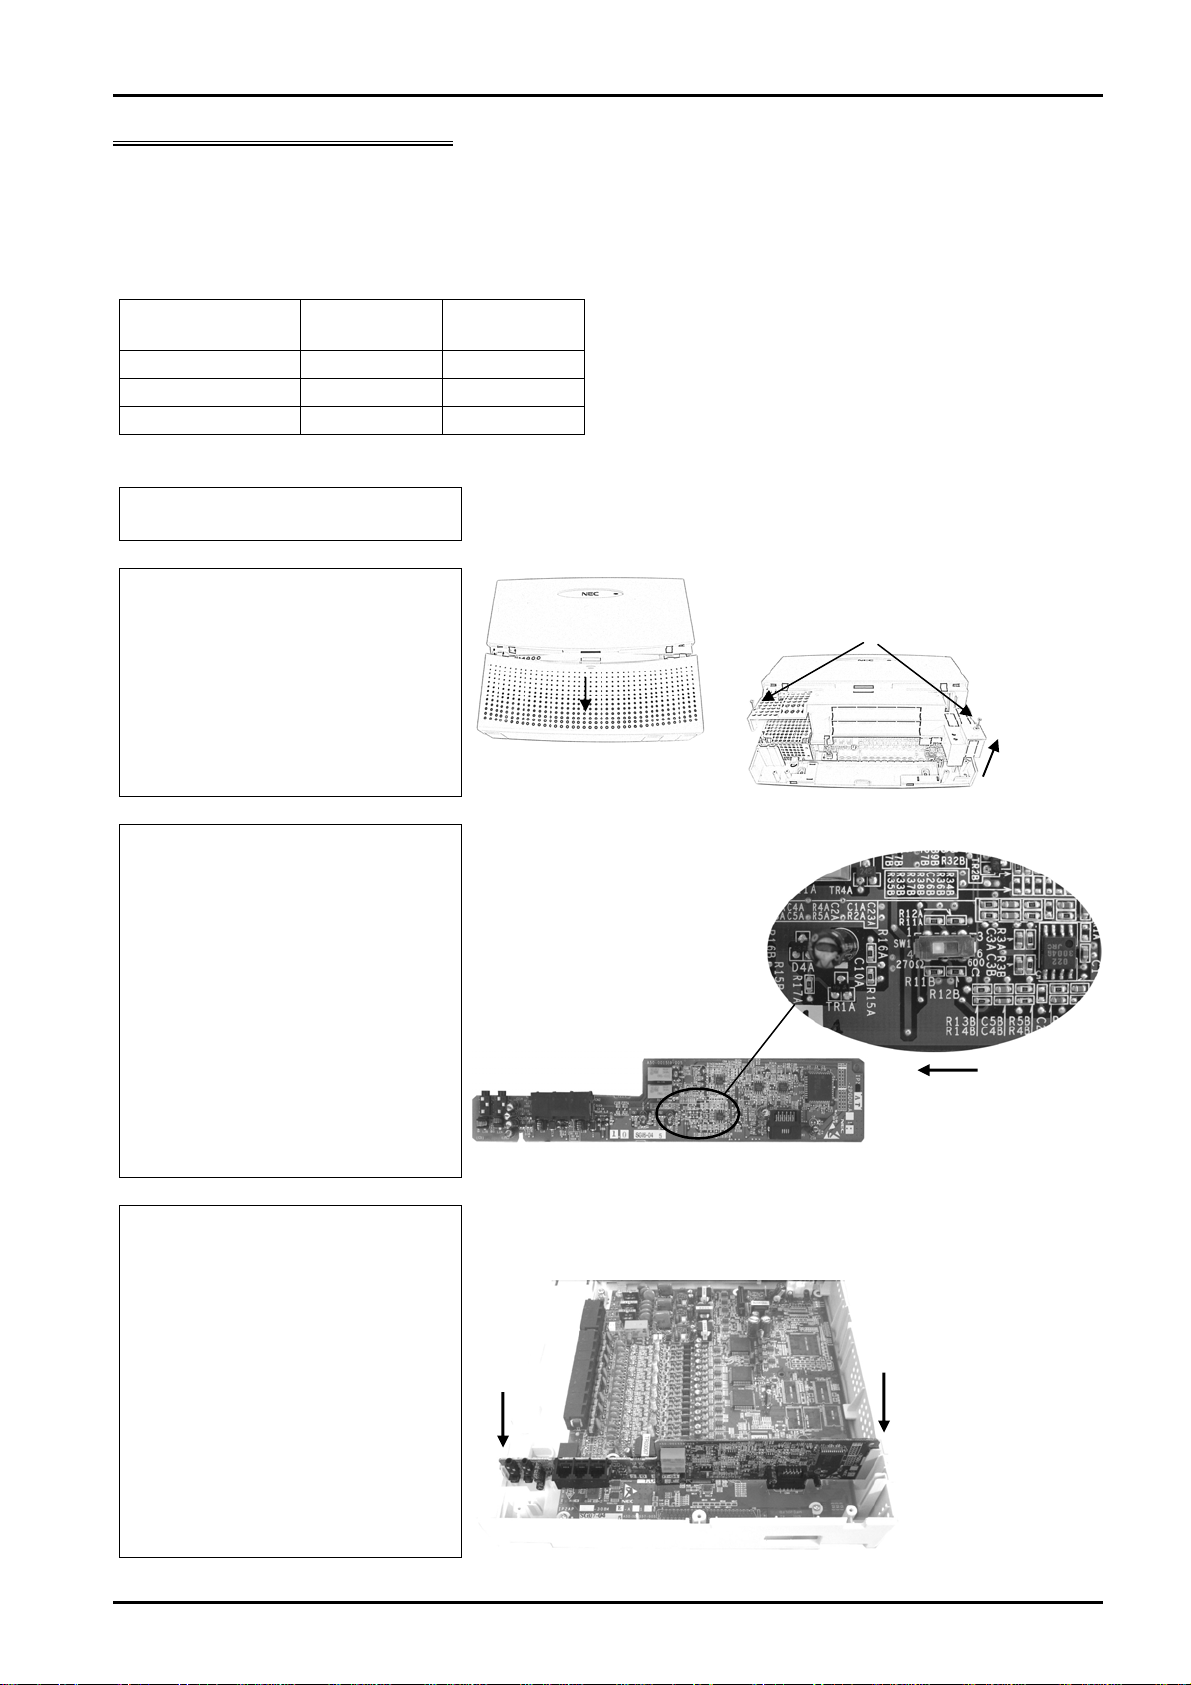
2 Run a single pair cable from
the 2PGDU card to each door
unit.
Maximum cable length is 150
meters with 0.5mm diameter
conductor.
The connection is not polarity
sensitive.
Loosen the
screw and
remove the
wall mount
plate.
Fix the wall
mount plate
using the 2
screws.
2PGDU Door phone RJ11 socket
(DPH1 or DPH2).
Connect pins:
3 pin
4 pin
Door unit.
Connect to screw
terminals marked
–
& I
3 4
8 Topaz 2PGDU Guide

Door Phones and Door Locks
Configure the Ring Assignment for the Door Phone Units
Each door unit will alert (ring) at a group of telephones when the button is pressed on the door unit.
The Topaz can have up to six door units installed.
1 Program 10-03-01
Determine the Door Phone
number (1-6) of the 2PGDU
cards.
Record the settings on the
Configuration sheet below.
The door phone numbers are
assigned automatically when
the 2PGDU card is installed
and the system is powered on.
You can also confirm the door
lock relay number used for
each of the door phones with
Program 10-03-01.
Each 2PGDU card can have 2 door phones.
¾Select the correct 2PGDU slot number with the Vol.STkeys.
¾Select the correct door phone port by pressing FLASH until
the curser moves to the PGD number, enter the number (1 or
2 for the door phone ports). The curser will automatically move
to the Type. You can not change the Type, it is fixed to Type 8
for the door phones.
¾Press HOLD to confirm the entry and display the door phone
number. You can not change the door phone number, it is
automatically assigned.
¾Press HOLD to confirm the entry and step to the relay
assignment.
You can change the port number that the relay is assigned to.
The relay can only be assigned to one of the ports on the
same 2PGDU card.
Port 1 will assign the relay to door phone 1.
Port 2 will assign the relay to door phone 2.
Port 3 will assign the relay to audio port 1.
Port 4 will assign the relay to audio port 2.
Topaz expansion
unit 2
The 2PGDU card installed in
expansion unit 2 will be slot
16 in Program 10-03-01.
Topaz expansion
unit 1
The 2PGDU card installed in
expansion unit 1 will be slot
10 in Program 10-03-01.
Topaz
main unit
The 2PGDU card installed in
the main unit will be slot 4 in
Program 10-03-01.
10-03-01 SlotNo 4
PGD 1 T
yp
e 8
Press Vol ST
to select the slot
number of the
2PGDU card (4,
10 or 16)
10-03-02 SlotNo 4
PGD 1 Port 1
Door phone
number will be
displayed.
10-03-02 SlotNo 4
Rela
y
1 Port 1
The relay is
assigned to this
port of the
2PGDU card.
Press FLASH to
move the curser
to the 2PGDU
port number (1-
4)
Topaz 2PGDU Guide 9

Door Phones and Door Locks
When you are finished:
¾Press DC several times when you are done to return to the
Program Mode.
(Press SPK to save changes and exit if you are finished).
2 Program 32-02-01
Assign telephones to ring for
each door phone.
For each door phone you can
assign up to 32 telephones
that will ring.
You can also specify different
telephones for each of the 8
night modes.
Default: Each door phone will ring at telephone 200
¾Select the correct door phone number with the Vol.STkeys.
¾Select the correct night mode by pressing FLASH until the
curser moves to the MODE number, enter the night mode
number. The curser will automatically move to the member
number, the curser will then automatically move to the
telephone number after you enter the member number (01-
32).
¾Enter the telephone number that you want the door phone to
ring at.
¾Press HOLD to confirm the entry and step to the next member
number.
When you are finished:
¾Press DC several times when you are done to return to the
Program Mode.
(Press SPK to save changes and exit if you are finished).
Press Vol ST
to select the
door phone
number (1-6)
Press FLASH to
move the curser
to the night
mode number
(1-8)
Enter the
telephone
number that you
want to ring.
Member number.
You can have up
to 32 telephones
ringing.
32-02-01 DOOR 1
Mode1=01 TEL 200
10 Topaz 2PGDU Guide

Door Phones and Door Locks
Connect the Door Lock Unit
You can connect an external door lock that can be controlled by the Topaz 2PGDU card.
•The 2PGDU card provides two pairs of normally open relay contacts. The contacts are closed when the
door lock is released. The 2PGDU card does not provide power at the relay contacts.
•Relay 1 is assigned to door unit 1, relay 2 is assigned to door unit 2.
•The contacts are rated at 24 VDC, 0.5A and 120VAC, 0.25A.
!The external door lock must be compatible with the 2PGDU relay contact operation.
Topaz relay contact open: Door locked.
Topaz relay contact closed: Door unlocked.
The relay assigned to each door phone is set by Program 10-03-01, refer to the door phone ring assignment
above for details.
At default:
Relay RY1 is assigned to door phone DPH1.
Relay RY2 is assigned to door phone DPH2.
!The relays can only be assigned to one of the ports on the same 2PGDU card.
1 Connect the door lock control
to the 2PGDU card relay
contacts.
!If you have a door phone unit
installed and door lock at the
same door then ensure you
connect the correct door lock
relay RY1/RY2.
2PGDU card.
Door unit connection.
Relay contact
operation of 2PGDU
card.
Door locked
Door unlocked
Topaz 2PGDU Guide 11

Door Phones and Door Locks
Configuration Sheet: 2PGDU Card
These settings are from Program 10-03-01 for each 2PGDU card.
DPH1 DPH2 RLY1 RLY2 Audio 1 Audio 2
2PGDU
Card Door phone
number
(1-6)
Door phone
number
(1-6)
Assigned to
2PGDU port
(1-4)
Assigned to
2PGDU port
(1-4)
Mode
6=Ext Page
9=Ext MOH
ACI port
number
(1-6)
Mode
6=Ext Page
9=Ext MOH
ACI port
number
(1-6)
Main unit
(Slot 4)
Expansion
unit 1
(Slot 10)
Expansion
unit 2
(Slot 16)
Configuration Sheet: Door Phone Ring Assignment
These settings are from Program 32-02-01 for each door phone enter the telephone numbers that each door
phone will ring for each night mode.
!You can also identify the location (e.g. Front Door) and if a door lock is installed on this sheet.
Telephone Ring Assignment for each Night Mode
Door
Phone 1 2 3 4 5 6 7 8
1
2
3
4
5
6
12 Topaz 2PGDU Guide

External Paging
4- External Paging
You can connect the audio ports of the Topaz to an external Public Address (PA) system. Any telephone can
then place an external paging call over the PA system.
Each 2PGDU card has two audio ports, you can install one 2PGDU card into each Topaz main/expansion unit
giving a total of six audio ports.
2PGDU audio port specification:
Impedance: 600 Ohm @ 1KHz
Nominal output level: 250mV (-10dBm)
Maximum output level: 400mV RMS
Connect the External Paging System
1 Run a single pair audio cable
to the external paging system.
Terminate the cable with a
3.5mm mono Jack plug to
connect to the 2PGDU audio
port.
Note, there is only 26mm of
clearance for the jack plug
inside the sub cover.
2 Program 10-03-01
Set the audio port of the
2PGDU card to External
Paging.
Record the settings on the
Configuration sheet on page
12.
The Topaz can have a 2PGDU card installed into each Topaz
main/expansion unit.
Each 2PGDU card has 2 audio ports which can be configured for
either external music or external paging.
¾Select the correct 2PGDU slot number with the Vol.STkeys.
¾Select the correct audio port by pressing FLASH until the
curser moves to the PGD port number, enter the number (3 or
4 for the audio ports). The curser will automatically move to
the Type. Set to Type 6 for external paging.
¾Press HOLD to confirm the entry and display the audio port
number. You can not change the port number, it is
automatically assigned.
The audio port number will determine the Page Zone number
that the user will dial to make the page call.
¾Press HOLD to confirm the entry and step to the next 2PGDU
port.
When you are finished:
¾Press DC several times when you are done to return to the
Program Mode.
(Press SPK to save changes and exit if you are finished).
Audio port of the Topaz
main/expansion unit
3.5mm mono
Jack plug
10-03-01 SlotNo 4
PGD 3 T
yp
e 6
Press Vol ST
to select the slot
number of the
2PGDU card (4,
10 or 16)
10-03-02 SlotNo 4
PGD 3 Port 1 The audio port
number will be
shown (1-6).
Press FLASH to
move the curser
to the 2PGDU
port number (1-
4)
Topaz 2PGDU Guide 13

External Paging
3 Program 31-04-01
Confirm the 2PGDU audio port
number to page zone number
assignment.
The Topaz can have up to 6
external paging zones.
Record the settings on this
sheet.
Default:
Audio Port number Page Zone
number
1 1
2 2
3 3
4 4
5 5
6 6
¾Select the audio port number (1-6) with the Vol.STkeys.
¾Enter the paging zone number (1-6) the audio port will be
assigned to.
¾Press HOLD to confirm the entry and step to the next 2PGDU
port.
When you are finished:
¾Press DC several times when you are done to return to the
Program Mode.
(Press SPK to save changes and exit if you are finished).
Audio port
number (1-6)
Page Zone
number (1-6)
31-04-01 SPK 1
Paging Zone GP 1
14 Topaz 2PGDU Guide

External Music
5- External Music on Hold
You can connect the audio ports of the Topaz to an external music device. The external music can be played to
calls placed in hold.
Each 2PGDU card has two audio ports, you can install one 2PGDU card into each Topaz main/expansion unit
giving a total of six audio ports. When you set a 2PGDU audio port as music input it is referred to as an Audio
Communication Interface (ACI).
2PGDU audio port specification:
Impedance: 600 Ohm @ 1KHz
Nominal input level: 250mV (-10dBm)
Maximum input level: 1V RMS
Music on Hold Options
•You can have a single external music device that will provide the music on hold for every type of held call
on the system.
More than one external music device connected to the Topaz via a 2PGDU audio port. You could then
assign a different music device per trunk or DDI number.
The system music source (Topaz tune or external music input) is defined in Program 10-04-01.
The music source used for each trunk is defined in Program 14-08-01.
The music source used for each DDI is defined in Program 22-11-09.
The 2PGDU audio ports are set as music input in Program 10-03-01.
You will also need to set the 2PGDU audio ports to Music input type in Program 33-01-01.
See below for configuration details.
Topaz 2PGDU Guide 15

External Music
Connect the External Music System
1 Run a single pair audio cable
to the external music device.
Terminate the cable with a
3.5mm mono Jack plug to
connect to the 2PGDU audio
port.
Note, there is only 26mm of
clearance for the jack plug
inside the sub cover.
2 Program 10-03-01
Set the audio port of the
2PGDU card to External Music
input.
Record the settings on the
Configuration sheet on page
12.
The Topaz can have a 2PGDU card installed into each Topaz
main/expansion unit.
Each 2PGDU card has 2 audio ports which can be configured for
either external music or external paging.
¾Select the correct 2PGDU slot number with the Vol.STkeys.
¾Select the correct audio port by pressing FLASH until the
curser moves to the PGD port number, enter the number (3 or
4 for the audio ports). The curser will automatically move to
the Type. Set to Type 9 for external music input.
¾Press HOLD to confirm the entry and display the audio port
number. You can not change the port number, it is
automatically assigned.
The audio port number will determine the Audio
Communication Interface (ACI) number.
¾Press HOLD to confirm the entry and step to the next 2PGDU
port.
When you are finished:
¾Press DC several times when you are done to return to the
Program Mode.
(Press SPK to save changes and exit if you are finished).
Audio port of the Topaz
main/expansion unit
3.5mm mono
Jack plug
10-03-01 SlotNo 4
PGD 4 T
yp
e 9
Press Vol ST
to select the slot
number of the
2PGDU card (4,
10 or 16)
10-03-02 SlotNo 4
PGD 4 Port 1 The audio port
number will be
shown (1-6).
Press FLASH to
move the curser
to the 2PGDU
port number (1-
4)
16 Topaz 2PGDU Guide

External Music
Assign the System’s Music on Hold
The system’s music on hold can be either a tune generated by the system or an external music device
connected to the MOH socket of the Topaz main unit.
1 Program 10-04-01
Set the music on hold device
for the system.
This will be used for all held
calls unless another is
specified for the trunk or DDI.
Default:
The Topaz generated tune is used.
¾Set to 0 to select the Topaz generated tune.
Set to 1 for external music input via the MOH socket.
¾Press HOLD to confirm the entry and display the music
selection (OFF/ON)
Set to 0 to turn OFF the music on hold (callers will hear
silence).
Set to 1 to turn ON the music on hold.
¾Press HOLD to confirm the entry and step to the gain setting.
Enter the gain level 1-63 (-15.5dB to +15.5dB), 0.5dB
increments.
Enter a value of 32 for 0dB, no gain.
¾Press HOLD to confirm the entry.
When you are finished:
¾Press DC several times when you are done to return to the
Program Mode.
(Press SPK to save changes and exit if you are finished).
10-04-01
Hold Music Set 0
2 Program 33-01-01
Set the audio port of the
2PGDU as music input.
An audio port is referred to as
an ACI (Audio Communication
Interface) port.
Default:
The audio (ACI) ports are not assigned.
¾Type 0 is not assigned.
Type 3 is BGM source input.
Type 4 is EXMOH source input.
Press HOLD to confirm the entry and display the next ACI
port.
¾Press HOLD to confirm the entry
When you are finished:
¾Press DC several times when you are done to return to the
Program Mode.
10-04-02
Music Select 1
10-04-03
Audio Gain Set 32
33-01-01 ACIPort1
ACI T
yp
e 4
Turn ON/OFF
the music on
hold
Gain level 1-63
Press Vol ST
to select the ACI
number (1-6)
Input Type (0-4)
Topaz 2PGDU Guide 17

External Music
Assign the Music on Hold to a Trunk
The music on hold can be either system’s music tune or an external music device connected to an audio port of
a 2PGDU card.
You can assign the music on hold for each trunk on the system with Program 14-08-01.
1 Program 14-08-01
Set the music on hold device
for each trunk.
Default:
The system’s music tune is used.
¾Set to Type 0 to select the system music tune (set by Program
10-04-01).
Set to Type 2 for external music input via a 2PGDU audio port.
¾Press HOLD to confirm the entry and display the 2PGDU
audio port number, if you set to Type 2 above.
Select the 2PGDU audio port number 1-6 (audio port numbers
is defined in Program 10-03-02).
¾Press HOLD to confirm the entry
When you are finished:
¾Press DC several times when you are done to return to the
Program Mode.
2 Program 33-01-01
Set the audio port of the
2PGDU as music input.
An audio port is referred to as
an ACI (Audio Communication
Interface) port.
Default:
The audio (ACI) ports are not assigned.
¾Type 0 is not assigned.
Type 1 is input.
Press HOLD to confirm the entry and display the next ACI
port.
¾Press HOLD to confirm the entry
When you are finished:
¾Press DC several times when you are done to return to the
Program Mode.
3 Program 11-06-01
Assign an extension number to
the ACI port.
An ACI (Audio Communication
Interface) port must have a
extension number in order to
operate correctly.
Choose a number outside of
the customers telephone
numbering scheme e.g. 601
for ACI port 1 etc.
Default:
The audio (ACI) ports do not have an extension number assigned.
¾Enter any spare extension number.
Press HOLD to confirm the entry and display the next ACI
port.
If the extension number is already used the display will flash
Duplicate Data, try a different extension number.
When you are finished:
¾Press DC several times when you are done to return to the
Program Mode.
(Press SPK to save changes and exit if you are finished).
Press Vol ST
to select the
trunk number (1-
51)
14-08-01 Trunk 1
MOH T
yp
e 0
14-08-02
Source Port 1
33-01-01 ACIPort1
ACI T
yp
e 1
11-06-01 ACIPort1
ACI Ext No. 601
Select the
2PGDU audio
port number 1-6
Press Vol ST
to select the ACI
number (1-6)
18 Topaz 2PGDU Guide

External Music
Assign the Music on Hold to an ISDN DDI Number
The music on hold can be either system’s music tune or an external music device connected to an audio port of
a 2PGDU card.
You can assign the music on hold for each DDI number with Program 22-11-09.
1 Program 22-11-09
Set the music on hold device
for DDI number.
!If you have different DDI
areas for night mode operation
ensure you set the MOH type
for all areas.
Default:
The system’s music tune is used.
¾Set to Type 0 to select the system music tune (set by Program
10-04-01).
Set to Type 2 for external music input via a 2PGDU audio port.
¾Press HOLD to confirm the entry and display the 2PGDU
audio port number, if you set to Type 2 above.
Select the 2PGDU audio port number 1-6 (audio port numbers
is defined in Program 10-03-02).
¾Press HOLD to confirm the entry
When you are finished:
¾Press DC several times when you are done to return to the
Program Mode.
2 Program 33-01-01
Set the audio port of the
2PGDU as music input.
An audio port is referred to as
an ACI (Audio Communication
Interface) port.
Default:
The audio (ACI) ports are not assigned.
¾Type 0 is not assigned.
Type 1 is input.
Press HOLD to confirm the entry and display the next ACI
port.
¾Press HOLD to confirm the entry
When you are finished:
¾Press DC several times when you are done to return to the
Program Mode.
3 Program 11-06-01
Assign an extension number to
the ACI port.
An ACI (Audio Communication
Interface) port must have a
extension number in order to
operate correctly.
Choose a number outside of
the customers telephone
numbering scheme e.g. 601
for ACI port 1 etc.
Default:
The audio (ACI) ports do not have an extension number assigned.
¾Enter any spare extension number.
Press HOLD to confirm the entry and display the next ACI
port.
If the extension number is already used the display will flash
Duplicate Data, try a different extension number.
When you are finished:
¾Press DC several times when you are done to return to the
Program Mode.
(Press SPK to save changes and exit if you are finished).
22-11-10 Tbl 1
Source Port 1
33-01-01 ACIPort1
ACI T
yp
e 1
11-06-01 ACIPort1
ACI Ext No. 601
22-11-09 Tbl 1
MOH T
yp
e 0
Select the
2PGDU audio
port number 1-6
Topaz 2PGDU Guide 19
Other manuals for TOPAZ
1
Table of contents
Other NEC Telephone System manuals

NEC
NEC EXIFU-A1 Quick guide

NEC
NEC NDK 9000 Instruction Manual

NEC
NEC Xen Master User guide

NEC
NEC SL 2100 User manual

NEC
NEC Ranger AK User manual

NEC
NEC DS1000 Operation instructions

NEC
NEC Univerge SV9100 User manual

NEC
NEC UX5000 User manual

NEC
NEC ELECTRA ELITE IPK II User manual

NEC
NEC SV8300 User manual

NEC
NEC UNIVERGE SL2100 User manual

NEC
NEC Univerge SV9100 User manual

NEC
NEC QuSL1100 User manual

NEC
NEC UNIVERGE SL2100 Instruction manual

NEC
NEC DXE Series Reference guide

NEC
NEC Xen Topaz User manual

NEC
NEC DSX-160 User manual

NEC
NEC Univerge SV8100 User guide

NEC
NEC SL1100 Instruction manual

NEC
NEC UX5000 User manual