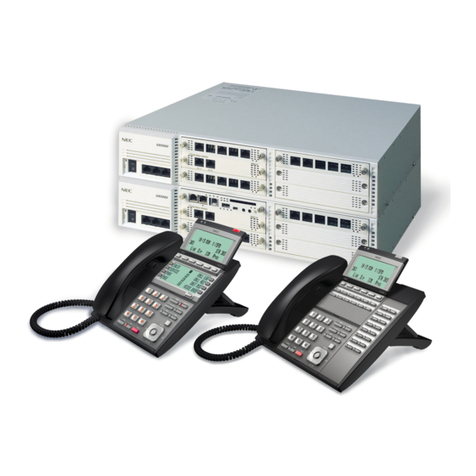
NEC Univerge UM8000 User manual

UM8000
Doc. No. 10569
Issue 1.0
Installation Manual


NEC shall not be liable for any direct, indirect, consequential or incidental
damages about the use of this equipment, manual or any related materials.
The information in this technical manual is advisory in nature and is subject to
change. NEC may make improvements and changes in the products described
in this manual without notice.
Changes is periodically made to the information in the new editions. Efforts have
been made to ensure that the contents of this manual are correct. Should you
find any error, NEC welcomes your comments to improve our communications.
Please contact NEC on 1800 036 136.
Contents of this manual are subject to change without prior notice at the
discretion of NEC Australia Pty Ltd.
This document has been prepared for the use of employees and customers of
NEC Australia Pty Ltd and may not be reproduced without prior written approval
of NEC Australia Pty Ltd.
Copyright © 2007
NEC Australia Pty Ltd
633 – 647 Springvale Road
Mulgrave Vic 3170


Installation Manual i
Table of Contents
Chapter 1 Introduction
Section 1 About UM8000® ......................................................................................... 1-1
1.1 Supported Phone Systems .............................................................. 1-1
1.2 Starting the UM8000 for the First Time ............................................ 1-1
Section 2 About this Guide .......................................................................................... 1-2
2.1 Documentation Conventions ............................................................ 1-2
2.2 Using the Command Line Interface ................................................. 1-3
Section 3 Related Documentation ............................................................................... 1-3
3.1 Supporting Documents .................................................................... 1-3
3.2 System Management Help ............................................................... 1-4
3.2.1 Locally Installing Online Help Files .................................... 1-4
3.2.2 Third-Party Documentation ................................................ 1-4
Chapter 2 WinSCP and PuTTY
Section 1 Overview ...................................................................................................... 2-1
Section 2 WinSCP ....................................................................................................... 2-1
2.1 Installing WinSCP ............................................................................ 2-1
2.2 Using WinSCP ................................................................................. 2-2
2.2.1 Running WinSCP ............................................................... 2-2
2.2.2 Using PuTTY from WinSCP ............................................... 2-3
Section 3 PuTTY ......................................................................................................... 2-3
3.1 Installing PuTTY ............................................................................... 2-3
3.2 Configuring PuTTY .......................................................................... 2-4
3.3 Using PuTTY .................................................................................... 2-5

Issue No. 1.0 UM8000
ii Table of Contents
Chapter 3 The Web Administration Console
Section 1 Overview ...................................................................................................... 3-1
1.1 Supported Internet Browsers ........................................................... 3-1
1.2 Configuring Internet Explorer ........................................................... 3-1
Section 2 Starting the UM8000 for the First Time ........................................................ 3-2
Section 3 Logging On to the Web Administration Console ........................................ 3-11
3.1 Logging In ...................................................................................... 3-11
3.2 Logging Off ..................................................................................... 3-12
Section 4 Web Administration Console Pages .......................................................... 3-12
Section 5 Web Administration Console Icons ............................................................ 3-13
Section 6 Web Administration Console Main Menu ................................................... 3-14
Chapter 4 System Components
Section 1 Overview ...................................................................................................... 4-1
1.1 System Components ........................................................................ 4-1
1.2 NEC-supplied Components .............................................................. 4-1
1.3 User-supplied Components .............................................................. 4-2
Section 2 Site Requirements ....................................................................................... 4-2
2.1 Site Recommendations .................................................................... 4-2
2.2 Setting Up the System Overview ..................................................... 4-3
Chapter 5 Startingand StoppingtheVoice Messaging
Software and System
Section 1 Overview ...................................................................................................... 5-1
Section 2 Stopping/Starting Using the Web Administration Console ........................... 5-1

UM8000 Issue No. 1.0
Installation Manual iii
Chapter 6 Hardware
Section 1 CD-VM00 Blade (Voice Mail and Server) .................................................... 6-1
1.1 Description ....................................................................................... 6-1
1.2 Functions ......................................................................................... 6-1
Section 2 Installation ................................................................................................... 6-2
Section 3 Load Push-button Switch ............................................................................. 6-4
3.1 Initialize Factory Defaults ................................................................. 6-4
3.2 Reset CD-VM00 (APSU) .................................................................. 6-4
Section 4 LED Indications ........................................................................................... 6-5
Section 5 Connectors .................................................................................................. 6-5
5.1 RS-232 Interface .............................................................................. 6-5
5.2 USB Interface .................................................................................. 6-7
5.3 VGA Display Interface ...................................................................... 6-7
5.4 10/100 BASE-TX Ethernet Interface ................................................ 6-8
Chapter 7 Setting Up Integration (SV8100)
Section 1 Overview ...................................................................................................... 7-1
Section 2 Setting Up Integration .................................................................................. 7-1
Section 3 Configuring Integration ................................................................................ 7-1
Section 4 Programming ............................................................................................... 7-2
4.1 Basic Configuration ......................................................................... 7-2
4.2 Class of Service ............................................................................... 7-3
4.3 Assign Trunks as Automated Attendant Trunks ............................... 7-4

Issue No. 1.0 UM8000
iv Table of Contents
Chapter 8 Setting Up Integration (SV8300)
Section 1 Overview ...................................................................................................... 8-1
Section 2 Setting Up Integration .................................................................................. 8-1
2.1 Assign Extension Numbers to Voice Messaging Ports .................... 8-1
2.2 Enabling Digital Voice Messaging Support ...................................... 8-1
2.3 Assign Voice Messaging Ports as Digital Voice Messaging Ports ... 8-2
2.4 Setting Up the UCD Hunt Group ...................................................... 8-3
2.5 Enabling the Automated Attendant .................................................. 8-4
2.6 Setting Up Call Forward on Busy or Ring-No-Answer ..................... 8-5
2.7 Enabling Busy Greetings .................................................................. 8-5
2.8 Enabling Easy Message Access ...................................................... 8-5
2.9 Disabling Easy Message Access ..................................................... 8-5
2.10 Enabling Automatic Subscriber-to-Subscriber Messaging in
Secured Mode ............................................................................. 8-6
2.11 Setting Up Message Waiting Indication ........................................... 8-6
2.12 Setting Up Automatic Number Identification (ANI) ........................... 8-6
Section 3 Setting Up Soft Keys .................................................................................... 8-7
3.1 Enabling Soft Key Call Screening .................................................... 8-7
3.2 Enabling the Voice Messaging Ports for Soft Keys .......................... 8-7
Section 4 Setting Up Live Record ................................................................................ 8-7
4.1 Configuring Live Record on the Phone System ............................... 8-8
4.2 Configuring Live Record on a Subscriber’s Extension ..................... 8-9
4.3 Configuring Live Record on UM8000 ............................................. 8-10
Section 5 Setting Up Live Monitor ............................................................................. 8-11
5.1 Enable Live Monitor on the Phone System .................................... 8-11
5.2 Configuring Live Monitor on a Subscriber’s Extension ................... 8-11
5.3 Enabling Live Monitor on UM8000 ................................................. 8-12

UM8000 Issue No. 1.0
Installation Manual v
Chapter 9 Configuring UM8000
Section 1 Overview ...................................................................................................... 9-1
Section 2 Starting the UM8000 for the First Time ....................................................... 9-1
Section 3 Configuring the Voice Messaging System ................................................. 9-10
Section 4 Before Shipping the Voice Messaging System .......................................... 9-11
4.1 Resetting Third-Party Licensing Agreements ................................ 9-11
Section 5 Setting Up the UM8000 Software .............................................................. 9-12
5.1 Configuring Network Setup ............................................................ 9-12
5.2 Specifying the Network Setup ........................................................ 9-12
5.3 Setting Up UM8000 Date and Time ............................................... 9-13
5.4 Changing Administrator Password and Creating a New User ....... 9-14
5.4.1 Changing the Password ................................................... 9-14
5.4.2 Creating a New User ........................................................ 9-14
Chapter 10 E-mail Integration
Section 1 Overview .................................................................................................... 10-1
Section 2 Protocols .................................................................................................... 10-1
2.1 E-mail Protocols ............................................................................. 10-1
2.2 Subscriber E-mail Authentication Protocols ................................... 10-2
Section 3 E-mail Integration Set Up .......................................................................... 10-3
Section 4 Configuring the E-mail Servers .................................................................. 10-3
4.1 Setting the E-mail Server Configuration ......................................... 10-3
4.2 Converting Existing Domino E-mail Files for Users ....................... 10-4
4.2.1 Converting Existing E-mail Files ...................................... 10-4
Section 5 Configuring the Voice Messaging System ................................................. 10-4
5.1 Configuring the Voice Messaging System for E-mail Integration ... 10-5
5.2 Configuring the E-mail Notification Template ................................. 10-5
Section 6 Setting Up Subscriber Mailboxes .............................................................. 10-7
6.1 Setting Up the Default Subscriber Template .................................. 10-7
6.2 Setting Subscriber E-mail Options ................................................. 10-7

Issue No. 1.0 UM8000
vi Table of Contents
Chapter 11 Remote Maintenance
Section 1 Overview .................................................................................................... 11-1
Section 2 Setting Up Dial-up Maintenance ................................................................ 11-1
2.1 Setting Up the Remote Computer Dial-up Networking ................... 11-2
Section 3 Using a Remote Computer ........................................................................ 11-2
3.1 Configuring TCP/IP ........................................................................ 11-2
3.1.1 Configuring TCP/IP for the Remote Computer ................. 11-2
3.2 Using Dial-up Connection .............................................................. 11-3
3.2.1 Using WinSCP and Dial-up to Connect Remotely ........... 11-3
3.2.2 Transferring Files to the Remote Computer ..................... 11-4
3.2.3 Transferring Files from the Remote Computer ................. 11-4
3.3 Logging On and Logging Off Using PuTTY .................................... 11-4
3.3.1 Logging On Using PuTTY ................................................ 11-4
3.3.2 Changing the Admin Password ........................................ 11-5
3.3.3 Logging Off ....................................................................... 11-5
Section 4 Single Point of Entry .................................................................................. 11-6
4.1 Using WebPro ................................................................................ 11-6
4.2 PCPro ........................................................................................... 11-10
Chapter 12 Backing up and Restoring UM8000
Section 1 Backing Up the Voice Messaging Data ..................................................... 12-1
Section 2 Backing Up and Restoring UM8000 Mail Database .................................. 12-1
2.1 Backing Up the UM8000 ................................................................ 12-1
2.1.1 Performing a Manual Backup ........................................... 12-1
2.1.2 Enabling Daily Backup ..................................................... 12-2
2.1.3 Downloading a Backup Stored on the Voice Mail Drive ... 12-3
2.2 Restoring a Database Back Up to the UM8000 ............................. 12-3
2.2.1 Uploading a Stored Backup to the Voice Mail Drive ........ 12-3
2.2.2 Restoring a Previous Backup ........................................... 12-3
2.2.3 Deleting a Stored Database Backup ................................ 12-4
2.2.4 Viewing Notes for a Stored Database Backup ................. 12-4
UM8000 Issue No. 1.0
Installation Manual vii
Chapter 13 Database Migration
Section 1 Migrating from OS/2 .................................................................................. 13-1
1.1 About Migration .............................................................................. 13-1
1.2 Backing Up Data Locally ................................................................ 13-1
1.2.1 Compressing the OS/2 Backup Data ............................... 13-1
1.2.2 Transferring Backup Files ................................................ 13-2
1.2.3 Using FTP to Transfer Files ............................................. 13-2
1.3 Migrating the Backup Data ............................................................. 13-4

1.4 Setting up OS/2 NetBIOS Backup For Migration ........................... 13-5
1.4.1 Configuring NetBIOS over TCP/IP ................................... 13-5
1.4.2 Setting Up an OS/2 Voice Messaging System
to Log On to a Network ............................................... 13-8
1.4.3 Logging On to Windows Automatically .......................... 13-10
1.5 Setting Up a Remote Windows Computer for a Backup .............. 13-10
1.5.1 Windows NT, 2000 or XP Setup .................................... 13-11
Section 2 Migrating from a DOS Voice Messaging System .................................... 13-12
2.1 About Migration ............................................................................ 13-12
2.1.1 Migration Setup Steps .................................................... 13-12
2.2 Backing Up a DOS Voice Messaging System ............................. 13-13
2.2.1 Backing Up the DOS Database ..................................... 13-13
2.2.2 Compressing the Backup Data ...................................... 13-15
2.2.3 Transferring the Backup Data to UM8000 ..................... 13-16
2.3 Migrating the Backup Data to UM8000 ........................................ 13-16
Chapter 14 Updating UM8000
Section 1 Overview .................................................................................................... 14-1
Section 2 Changing Licensing Information ................................................................ 14-1
Section 3 Adding/Removing Language Packs .......................................................... 14-2
3.1 Installing New Language Packs ..................................................... 14-2
3.2 Removing Language Packs ........................................................... 14-3
Section 4 Global Tone Detection ............................................................................... 14-4
Section 5 Applying Patches, Hot Fixes, or Updates .................................................. 14-4

Issue No. 1.0 UMJ8000
viii Table of Contents
THIS PAGE INTENTIONALLY LEFT BLANK

Installation Manual ix
List of Figures and Tables
Figure 3-1 UM8000 Login .................................................................................... 3-3
Figure 3-2 Third Party Software License Agreement ........................................... 3-4
Figure 3-3 UM8000 Switch Information ............................................................... 3-5
Figure 3-4 UM8000 Integration Options .............................................................. 3-6
Figure 3-5 Entering Switch Extensions for Voice Mail Ports, Screen 1 ............... 3-7
Figure 3-6 Entering Switch Extensions for Voice Mail Ports, Screen 2 ............... 3-8
Figure 3-7 Product Registration Form ................................................................. 3-9
Figure 3-8 System Information .......................................................................... 3-10
Figure 3-9 Server Control Start Icon .................................................................. 3-11
Figure 6-1 CD-VM00 Blade–Top View ................................................................ 6-2
Figure 6-2 Install the CR-2032 Battery ................................................................ 6-3
Figure 6-3 Install the SO-DIMM Memory ............................................................. 6-3
Figure 6-4 Install the Compact Flash Drive ......................................................... 6-4
Table 6-1 LED Indicators .................................................................................... 6-5
Figure 6-5 CD-VM00 DB9 to 6-Pin Modular RS-232 Adapter ............................. 6-6
Figure 6-6 CD-VM00 RS-232 Serial Cable (DTE) ............................................... 6-6
Figure 6-7 CD-VM00 RS-232 Serial Cable (DCE) ............................................... 6-7
Table 6-2 Ethernet Connector Pin-Out ............................................................... 6-8
Figure 9-1 UM8000 Login .................................................................................... 9-2
Figure 9-2 Third Party Software License Agreement ........................................... 9-3
Figure 9-3 UM8000 Switch Information ............................................................... 9-4
Figure 9-4 UM8000 Integration Options .............................................................. 9-5
Figure 9-5 Entering Switch Extensions for Voice Mail Ports, Screen 1 ............... 9-6
Figure 9-6 Entering Switch Extensions for Voice Mail Ports, Screen 2 ............... 9-7
Figure 9-7 Product Registration Form ................................................................. 9-8
Figure 9-8 System Information ............................................................................ 9-9
Figure 9-9 Server Control Start Icon .................................................................. 9-10

Issue No. 1.0 UM8000
xList of Figures and Tables
Figure 11-1 WebPro Login ...................................................................................11-6
Figure 11-2 WebPro Connection to In-Skin Voice Mail ........................................11-7
Figure 11-3 WebPro Security Certificate Warning ...............................................11-8
Figure 11-4 WebPro Web Admin Console ...........................................................11-9
Figure 11-5 PCPro Login ...................................................................................11-10
Figure 11-6 Web Browser Security Certificate Warning .....................................11-11
Figure 11-7 Web Admin Console .......................................................................11-12

Installation Manual 1 - 1
Introduction
1
Introduction
SECTION 1 ABOUT UM8000®
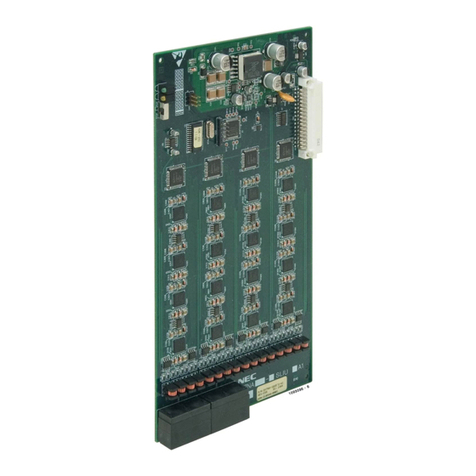
UM8000 is a complete, self-contained voice messaging system consisting
of a single plug-in blade that is installed directly into the SV8100/SV8300
telephone system.
The voice blade includes hardwaresupport for up to 16 voice ports and four
fax ports. The voice blade also includes a compact flash disk (CF) that
stores the voice messaging software and all voice recordings. All software
required to run the UM8000 system is pre-installed, including the Linux
operating system and the UM8000 voice messaging system.
1.1 Supported Phone Systems
The UM8000 system is designed specifically for use with the
SV8100/SV8300 telephone system manufactured by NEC.
The SV8100/SV8300 is enabled for the following UM8000 licenses
at default:
P0 Ports Voice Mail
P5 Seats Unified Messaging
P3 Languages
In addition, the following language prompt sets are loaded at
default:
PUS English
PFrench (Canadian)
PSpanish (Latin America)
1.2 Starting the UM8000 for the First Time
Before starting the UM8000 for the first time, make the required
settings and license agreements. Refer to Chapter 3 Section 2
Starting the UM8000 for the First Time on page 3-2 for information
on third party software license agreements that must be accepted
before the voice mail application can start.
If the license agreements are not accepted, the application cannot
start.

Issue No. 1.0 UM8000
1 - 2 Introduction
SECTION 2 ABOUT THIS GUIDE
This Installation Guide provides complete instructions for installing and setting up a
UM8000 voice messaging system.
2.1 Documentation Conventions
The following conventions are used throughout this guide.
PKey names. Names of keys on the keyboard are shown in capital letters.
Example: OK
When two keys must be pressed simultaneously they are joined by
a +sign.
Example: ALT+TAB
PUser input. Information required to be typed is shown in a distinctive font.
Example: Type names first
PPlaceholder text. Variable text that will be replaced by specific text is
shown in italics between angle brackets.
Example: vmctl <action> <service> <ENTER>
PNotes, cautions, and warnings. Text for notes, cautions, and warnings
appear as shown below:
P<ENTER>. Press the ENTER key on the keyboard when this character
string appears after a command. In general, all command lines should be
followed by pressing the ENTER key.
Example: vmctl vmail stop <ENTER>
NOTE
On the command line prompt, always press <ENTER> after typing a
command.
NOTE
A note provides additional information to supplement the main text. A note
provides helpful information, but is not essential to understanding the
current topic.
CAUTION
A caution advises you that failure to avoid or to take a specific action might
lead to unwanted or undesirable results.
WARNING
A warning advises you that failure to avoid or to take a specific action
might result in physical harm to the user, damage to the hardware or loss of
data.

UM8000 Issue No. 1.0
Installation Manual 1 - 3
2.2 Using the Command Line Interface
Communicating with the Linux operating system requires the use of tools and
shells such as WinSCP and PuTTY.
All procedures in this document are based on the WinSCP and PuTTY
applications. When using both applications, input devices include the keyboard
or mouse. Use the input device that you prefer.
SECTION 3 RELATED DOCUMENTATION
3.1 Supporting Documents
The documentation set for the UM8000 voice messaging system consists of the
following:
PInstallation Guide – Provides instructions for installing and setting up a
voice messaging system.
Input
Device
Mouse Click to choose Maintenance menu items and buttons; choose items in
the Web administration console; and choose items or buttons in
WinSCP.
Keyboard
Command
Prompt
Type a command with options then press the ENTER
key. For example:
mcedit /cps.ini <ENTER>
This command opens the cps.ini file in the mcedit tool.
1, 2, 3,... 0 To choose a menu item, type the numeric equivalent of
a menu item. For example: 0 = Log out on the
Maintenance menu.
TAB Press the TAB key to move through menu items and
command buttons in the Maintenance menu.
UP (↑),
DOWN (↓),
LEFT (←),
and
RIGHT(→)
Use the keyboard arrow keys to move between menu
items, buttons, or options.
Function
Keys
Tools such as mcedit use function keys to execute
specific actions. For example: F10, exits mcedit; F5
saves the file, and so on.
SPACEBAR
Press the SPACEBAR to toggle check marks off and
on. For example,
(*) Messages
Pressing the SPACEBAR clears the check box.
( ) Messages

Issue No. 1.0 UM8000
1 - 4 Introduction
PSystem Management Help – Provides online information and instructions
for managing the voice messaging system. This is available on-line from
the Web Administration Console and as a stand alone help file on the
Support CD.
The Installation Guide and User Guide are provided in PDF format on the
support disc. System Management Help is provided in a zip file on the support
disc.
Adobe®Acrobat Reader is required to read and print the PDF files. Adobe
Reader versions for Windows®and Linux are provided on the support disc. The
latest version of Adobe Reader can be downloaded from the Adobe Web site.
3.2 System Management Help
System Management Help provides immediate assistance while using the Web
administration console.
PClick the HELP icon to see context-sensitive help for the current page.
Refer to Chapter 3 Section 5 Web Administration Console Icons on page
3-13.
PSystem management help can be installed locally on any computer for
viewing. WinZip, or a similar file decompression program, is required to
extract the help files.
3.2.1 Locally Installing Online Help Files
1. Insert the support disc into the disk drive.
The autostart page appears.
2. Click Documentation, then follow the on-screen instructions.
3. Click Install System Management Help locally.
4. Save the zip file to the local hard disk.
5. Use WinZip or another file decompression program to extract all
of the files to a local directory on the computer.
3.2.2 Third-Party Documentation
Compliance information for third-party electronic devices is provided in
the third-party manufacturer documentation supplied with the UM8000
system.
Do not use third-party documentation to install, upgrade or manage
the voice messaging system. Use only the UM8000 documentation to
install, upgrade, or manage the voice messaging system.
NOTE
Pop-up windows must be enabled on the Internet browser to access
some features of the Web administration console and system
management help. To enable pop-up windows for a specific site, refer to
the Internet browser documentation.

Installation Manual 2 - 1
WinSCP and PuTTY
2
WinSCP and PuTTY
SECTION 1 OVERVIEW
WinSCP (file transfer) and PuTTY (SSH utility) are open source programs
that have been tested and approved for use with the voice messaging
system.
These programs can be downloaded from the Internet or they can be
installed from the Support disc.
SECTION 2 WINSCP
2.1 Installing WinSCP
The following procedure provides instructions for installing the
WinSCP Client:
1. Insert the Support disc into the disk drive.
The Autostart page appears.
2. Using Windows Explorer, browse to the Utilities/
RemoteAccess/WinSCP/ directory.
3. Double-click winscp382setupintl2.exe to start the WinSCP
installation.
A security alert message appears.
4. Click RUN.
The Select Setup Language page appears.
5. Choose the appropriate language from the drop-down list,
then click OK.
The Welcome to WinSCP Setup Wizard appears.
6. Click Next.
7. On the License Agreement page, click Next.
8. Accept the default installation path or type a new path, then
click Next.
The Select components page appears.
9. Accept the default components. If appropriate, choose a
language for translation, then click Next.
10. Accept the default Start Menu folder name or type a new name,
then click Next.
The Select Additional Tasks page appears.

Issue No. 1.0 UM8000
2 - 2 WinSCP and PuTTY
11. Accept the default additional task settings, then click Next.
The Initial user settings page appears.
12. Select one of the user interface styles, then click Next. All WinSCP
procedures in this document assume that the Norton Commander
interface is being used.
The Ready to Install page appears.
13. Verify that the settings are correct, then click Install.
To review or change any of the settings, click Back.
When the installation is complete, the Completing WinSCP3 Setup Wizard
page appears.
14. Clear the Start WinSCP now check box, then click Finish.
2.2 Using WinSCP
The following instructions assume that WinSCP is installed on a computer
running the Windows XP operating system.
2.2.1 Running WinSCP
The following procedure provides instructions to run WinSCP:
1. Click Start > Programs > WinSCP3 > WinSCP.
The WinSCP Login window appears.
Interface Style Description
Norton Commander
(Preferred Option) Displays source computer directories in the left pane
and destination computer directories in the right pane.
Explorer-like Displays directories in the left pane and files in the
right pane.
Other manuals for Univerge UM8000
7
Table of contents
Other NEC Telephone System manuals

NEC
NEC Xen Alpha User manual

NEC
NEC TOPAZ User manual

NEC
NEC DSX User manual

NEC
NEC DSX-160 User manual

NEC
NEC Univerge SV8100 Instruction manual

NEC
NEC UNIVERGE SL2100 User manual

NEC
NEC ELECTRA ELITE IPK II User manual

NEC
NEC Xen Topaz User guide

NEC
NEC AccuSync 120 Owner's manual

NEC
NEC XN120 Vision User manual
Popular Telephone System manuals by other brands

AT&T
AT&T SPIRIT 2448 Expansion Unit installation instructions

Orchid Telecom
Orchid Telecom KS 832 Administration guide

Intelbras
Intelbras Micro PABX Conecta manual

Visonic
Visonic AMBER SELECT quick start guide

Bogen
Bogen TAM-B installation instructions

Samsung
Samsung Office DECT 8000 Installation and programming manual