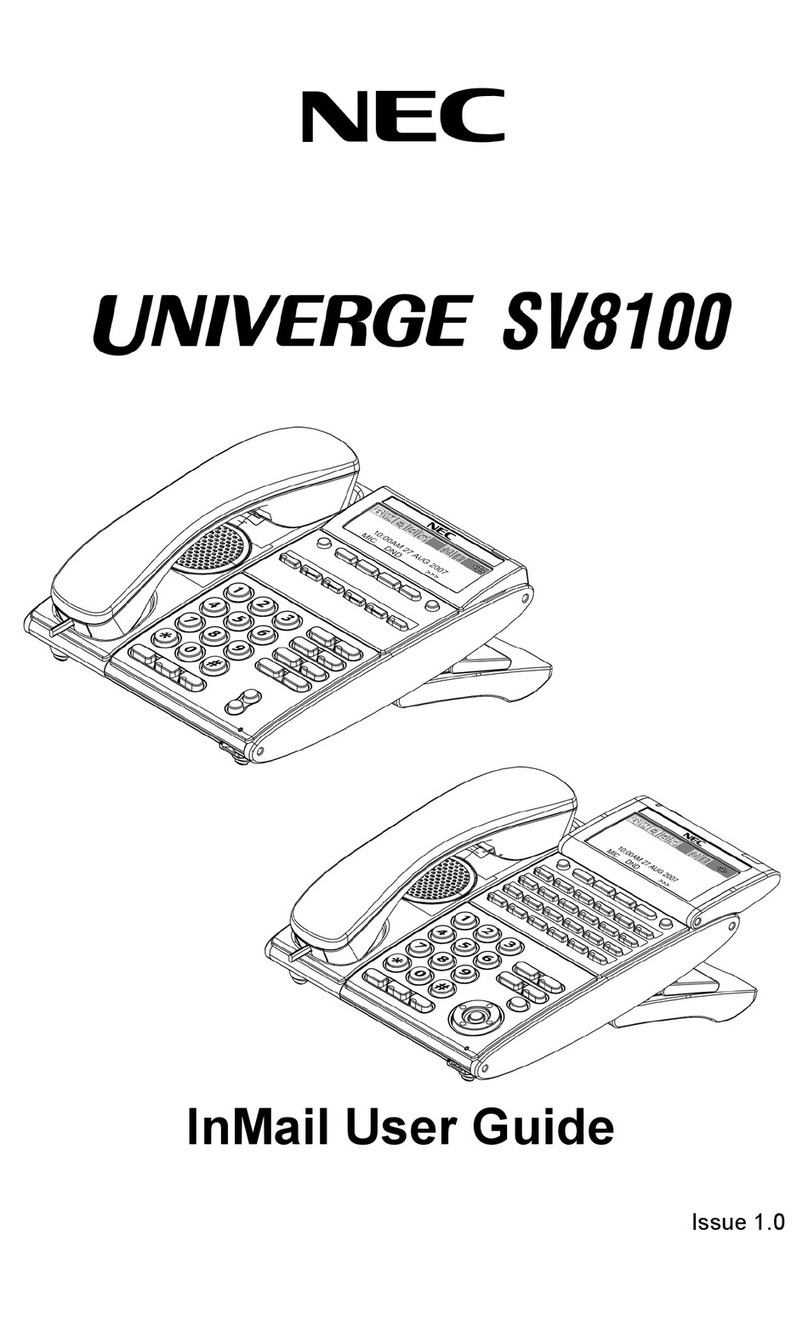
NEC Univerge SV8100 User manual

INMAIL SYSTEM GUIDE
Issue 7.00 September 2012

This page is left blank intentionally

InMail System Guide i
___________________________________________________________________________________
___________________________________________________________________________________
TABLE OF CONTENTS
Chapter 1 Quick Setup
Section 1 Install the InMail Blade ............................................................................. 1-1
Section 2 LED Indication ......................................................................................... 1-3
Section 3 Start-up (Default) InMail Configuration .................................................... 1-3
Section 4 Basic Functions without Main Greeting ................................................... 1-4
Section 5 Enable the Mailboxes for all Installed Extensions ................................... 1-4
Section 6 Set Up Automated Attendant to Answer Outside Calls ........................... 1-5
Section 7 Set Up Simple Day/Night Answering ....................................................... 1-8
Section 8 InMail System Requirements .................................................................. 1-9
Section 9 Examples of Common Applications ........................................................ 1-9
Chapter 2 Features
Section 1 Introduction to InMail Features ............................................................... 2-17
Section 2 Feature Glossary ................................................................................... 2-18
Section 3 Feature Descriptions ............................................................................. 2-28
ACD Delay Announcement .....................................................................2-31
Announcement Mailbox ...........................................................................2-35
Announcement Message ........................................................................2-41
Answer Schedule Override .....................................................................2-43
Answer Tables ........................................................................................2-47
Answering Machine Emulation ................................................................2-57
Auto Attendant Do Not Disturb ................................................................2-59
Auto Erase or Save .................................................................................2-61

___________________________________________________________________________________
ii Table of Contents
___________________________________________________________________________________
Issue 7.00
Auto Time Stamp .................................................................................... 2-63
Automated Attendant .............................................................................. 2-65
Automated Attendant Transfer ................................................................ 2-69
Automatic Routing for Rotary Dial Callers ..............................................2-71
Call Forward to a Mailbox ....................................................................... 2-73
Caller ID .................................................................................................. 2-77
Caller ID - Automatic Access to VM by Caller ID ....................................2-79
Caller ID with Return Call ........................................................................ 2-85
Calling the Automated Attendant ............................................................2-87
Cascading Message Notification ............................................................. 2-89
Dial Action Table ................................................................................... 2-107
Directory Dialing .................................................................................... 2-113
Directory Dialing Mailbox ...................................................................... 2-125
Distribution List ..................................................................................... 2-127
Email Notification .................................................................................. 2-131
Erasing All Messages ........................................................................... 2-145
Exiting a Mailbox ................................................................................... 2-147
External Transfer .................................................................................. 2-149
Fax Detection ........................................................................................ 2-151
Find Me Follow Me ................................................................................ 2-153
Flexible Answering Schedules .............................................................. 2-161
Flexible Call Routing ............................................................................. 2-163
Flexible Mailbox Numbering Plan ......................................................... 2-165
Forced Unscreened Transfer ................................................................ 2-169
Getting Recorded Help ......................................................................... 2-171
Go To A Mailbox ................................................................................... 2-173
Greeting ................................................................................................ 2-175
Group (Shared) Mailbox ........................................................................2-181
Guest Mailbox ....................................................................................... 2-189

VM8000 Issue 7.00
InMail System Guide iii
___________________________________________________________________________________
__________________________________________________________________________________
Hang Up ................................................................................................2-193
Hotel Motel ............................................................................................2-195
InMail Upload Download Audio .............................................................2-199
Instruction Menu ....................................................................................2-223
Language Settings ................................................................................2-225
Leaving a Message ...............................................................................2-229
Listening to Messages ..........................................................................2-233
Live Record ...........................................................................................2-237
Log On to Voice Mail .............................................................................2-239
Mailbox Announcement Message .........................................................2-243
Mailbox Name .......................................................................................2-247
Mailbox Options Menu ..........................................................................2-251
Mailbox Security Code Delete ...............................................................2-253
Main Menu ............................................................................................2-255
Make Call ..............................................................................................2-257
Message Count Display ........................................................................2-261
Message Delete ....................................................................................2-263
Message Forward .................................................................................2-265
Message Length ....................................................................................2-267
Message Listen Mode ...........................................................................2-269
Message Notification .............................................................................2-271
Message Playback Direction .................................................................2-281
Message Playback Options ...................................................................2-283
Message Record ...................................................................................2-285
Message Reply .....................................................................................2-287
Message Storage Limit .........................................................................2-289
Message Waiting Lamp .........................................................................2-291
Multiple Company Greetings .................................................................2-293
Next Call Routing Mailbox .....................................................................2-295

___________________________________________________________________________________
iv Table of Contents
___________________________________________________________________________________
Issue 7.00
Park and Page/Auto Attendant Direct to Voice Mail ............................. 2-303
Programming Voice Mail ....................................................................... 2-311
Quick Message ..................................................................................... 2-313
Record and Send a Message ............................................................... 2-317
Remote Programming ........................................................................... 2-319
Routing Mailbox .................................................................................... 2-321
Screened Transfer ................................................................................ 2-327
Security Code ....................................................................................... 2-331
Single Digit Dialing ................................................................................ 2-333
Station Mailbox ..................................................................................... 2-335
Subscriber Mailbox ...............................................................................2-337
System Administrator ............................................................................ 2-341
System Administrator Mailbox .............................................................. 2-343
System Re-initialization ......................................................................... 2-345
Time and Date ......................................................................................2-347
Time and Date Stamp ........................................................................... 2-349
Transfer to a Mailbox ............................................................................ 2-351
Undefined Routing ................................................................................ 2-353
Unscreened Transfer ............................................................................ 2-355
Voice Mail Overflow .............................................................................. 2-359
Volume Control ..................................................................................... 2-369
Chapter 3 Programming
Section 1 Before You Start Programming ............................................................ 3-371
Section 2 Start-Up Programming (Default) ......................................................... 3-371
2.1 InMail Configuration ....................................................................................... 3-372
2.2 Optional InMail Start-Up Programming ......................................................... 3-373
2.3 Set up Automated Attendant to Answer Outside Calls ................................. 3-373

VM8000 Issue 7.00
InMail System Guide v
___________________________________________________________________________________
__________________________________________________________________________________
Section 3 Program 15 Extension, Basic Setup ................................................... 3-375
Section 4 Program 41 ACD Setup ...................................................................... 3-378
Section 5 Program 45 Voice Mail Integration ..................................................... 3-382
Section 6 Program 47 InMail ............................................................................... 3-384
Chapter 4 VM8000 InMail Utility
Section 1 VM8000 InMail Utility ........................................................................... 4-489
Section 2 Requirements ...................................................................................... 4-490
Section 3 Installing and Starting the VM8000 InMail Utility ................................. 4-490
Section 4 Installing Reliant File System Driver ................................................... 4-491
Chapter 5 Soft Key Glossary

___________________________________________________________________________________
vi Table of Contents
___________________________________________________________________________________
Issue 7.00

InMail System Guide 1 - 1
Chapter
1
Quick Setup
SECTION 1 INSTALL THE INMAIL BLADE
1. Take adequate anti-static precautions.
Wear a grounded wrist strap at all times when installing or
removing the InMail blade.
Ensure the wrist strap is attached to a known earth ground
(such as the earth ground lug on the CHS2U).
Discharge any built-up static electricity by touching the cabinet
earth ground lug.
2. Install four plastic stand-offs included with the InMail blade before
installing the CompactFlash card assembly.
Locate stand-offs as shown in Figure 1-1 CPU without InMail
Daughter Board (PZ-VM21) and CompactFlash on page 1-2.
Be sure to install the stand-offs from the back (underneath) side
of the blade.
3. Install the InMail CompactFlash card assembly face up as shown in Figure
1-2 InMail Daughter Board with CompactFlash Card Assembly Installed on
page 1-2.
4. Insert the InMail blade into the CN4 connector on the CPU.
Position the InMail blade over the CN4 connector — then push
the blade into the connector on the CPU.
The InMail CompactFlash drive must never be inserted or removed
with the chassis power on. Always turn chassis power OFF when
inserting or removing the InMail CompactFlash drive.

Issue 7.00
1 - 2 Quick Setup
Figure 1-1 CPU without InMail Daughter Board (PZ-VM21) and CompactFlash
Figure 1-2 InMail Daughter Board with CompactFlash Card Assembly Installed

Issue 7.00
InMail System Guide 1 - 3
SECTION 2 LED INDICATION
1. Power up the system.
Remove the grounded wrist strap.
Mount the PZ-VM21 onto CD-CP00.
Install the CD-CP00 in the SV8100 chassis.
Turn the chassis power switch to On.
2. Check the InMail LED. See Figure 1-3 Checking LED1.
Once the system powers up, check LED1 on the InMail daughter board.
LED1 is viewable on the front panel of the CD-CP00.
.LED1 will blink quickly only when the InMail CF is being accessed.
SECTION 3 START-UP (DEFAULT) INMAIL CONFIGURATION
When you install the InMail blade and turn on the system, InMail has the following
default programming:
Subscriber Mailboxes are enabled for extensions 200-207. The mailbox
numbers are the same as the extension numbers.
The Automated Attendant does not answer outside calls.
The InMail does not answer internal calls.
Figure 1-3 Checking LED1

Issue 7.00
1 - 4 Quick Setup
SECTION 4 BASIC FUNCTIONS WITHOUT MAIN GREETING
To make the InMail answer, the following programming must be done. The example
shown is for a 8-port InMail. Extension, Group and Pilot Numbers shown can be
adjusted as needed per installation requirements.
47-01-17 Set first port of In-Mail to 25, changing this PRG requires a CHS2U GW
reset.
10-09-01 Verify at least one resource is set to ICM/TRK or Common.
11-07-01 Set TEL Group Pilot 64 to 555 (Note: digit 5 is set to 4 digits by default).
Never use Group 1, as this is the default group for all extensions.
15-03-01 Set extension 224~231 to DP
15-03-03 Set extension 224~231 to Special.
16-02-01 Put 224~231 in Group 64.
16-02-02 Assign priorities 1~8 to 224~231.
16-01-01 Set Group 64 name to Voice Mail.
16-01-04 Set Group 64 to Circular.
16-01-10 Set Group 64 to Busy/No Answer.
45-01-01 Set to Group 64.
SECTION 5 ENABLE THE MAILBOXES FOR ALL INSTALLED EXTENSIONS
Since by default only extensions 200-263 have Subscriber Mailboxes, you should
enable additional Subscriber Mailboxes for all installed extensions.
.Be aware that mailboxes beginning with a leading digit of either 0, * and # are not
supported.
To enable additional Subscriber Mailboxes:
1. In 47-02-01 Mailbox Type, enter 1 to enable a Subscriber Mailbox for each
extension as a ‘Person’ mailbox.
To make programming easier, consider associating a mailbox number with a station
port. For example, mailbox 1 should correspond to port 1, which in turn corresponds
to extension 200.
2. In 47-02-02 Mailbox Number, select the extension number to be associated with
the mailbox you are programming.

Issue 7.00
InMail System Guide 1 - 5
Normally, mailbox 1 should use Mailbox Number 200, mailbox 2 should use Mailbox
Number 201, etc.
Be aware that mailboxes beginning with a leading digit of either 0, * and # are not
supported.
3. In 15-02-26 Message Key Operation Mode, enter 1 at each extension for which
you are adding a mailbox. This enables the Message key for Voice Mail access.
You can optionally use 15-07-01 Programming Function Keys to assign a Voice Mail
programmable key (code 77).
If you don’t assign the Message key or a programmable key for Voice Mail access,
an extension user can access his mailbox by the following actions:
Press Speaker key
Dial InMail pilot number
Dial mailbox number
SECTION 6 SET UPAUTOMATED ATTENDANT TO ANSWER OUTSIDE CALLS
To enable Automated Attendant to answer outside calls, set up Direct Inward Lines
(DILs) and terminate them to InMail.
Automated Attendant enables the following capabilities:
All calls are answered by Call Routing Mailbox 1 and Dial Action Table 1. This
happens because:
Answer Table 1 Runs Monday-Friday from 8:30AM to 5:00PM, and uses Call
Routing Mailbox 1.
At all other times, the Default Mailbox answers – also using Call Routing Mailbox 1.
Dial Action Table 1 allows outside callers to perform the following actions:
Dial system extensions (if installed).
Dial 0 for an operator (extension 200).
Dial * + Extension to leave a Quick Message in a mailbox.
Dial # + Extension to remotely log on to their mailbox.
Wait on the line to be automatically routed to the operator.
To Set up the Automated Attendant to answer outside calls:
1. Set up trunks as Direct Inward Lines (DIL) or Direct Inward Dialling lines (DID).
.For full details for Direct Inward Dialling (DID) programming, refer to the
features manual.
22-02-01 Incoming Call Trunk Setup
Assign Service Type 4 to each trunk you want to be a DIL. Make a separate
entry for each Night Service mode.

Issue 7.00
1 - 6 Quick Setup
Assign Service Type 3 to each trunk you want to be a DID. Make a separate
entry for each Night Service mode.
.By default, trunks are Service Type 0(Normal).

Issue 7.00
InMail System Guide 1 - 7
2. Have the Direct Inward Lines or Direct Inward Dial lines terminate to InMail
(extension 555).
22-07-01 DIL Assignment
For each trunk you designated as a DIL above, enter 555. Make a separate
entry for each Night Service mode.
.By default, there are no DIL destinations programmed.
22-11 DID Assignment
For the required incoming digits, enter 555 in 22-11-02 or 102 (Voice mail
routing) in 22-11-05 or 06 . Make a separate entry for each Night Service
mode configured.

Issue 7.00
1 - 8 Quick Setup
3. Review the default Automated Attendant setup.
SECTION 7 SET UPSIMPLE DAY/NIGHT ANSWERING
After you set up DILs to InMail, Call Routing Mailbox 1 answers outside calls. This is
because:
Trunks Route to Answer Table 1
47-10-01 Answer Table Assignment
InMail
Default
Automated Attendant Answering
Answer Table 1
47-11 Answer Table Options
Schedule 1 or Default Mailbox
47-12 Answer Schedules
47-11-05 Default Mailbox
Call Routing Mailbox 1
47-08 Call Routing Mailbox Options
All calls route to Call Routing Mailbox 1
Schedule 1 active M-F 8:30AM-5:00PM
Default Mailbox active all other times
From a System Administrator mailbox,
record an Instruction Menu (SA + I) for
the active Call Routing Mailbox.
Dial Action Table 1
47-13 Dial Action Tables
DIL or DDI to Voice Mail Master (555)
22-01-01 Incoming Call Trunk Setup
22-07-01 DIL Setup 22-11 DDI routing
Dial Action Table 1 Dialing Options:
Dial an extension number, or
O for the operator

Issue 7.00
InMail System Guide 1 - 9
All trunks by default are assigned to Answer Table 1.
Answer Table 1, which runs Monday-Friday from 8:30AM to 5:00PM, uses Call
Routing Mailbox 1.
The Default Mailbox, which runs at all other times (evenings and weekends),
also uses Call Routing Mailbox 1.
To Set up simple Day/Night Answering:
In 47-11-03 Default Mailbox Category and in 47-11-03 Default Mailbox Number
change the Default Mailbox for Answer Table 1 to 2.
From the System Administrator Mailbox:
1. Dial SA + I and record a new Instruction Menu message for Call Routing
Mailbox 1.
2. Dial SA + I and record a new Instruction Menu message for Call Routing
Mailbox 2.
.Monday through Friday from 8:30AM to 5:00PM callers hear the Instruction
Menu message for Call Routing Mailbox 1.
Evenings and weekends, callers hear the Instruction Menu message for Call
Routing Mailbox 2.
.Review the feature Automated Attendant on page 2-65.
SECTION 8 INMAIL SYSTEM REQUIREMENTS
InMail Software
InMail CompactFlash Drive
PZ-VM21 Daughter Board
SECTION 9 EXAMPLES OF COMMON APPLICATIONS
The examples below show common applications. The chart in the beginning of each
example provides the following information:
How the relevant programmable options work by default.
The Application Summary providing the basic steps to set up the application.
Following the chart are the step-by-step instructions for setting up the application.
For more information, refer to Programming on page 3-371 in this manual.

Issue 7.00
1 - 10 Quick Setup
Example 1: Set Up Separate Day and Night Greetings
Change the Default Mailbox to Call Routing Mailbox 2.
47-11-03 Default Mailbox Number, change the Default Mailbox assignment to 2.
Record the daytime and night Instruction Menus.
1. At extension 200, press Message.
2. Dial SA (72) + I(4).
3. Dial 001 (for Call Routing Mailbox 1) + R(7).
4. Record the daytime Instruction Menu message + #twice.
5. Dial I(4).
6. Dial 002 (for Call Routing Mailbox 2) + R(7).
7. Record the night Instruction Menu message + #+ hang up.
.See the Instruction Menu in this manual.
Default Automated Attendant Answering
All trunks answered by the Automated Attendant route to Answer Table 1.
Answer Table 1 uses Schedule 1 to answer calls from 8:30 AM -5:00 PM Monday through Friday
with Call Routing Mailbox 1.
The Default Mailbox for Answer Table 1 picks up Automated Attendant calls at all other times. The
Default Mailbox for Answer Table 1 is also Call Routing Mailbox 1.
The greeting that plays to outside callers is the Instruction Menu for the Call Routing
Mailbox that answers the call.
Since Schedule 1 and the Default Mailbox both use Call Routing Mailbox 1, the Automated
Attendant answers all calls the same way day and night, with the Instruction Menu for Call
Routing Mailbox 1.
Application Summary
Change the Default Mailbox from Call Routing Mailbox 1 to 2.
Record a night Instruction Menu for Call Routing Mailbox 2.

Issue 7.00
InMail System Guide 1 - 11
Example 2: Provide Unique Day and Night Dialing Options for Callers
Set up separate day and night greetings.
Following example 1, set up separate day and night Instruction Menus using Call Routing
Mailboxes 1 and 2.
1. Example of the day Instruction Menu: Thank you for calling. For Sales,
dial 201. For Technical Support, dial 202. To talk to an operator, dial 0. If
you know your party’s extension number, please dial it now.
2. Example of the night Instruction menu: Thank you for calling. Our normal
business hours are 8:30 to 5:00, Monday through Friday. To leave us a
message, please dial 0 now.
Assign a unique Dial Action Table (2) to the night time Call Routing Mailbox (2).
In 47-08-01 Dial Action Table, assign Dial Action Table 2 to Call Routing Mailbox 2.
Change the dialing options for the night time Dial Action Table (2).
In 47-13-01 InMail Dial Action Table Actions for Dial Action Table 2, make the following
changes:
1. For the digits 2 and 3, enter 0for the Action entry to prevent callers from
dialing extensions at night.
2. For the digit 0, change the Action entry to REC1 (by dialing 3) and the
Data entry to 200. This allows night time callers to dial 0to leave a
message for the operator.
3. Note that the * and # entries are left unchanged so that experienced
users can still leave Quick Messages or do Remote Logons at night.
Default Dial Action Table Options
All Call Routing Mailboxes (1-8 by default) use Dial Action Table 1.
Dial Action Table 1 provides the following dial options:
Dial extension number.
Dial 0 for the operator.
Dial * + extension to leave a Quick Message.
Dial # + extension to do a Remote Logon to the mailbox.
Timeout to operator if no digits dialed.
Application Summary
Allow callers at night to dial 0 to leave a message for the operator.

Issue 7.00
1 - 12 Quick Setup
Example 3: Manual Night Mode Control of the Automated Attendant
Set up programmable keys to switch the system into the night mode and back into
the day mode.
Night Mode
1. At the extension that should control the system night mode, press
Speaker + 851.
2. Press the programmable function key you want to assign as the day
(night mode 1) key.
3. Dial 09 + 1(for night mode 1).
.You hear three confirmation beeps.
.This allows the user to switch the system into the day mode (i.e., night mode 1).
Day Mode
1. Press the programmable function key you want to assign as the night
(night mode 2) key.
2. Dial 09 + 2(for night mode 2).
.You hear three confirmation beeps.
.This allows the user to switch the system from the day mode into night mode 2.
3. Press Speaker to hang up.
Default Scheduling Options
There is no manual control of the Automated Attendant.
All calls answered by the Automated Attendant automatically follow the schedule set up by
Answer Table 1.
Answer Table 1 uses Schedule 1 to answer calls from 8:30 AM -5:00 PM Monday through Friday
with Call Routing Mailbox 1.
The Default Mailbox for Answer Table 1 picks up Automated Attendant calls at all other times.
The Default Mailbox for Answer Table 1 is also Call Routing Mailbox 1.
Application Summary
Set up a programmable key to switch the system into the night mode.
Assign a Group Mailbox to a virtual extension.
Have calls at night route to the virtual extension, which is Fixed Call Forwarded to voice
mail.
Other manuals for Univerge SV8100
89
Table of contents
Other NEC Telephone manuals

NEC
NEC NEAXMAIL IM-16 User manual

NEC
NEC Univerge SV9100 User manual

NEC
NEC SL1000 User manual

NEC
NEC XEN IPK DIGITAL TELEPHONE User manual

NEC
NEC Univerge SV9100 User manual

NEC
NEC Univerge SV9100 User manual

NEC
NEC Univerge SV8100 User manual

NEC
NEC UNIVERGE SL2100 User manual

NEC
NEC DT730G (CG): ITL-12CG-3 User manual

NEC
NEC Electra 16/48 User manual