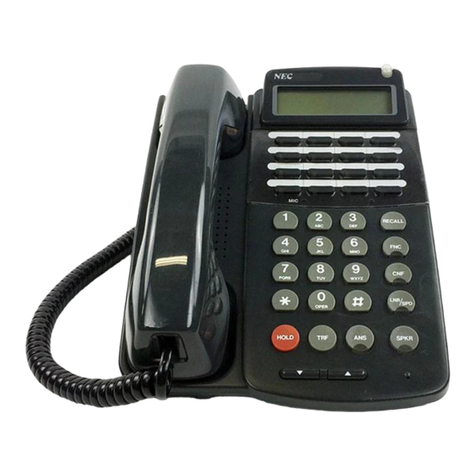
NEC ITY-6D Guide

\ Orchestrating a brighter world
UNIVERGE BLUE® CONNECT
START GUIDE
ITY-6D
Issue 1.0
NDA-32051

SOFTWARE LICENSE AGREEMENT
NEC Platforms, Ltd. (hereinafter called “NECPF”) grants certain license to you pursuant
to the terms and conditions of this Software License Agreement (hereinafter called the
“Agreement”) to use the software (hereinafter called the “Software”) which is embedded in
DT820 STD-SIP series (hereinafter called the “Products”) and related documents
(hereinafter called the “Documents”) (the Software and the Documents collectively called
the “Licensed Products”). PLEASE READ THIS AGREEMENT CAREFULLY BEFORE
USING THE PRODUCTS. BY USING THE PRODUCTS, YOU ARE AGREEING TO BE
BOUND BY THE TERMS AND CONDITIONS OF THIS AGREEMENT. If you do not
accept the terms and conditions of this Agreement, you may not use the Products and
you should immediately return the Products with the receipt of payment to the place
where you purchased it for full refund.
1. License
(1) Subject to the terms and conditions set forth herein, NECPF grants to you the non-
transferable, non-exclusive and limited license to use the Software in accordance
with the Documents as solely embedded in the Products.
(2) Except as otherwise expressly stated herein, you shall not (i) copy, modify, translate,
quote or create any derivative work of all or any part of the Licensed Products, (ii)
sell, rent, lease, distribute, sublicense or otherwise transfer all or any part of the
Licensed Products except as set forth in Section 1(4) below, (iii) reverse engineer,
decompile, reverse assemble or otherwise attempt to gain access to the source code
of all or any part of the Software, (iv) remove, alter, cover or obfuscate any copyright
notices, trademark notices or other proprietary rights notices placed or embedded on
or in the Licensed Products, (v) use all or any part of the Software other than on the
Products, (vi) unbundle any part of the Software, (vii) use the Licensed Products for
the development of any application program for commercial use, (viii) use the
Licensed Products in life support systems, human implantation, nuclear facilities or
systems or any other application where failure could lead to a loss of life or
catastrophic property damage, or (ix) cause or permit any third party to do any of the
foregoing.
(3) Upon giving prior written notice to you, NECPF shall have the right to audit your use,
deployment, and exploitation of the Licensed Products for the purpose of confirming
whether you comply with the terms and conditions of this Agreement. Such audit
shall be conducted during regular business hours at your site and in such a manner
as not to interfere unreasonably with your normal business activities.
(4) You may transfer your rights and obligations under the terms and conditions of this
Agreement to a third party, provided, however, that the following conditions shall be
fulfilled; (i) such third party agrees to be bound by all the terms and conditions of this
Agreement,(ii) you transfer all the Licensed Products and the Products to such third
party, and (iii) such transfer does not violate Export Administration Regulations by
the US Government and the applicable laws, regulations and administrative
guidance of any country having competent jurisdiction.
2. Intellectual Property Rights
Nothing in this Agreement shall be construed as transferring any or all intellectual
property rights in, and to, the Licensed Products and all the update versions thereof,
whether or not provided by NECPF. You agree that NECPF or its licensors shall retain
such intellectual property rights, whether or not any part thereof is or may be
copyrighted or patented.
3. No Warranty
(1) NECPF PROVIDES THE LICENSED PRODUCTS “AS IS” AND MAKES NO
WARRANTY OF ANY KIND WHETHER EXPRESS OR IMPLIED (EITHER IN FACT
OR BY OPERATION OF LAW) WITH RESPECT TO THE LICENSED PRODUCTS.
(2) In the event that NECPF makes the update version, function added version, bug-fix
version, or modification of the Licensed Products or program to be such (hereinafter
collectively called the “Updated Program”), NECPF may, at its sole discretion,
provide you with the Updated Program or the information related to the Updated
Program in accordance with the Software Support Agreement separately entered
into between NECPF and you provided, however, that NECPF may, at its discretion,
provide the Updated Program and related information at the timing and in the
manner determined by NECPF. The Updated Program shall be deemed as a part of
the Licensed Products.
4. Termination
(1) You may terminate this Agreement by giving NECPF a prior written notice.
(2) In the event that you fail to comply with any provision of this Agreement, NECPF may,
at any time, terminate this Agreement.
(3) After any termination of this Agreement, you shall not use the Licensed Products for
any purpose and shall immediately delete or destroy all the Licensed Products.
Sections 1(2), 1(3), 2, 3, 4(3), 5, 6, 7 and 8 shall survive any termination of this
Agreement.
5. Export Control
In any event, you agree that you will export or re-export the Licensed Products to any
country, person or entity subject to any export restrictions and orders of Japan, the
United States and any other country having competent jurisdiction.
6. Limitation of Liability
IN NO EVENT SHALL NECPF ITS SUPPLIERS AND ITS DISTRIBUTORS BE LIABLE
TO YOU FOR ANY INDIRECT, SPECIAL, INCIDENTAL, CONSEQUENTIAL OR
PUNITIVE DAMAGES (INCLUDING LOSS OF PROFITS AND PROCUREMENT
COSTS FOR ANY SUBSTITUTE), ON ACCOUNT OF OR ARISING OUT OF USE OF
THE LICENSED PRODUCTS OR IMPOSSIBILITY THEREOF, EVEN IF ADVISED OF
THE POSSIBILITY OF SUCH DAMAGES AND ITS DISTRIBUTORS, THE MAXIMUM
AGGREGATE LIABILITY OF NECPF, ITS SUPPLIERS AND ITS DISTRIBUTORS,
WHETHER IN TORT, CONTRACT OR ANY OTHER LEGAL THEORY, SHALL NOT
EXCEED ONE HUNDRED PERCENT (100%) OF THE RESPECTABLE AMOUNT
ACTUALLY PAID FOR PURCHASING THE LICENSED PRODUCTS BY YOU.
7. Open Source Software
The Software includes the Open Source Software components (hereinafter called the
"OSS"). Such OSS is not subject to the terms and conditions of this Agreement but
those of the applicable license. Please visit following website for obtaining details of
such OSS and terms and conditions of use therefor.
https://mind.bcom.nec.co.jp/customernet/soft-license/DT820S_OSS_V4400.html
8. General Provisions
(1) This Agreement shall be governed by and interpreted in accordance with the laws of
Japan.
(2) All disputes arising out of or in relation to this Agreement shall be submitted to the
exclusive jurisdiction of the Tokyo District Court as the court of the first trial.
(3) This Agreement constitutes the entire agreement between you and NECPF and
supersedes any and all oral or written agreements previously existing between you
and NECPF with respect to the subject matter hereof.
(4) The Licensed Product is a "commercial item" as that term is defined in 48 C.F.R.
2.101, consisting of "commercial computer software" and "commercial computer
software documentation" as such terms are used in 48 C.F.R. 12.212. Consistent
with 48 C.F.R. 12.212 and 48 C.F.R. 227.7202-1 through 227.7202-4, NECPF
provides the Licensed Products to U.S. Government End Users only pursuant to the
terms and conditions therein.
9 Contact Information
North America
NEC Corporation of America:
3929 W. John Carpenter Freeway, Irving, Texas 75063, U.S.A.
TEL :+1-214-262-7525
Oceania
NEC Australia Pty. Ltd.:
Level 11 717 Bourke Street, Docklands, VIC 3008, Australia
TEL :+61-3-9900-9888

EMEA
NEC Enterprise Solutions:
Olympia 4, 1213 NT Hilversum, The Netherlands
TEL :+31-35-6899111
Asia
NEC Platforms, Ltd:
1753, Shimonumabe, Nakahara-ku, Kawasaki, Kanagawa 211-8666, Japan
TEL :+81-44-435-5342

WELCOME TO UNIVERGE BLUE CONNECT
All of your business communications
integrated, efficient and reliable.
®

What’s in the box?
NEC ITY-6D
ITY-6D Base & Handset
Figure 1: ITY-6D Base & Handset
1

Guided Setup
Adjust the Angle of the Tilt Leg
To adjust the tilt level of the phone:
1.
The height can be adjusted by moving the legs, which are attached
to the bottom of the terminal.
Second Level
First Level
Figure 2: Description of the position
2.
Turn the phone over (key sidedown).
3.
Push in the leg stoppers
Figure 3: The leg stoppers
2

Second Level
4.
Adjustthelegstothedesiredheight(The upper they are, the
lower the phone becomes).
First Level
Figure 4: Adjust the legs
Attach the Handset
Please follow the diagram to attach the handset.
1. Insert the coiled cord plug into the HANDSET connector on the back of
the phone until it sounds a click.
2. Thread the coiled cord through the groove, as shown in the figure below.
Figure 5: Thread the coiled cord through the groove
Connect LAN cable to the Phone
A 10 BASE-T/100 BASE-T/TX LAN cable (Straight) is needed to connect
the phone to network.
1.
Connect the 10 BASE-T/100 BASE-T/TX LAN cable to the LAN
port on the phone and to an open port on a device such as a Hub
or PoE (Power Over Ethernet) switch on the local area network.
3

2.
Thread the LAN cable through the groove on the bottom of the tilt
legs.
Figure 6: Thread the LAN cable through the groove
Configure a Headset
Toutilizeaheadset,it must be enabled that theheadsetmodeonthe phone:
1.
Pressthe“Menu”key.
2.
Press
3.
Press
4.
Press
5.
Press
“User Settings”.
“Headset”.
“Enable/Disable”.
“Enable”.
6.
Press Enter on the cursor pad or the “OK” softkey to apply the setting.
7.
Insert the headset cord plug into the HEADSET connector on the back of
the phone until it sounds a click.
Figure 7: Connect the headset cord plug to the phone
3
2
1
2
4

The phone will now pick the headset as the default
communicationmethodwhenplacingandansweringphonecalls.
To return the phone to non-headset mode, follow the steps in
“Configure a Headset”andset HeadsettoDisabled.
Connect a Computer (Optional)
A computer can be connected to the network through the phone using a
LAN cable if there are a limited number of available ports on the local area
network.
Note: Any devices connected to the phone’s PC port will be temporarily disconnected from the
network when the phone is rebooted, or when the phone itself is disconnected from the
network because of the power turned off.
Note: If a device connected through the PC port is having connection issues, contact your system
administrator to verify that the PC port is enabled on the phone.
1. Insert the LAN cable into PC port on the back of the phone, until it sounds
a click.
Figure 8: Insert the LAN cable into the PC port
5

Features
NEC ITY-6D
Figure 9: ITY-6D Features Description
Reference
Number
Feature
FeatureDescription
1 Call Indicator Lamp
•
If missed call notification for the call indicator
lamp is disabled (default), the lamp flashes for
incoming andmissed calls, and displays steady
red for message waiting.
•
If missed call notification for the call indicator
lamp is enabled, thelampflashes for incoming
calls and missed calls, including missed calls
where someone has left a voice mail. The lamp
only display steady red if there are still
messages waiting after the missed calls are
cleared.
6

2 LCD TheLCD(LiquidCrystal Display)provides call
status activity information plus date, time and
softkey operation.
3 Exit key This key can be used to exit from the Menu or
Help mode and go back to the telephone main
screen.
4 Softkeys
The softkeys show the available features for the
current activity. Any feature shown at the bottom
of the LCD is available. The appropriate key is
displayed on the screen according to the call
handling process.
5 Help key Press the Help key and then press a softkey to
display information about that softkey.
6 Programmable Keys
The first programmable key is reserved as the Line
Key. Line Keys allow the user to select which line to
operate on.
Any programmable keys not used as Line Keys can
be programmed as Speed Dial Keys by the user or
system administrator. Numbers up to 24 digits can
be assigned to Speed Dial Keys. The numbers may
be a telephone number or star/hash codes.
7 Feature key This key displays a set of menu options that provide
additional capabilities, such as speed dial key
programming.
8 Recall key Press this key to get a dial tone. If the phone is
currently on a call, the current call will be placed on
hold and a new call will be started.
9 Answer key
Press this key to answer an incoming call. If there
is a headset attached to the phone, the audio will
go through the headset. If not, the audio will go
through the speaker on the phone. This key can
also be used to answer a waiting call.
10 Mic key Press key to mute the microphone. The LED on
this key flashes when the microphone is muted.
Press the key again to un-mute the microphone.
11 Menu key Press this key to access the features and settings
provided on the local telephone menu, such as Call
History, Personal Directory or User Settings.
12 Hold key Press this key to place a call on hold.
13 Transfer key Press this key to transfer a call.
14 Speaker key
Controls the built-in speaker which can be used for
Hands Free dialing and conversations.
The LED on this key lights when the speaker is
active.
15 Cursor pad Use this key to navigate to various features.
The up and down keys on the cursor pad can be used
to adjust the volume of the phone.
7

BASIC KEY OPERATIONS
This chapter describes basic keys on the phone such as cursor pad or key
pad.
Table 1: Description of the cursor pad and key pad
User actions/Keys
Digit key Select corresponding menu Item
4-way scroll BACK key ◄
(Redial key) Return to User Settings menu
4-way scroll FORWARD key
►
(Directory key) Select highlighted menu item
4-way scroll UP key
▲
(Volume up key) Move to previous menu item
4-way scroll DOWN key
▼
(Volume down) Move to next menu item
ENTER key ●
(Center button on cursor pad) Select highlighted menu item
DT820 PHONE DISPLAY
Use the ↑Up and ↓Down softkeys on the phone indicate to the user when
there are more options than displayed on the LCD screen.
Note: The softkeys are buttons that change function depending on the situation. Each softkey’s
current function is displayed on the LCD screen above the button on the phone.
Softkeys
Figure 10: Softkeys
MENU KEY
From the Menu key, various application features are available such as
Personal Directory, Call History and User Settings.
To display the Menu List using the Menu Key:
Press the Menu key while the current time displays on the LCD screen. The
Menu List is displayed on the LCD. Use the keys on the Cursor Pad to select
the desired Menu Item.
8

Table 2: Menu list descriptions
Menu Items Description
1 Personal Directory
Opens the Personal Directory
2 Call History Invokes Call History. It shows information about
Missed Calls, Placed Calls and Received Calls.
3 User Settings Invokes User Settings, including headset options,
date/time options, LCD contrast settings and
language options.
4 Admin Settings Invokes Administrator Settings (User Name and
Password required)
5 Reboot Phone The phone can be restarted without logging in to the
Admin Settings. It may need to be restarted to check
for a new version of firmware.
6 Status It shows the Terminal and Network information for the
phone, such as the Firmware Version, IP Address,
Default Gateway, etc.
OPERATION BY MENU AND CURSOR PAD
The menus on the phone can be used with the cursor pad to access Call
History, Personal Directory and terminal settings quickly and easily.
For example, the following operations show alternate ways to access the
Personal Directory:
1.Press the
“Menu” key
2.Press the Right
cursor pad key
Figure 11: Use Menus and Cursor Pad to access the Personal Directory
9

SOFTKEYS, EXIT AND HELP KEYS
Softkeys
The softkeys on the phones provide a set of functions on the LCD that adapts
to the changing state of the phone. The softkeys, at the bottom of the LCD,
display the names of available functions, names of user-assigned functions
and names of functions assigned by a specific softkey pattern. Displayed
softkeys can vary, depending on the state of the phone and the network
settings.
Note: Softkey functionality is only available for phones with LCD displays.
Commonly used softkeys include:
NewCall – Generates dial tone for a call
Voicemail – Automatically dials the voicemail extension on the system. This
feature may not be available on all systems.
EndCall - Terminates the current call.
Conference/Conf - Initiates/completes a conference.
Resume - Takes the call off Hold status.
Dial - Dials the number.
Delete - Deletes the last digit entered (backspace).
Reject - Transfers call to the Voice Mail or forwarding conditions.
>>> - Press this to see additional softkeys for the current screen.
↑
/
↓
-Use theupand down arrow keysto navigate throughthemenus.
Exit- Leaves current menu without saving any changes.
Select - Selects the highlighted option.
Cancel - Exit the current screen/options without changing any settings.
OK - Press this after making changes or selecting choices.
Save - Press this to save the changes made in the Personal Directory or
Speed Dial.
Delete - On the Call History, Personal Directory and Speed Dial screens,
press this to delete the currently highlighted information.
Options - In the Call History menus, press this to view the options for the
entry, including dialing and Personal Directory options.
Note: Not all softkeys may be available on the system. For details on the softkeys on the system,
contact your system administrator.
10

Exit and Help keys
Press the Exit key to exit the Menu screens and return to the main screen.
The Help key can be used to view information about the softkeys that are
displayed on the phone.
1. Press the “Help” key.
2. Press the softkey that needs to be seen the help information.
3. ↑Up/↓Down softkeys or Up/Down keys on the cursor pad can be used
to scroll through the help information, if needed.
4. Press the “Exit” softkey to return to the previous screen.
Note: Help screens may not be available for all the softkeys on the phone.
GIGABIT ETHERNET SUPPORT
All DT820 phones support Gigabit Ethernet on both the LAN and PC ports.
Gigabit Ethernet is enabled by setting the Speed and Duplex setting for
each port to Auto Negotiate.
11

Voicemail Box Setup
RECORDING YOUR PERSONAL VOICEMAIL GREETING
1.
Press the “Voicemail” soft key.
2.
Enter the PIN provided to you by your Administrator, followed by
the
# key.
3.
Select option 3 for personal options.
4.
Select option 1 to record your voicemail greeting.
5.
Follow the voice prompts to record and check your greeting.
CHANGING THE PIN FROM THE PHONE
1.
Press the “Voicemail” soft key.
2.
Enter the PIN provided to you by your Administrator, followed by the
# key.
3.
Select option 3 for personal options.
4.
Select option 2 to change your PIN.
5.
Enter the new PIN when prompted. Press # when done.
12

Commonly Used Features
PLACING OUTGOING CALLS
When the phone is not in use:
1.
Pickupthehandsetorpressthe“Speaker” key.
2.
Dial an extension or telephone number
Note: The Delete softkey can be used to delete the last digit (backspace).
3.
Press the Dial softkey to initiate the call, or wait a few seconds for
the call to be automatically dialed.
Note: A call also can be made by dialing the number and then picking up the handset or pressing
the “Headset” softkey.
When the phone is already on acall:
1. Press the “Hold” key. The original call is put on hold.
2. Pressthe“NewCall”softkey. Dial tone sounds.
3. Dial an extension ortelephonenumber.
To switch between calls:
1. Press the “Shuttle” softkey to switch between the calls.
2. To switch back to the other call, press the “Shuttle” softkey again.
ANSWERING AN INCOMING CALL
On the Handset:
oPick up the handset to answer the call.
On a Headset:
oPress the “Answer” button.
On Speakerphone:
oPress the “Speaker” button
If the phone is showing the Personal Directory, Call History or Menu screen:
o
Press the Line key.
13

Note: If any settings are being changed on the phone or a Personal Directory or Speed Dial
entry is being modified, the changes will be discarded once the Line Key is pressed.
TRANSFERRING THE CURRENT CALL TO THE HEADSET
1.
While on a call using the handset, press the “Headset” softkey to
transfer the call to the headset, then hang-up the handset.
2.
A Headset icon displays on the LCD. If it needs to be transferred
the call to the handset, pick up the handset again.
REJECTING AN INCOMING CALL
Press the “Reject” soft key to immediately send the caller to voicemail.
REDIAL LAST NUMBER DIALED
Press the “Redial” softkey.
ENDING A CALL
Hang up the handset or press the “End Call” softkey.
HOLD / RESUME A CALL
Placing a Call On Hold:
oWhile on a call, press the “Hold” key.
Retrieving Calls On Hold:
oPress the “Hold” key or the "Resume" softkey.
MUTE
1. To mute the microphone on an active call, press the “Mic”key.
2. To un-mute the microphone, press the “Mic” key again.
TRANSFERRING CALLS
Blind Transfers:
1.
While on a call, press the “Transfer” key.
2.
Press the “Blind” softkey.
3.
Dial an extension or telephonenumber.
14

4.
Press the “Dial” softkey, or wait a few seconds for the call to be
automatically transferred.
5.
The call is immediately transferred and the phone is disconnected.
Attended Transfers:
1.
While on a call, press the “Transfer” line key.
2.
Dial an extension or telephonenumber.
3.
Press the “Dial” softkey or wait a few seconds the call to be
automatically dialed.
4.
Once the other party answers the call, it can be spoken with the party
before the transfer completion.
5.
Press the “Transfer” key to complete the transfer.
Transfer Shuttle:
oWhile connecting to both parties, press the “Shuttle” softkey.
It’ll be connected to the original call opponent. Press the “Shuttle”
softkey to switch between the two parties again.
CALL WAITING
Whilealreadyonacallandanewcallringsin,the phone beeps and flash the
call indicator lamp to notice.
Answering the Second Call:
1.
Press the line key or “Answer” key.
The first call will be put onhold and a new call will start.
2.
Once thesecond call has ended, pressthe “EndCall”softkeyto end the
callandreturn to the first call.
3.
Press the “Hold” key or the “Resume” softkey to return to the first
call without ending the second call
Rejecting the Second Call:
1.
Press the first line key. The line key will beginblinking.
2.
Press the “Reject” softkey to immediately send the caller tovoicemail.
VOLUME ADJUSTMENT
In-call volume (handset/headset):
o
Press the Up/Down key on the Cursor pad while on a call.
15
Table of contents
Other NEC Telephone manuals

NEC
NEC G277 Installation guide

NEC
NEC Univerge SV8100 User guide

NEC
NEC UNIVERGE SL2100 User manual

NEC
NEC NDK 900 User manual

NEC
NEC DT310 Reference guide

NEC
NEC UNIVERGE SV9300 DT410 User manual

NEC
NEC Aspire Owner's manual

NEC
NEC SV8300 User manual

NEC
NEC Univerge SV8100 DT310 User manual

NEC
NEC 8IPLD Instruction manual

NEC
NEC DT930 Series Setup guide

NEC
NEC AT-10 User manual

NEC
NEC NEAX7400 ICS M120e User manual

NEC
NEC Univerge SV8100 Operating instructions

NEC
NEC Aspila Topaz User manual

NEC
NEC XEN IPK ANALOGUE TELEPHONE User manual

NEC
NEC Aspila Topaz User manual

NEC
NEC Portrait 308 User manual

NEC
NEC UNIVERGE SV810 User manual

NEC
NEC Xen Master Instruction manual