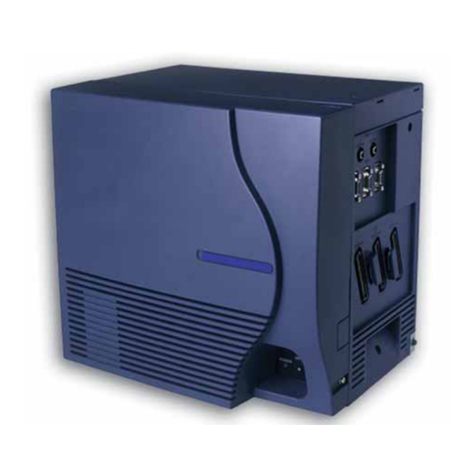
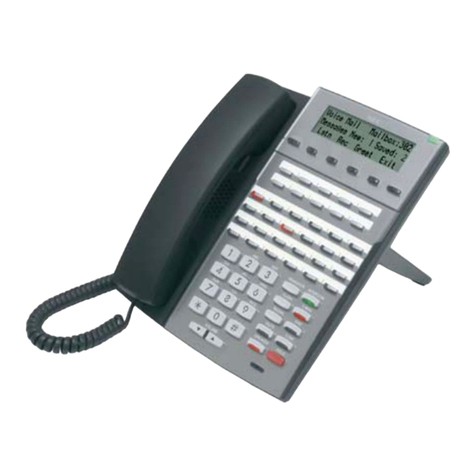
NEC Xen alpha User manual

Features & Specifications Manual
November 2003, A6-506000-642-01(8508), Release 6.0
Installation Manual
NEC Business Solutions Ltd
A6-506000-642-01(8508)
Release 6.0
November 2003

Page ii Features & Specifications Manual
A6-506000-642-01(8508), Release 6.0, November 2003
This page is intentionally blank.

Features & Specifications Manual – Table of Contents Page iii
November 2003, A6-506000-642-01 (8508), Release 6.0
Xen Alpha Release 6.0
Chapter 1
System Overview
Section 1 Your System . . . . . . . . . . . . . . . . . . . . . . . . . . . . . . . . . . . . 19
Section 2 Regulatory Information. . . . . . . . . . . . . . . . . . . . . . . . . . . . 21
Electromagnetic Interference (EMI) . . . . . . . . . . . . . . . . . . . . . . . . 21
Battery Disposal. . . . . . . . . . . . . . . . . . . . . . . . . . . . . . . . . . . . . . . 21
Incidence of Harm . . . . . . . . . . . . . . . . . . . . . . . . . . . . . . . . . . . . . 21
Hearing Aid Compatibility. . . . . . . . . . . . . . . . . . . . . . . . . . . . . . . . 21
Service Requirements . . . . . . . . . . . . . . . . . . . . . . . . . . . . . . . . . . 21
Compliance Information . . . . . . . . . . . . . . . . . . . . . . . . . . . . . . . . . 21
Section 3 Equipment . . . . . . . . . . . . . . . . . . . . . . . . . . . . . . . . . . . . . . 22
Section 4 System Capacities . . . . . . . . . . . . . . . . . . . . . . . . . . . . . . . 27
Section 5 System Block Diagram . . . . . . . . . . . . . . . . . . . . . . . . . . . . 28
Section 6 Cabling Requirements & Specifications. . . . . . . . . . . . . . 29
Section 7 Power Requirements . . . . . . . . . . . . . . . . . . . . . . . . . . . . . 31
Power Supply Inputs . . . . . . . . . . . . . . . . . . . . . . . . . . . . . . . . . . . 31
Power Supply Consumption. . . . . . . . . . . . . . . . . . . . . . . . . . . . . . 31
Section 8 Environmental conditions . . . . . . . . . . . . . . . . . . . . . . . . . 31
Temperature. . . . . . . . . . . . . . . . . . . . . . . . . . . . . . . . . . . . . . . . . . 31
Humidity . . . . . . . . . . . . . . . . . . . . . . . . . . . . . . . . . . . . . . . . . . . . . 31
Section 9 Weights & Dimensions . . . . . . . . . . . . . . . . . . . . . . . . . . . . 32
Section 10 Outside Line Type. . . . . . . . . . . . . . . . . . . . . . . . . . . . . . . . 33
Section 11 Network & Control. . . . . . . . . . . . . . . . . . . . . . . . . . . . . . . . 33
Transmission, Network & Control Specifications . . . . . . . . . . . . . . 33
Telephone . . . . . . . . . . . . . . . . . . . . . . . . . . . . . . . . . . . . . . . . 34
Section 12 Dialling Specifications . . . . . . . . . . . . . . . . . . . . . . . . . . . . 35
Dial Pulse Address Signalling . . . . . . . . . . . . . . . . . . . . . . . . . . . . 35
Dual-Tone Multifrequency (DTMF) Address Signalling . . . . . . . . . 35
Section 13 External Equipment Connection . . . . . . . . . . . . . . . . . . . . 36
Table of Contents

Page iv Features & Specifications Manual – Table of Contents
A6-506000-642-01 (8508), Release 6.0, November 2003
Section 14 Battery Backup. . . . . . . . . . . . . . . . . . . . . . . . . . . . . . . . . . .37
System Backup . . . . . . . . . . . . . . . . . . . . . . . . . . . . . . . . . . . . . . . .37
Memory Backup. . . . . . . . . . . . . . . . . . . . . . . . . . . . . . . . . . . . . . . .37
Section 15 Visual & Audible Indications . . . . . . . . . . . . . . . . . . . . . . . .38
Tone Patterns Table . . . . . . . . . . . . . . . . . . . . . . . . . . . . . . . . . . . .38
Multiline Terminal Flash Patterns Table . . . . . . . . . . . . . . . . . . . . .41
DSS/BLF LED Indications Table . . . . . . . . . . . . . . . . . . . . . . . . . . .42
Chapter 2
KSU Installation
Section 1 General Information . . . . . . . . . . . . . . . . . . . . . . . . . . . . . . .43
Section 2 Site Preparation . . . . . . . . . . . . . . . . . . . . . . . . . . . . . . . . . .43
Precautionary Information . . . . . . . . . . . . . . . . . . . . . . . . . . . . . . . .43
Site Selection Conditions. . . . . . . . . . . . . . . . . . . . . . . . . . . . . . . . .44
Multiline Telephone Installation Site . . . . . . . . . . . . . . . . . . . . . . . .45
Section 3 Installing the Key Service Unit (KSU). . . . . . . . . . . . . . . . .45
Installation Precautions . . . . . . . . . . . . . . . . . . . . . . . . . . . . . . . . . .45
The Key Service Unit. . . . . . . . . . . . . . . . . . . . . . . . . . . . . . . . . . . .45
Removing the KSU Cover . . . . . . . . . . . . . . . . . . . . . . . . . . . . . . . .46
Wall Mounting the KSU . . . . . . . . . . . . . . . . . . . . . . . . . . . . . . . . . .47
Installing or Replacing the Internal Backup Batteries . . . . . . . . . . .48
Connecting External Backup Batteries . . . . . . . . . . . . . . . . . . .50
Grounding Requirements . . . . . . . . . . . . . . . . . . . . . . . . . . . . .52
Connecting the B614-B13 KSU. . . . . . . . . . . . . . . . . . . . . . . . . . . .52
Switch Settings . . . . . . . . . . . . . . . . . . . . . . . . . . . . . . . . . . . . . . . .52
Telephone Connections. . . . . . . . . . . . . . . . . . . . . . . . . . . . . . . . . .54
Exchange Line Connection . . . . . . . . . . . . . . . . . . . . . . . . . . . . . . .54
Power Fail Telephone and Fax Connection . . . . . . . . . . . . . . . . . .54
External Ringer and External Paging Control Connection. . . . . . . .55
External Speaker Connection . . . . . . . . . . . . . . . . . . . . . . . . . . . . .55
External Music-On-Hold (MOH)/Background Music
(BGM) Source Connection . . . . . . . . . . . . . . . . . . . . . . . . . . . .57
External ROM Card. . . . . . . . . . . . . . . . . . . . . . . . . . . . . . . . . . . . .58
Section 4 Installing an Electronic Telephone Unit (ETU). . . . . . . . . .60
General Information. . . . . . . . . . . . . . . . . . . . . . . . . . . . . . . . . . . . .60
Interface ETUs. . . . . . . . . . . . . . . . . . . . . . . . . . . . . . . . . . . . . . . . .61
SLI(2)-B13 ETU . . . . . . . . . . . . . . . . . . . . . . . . . . . . . . . . . . . .62
COI(2)-B13 ETU . . . . . . . . . . . . . . . . . . . . . . . . . . . . . . . . . . . .63
CID(2)-B13 Unit . . . . . . . . . . . . . . . . . . . . . . . . . . . . . . . . . . . .64
BRT(1)-B13 ETU . . . . . . . . . . . . . . . . . . . . . . . . . . . . . . . . . . .66
Optional ETUs. . . . . . . . . . . . . . . . . . . . . . . . . . . . . . . . . . . . . . . . .67
MIF-B13 ETU . . . . . . . . . . . . . . . . . . . . . . . . . . . . . . . . . . . . . .68
DPH-B13 ETU . . . . . . . . . . . . . . . . . . . . . . . . . . . . . . . . . . . . .70
Features & Specifications Manual – Table of Contents Page v
November 2003, A6-506000-642-01 (8508), Release 6.0
Door Phones . . . . . . . . . . . . . . . . . . . . . . . . . . . . . . . . . . . . . . . . . .71
Door Lock Release . . . . . . . . . . . . . . . . . . . . . . . . . . . . . . . . . . . . .71
TRF-B13 ETU . . . . . . . . . . . . . . . . . . . . . . . . . . . . . . . . . . . . . . . . .72
Trunk Transfer Speech Volume Adjustment . . . . . . . . . . . . . . . . . .72
VRS-B13 ETU . . . . . . . . . . . . . . . . . . . . . . . . . . . . . . . . . . . . . . . . .74
VMS(2)-B13 ETU. . . . . . . . . . . . . . . . . . . . . . . . . . . . . . . . . . . . . . .75
Power Failure Backup . . . . . . . . . . . . . . . . . . . . . . . . . . . . . . . . . . .76
Operation When Input Power is Restored . . . . . . . . . . . . . . . .77
Section 5 Cable Connections. . . . . . . . . . . . . . . . . . . . . . . . . . . . . . . .77
General Information. . . . . . . . . . . . . . . . . . . . . . . . . . . . . . . . . . . . .77
Wiring to the KSU . . . . . . . . . . . . . . . . . . . . . . . . . . . . . . . . . . . . . .79
Multiline Telephone Connection (Dterm Series i) . . . . . . . . . . .79
Single Line Telephone Connection . . . . . . . . . . . . . . . . . . . . .80
Outside Lines. . . . . . . . . . . . . . . . . . . . . . . . . . . . . . . . . . . . . . . . . .80
Chapter 3
Installing DTB-Type Multiline Terminals
Section 1 General Information . . . . . . . . . . . . . . . . . . . . . . . . . . . . . . .83
Section 2 Multiline Terminals. . . . . . . . . . . . . . . . . . . . . . . . . . . . . . . .83
DTB-16-1A (WH) TEL . . . . . . . . . . . . . . . . . . . . . . . . . . . . . . . . . . .83
DTB-16D-1A (WH) TEL. . . . . . . . . . . . . . . . . . . . . . . . . . . . . . . . . .84
Section 3 Wall Mounting. . . . . . . . . . . . . . . . . . . . . . . . . . . . . . . . . . . .85
Wall Mounting Template . . . . . . . . . . . . . . . . . . . . . . . . . . . . . . . . .88
Chapter 4
Installing Dterm Series i Multiline Terminals
Section 1 General Information . . . . . . . . . . . . . . . . . . . . . . . . . . . . . . .89
Section 2 Multiline Terminals. . . . . . . . . . . . . . . . . . . . . . . . . . . . . . . .89
DTR-2DT-1A( ) TEL. . . . . . . . . . . . . . . . . . . . . . . . . . . . . . . . . . . . 89
DTR-8D-1A( ) TEL. . . . . . . . . . . . . . . . . . . . . . . . . . . . . . . . . . . . . 90
DTR-16D-1A( ) TEL. . . . . . . . . . . . . . . . . . . . . . . . . . . . . . . . . . . . 90
DTR-32D-1A( ) TEL. . . . . . . . . . . . . . . . . . . . . . . . . . . . . . . . . . . . 91
Section 3 Connecting a Dterm Series i Multiline Terminal . . . . . . . .92
Section 4 Adjusting the LCD on a Multiline Terminal . . . . . . . . . . . .93
Section 5 Installing Line Cards and Plastic Panels . . . . . . . . . . . . . .94
Installing the Line Card and Plastic Panel . . . . . . . . . . . . . . . . . . . 94
Removing the Plastic Panel . . . . . . . . . . . . . . . . . . . . . . . . . . . . . . 95

Page vi Features & Specifications Manual – Table of Contents
A6-506000-642-01 (8508), Release 6.0, November 2003
Section 6 Installing a Directory Card on a Multiline Terminal. . . . . .96
Section 7 Installing a Button Set on a Multiline Terminal . . . . . . . . .97
Section 8 Adjusting the Height on a Multiline Terminal . . . . . . . . . .98
Section 9 Removing or Installing the Base Plate on a
Multiline Terminal. . . . . . . . . . . . . . . . . . . . . . . . . . . . . . . . .99
Removing the Base Plate. . . . . . . . . . . . . . . . . . . . . . . . . . . . . . . . 99
Installing the Base Plate. . . . . . . . . . . . . . . . . . . . . . . . . . . . . . . . . 99
Section 10 Wall Mounting Multiline Terminals . . . . . . . . . . . . . . . . . .100
Wall Mounting a Multiline Terminal using the Base Plate. . . . . . . 100
Removing the Wall Mounted Telephone from the Base Plate.. . . 103
Wall Mounting a Multiline Terminal using the Wall Mount Unit
(WM-R( ) Unit). . . . . . . . . . . . . . . . . . . . . . . . . . . . . . . . . . . . . . . 105
Chapter 5
Installing Dterm Series i Optional Equipment
Section 1 General Information . . . . . . . . . . . . . . . . . . . . . . . . . . . . . .109
Section 2 Preparing for Adapter Installation . . . . . . . . . . . . . . . . . .109
Section 3 Installing Adapters . . . . . . . . . . . . . . . . . . . . . . . . . . . . . . .111
ACA-U( ) Unit (AC Adapter). . . . . . . . . . . . . . . . . . . . . . . . . . . . . 111
AD(A)-R( ) Unit (Ancillary Device Adapter) . . . . . . . . . . . . . . . . . 112
AP(A)-R( ) Unit and AP(R)-R( ) Unit (Port Adapters) . . . . . . . . . 120
CT(U)-R( ) Unit (Computer Telephony Adapter) . . . . . . . . . . . . . 123
Chapter 6
Installing DTU-Type Multiline Terminals
Section 1 General Information . . . . . . . . . . . . . . . . . . . . . . . . . . . . . .127
Section 2 Multiline Terminals. . . . . . . . . . . . . . . . . . . . . . . . . . . . . . .127
DTU-8-1A (WH) TEL . . . . . . . . . . . . . . . . . . . . . . . . . . . . . . . . . . .127
DTU-8D-1A (WH)/(BK) TEL. . . . . . . . . . . . . . . . . . . . . . . . . . . . . .128
DTU-16D-1A (WH)/(BK) TEL. . . . . . . . . . . . . . . . . . . . . . . . . . . . .128
DTU-32D-1A (WH)/(BK) TEL. . . . . . . . . . . . . . . . . . . . . . . . . . . . .129
Section 3 Connecting A Multiline Terminal To The System . . . . . .129
Section 4 Adjusting The LCD. . . . . . . . . . . . . . . . . . . . . . . . . . . . . . .130

Features & Specifications Manual – Table of Contents Page vii
November 2003, A6-506000-642-01 (8508), Release 6.0
Section 5 Installing Line Cards & Plastic Panels . . . . . . . . . . . . . . .131
Line Card and Plastic Panel Installation . . . . . . . . . . . . . . . . . . . .131
Section 6 Removing Softkeys . . . . . . . . . . . . . . . . . . . . . . . . . . . . . .132
Section 7 Adjusting The Height Of The Multiline Terminal . . . . . . .133
Section 8 Wall Mounting. . . . . . . . . . . . . . . . . . . . . . . . . . . . . . . . . . .134
Removing and Remounting the Handset Hanger . . . . . . . . .134
Wall Mounting, Using the Base Unit . . . . . . . . . . . . . . . . . . . .134
Installing the Wall Mount Unit & Mounting the Multiline
Terminal Using the WMU-UA Unit . . . . . . . . . . . . . . . . . . . . .138
Removing the Multiline Terminal from the Base Cover . . . . .141
Removing the Multiline Terminal from the WMU-UA Unit . . .141
Section 9 Installing Optional Adapters . . . . . . . . . . . . . . . . . . . . . . .142
Preparing Multiline Terminal for Adapter Installation. . . . . . . . . . .142
ACA-UA Unit (AC Adapter) . . . . . . . . . . . . . . . . . . . . . . . . . . . . . .145
ADA-UA Unit (Ancillary Device Adapter). . . . . . . . . . . . . . . . . . . .146
Connecting Cables to the ADA-UA Unit . . . . . . . . . . . . . . . . .147
Switch Settings . . . . . . . . . . . . . . . . . . . . . . . . . . . . . . . . . . . .149
APR-UA Unit (Analogue Port Ringer) . . . . . . . . . . . . . . . . . . . . . .151
Installing an APR-UA Unit on a Multiline Terminal . . . . . . . . .151
Switch Settings . . . . . . . . . . . . . . . . . . . . . . . . . . . . . . . . . . . .152
Connecting Cables on the APR-UA Unit . . . . . . . . . . . . . . . .153
CTA-BA Unit (Computer Telephony Application) . . . . . . . . . . . . .154
Installing the CTA-BA Unit . . . . . . . . . . . . . . . . . . . . . . . . . . .154
Connecting the Cables on the CTA-BA Unit . . . . . . . . . . . . .155
Installing the Driver on the PC . . . . . . . . . . . . . . . . . . . . . . . .155
HFU-UA (WH) Unit (Handsfree Unit). . . . . . . . . . . . . . . . . . . . . . .156
Installing an HFU-UA (WH) Unit on a Multiline Terminal . . . .156
Installing the External Microphone . . . . . . . . . . . . . . . . . . . . .156
Switch Settings . . . . . . . . . . . . . . . . . . . . . . . . . . . . . . . . . . . .157
Chapter 7
Installing ETW-Type Multiline Terminals
Section 1 General Information . . . . . . . . . . . . . . . . . . . . . . . . . . . . . .159
Section 2 ETW-Type Multiline Terminals . . . . . . . . . . . . . . . . . . . . .159
Section 3 Connecting an ETW-Type Multiline Terminal . . . . . . . . .160
Terminal Update . . . . . . . . . . . . . . . . . . . . . . . . . . . . . . . . . . . . . .160
Modular Terminal Connections . . . . . . . . . . . . . . . . . . . . . . .160
Attach a Multiline Terminal to the System. . . . . . . . . . . . . . . . . . .160

Page viii Features & Specifications Manual – Table of Contents
A6-506000-642-01 (8508), Release 6.0, November 2003
Chapter 8
Installing Optional Terminal Equipment
Section 1 SLT(1)-U13 ADP (Single Line Telephone Adaptor) . . . . .161
Connecting the SLT(1)-U13 ADP to the System . . . . . . . . . .161
Wall Mounting the SLT(1)-U13 ADP . . . . . . . . . . . . . . . . . . .162
Chapter 9
Telephone Programming
Section 1 Introduction. . . . . . . . . . . . . . . . . . . . . . . . . . . . . . . . . . . . .165
Section 2 Entering Programming Mode . . . . . . . . . . . . . . . . . . . . . .165
Programming Guidelines . . . . . . . . . . . . . . . . . . . . . . . . . . . .166
Section 3 Programming Functions . . . . . . . . . . . . . . . . . . . . . . . . . .168
Section 4 Programming Functions . . . . . . . . . . . . . . . . . . . . . . . . . .169
Trunk Programming . . . . . . . . . . . . . . . . . . . . . . . . . . . . . . . . . . .184
Telephone Port Programming . . . . . . . . . . . . . . . . . . . . . . . . . . .188
Trunk Telephone Menu Programming . . . . . . . . . . . . . . . . . . . .194
Tenant Programming . . . . . . . . . . . . . . . . . . . . . . . . . . . . . . . . . .199
System Mode Programming . . . . . . . . . . . . . . . . . . . . . . . . . . . . .200
Maintenance Modes . . . . . . . . . . . . . . . . . . . . . . . . . . . . . . . . . . .201

Installation Manual – List of Figures ix
November 2003, A6-506000-642-01(8508), Release 6.0
Xen Alpha Release 6.0
Chapter 1
System Overview
Figure 1-1: System Configuration Sample. . . . . . . . . . . . . . . . . . . . . . . . . . . . . . 20
Figure 1-2: NEC Xen Alpha System Block Diagram . . . . . . . . . . . . . . . . . . . . . . 28
Figure 1-3: Connecting the ESI to the Multiline Telephone Using Twisted
2-Pair Cable . . . . . . . . . . . . . . . . . . . . . . . . . . . . . . . . . . . . . . . . . . . 29
Chapter 2
KSU Installation
Figure 2-1: Front View of a KSU . . . . . . . . . . . . . . . . . . . . . . . . . . . . . . . . . . . . . 45
Figure 2-2: How to Remove the KSU Cover . . . . . . . . . . . . . . . . . . . . . . . . . . . .46
Figure 2-3: Attaching the Wall Mounting Bracket for the KSU to the Wall. . . . . .47
Figure 2-4: Attaching the KSU to the Wall Mount Template . . . . . . . . . . . . . . . .47
Figure 2-5: Securing the KSU to the Wall Mount Template. . . . . . . . . . . . . . . . . 48
Figure 2-6: Inserting a New Battery in the KSU Unit. . . . . . . . . . . . . . . . . . . . . . 48
Figure 2-7: Attaching the Battery Connectors. . . . . . . . . . . . . . . . . . . . . . . . . . .49
Figure 2-8: Mounting the External Battery Cabinet. . . . . . . . . . . . . . . . . . . . . . . 51
Figure 2-9: Connecting External Batteries. . . . . . . . . . . . . . . . . . . . . . . . . . . . . .51
Figure 2-10: KSU Grounding. . . . . . . . . . . . . . . . . . . . . . . . . . . . . . . . . . . . . . . . .52
Figure 2-11: KSU Switch Settings. . . . . . . . . . . . . . . . . . . . . . . . . . . . . . . . . . . . . 53
Figure 2-12: Telephone Connection . . . . . . . . . . . . . . . . . . . . . . . . . . . . . . . . . . . 54
Figure 2-13: Exchange Line Connection. . . . . . . . . . . . . . . . . . . . . . . . . . . . . . . .54
Figure 2-14: Power Fail Telephone and Fax Connection . . . . . . . . . . . . . . . . . . .55
Figure 2-15: External Ringer Connection . . . . . . . . . . . . . . . . . . . . . . . . . . . . . . . 55
Figure 2-16: External Paging Connection . . . . . . . . . . . . . . . . . . . . . . . . . . . . . . .56
Figure 2-17: MOH/BGM Source Connection. . . . . . . . . . . . . . . . . . . . . . . . . . . . . 57
Figure 2-18: External ROM Card. . . . . . . . . . . . . . . . . . . . . . . . . . . . . . . . . . . . . .58
Figure 2-19: Inserting the External ROM Card . . . . . . . . . . . . . . . . . . . . . . . . . . .59
Figure 2-20: Installing a Vertically Mounted ETU . . . . . . . . . . . . . . . . . . . . . . . . . 60
Figure 2-21: ESI(8)-B13 ETU . . . . . . . . . . . . . . . . . . . . . . . . . . . . . . . . . . . . . . . . 61
Figure 2-22: SLI(2)-B13 ETU . . . . . . . . . . . . . . . . . . . . . . . . . . . . . . . . . . . . . . . .62
Figure 2-23: COI(2)-B13 ETU . . . . . . . . . . . . . . . . . . . . . . . . . . . . . . . . . . . . . . . .63
Figure 2-24: Mounting the CID(2)-B13 Unit onto the Mainboard. . . . . . . . . . . . . . 64
Figure 2-25: Mounting the CID(2)-B13 Unit onto the COI(2)-B13 ETU. . . . . . . . . 65
Figure 2-26: BRT(1)-B13 ETU. . . . . . . . . . . . . . . . . . . . . . . . . . . . . . . . . . . . . . . .66
Figure 2-27: BRT(1)-B13 ETU Connection Cable. . . . . . . . . . . . . . . . . . . . . . . . .66
Figure 2-28: PBR-B13 ETU. . . . . . . . . . . . . . . . . . . . . . . . . . . . . . . . . . . . . . . . . .67
List of Figures

xInstallation Manual – List of Figures
A6-506000-642-01(8508), Release 6.0, November 2003
Figure 2-29: Removing the Ground Plate. . . . . . . . . . . . . . . . . . . . . . . . . . . . . . . 68
Figure 2-30: Mounting the DB-9 Plate . . . . . . . . . . . . . . . . . . . . . . . . . . . . . . . . . 68
Figure 2-31: Connecting the DB-9 Cable . . . . . . . . . . . . . . . . . . . . . . . . . . . . . . . 69
Figure 2-32: MIF-B13 ETU . . . . . . . . . . . . . . . . . . . . . . . . . . . . . . . . . . . . . . . . . . 69
Figure 2-33: DHP-B13 ETU . . . . . . . . . . . . . . . . . . . . . . . . . . . . . . . . . . . . . . . . . 70
Figure 2-34: TRF-B13 ETU. . . . . . . . . . . . . . . . . . . . . . . . . . . . . . . . . . . . . . . . . . 72
Figure 2-35: VRS-B13 ETU . . . . . . . . . . . . . . . . . . . . . . . . . . . . . . . . . . . . . . . . . 74
Figure 2-36: VMS(2)-B13 ETU . . . . . . . . . . . . . . . . . . . . . . . . . . . . . . . . . . . . . . . 75
Figure 2-37: Power Failure Backup Flowchart . . . . . . . . . . . . . . . . . . . . . . . . . . . 76
Figure 2-38: Attaching the Cables to the Connector. . . . . . . . . . . . . . . . . . . . . . . 78
Figure 2-39: Holding the Connector with the Pliers . . . . . . . . . . . . . . . . . . . . . . . 78
Figure 2-40: ETW/DTU-Type Multiline Terminal and SLT Adapter Connection. . 79
Figure 2-41: Dterm Series i Multiline Terminal Connection . . . . . . . . . . . . . . . . . 79
Figure 2-42: Single Line Telephone Connection . . . . . . . . . . . . . . . . . . . . . . . . . 80
Figure 2-43: KSU Cabling Knockouts. . . . . . . . . . . . . . . . . . . . . . . . . . . . . . . . . . 80
Figure 2-44: Removing the Knockout Panels in the KSU. . . . . . . . . . . . . . . . . . . 81
Chapter 3
Installing DTB-Type Multiline Terminals
Figure 3-1: DTB-16-1A (WH) TEL Multiline Telephone . . . . . . . . . . . . . . . . . . . 83
Figure 3-2: DTB-16D-1A (WH) TEL Multiline Telephone . . . . . . . . . . . . . . . . . . 84
Chapter 4
Installing Dterm Series i Multiline Terminals
Figure 4-1: DTR-2DT-1A( ) TEL . . . . . . . . . . . . . . . . . . . . . . . . . . . . . . . . . . . . 89
Figure 4-2: DTR-8D-1A( ) TEL Multiline Terminal . . . . . . . . . . . . . . . . . . . . . . . 90
Figure 4-3: DTR-16D-1A( ) TEL Multiline Terminal . . . . . . . . . . . . . . . . . . . . . . 90
Figure 4-4: DTR-32D-1A( ) TEL Multiline Terminal . . . . . . . . . . . . . . . . . . . . . . 91
Figure 4-5: Connecting a Multiline Terminal to the System . . . . . . . . . . . . . . . . 92
Figure 4-6: Leading Line Cords on a Multiline Terminal. . . . . . . . . . . . . . . . . . . 92
Figure 4-7: Adjusting the LCD on a Multiline Terminal. . . . . . . . . . . . . . . . . . . . 93
Figure 4-8: Installing the Line Card on a Dterm Series i Multiline Terminal . . . . 94
Figure 4-9: Installing the Plastic Panel on a Dterm Series i Multiline Terminal . 94
Figure 4-10: Removing the Plastic Panel from the Multiline Terminal . . . . . . . . . 95
Figure 4-11: Attaching Directory Card to Directory Card Holder . . . . . . . . . . . . . 96
Figure 4-12: Attaching Directory Card Holder to the Multiline Terminal . . . . . . . . 96
Figure 4-13: Removing the Button Set from a Multiline Terminal. . . . . . . . . . . . . 97
Figure 4-14: Inserting a New Button Set into a Multiline Terminal . . . . . . . . . . . . 97
Figure 4-15: Locating the Adjustment Tabs on the Multiline Terminal . . . . . . . . . 98
Figure 4-16: Raising the Height on the Dterm Series i Multiline Terminal . . . . . . 98
Figure 4-17: Lowering the Base Plate on the Multiline Terminal . . . . . . . . . . . . . 98
Figure 4-18: Removing Base Plate. . . . . . . . . . . . . . . . . . . . . . . . . . . . . . . . . . . . 99
Figure 4-19: Installing Base Plate. . . . . . . . . . . . . . . . . . . . . . . . . . . . . . . . . . . . . 99

Installation Manual – List of Figures xi
November 2003, A6-506000-642-01(8508), Release 6.0
Figure 4-20: Removing the Hanger Hook on a Multiline Telephone. . . . . . . . . . 100
Figure 4-21: Sliding the Hanger Hook into Position . . . . . . . . . . . . . . . . . . . . . . 100
Figure 4-22: Removing the Cutout . . . . . . . . . . . . . . . . . . . . . . . . . . . . . . . . . . . 101
Figure 4-23: Bundling the Line Cord. . . . . . . . . . . . . . . . . . . . . . . . . . . . . . . . . . 101
Figure 4-24: Wall Mounting the Base Plate . . . . . . . . . . . . . . . . . . . . . . . . . . . . 102
Figure 4-25: Installing the Telephone. . . . . . . . . . . . . . . . . . . . . . . . . . . . . . . . . 102
Figure 4-26: Plugging in Line Cord. . . . . . . . . . . . . . . . . . . . . . . . . . . . . . . . . . . 102
Figure 4-27: Hiding Excess Cord . . . . . . . . . . . . . . . . . . . . . . . . . . . . . . . . . . . . 103
Figure 4-28: Removing the Telephone. . . . . . . . . . . . . . . . . . . . . . . . . . . . . . . . 103
Figure 4-29: Wall Mounting Base Plate on Switch Box . . . . . . . . . . . . . . . . . . . 104
Figure 4-30: Wall Mounted Telephone . . . . . . . . . . . . . . . . . . . . . . . . . . . . . . . . 104
Figure 4-31: Bundling the Line Cord. . . . . . . . . . . . . . . . . . . . . . . . . . . . . . . . . . 105
Figure 4-32: Attaching the Wall Mount Unit to the Wall . . . . . . . . . . . . . . . . . . . 105
Figure 4-33: Attaching the Multiline Telephone to the Wall Mount Unit . . . . . . . 106
Figure 4-34: Plugging in Line Cord. . . . . . . . . . . . . . . . . . . . . . . . . . . . . . . . . . . 106
Figure 4-35: Hiding Excess Cord Behind the Wall Mount Unit. . . . . . . . . . . . . . 107
Figure 4-36: Removing the Telephone from the Wall Mount Unit. . . . . . . . . . . . 107
Figure 4-37: Mounting Wall Mount Unit on the Switch Box . . . . . . . . . . . . . . . . 108
Figure 4-38: Wall Mounted Telephone . . . . . . . . . . . . . . . . . . . . . . . . . . . . . . . . 108
Chapter 5
Installing Dterm Series i Optional Equipment
Figure 5-1: Locating the Adjustment Tabs on the Multiline Terminal . . . . . . . . 109
Figure 5-2: Raising the Base Plate. . . . . . . . . . . . . . . . . . . . . . . . . . . . . . . . . . 110
Figure 5-3: Removing the Multiline Terminal Base Plate . . . . . . . . . . . . . . . . . 110
Figure 5-4: Modifying Base Plate for Adapter Installation. . . . . . . . . . . . . . . . . 111
Figure 5-5: Connecting the AC Adapter to an Installed Adapter . . . . . . . . . . . .112
Figure 5-6: AD(A)-R( ) Unit. . . . . . . . . . . . . . . . . . . . . . . . . . . . . . . . . . . . . . . .112
Figure 5-7: Connecting a Multiline Terminal to a Recording Device using
an AD(A)-R( ) Unit (Example) . . . . . . . . . . . . . . . . . . . . . . . . . . . . 113
Figure 5-8: AD(A)-R( ) Unit Connection without Pause Control . . . . . . . . . . . .113
Figure 5-9: AD(A)-R( ) Unit Connection with Pause Control. . . . . . . . . . . . . . .113
Figure 5-10: Removing AD(A)-R( ) Unit Cover. . . . . . . . . . . . . . . . . . . . . . . . . .114
Figure 5-11: Attaching Cables to the AD(A)-R( ) Unit . . . . . . . . . . . . . . . . . . . . 114
Figure 5-12: AD(A)-R( ) Unit Cable Access Port . . . . . . . . . . . . . . . . . . . . . . . .116
Figure 5-13: AD(A)-R( ) Switch Default Settings . . . . . . . . . . . . . . . . . . . . . . . . 117
Figure 5-14: Attaching the AD(A)-R( ) Unit to the Multiline Terminal. . . . . . . . . 119
Figure 5-15: Connecting a Multiline Terminal to an Analogue Telephone Using
an AP(A)-R( ) Unit/AP(R)-R( ) Unit (Example) . . . . . . . . . . . . . . .120
Figure 5-16: AP(A)-R( ) Unit/AP(R)-R( ) Unit Switches . . . . . . . . . . . . . . . . . . 120
Figure 5-17: Attaching the AP(A)-R( )/AP(R)-R( ) Units to the Multiline
Terminal . . . . . . . . . . . . . . . . . . . . . . . . . . . . . . . . . . . . . . . . . . . . .122
Figure 5-18: Installing the Ferrite Core on the AP(A)-R( )/AP(R)-R( ) Units . . .122
Figure 5-19: CT(U)-R( ) Unit. . . . . . . . . . . . . . . . . . . . . . . . . . . . . . . . . . . . . . . .123

xii Installation Manual – List of Figures
A6-506000-642-01(8508), Release 6.0, November 2003
Figure 5-20: Connecting a Multiline Terminal to a PC using a CT(U)-R( )
Unit (Example) . . . . . . . . . . . . . . . . . . . . . . . . . . . . . . . . . . . . . . . . 123
Figure 5-21: Attaching the CT(U)-R( ) Unit to the Multiline Terminal . . . . . . . . .124
Figure 5-22: Connecting the USB Cable to the CT(U)-R( ) Unit. . . . . . . . . . . . .125
Figure 5-23: Attaching the Headset to the Multiline Terminal . . . . . . . . . . . . . . .125
Chapter 6
Installing DTU-Type Multiline Terminals
Figure 6-1: DTU-8-1A (WH) TEL Multiline Terminal. . . . . . . . . . . . . . . . . . . . . 127
Figure 6-2: DTU-8D-1A (BK)/(WH) TEL Multiline Terminal . . . . . . . . . . . . . . . 128
Figure 6-3: DTU-16D-1A (WH)/(BK) TEL Multiline Terminal . . . . . . . . . . . . . . 128
Figure 6-4: DTU-32D-1A (WH)/(BK) TEL Multiline Terminal . . . . . . . . . . . . . . 129
Figure 6-5: Connecting a Multiline Terminal to the System . . . . . . . . . . . . . . . 129
Figure 6-6: Leading Line Cords on a Multiline Terminal. . . . . . . . . . . . . . . . . . 130
Figure 6-7: Adjusting the LCD . . . . . . . . . . . . . . . . . . . . . . . . . . . . . . . . . . . . . 130
Figure 6-8: Installing Line Card and Plastic Panel on a Multiline Terminal. . . . 131
Figure 6-9: Installing Plastic Panel . . . . . . . . . . . . . . . . . . . . . . . . . . . . . . . . . . 131
Figure 6-10: Removing the Plastic Panel from the Multiline Terminal . . . . . . . . 132
Figure 6-11: Removing Softkeys . . . . . . . . . . . . . . . . . . . . . . . . . . . . . . . . . . . . 132
Figure 6-12: Locating the Adjustment Tabs on the Multiline Terminal . . . . . . . . 133
Figure 6-13: Raising the Base Plate on the Multiline Terminal. . . . . . . . . . . . . . 133
Figure 6-14: Adjusting the Line Cord Length . . . . . . . . . . . . . . . . . . . . . . . . . . . 133
Figure 6-15: Lowering the Base Plate on the Multiline Terminal . . . . . . . . . . . . 134
Figure 6-16: Positioning the Handset Hanger. . . . . . . . . . . . . . . . . . . . . . . . . . . 134
Figure 6-17: Removing the Knockout. . . . . . . . . . . . . . . . . . . . . . . . . . . . . . . . . 135
Figure 6-18: Attaching the Base Plate to the Wall . . . . . . . . . . . . . . . . . . . . . . . 135
Figure 6-19: Wall Mounting using a Modular Jack . . . . . . . . . . . . . . . . . . . . . . . 135
Figure 6-20: Plugging in the Line Cord using a Wall Jack . . . . . . . . . . . . . . . . . 136
Figure 6-21: Plugging in the Line Cord Using a Modular Jack . . . . . . . . . . . . . . 136
Figure 6-22: Attaching the Bottom Tabs of the Multiline Terminal to the
Base Cover. . . . . . . . . . . . . . . . . . . . . . . . . . . . . . . . . . . . . . . . . . . 137
Figure 6-23: Attaching the Top Tabs of the Multiline Terminal to the Base Plate137
Figure 6-24: Installed Wall Mount Unit . . . . . . . . . . . . . . . . . . . . . . . . . . . . . . . . 138
Figure 6-25: Removing the Tabs from the Adapter . . . . . . . . . . . . . . . . . . . . . . 138
Figure 6-26: Removing the Tabs from the WMU-UA Unit . . . . . . . . . . . . . . . . . 139
Figure 6-27: Leading the Line Cord out of the WMU-UA Unit . . . . . . . . . . . . . . 139
Figure 6-28: Attaching the Wall Mount Unit to the Wall . . . . . . . . . . . . . . . . . . . 140
Figure 6-29: Attaching the Multiline Terminal to the WMU-UA Unit . . . . . . . . . . 140
Figure 6-30: Removing the Multiline Terminal from the Base Cover . . . . . . . . . 141
Figure 6-31: Raising the Base Plate. . . . . . . . . . . . . . . . . . . . . . . . . . . . . . . . . . 142
Figure 6-32: Unlocking Tab . . . . . . . . . . . . . . . . . . . . . . . . . . . . . . . . . . . . . . . . 142
Figure 6-33: Releasing Right Tab. . . . . . . . . . . . . . . . . . . . . . . . . . . . . . . . . . . . 143
Figure 6-34: Removing Bottom Cover . . . . . . . . . . . . . . . . . . . . . . . . . . . . . . . . 143
Figure 6-35: Removing Base Plate Dummy End . . . . . . . . . . . . . . . . . . . . . . . . 143

Installation Manual – List of Figures xiii
November 2003, A6-506000-642-01(8508), Release 6.0
Figure 6-36: Cutting Dummy End in Half . . . . . . . . . . . . . . . . . . . . . . . . . . . . . . 143
Figure 6-37: Installing Adapter in Connector 1 . . . . . . . . . . . . . . . . . . . . . . . . . . 144
Figure 6-38: Installing Dummy End B. . . . . . . . . . . . . . . . . . . . . . . . . . . . . . . . . 144
Figure 6-39: ACA-UA Unit Connection . . . . . . . . . . . . . . . . . . . . . . . . . . . . . . . . 145
Figure 6-40: Attaching the ADA-UA Unit to the Multiline Terminal . . . . . . . . . . . 146
Figure 6-41: Leading the Audio Cable out from the ADA-UA Unit . . . . . . . . . . . 146
Figure 6-42: ADA-UA Unit. . . . . . . . . . . . . . . . . . . . . . . . . . . . . . . . . . . . . . . . . . 147
Figure 6-43: Attaching Cables to the ADA-UA Unit . . . . . . . . . . . . . . . . . . . . . . 147
Figure 6-44: ADA-UA Unit Switch Settings. . . . . . . . . . . . . . . . . . . . . . . . . . . . . 149
Figure 6-45: APR-UA Unit. . . . . . . . . . . . . . . . . . . . . . . . . . . . . . . . . . . . . . . . . . 151
Figure 6-46: Attaching the Unit to the Multiline Terminal . . . . . . . . . . . . . . . . . . 151
Figure 6-47: Leading the Telephone Cord out from the Unit . . . . . . . . . . . . . . . 152
Figure 6-48: Closing the Base Plate Cover. . . . . . . . . . . . . . . . . . . . . . . . . . . . . 152
Figure 6-49: APR-UA Unit Switches. . . . . . . . . . . . . . . . . . . . . . . . . . . . . . . . . . 152
Figure 6-50: Connecting Cables on the APR-UA Unit . . . . . . . . . . . . . . . . . . . . 153
Figure 6-51: Attaching a Xen Multiline Terminal to a PC . . . . . . . . . . . . . . . . . . 154
Figure 6-52: CTA-BA Unit. . . . . . . . . . . . . . . . . . . . . . . . . . . . . . . . . . . . . . . . . . 154
Figure 6-53: Attaching the Unit to the Multiline Terminal . . . . . . . . . . . . . . . . . . 155
Figure 6-54: Connecting the RS-232C Cable to the CTA-BA Unit on the
Multiline Terminal . . . . . . . . . . . . . . . . . . . . . . . . . . . . . . . . . . . . . . 155
Figure 6-55: HFU-UA (WH) Unit. . . . . . . . . . . . . . . . . . . . . . . . . . . . . . . . . . . . . 156
Figure 6-56: Microphone with Mute . . . . . . . . . . . . . . . . . . . . . . . . . . . . . . . . . . 156
Figure 6-57: Attaching a Microphone to a Multiline Terminal . . . . . . . . . . . . . . . 156
Figure 6-58: HFU-UA (WH) Unit Switches . . . . . . . . . . . . . . . . . . . . . . . . . . . . . 157
Chapter 7
Installing ETW-Type Multiline Terminals
Figure 7-1: Modular Terminal Connections for Multiline Terminals . . . . . . . . . 160
Figure 7-2: Connecting an ETW-Type Multiline Terminal. . . . . . . . . . . . . . . . . 160
Chapter 8
Installing Optional Terminal Equipment
Figure 8-1: Connecting a Single Line Telephone to the System using an
SLT(1)-U13 ADP . . . . . . . . . . . . . . . . . . . . . . . . . . . . . . . . . . . . . . 161
Figure 8-2: Connecting the SLT(1)-U13 ADP. . . . . . . . . . . . . . . . . . . . . . . . . . 162
Figure 8-3: Removing the Screws from the SLT(1)-U13 ADP . . . . . . . . . . . . . 162
Figure 8-4: Attaching the SLT(1)-U13 ADP to the Wall . . . . . . . . . . . . . . . . . . 163
Chapter 9
Telephone Programming

xiv Installation Manual – List of Figures
A6-506000-642-01(8508), Release 6.0, November 2003
This page is intentionally blank.

Installation Manual – Table of Contents xv
November 2003, A6-506000-642-01(8508), Release 6.0
Xen Alpha Release 6.0
Chapter 1
System Overview
Table 1-1: Multiline Telephone Loop Resistance and Cable Length . . . . . . . . . 29
Table 1-2: Cable Connection Between an Analogue Port and the Single
Line Telephone . . . . . . . . . . . . . . . . . . . . . . . . . . . . . . . . . . . . . . . . .30
Table 1-3: Power Consumption . . . . . . . . . . . . . . . . . . . . . . . . . . . . . . . . . . . . . . 31
Table 1-4: Weights and Dimensions . . . . . . . . . . . . . . . . . . . . . . . . . . . . . . . . . 32
Table 1-5: Internal and External Battery Specifications . . . . . . . . . . . . . . . . . . . 37
Table 1-6: Tone Patterns . . . . . . . . . . . . . . . . . . . . . . . . . . . . . . . . . . . . . . . . . . 38
Table 1-7: Multiline Telephone LED Patterns. . . . . . . . . . . . . . . . . . . . . . . . . . . 41
Table 1-8: DSS/BLF LED Indications. . . . . . . . . . . . . . . . . . . . . . . . . . . . . . . . . 42
Chapter 2
KSU Installation
Table 2-1: KSU Switches and Connections. . . . . . . . . . . . . . . . . . . . . . . . . . . . 53
Table 2-2: DPH-B13 ETU Switch Settings. . . . . . . . . . . . . . . . . . . . . . . . . . . . . 71
Table 2-3: TRF-B13 ETU Switch Settings . . . . . . . . . . . . . . . . . . . . . . . . . . . . . 73
Table 4-4: CO/PBX Line Loss Compensation . . . . . . . . . . . . . . . . . . . . . . . . . . 73
Chapter 3
Installing DTB-Type Multiline Terminals
Chapter 4
Installing Dterm Series i Multiline Terminals
Chapter 5
Installing Dterm Series i Optional Equipment
List of Tables

xvi Installation Manual – Table of Contents
A6-506000-642-01(8508), Release 6.0, November 2003
Chapter 6
Installing DTU-Type Multiline Terminals
Table 6-1: ADA-UA Cable Connections . . . . . . . . . . . . . . . . . . . . . . . . . . . . . . 148
Table 6-2: ADA-UA Unit Switch Settings . . . . . . . . . . . . . . . . . . . . . . . . . . . . . 150
Table 6-3: HFU-UA (WH) Unit Switch Settings . . . . . . . . . . . . . . . . . . . . . . . . .157
Chapter 7
Installing ETW-Type Multiline Terminals
Chapter 8
Installing Optional Terminal Equipment
Chapter 9
Telephone Programming
Table 9-1: Navigational Keys for Telephone Programming. . . . . . . . . . . . . . . .166
Table 9-2: Trunk Programming Functions. . . . . . . . . . . . . . . . . . . . . . . . . . . . .184
Table 9-3: Telephone Port Programming . . . . . . . . . . . . . . . . . . . . . . . . . . . . .188
Table 9-4: Trunk Telephone Menu Programming . . . . . . . . . . . . . . . . . . . . . . .194
Table 9-5: Tenant Programming . . . . . . . . . . . . . . . . . . . . . . . . . . . . . . . . . . . .199
Table 9-6: System Mode Programming. . . . . . . . . . . . . . . . . . . . . . . . . . . . . . .200
Table 9-7: Maintenance Modes. . . . . . . . . . . . . . . . . . . . . . . . . . . . . . . . . . . . .201

Installation Manual, Chapter 1 – System Overview 19
November 2003, A6-506000-642-01(8508), Release 6.0
Xen Alpha Release 6.0
CHAPTER
1System Overview
S
ECTION
1
YOUR SYSTEM Your NEC Xen Alpha provides you a complete communications system to enhance
your business. The Xen Alpha telephone provides for a maximum of six lines and
sixteen telephones. This system is easy to install, operate, and maintain and provides
you the benefits and many of the features of a larger key telephone system.
Your system is easy to install, allowing you to have your system up and running in a
very short time using the system defaults. Should you need to customise your system,
an easy-to-use Windows PC based software is provided. You can also make changes
using a telephone.
Your system provides battery backup in case of a power outages. System
programming and speed dialling is retained by a long-life lithium battery. The battery
located in key service unit (KSU) allows your telephones to continue operating in the
event of a power outage.
Xen Alpha is a feature-rich system that provides telephone functions and support many
advanced features such as:
Computer Telephony Integration (CTI) UUniform Call Distribution
Call Forward External UAutomated Attendant
ISDN-BRI Voice Trunks UAutomatic Carrier Routing
Caller ID UTrunk to Trunk Transfer
Integrated Digital Voice Mail UVirtual Extensions
The Xen Alpha system offers a variety of Multiline Terminals. These Multiline Terminals
are available in 8-button, 16-button and 32-button capacities and are offered as display
and non-display models. A budget and premium range of Multiline Terminals
is available.
A customer with existing ETW terminals can easily connect them to the Xen Alpha
system, providing inexpensive migration from the NEC Ranger NDK/DK systems. Most
Xen Alpha system features are available with the ETW-type Multiline Terminals.
The Xen Alpha systems support a wide range of additional equipment that can be
connected to the system to accommodate individual customer needs.
Equipment such as Single Line Telephones, external speakers, facsimile machines,
external microphones, and headsets can be connected. The diagram in Figure 1-1:
System Configuration Sample, Pg 20 shows a Xen Alpha system with standard and
optional equipment (some locally provided).

20 Installation Manual, Chapter 1 – System Overview
A6-506000-642-01(8508), Release 6.0, November 2003
.
Figure 1-1: System Configuration Sample
Multiline Terminal
(ETW-type)
External
Speaker
CordlessSingle
Line
Telephone
Station Message Detail
Recording (SMDR)
Facsimile
Answering
Machine
External
Speakerphone
Headset
CO/PBX/Centrex
Basic Rate ISDN
Multiline Terminal
(DTU-type)
Computer Telephony Integration
Single Line Telephone
NEC XEN ALPHA
Multiline Terminal
(DTB Type)
Doorphone Unit
Voice Mail Integration
Multiline Terminal
(Dterm Series i)

Installation Manual, Chapter 1 – System Overview 21
November 2003, A6-506000-642-01(8508), Release 6.0
S
ECTION
2
REGULATORY
INFORMATION
Electromagnetic Interference (EMI)
Warning: This is a Class A product. In a domestic environment this product may
cause radio interference in which case the user may be required to take
adequate measures.
Battery Disposal
The NEC Xen Alpha system includes the following batteries. When disposing of these
batteries, KSUs and/or ETUs, you must comply with the rules and regulations of your
state regarding proper disposal procedures.
IMPORTANT SAFEGUARDS OF BATTERY DISPOSAL
The product that you have purchased contains a rechargeable battery. The battery
must be disposed of properly.
Incidence of Harm
If the System is malfunctioning, it may also be causing harm to the telephone network.
The Telephone system should be disconnected until the source of the problem can be
determined and until repair has been made. If this is not done, the Network Provider
may temporarily disconnect the service.
Hearing Aid Compatibility
The NEC Multiline Terminals that are provided for this system are hearing aid
compatible. The manufacturer of Single Line Telephones for use with the system must
provide notice of hearing aid compatibility to comply with ACA Technical Standards.
Service Requirements
In the event of equipment malfunction, all repairs should be performed by an
authorised dealer of NEC Business Solutions Ltd or by NEC Business Solutions Ltd. It
is the responsibility of users requiring service to report the need for service to one of
NEC Business Solutions Ltd authorised agents or to NEC Business Solutions Ltd.
Compliance Information
This equipment has been tested to comply with all relevant ACA Technical Standards.
Unit Name Type of Battery Quantity
B614-B13 KSU Lead Acid
Lithium 2
1
VRS-B13 ETU NiCd 1

22 Installation Manual, Chapter 1 – System Overview
A6-506000-642-01(8508), Release 6.0, November 2003
S
ECTION
3
EQUIPMENT The following table lists the equipment that is available with your system. The
Quantities column indicates the maximum number of pieces of equipment that can be
installed for each system.
Equipment Description Quantity
Key Service Unit
B614-B13 KSU
The Basic Key Service Unit (KSU) provides service for
outside lines and interconnection of the telephones. The
basic KSU supports up to two trunk lines and six
telephones.
The B614-B13 KSU has a dedicated ESI slot, SLI slot,
DPH slot, PBR slot, TRF slot, VRS/VMS slot, 2 x COI/
BRT slots and MIF slot.
1 per system
Interface Electronic Telephone Units
BRT(1)-B13 ETU
This Basic Rate Interface unit provides one circuit for an
ISDN Basic Rate Interface (two voice channels).
This ETU is installed in the COI/BRT slot.
2 ETUs
4 Trunk Lines
CID-B13 UNIT
The Caller ID Unit detects Caller ID signals from the
central office and sends caller identification to the main
board. This information is then displayed on the LCD of
the telephones.
This ETU is installed on the COI(2)-B13 ETU and
MB614-B13 Mainboard as a piggyback.
3 Units
COI(2)-B13 ETU
This unit supports two outside (CO/PBX) lines and
provides circuitry for ring detection, holding, and
dialling.
The outside lines must be Loop Start, DTMF or Decadic
trunks.
This ETU is installed in the COI/BRT slot.
2 ETUs
4 CO/PBX lines
ESI(8)-B13 ETU
The Electronic Station Interface ETU contains eight
circuits. Each circuit can support any type of multiline
telephone, or single line telephone adapter.
This ETU is installed in the ESI slot. A 6 channel ESI
circuit is built in on the B614-B13 KSU.
1 ETU
8 Extensions
SLI(2)-B13 ETU
The Single Line Interface ETU supports a maximum of
two analogue single line telephones, faxes, modems or
other anologue devices. This ETU provides Ringing
Signal Generator (RSG) to single line telephones.
This ETU is installed in the SLI slot.
1 ETU
2 Extensions
Optional Electronic Telephone Units
MIF-B13 ETU
This unit provides additional memory for processing and
backup for PC programming and SMDR.
1 per system
DPH-B13 ETU
The doorphone interface ETU allows two DP-D-1D
Doorphones to be connected. Two door lock release
relays are also provided.
This ETU is installed in the DPH slot.
1 ETU
Table of contents
Other NEC Telephone manuals

NEC
NEC Xen Topaz User manual

NEC
NEC SV8300 User manual

NEC
NEC Aspire Use and care manual

NEC
NEC SL1100 User manual

NEC
NEC DT730G (CG): ITL-12CG-3 User manual

NEC
NEC Univerge SV8100 User manual

NEC
NEC DT830 Series User manual

NEC
NEC AT-50 User manual

NEC
NEC DT430 Series User manual

NEC
NEC Dterm PSIII User manual

NEC
NEC AT-55 Instruction manual

NEC
NEC Univerge SV8100 Instruction Manual

NEC
NEC Univerge SV9100 Instruction manual

NEC
NEC DSX DSX-40 User manual

NEC
NEC ESERIES User manual

NEC
NEC UX5000 User manual

NEC
NEC Xen IPK II User manual

NEC
NEC Univerge SV8100 Operating instructions

NEC
NEC Aspila Topaz User manual

NEC
NEC Univerge SV8100 User manual