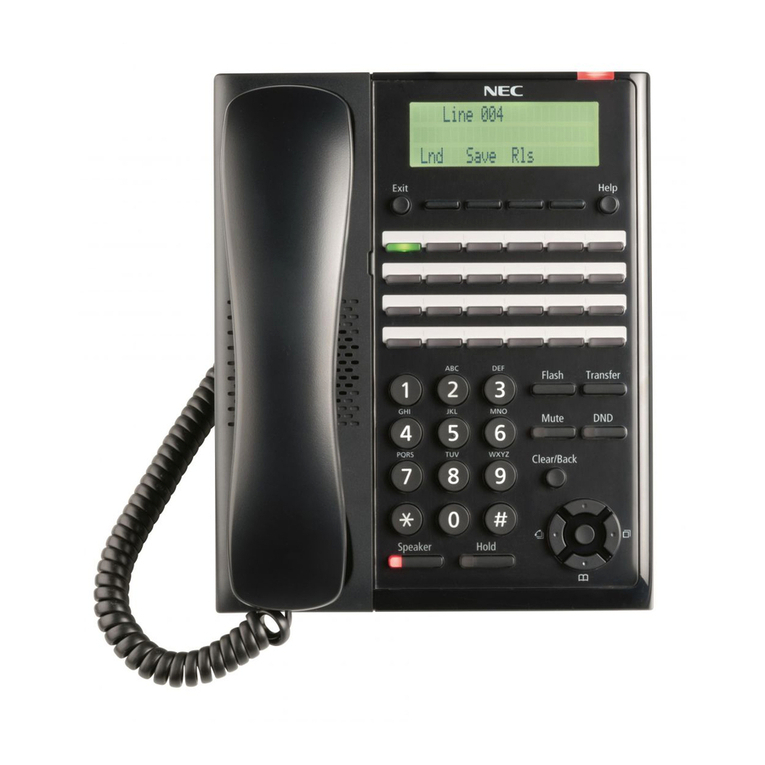
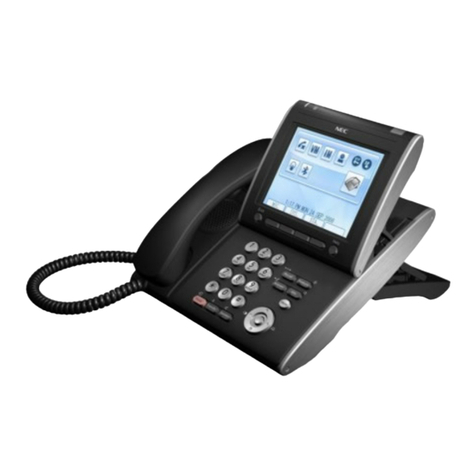
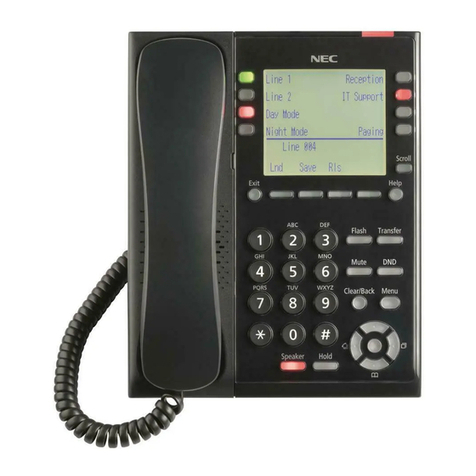
NEC UNIVERGE SL2100 User manual

Please read this manual carefully before operating
this product and save this manual for future use.
Multiline Terminal User Guide (4W)

1
Before using Your Terminal…
Thank you for purchasing NEC SL2100 system.
Due to the flexibility built into the system, your Dialing Codes and Feature Capacities may differ
from those in this guide. Check with your NEC Authorized Supplier / System Administrator and
make a note of any differences.
Installing the Handset and Line Cord
When installing the handset :
1. Make sure the handset cord is plugged into
the handset jack on the telephone base.
2. The line cord routes through the channel
on the telephone base.
3. Alternatively the line cord can route
through the channel on the telephone legs.
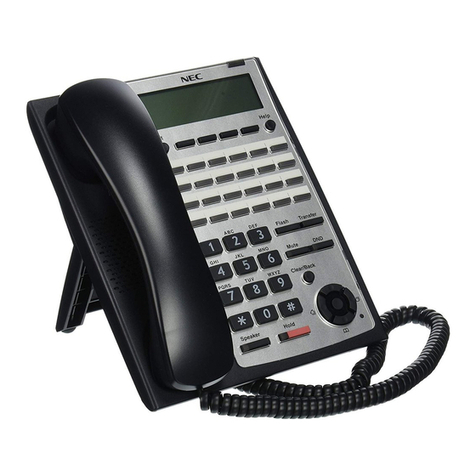
Adjust the two-position Viewing Angle
To set the low viewing angle position:
1. Fold the legs all the way back.
To set the high viewing angle position:
1. Flip up the two leg supports.
2. Fold the legs back until the supports contact the base.
NEC Corporation reserves the right to change the specifications, functions, or features at any time without notice.
NEC Corporation has prepared this document for use by its employees and customers. The information contained
herein is the property of NEC Corporation and shall not be reproduced without prior written approval of NEC
Corporation.
Copyright 2017, NEC Corporation

2
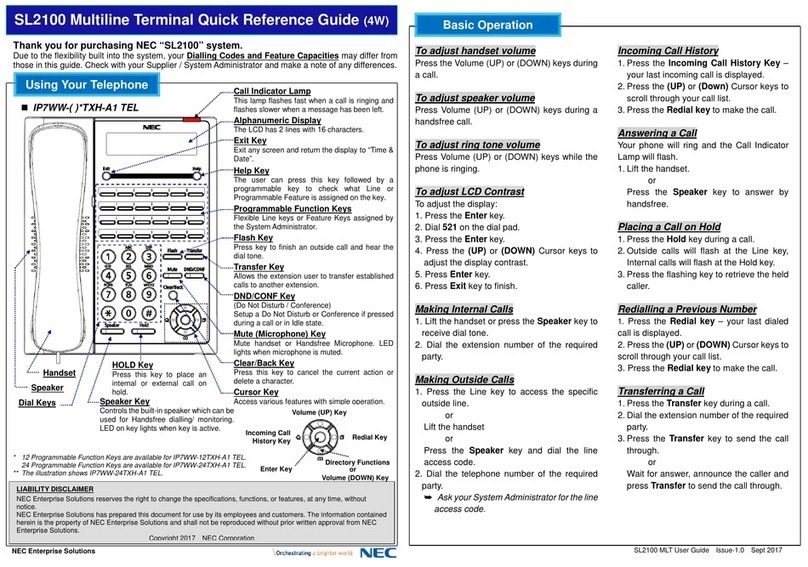
Dial Keys
HOLD Key
Press this key to place
an internal or external
call on hold.
Speaker Key
Controls the built-in speaker which
can be used for Handsfree dialing/
monitoring. LED on key lights when
key is active.
Enter Key
Redial
Key
Volume (UP)
Incoming Call
History Key
* The illustration shows IP7WW-24TXH-A1 TEL.
Call Indicator Lamp
This lamp flashes fast when a call is ringing and
flashes slower when a message has been left.
Alphanumeric Display
The LCD has 2 lines with 16 characters.
Exit Key
Exit any screen and return the display to “Time &
Date”.
Help Key
The user can press this key followed by a
programmable key to check what Line or
Programmable Feature is assigned on the key.
Programmable Function Keys
Flexible Line keys or Feature Keys assigned by
the System Administrator.
Flash Key
Press key to finish an outside call and hear the
dial tone.
Transfer Key
Allows the extension user to transfer established
calls to another extension.
DND/CONF Key
(Do Not Disturb / Conference)
Setup a Do Not Disturb or Conference if pressed
during a call.
Mute (Microphone) Key
Mute handset or Handsfree Microphone. LED
lights when microphone is muted.
Clear/Back Key
Press this key to cancel the current action or
delete a character.
Cursor Key
Access various features with simple operation.
Directory Functions
or
Volume (DOWN) Key
Handset
Speaker
Using Your Terminal
Handsfree Options
-Handsfree lets you place and answer calls by pressing “Speaker” instead of using the handset.
-With Automatic Handsfree, you can press a Speaker Key without lifting the handset. Normally, you have
Automatic Handsfree.
-Use Handsfree Answerback to answer a voice-announced Intercom call by speaking toward your phone without
lifting the handset.
3
To change the Trunk Access Code, Ask your NEC Authorized Supplier for the details.
In the default setting, Programmable Function Key No. 1 to 12 is assigned as “Trunk” Key. If you want to assign DSS
Keys at the unused Trunk Keys, these unused keys should be erased by “852 + 000” operation before the above
operation.
In case of DSS Key, the extension status can be indicated on the BLF. (idle : extinguished, Busy : lit)
When you register a telephone number, the Trunk Access Code should be added in front of the number.
Up to 36 digits dialing can be registered, but the name can not be registered.
If you want to continue the operation, press Programmable Function Key instead of Speaker Key to finish.
For Your Convenience
Programmable Function Keys
Programmable Function Keys can be assigned as “Trunk” Key and/or other Function Keys. You can just
press the function key to activate the assigned function without dialing the Service Code.
Function Code & Add Data
Function Key
Speaker
Speaker
DSS / One-Touch Keys
Programmable Function Keys can be assigned as DSS (Direct Station Selection) or One-Touch Keys. You
can place an Outside / Intercom Call by just pressing this key without dialing the number.
Function Key
Speaker
Speaker
Telephone Number
Trunk Access Code
Extension Number
Hold
2
5
1
5
?
?
?
8
1
5
1
0
9
?
?
?
?
?
?
8
8
There are 2 levels of Function Keys. (General Keys : assigned by 851, Appearance Keys : assigned by
852)
Appearance Keys have priority. You can overwrite the Appearance Key at the General Key.
If you want to overwrite the General Key at the Appearance Key, you have to erase the Appearance Key by
dialing “852 + 000” before General Key assignment.
In the default setting, Programmable Function Key No. 1 to 12 is assigned as “Trunk” Key. If you want to
assign Function Keys (General) at the unused Trunk Keys, these unused keys should be erased by “852 +
000” operation.
Programmable Function Keys can be erased by dialing “852 + 000” or “851 + 00”.
0

4
For Your Convenience
Abbreviated Dial (Speed Dial) Registration
Speaker
Speaker
Telephone Number
Hold
Common ABB
Group ABB
ABB Bin Number
Name
Hold
The digit of Bin No. depends on the system setting. (0-9<Only Group ABB> / 00-99 / 000-999)
System setting is necessary for Group ABB function. Ask your NEC Authorized Supplier for the details.
Name can be entered by Dial Pad Keys. (See below)
Up to 36 digits dialing can be registered, and up to 12 characters can be registered as name.
If you want to continue the operation, dial Bin No. instead of Speaker Key to finish.
You can skip to enter the name. (No enter any character, then press “Hold” Key).
You can erase the registered number & name by pressing “Exit” Key after dialing Bin No..
0
!
“
#
$
%
&
‘
(
)
Ô
Õ
ú
å
ä
æ
ö
ü
α
ε
θ
β
1
@
[
]
^
_
‘
{
¥
}
|
Á
À
Â
Ã
Å
Æ
É
Ç
Ê
Ì
Ó
φ
A
B
C
a
b
c
2
D
E
F
d
e
f
3
G
H
I
g
h
i
4
J
K
L
j
k
l
5
M
N
O
m
n
o
6
P
Q
R
S
p
q
r
s
7
T
U
V
t
u
v
8
W
X
Y
Z
w
x
y
z
9
+
,
-
.
/
:
;
<
=
>
?
π
Σ
σ
Ω
∞
¢
£
When you enter a name, use Dial Pad Keys to enter letters as below. For example, press “2” key once for “A”,
twice for “B”, etc…
Accepts a character and move
the cursor one place to the right.
Press twice to insert a “space”.
Clear the character entry to the
left, one character at a time.
(Backspace)
Clear/Back
Entering Alphanumeric Characters
8
3
5
8
4
5
?
?
?
?
?
?
?
?
?
#
1
2
3
4
5
6
7
8
9
0

5
Placing Calls
Place an Outside Call <Quick Access>
Telephone Number
Place an Intercom Call <Dial Access>
Extension Number
Trunk Key
Listen to the Dial Tone before dialing a Telephone Number.
You can have function keys for Trunks or Trunk Groups. Ask your NEC Authorized Supplier for the details.
Place an Outside Call <Access by Code>
Speaker
Telephone Number
Trunk Access Code
(e.g. : 005 = Trunk No.5)
Trunk Group No.
Trunk No.
To change the Trunk Access Code, Ask your NEC Authorized Supplier for the details.
Listen to the Dial Tone before dialing a Telephone Number.
In case the number of Trunk Group is more than 10, you should enter 2 digits (e.g. 11 : Group 11) after
dialing “804”. Ask your NEC Authorized Supplier for the details.
For the dial digit of Trunk No., ask your NEC Authorized Supplier for the details.
Speaker
Your call will ring or voice-announce. If you hear ringing, wait for an answer. If you hear a beep, begin
speaking. Dialing “1” changes voice/ring mode. (in case the destination is Multi-line Terminal)
?
?
?
?
9
0
4
0
8
?
9
#
#
0
?
?
?
?
?
?
?
?
?

6
Placing Calls Quickly
Directory Dialing
On-Hook
Condition
Press several times to search
Last Number Dialing
On-Hook
Condition
Press several times to search
Redial List
Quick Redial
Speaker
Callback by Received Number
The system retains the last 10 numbers dialed which can be reviewed and redialed.
To cancel the Redial List operation, press “Clear/Back” Key.
Caller-ID function is required to use this operation for outside calls. Ask your NEC Authorized Supplier for
more details.
To cancel the Callback operation, press “Clear/Back” Key.
On-Hook
Condition
Press several times to search
After searching the desired destination, press “Enter” Key to confirm the telephone number before lifting the
handset, if necessary.
You can enter more Characters (up to 12) to make desired destination’s search even more specific.
You can also search the desired destination without entering the Characters. (press Cursor Keys only)
To cancel the Directory Dialing operation, press “Clear/Back” Key.
1st Character
you want to search
1/90
ABC Ltd
N 6/24
NEC CORP
98765432 01/10
OUT:DEC-22 11:10
012445566 03/10
OUT:DEC-22 10:32
033445566 01/14
RCV:DEC-22 11:33
098765432 03/14
RCV:DEC-22 10:12
?
5
#

7
Abbreviated (Speed) Dialing <for Outside>
Common
ABB
Group
ABB
Common ABB Bin Number
Group ABB Bin Number
Speaker
Speaker
Common ABB Key
(SC851+27)
Group ABB Key
(SC851+28)
The digit of Bin No. depends on the system setting. (0-9 <Only Group ABB> / 00-99 / 000-999)
Telephone Numbers shall be pre-registered to the system.
System setting is necessary for Group ABB function. Ask your NEC Authorized Supplier for the details.
When you assign the Common ABB Key on the Programmable Function Key, “Press HOLD” is required
after dialing the Function Code 27.
Placing Calls Quickly
One-Touch / DSS Call
One-Touch / DSS Key
(SC851+01)
Telephone / Extension number should be pre-registered to a One-Touch / DSS Key.
Trunk Access Code should be added in front of the Telephone number.
On-Hook
Condition
2
#
4
#
?
?
?
?
?
?

8
Set Camp On / Callback
Camp On In case of Intercom Call, when you hear ringing, wait for the called party to answer.
In case of Outside Call, when you hear Dial Tone, begin telephone number dialing.
Callback In case of Intercom Call, when your terminal starts the ringing, lift handset and wait for the
called party to answer.
In case of Outside Call, when your terminal starts the ringing, lift handset, hear Dial Tone,
and begin telephone number dialing.
This function is applicable in case all trunks are busy condition. (not applicable for dialed outside party
busy)
Cancel Camp On / Callback
(In case of Camp On)
If your call doesn’t go through…
Camp On
Hear Busy Tone
or No Answer
Callback
Wait without
hanging up
Wait for the system
to call you back
Camp On Key
(SC851+35)
Hear Busy Tone
or No Answer
Repeat Dial Key
(SC851+29)
When the Repeat Dialing is set, Repeat Dial Key shall flash and the system automatically and periodically
redials a call. Repeat duration is programmable. Ask your NEC Authorized Supplier for the details.
You should lift the handset when the called party answered.
Press flashing Repeat Dial Key to cancel.
Repeat Dialing <Outside Call Only>
0
5
8
0
8
7

9
Set a Message Waiting
Hear Busy Tone
or No Answer
Cancel Message Waiting
Extension Number
Individual
Cancel
(originated extension)
All Cancel
(at any extension)
MW Key
(SC851+38)
MW Key
(SC851+38)
On-Hook
Condition
Help
When you set a MW, the called party’s Indicator starts to flash, and your Indicator is lit in Red.
Answer a Message Waiting (Your terminal’s Indicator is flashing in Red)
Check & Answer
Quick Answer
If your call doesn’t go through…
When you answer a MW, the Indicator shall automatically be off when the called party answers.
You can select the desired party by pressing Up Key after dialing “, 0”, if several number of Message
Waiting has been set.
0
0
0
1
8
7
?
?
?
3
8
7

10
Answering Calls
Answering an Outside Call
Ringing
Picking up a Call for other Extensions
In same
Group
In other
Group
Specified
Extension
Extension Number
System setting is necessary to make Call Pickup Group. Ask your NEC Authorized Supplier for the details.
Speaker
Ringing
Extension
Non-Ringing
Extension
Trunk Key
(Flashing)
Confirm the status of Mute Key if you want to answer by Handsfree. (Mute On : LED On, Mute Off : LED
Off)
Answering an Intercom Call
Ringing
Speaker
Signal Mode
Extension
Voice Mode
Extension
Intercom Call Mode (Signal or Voice) can be set at your terminal by :
“Signal” : Speaker -> 823 “Voice” : Speaker -> 821
Confirm the status of Mute Key if you want to answer by Handsfree. (Mute On : LED On, Mute Off : LED
Off)
Voice
Speak toward
your terminal
Speaker
Call Pickup Key
(SC851+24)
Speaker
Call Pickup for other
Group Key
(SC851+25)
Speaker
#
9
8
6
?
?
?

11
Hold / Transferring Calls
Holding a Call / Retrieving a Held Call
Talking
Hold
Retrieve
In case of Intercom, the call shall be held as “Exclusive Hold” on your terminal.
This operation puts your outside call on System Hold. Other extension user can take the call off Hold.
Retrieve a Held Outside Call
Trunk Number you want to retrieve
For the dial digit of Trunk Number, ask your NEC Authorized Supplier for the details.
Hold
Trunk Key
(Flashing)
Hold
(Flashing)
Outside
Call
Intercom
Call
Holding a Call Exclusively
Talking
Hold
Retrieve
This operation puts your outside call on Exclusive Hold. Other extension user can not take the call off Hold.
Trunk Key
(Flashing)
Hold
(Flashing)
Outside
Call
Intercom
Call
Exclusive Hold Key
(SC851+45)
Speaker
Transferring a Call to the other Extension
Talking
Extension Number
Announce
Hold
Transfer
If your terminal has DSS/One-Touch key, just press it instead of “HOLD” and “Extension Number” dialing.
?
?
?
2
7
7
?
?
?

12
For more Convenient Use…
Do Not Disturb (DND)
DND : Trunk Incoming Call
DND : Intercom Incoming Call
DND : Trunk & Intercom Incoming Call
DND : Transferred (CFW) Call
When you set DND function, DND/CONF Key shall be lit and the Internal Dial Tone pattern shall be
changed.
On-Hook
Condition
DND/CONF
DND : Cancel
Talking
Extension Number
Telephone Number
You can repeat this operation to add more parties.
You may be able to have up to 16 parties. (include your terminal) May need to adjust the volume level due
to the Environment where calls are placed. Ask your NEC Authorized Supplier for the details.
Talking
Repeat for additional parties
<Twice>
Start
Conference
DND/CONF
DND/CONF
Trunk Key
Conference
1
2
3
4
0
?
?
?
?
?

13
Extension Number
Set
Cancel
When you set Call Forward / Follow Me, the destination extension shall be displayed on the LCD, and the
Internal Dial Tone pattern shall be changed.
Call Forwarding / Follow Me
Call Forward Immediate
Speaker
Call Forward
Immediate Key
(SC851+10)
Speaker
On-Hook
Condition
Extension Number
Set
Cancel
Call Forward when Busy
Speaker
Call Forward
when Busy Key
(SC851+11)
Speaker
On-Hook
Condition
Extension Number
Set
Cancel
Call Forward when No Answer
Speaker
Call Forward when
No Answer Key
(SC851+12)
Speaker
On-Hook
Condition
Extension Number
Set
Cancel
Call Forward when Busy / No Answer
Speaker
Call Forward when
Busy / No Ans Key
(SC851+13)
Speaker
On-Hook
Condition
For more Convenient Use…
8
8
4
?
?
?
1
0
3
8
4
?
?
?
1
0
?
?
?
?
?
?
1
1
0
0
5
8
4
4
8
4

14
For more Convenient Use…
Call Forwarding / Follow Me (Cont’d)
Extension Number
Set
Cancel
Call Forward Both Ring
Speaker
Call Forward
Both Ring Key
(SC851+14)
Speaker
On-Hook
Condition
Extension Number
Set
Cancel
Call Forward Follow Me
Speaker
Call Forward
Follow Me Key
(SC851+15)
Speaker
On-Hook
Condition
?
?
?
?
?
?
6
8
4
2
8
4
1
1
0
0

15
Cursor Keys Operation
Menu Structure
100 : Call History
130 : Dialed Number
120 : Received Call
110 : Missed Call
200 : Contacts
230 : Edit Contact
220 : New Contact
210 : Search Contact
111 - 11x : Missed Call Data
221 : Save Private Phone Book
211 - 21x : Name Started from
131 - 13x : Dialed Call Data
121 - 12x : Received Call Data
231 - 23x : Name Started from
223 : Save Group Phone Book
222 : Save Common Phone Book
The following table shows the menu structure of the Cursor Keys. You can reach the desired menu by
pressing Navigation Keys (Up / Down / Right / Left) or dial 3 digits for shortcut access after pressing the
“Enter Key” to activate a menu.
Main Menu
Back to the previous menu.
Clear/Back
Exit
Exit from this menu mode.
Enter Key
400 : User Features
410 : Call Voice Mail
420 : Call Forward
422 : Both Ring
421 : All Calls
425 : Busy/ No Answer
424 : No Answer
423 : Busy
426 : Follow-Me
430 : Paging
432 : External Zone
431 : Internal Zone
440 : Dept.Grp login/out
442 : Withdraw
441 : Join
a

16
Cursor Keys Operation
530 : Ring Options
800 : Properties
500 : Phone Setting
520 : Display
810 : Phone
521 : Contrast
Port Information
820 : System
Main Software Version
MAC Address
Hardware Key Code
531 : Ringing/ Voice Call
533 : Ring Tones
532 : Ringing Volume
540 : Key Touch Tone
560 : Key Assignment
600 : System Setting
830 : VoIPDB
840 : IP Address
VoIPDB TYPE
MAC Address
Active/Reserved
IP Address Information
System xxx.xxx.xxx.xxx
VoIPDB xxx.xxx.xxx.xxx
a
561 - 56x : Key 1 – Key 24
610 : System Time
620 : System Date
611 : Edit
612 : Save
613 : Cancel
621 : Edit
622 : Save
623 : Cancel
550 : Not Used
510 : Not Used
630 : Manage Messages
631 : Record
632 : Listen
633 : Erase

17
System setting is necessary to use Built-In Automated Attendant. Ask your NEC
Authorized Supplier for the details.
Message Number
(001 – 100)
Stop REC
Recording
Listening
Record / Listen / Erase Answering Messages
Up to 4 types of messages can be recorded.
The Message length can not exceed 4 minutes.
Listening
Record
Message Number
(001 – 100)
Message Number
(001 – 100)
Listen
Erase
Built-In Automated Attendant
6
7
1
?
?
?
?
?
?
?
?
?
7
5
3
#

18
In-Mail (Voice Mail)
Log-On to the In-Mail
Optional hardware and System setting is necessary to use In-Mail (Voice Mail) feature. Ask
your NEC Authorized Supplier for the details.
Voice Mail Pilot Number
Your Mailbox Number
Security Code (if it is set)
Main
Menu
Listen to Messages
Record & Send Message
Mailbox Greeting
L 5
Record Mailbox Name
Mailbox OPtions
TIme and Date
EXit Mailbox
Callers hear your active
greeting (1-3) only if you do
not answer or are busy. If
Auto Attendant DND is ON,
the Auto Attendant does
not ring your phone. Callers
immediately hear your
active greeting. If OFF, the
Auto Attendant will try your
extension.
In-Mail will play your
mailbox name in the voice
prompts instead of your
mailbox number.
Main Menu
Record Reply
Have Msg Forwarded
Make Call to Sender
Get TIme, Date
SAve Message
Erase Msg
Listen to Next Msg
RE
MF
MC
TI
SA
E
73
63
62
84
72
3
Backup a Few Seconds
Backup to Beginning
Go Ahead a Few Seconds
Pause/Resume Listening
Select New Message List
Select Saved Message List
Select All Message List
Exit Listen Mode
L 5
B 2
BB 22
G 4
1N 16
1S 17
1A 12
# #
While listening
you can:
RS 77
G
4
Reenter mailbox number
Send Message
# #
Pause/Resume
Erase Recording
E 3
End Recording
# #
Enter mailbox number, then:
While recording you can:
RN
76
OP 67
TI 84
Security Code
Message Notification
N 6
Auto Time Stamp
Exit to Main Menu
# #
The mailbox options are:
S 7 AT 28
X 9
Select New Message List
Select Saved Message List
Select All Message List
1N 16
1S 17
1A 12
Speaker
?
?
?
?
?
?
?
?
?
?
Mark Message as new
MM 66
PaGing Message
PG 74
Call Handling Option
CO 26
Auto Play Option
AO 27

19
In-Mail (Voice Mail)
Call Forward to Voice Mail
Voice Mail Pilot Number
Set
Cancel
Speaker
Call Forward
Immediate Key
(SC851+10)
Speaker
On-Hook
Condition
Forward All Incoming Calls
Set
Cancel
Speaker
Call Forward
when Busy Key
(SC851+11)
Speaker
On-Hook
Condition
Forward Incoming Call when Busy
Voice Mail Pilot Number
Set
Cancel
Speaker
Call Forward when
No Answer Key
(SC851+12)
Speaker
On-Hook
Condition
Forward Incoming Call when No Answer
Set
Cancel
Speaker
Call Forward when
Busy / No Ans Key
(SC851+13)
Speaker
On-Hook
Condition
Voice Mail Pilot Number
Forward Incoming Call when Busy / No Answer
(SC851+79 + Ext No.)
On-Hook
Condition
Auto-Attendant Key
Press “Automated Attendant” Key several times to
change the status. (All Calls -> No Answer -> Busy ->
Busy/No Answer -> Cancel)
Convenient Operation by Function Key
Voice Mail Pilot Number
?
?
?
1
0
8
8
4
1
?
?
?
?
?
?
?
?
?
1
1
0
0
0
4
8
4
5
8
4
3
8
4
Other manuals for UNIVERGE SL2100
29
Table of contents
Other NEC Touch Terminal manuals

NEC
NEC UNIVERGE SL2100 User manual

NEC
NEC SL1000 User manual

NEC
NEC Univerge SV8100 User manual

NEC
NEC UNIVERGE SL2100 User manual

NEC
NEC DT750 User manual

NEC
NEC Univerge DT820 User manual

NEC
NEC MultiSync C431 User manual

NEC
NEC P4WW-24TXH-A User manual

NEC
NEC Univerge SV9100 Configuration guide

NEC
NEC UNIVERGE SL2100 User manual