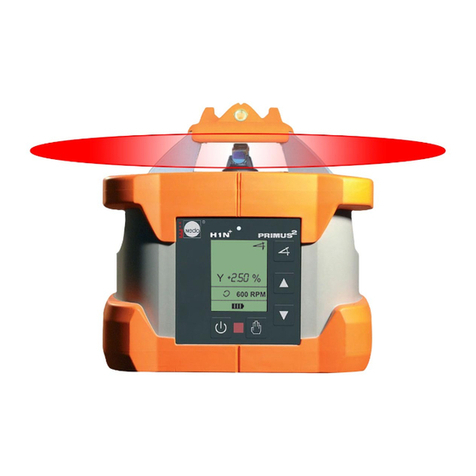
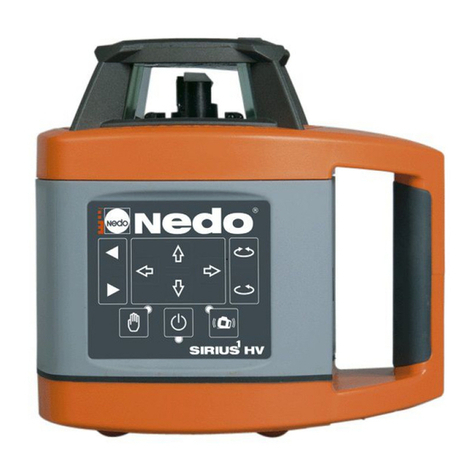
Nedo PRIMUS2 H User manual

DE Bedienungsanleitung
EN Operating instructions
FR Mode d‘emploi
NL Gebruiksanwijzing
ES Manual de instrucciones

15EN
Imprint
Copyright:
NEDO GmbH & Co. KG
Hochgerichtstraße 39 – 43
72280 Dornstetten
Germany
Tel.: +49 74432401-0
Fax: +49 74432401-45
E-Mail: [email protected]
Internet: www.nedo.com
Transmission, reproduction and use of this document or
its contents are prohibited unless expressly permitted in
writing. Offenders will be liable for damages. All rights
reserved, especially those created by the granting of a
patent, utility model or registered design.
These operating instructions have been drawn up with
due care. However, NEDO GmbH & Co. KG does not
accept any liability for possible errors in these operating
instructions and their consequences. Equally, it does
not accept any liability for direct losses or consequential
losses resulting from improper use of the laser.
The specific national safety regulations and health & safety
provisions as well as the specifications in these operating
instructions must be noted and complied with when using
the laser.
All product and brand names used are the property of the
holder and are not explicitly labelled as such.
Contents subject to change without notice.

16 EN Contents
1 About these operating instructions
1.1 Symbols used in these operating instructions ............................................. 17
2 Safety information
2.1 Documentation .......................................................................................... 18
2.2 Laser radiation ........................................................................................... 18
2.3 Intended use.............................................................................................. 19
2.4 Transport and storage ................................................................................ 19
2.5 The environment........................................................................................ 19
3 Description
3.1 General product description ....................................................................... 20
3.2 Specifications............................................................................................. 20
3.3 Scope of Delivery....................................................................................... 20
4 Controls
4.1 Control panel buttons................................................................................. 21
4.2 Displays ..................................................................................................... 21
5 Initial Startup
5.1 Power supply safety instructions ................................................................ 22
5.2 General power supply notes ...................................................................... 22
5.3 Operating the laser with rechargeable batteries ......................................... 22
5.4 Operating the laser with batteries .............................................................. 22
6 Starting up the laser
6.1 Install or s et up laser for use ..................................................................... 23
7 Switch on the laser
7.1 AUTOMATIC operating mode..................................................................... 24
7.2 MANUAL operating mode.......................................................................... 24
8 Maintenance/Care
8.1 Maintenance.............................................................................................. 25
8.2 Care........................................................................................................... 25
8.3 Checking the horizontal accuracy ............................................................... 26
9 Warnings and error messages
9.1 Warnings ................................................................................................... 27
9.2 Error messages .......................................................................................... 27

17EN
These operating instructions contain all the important information necessary
for handling the PRIMUS 2 H fully automatic rotating laser. Operation,
maintenance and care of the laser as well as the warnings and error messages
are also described.
• Do not use the PRIMUS 2 H rotating laser until you have completely read
and understood these operating instructions.
• Keep these operating instructions together with the PRIMUS 2 H rotating
laser at all times.
• The PRIMUS 2 H rotating laser is also referred to as a "laser" in these ope-
rating instructions.
Compliance with the safety instructions and warnings is the basic requirement
for safe use of the PRIMUS 2 H rotating laser. The various instructions and
warnings are labelled with corresponding symbols.
WARNING!
This pictogram with the word "WARNING!" indicates an imminent danger, which could
result in severe physical injuries if it is not avoided.
fThis arrow indicates the appropriate measure to prevent the imminent danger.
CAUTION!
This pictogram with the word "CAUTION!" indicates an imminent danger, which could
result in slight or moderate physical injuries or property damage if it is not avoided.
fThis arrow indicates the appropriate measure to prevent the imminent danger.
NOTE
This "Note" pictogram provides tips, recommendations and important information on
use and handling of the laser.
In addition, the standard symbols are used in the appropriate places in these
operating instructions.
1 About these operating instructions
General Notes
1.1 Symbols used in these operating instructions

18 EN
2 Safety information
Safety instructions
2.1 Documentation
Compliance with the following safety instructions and the specific national safety regu-
lations and health & safety provisions is a basic requirement for trouble-free and safe
use of the laser. Therefore, please read carefully through these operating instructions
and all notes and follow them while working with the laser.
2.2 Laser radiation
The Primus 2 H rotating laser is, depending on the version, a Class 2 or Class 3R laser
product in accordance with EN 60825-1:2014.
LASER RADIATION
DO NOT STARE INTO BEAM
LASER CLASS 2
DIN EN 60825-1:2014
P #1mW
l: 630-680 nm
w # 1,5 mrad
LASER RADIATION
AVOID DIRECT
EYE EXPOSURE!
LASER CLASS 3R
EN 60825-1:2014
P #5 mW
l: 630-680 nm
w # 1.5 mrad
General safety instructions for handling laser radiation
WARNING!
Laser radiation can damage the eyes.
fPrevent direct eye exposure to the beam.
fDo not direct the beam at other people or into public areas.
fTo prevent reflections, do not point the laser at reflective surfaces.
fIf possible, do not operate the laser at eye level.
fThe housing of the laser may be opened by trained service technicians only.
The emitted laser radiation has the following properties:
• Class 2 Power P #1mW / Class 3R Power P #5mW
• Wavelength l: 630-680 nm
• Beam divergence w # 1.5 mrad
• Rotating laser dot: Laser pulse with f: 0.2Hz ... 10Hz

19EN
Warning signs
WARNING!
Warning signs on the laser are for your safety.
fNever remove the warning signs!
Laser exit openings
2.3 Intended use
The PRIMUS 2 H fully automatic rotating laser is suitable for levelling and for
marking heights. The laser can be used indoors and outdoors.
Repairs may only be carried out by NEDO or an authorised customer service
agent.
2.4 Transport and storage
The laser is is a sensitive, high-precision instrument and must be handled with
appropriate care. Always transport and store the laser and the accessories in
the transportation case.
2.5 The environment
Product-specific information on disposal of the laser can be downloaded from
www.nedo.com.
Batteries and rechargeable batteries are hazardous waste and may not be placed in
the domestic waste. They must be properly disposed of according to the respective
national guidelines.
Safety instructions

20 EN Operating Instructions
3 Description
3.1 General product description
The PRIMUS 2 H laser is a fully-automatic rotating laser for horizontal use.
The innovative shock protection system and the robust, water and dustproof
housing protects the high power laser under virtually all indoor and outdoor
operating conditions.
3.2 Specifications
Fully-automatic rotating laser PRIMUS 2 H
Self-levelling range ±5°, motorised with automatic monitoring
Levelling accuracy better than ±0,05mm/m
Laser model < 5 mW, Laser class 3R, 635 nm
Operating voltage 6 V
Operation duration approx. 100 h with rechargeable batteries/approx.
120 h with batteries
Weight 4,0 kg
Dimensions (width/depth/height) 210×208×185 mm
Working temperature range –20 °C to +50 °C
Charging temperature –5 °C to +40 °C (recommended: +10 °C to +20 °C)
Working range with ACCEPTOR Pro
receiver
700 m diameter
Rotational speed 600 rpm / optional 900 rpm
Class of protection IP 66
3.3 Scope of Delivery
The illustrated scope of delivery includes the ACCEPTOR PRO laser receiver
and a fixing clip. Its use is described in the corresponding instructions.
1 Rotating laser
2 Handle, rubberised
3 Spirit level
4 Control panel with buttons and display
5 5/8" threaded bushing (bottom)
6 Battery/rechargeable battery
compartment
7 Handle, rubberised
2
3
5
7
4
6
1
1 PRIMUS 2 H rotating laser
2 Charger
3 ACCEPTOR PRO laser receiver
4 Operating Instructions
5 Transportation case
1
2
3
5
4

21EN Operating Instructions
4 Controls
4.1 Control panel buttons
The laser is operated using the control panel.
4.2 Displays
Symbol Description
C00 – C03 Warning
ERR1 – 12 Error display
ROTATION mode
600 rpm Speed of the laser, from Serial no. P2-10000 optional 900 rpm possible
MANUAL operating mode
Warning symbol (flashes)
Remaining life in hours
Rechargeable battery 100 70 30 5 < 0,5
Battery 120 100 50 15 < 2
Levelling
Display
Activate/
deactivate
MANUAL ope-
rating mode
Laser
ON/OFF
Warning LED

22 EN Operating Instructions
5 Initial Startup
5.1 Power supply safety instructions
WARNING!
Destruction! Explosion risk!
fUse charger included in the scope of delivery only.
fDo not insert batters in the rechargeable battery pack and charge with the charger.
CAUTION!
Damage!
fDo not mix dead and fully charged batteries.
fDo not place rechargeable batteries or batteries on radiators or store them in the sun.
5.2 General power supply notes
Use the charger in dry rooms only.
5.3 Operating the laser with rechargeable batteries
Rechargeable battery
pack is pushed in
Connect charger
1 Connect charger to rechargeable battery
pack.
2 Connect charger to mains supply.
Note voltage! (110-230 V)
Charging time for complete charging:
12-14 h.
During charging, the LED above the char-
ger socket lights up in the rechargeable
battery pack.
Operation possible during the charging
process (charging time lengthened).
5.4 Operating the laser with batteries
When delivered, the rechargeable battery pack is inserted, the laser is ready
for use. Replace rechargeable battery pack. as follows:
Note pole position!
Release rechargea-
ble battery pack /
battery compartment
locking device
Pull out rechargeable
battery pack / batte-
ry compartment
Insert batteries into
battery compartment
Push in battery
compartment
Lock battery com-
partment

23EN Operating Instructions
6 Starting up the laser
6.1 Install or s et up laser for use
The laser can be installed or set up in a horizontal depending on the use
situation.
Horizontal on tripod Set up horizontally
Set laser to working height HORIZONTAL laser projection
Use integrated spirit level to align laser
CAUTION!
Unevenness, soft surfaces and vibrations impair the stability of the laser or tripod.
fWhen installing/setting up the laser, ensure it has a safe, firm foothold.
NOTE
The cap with the axis markings is pushed
on. If the cap has been removed, it must be
pushed on as shown to the right, with the X
and Y axes pointing in the right direction.
7 Switch on the laser
AUTOMATIC operating mode is the default setting each time the laser is swit-
ched on.
NOTE
Despite careful setting up, warnings and error messages can appear in the display in
AUTOMATIC operating mode due to external influences and strong vibrations. For
description and remedies, see Chapter 9.

24 EN Operating Instructions
7.1 AUTOMATIC operating mode
In AUTOMATIC operating mode, the laser automatically levels itself horizon-
tally within a range of ±5° and compensates for minor vibrations.
Switch on the laser Laser levels itself
horizontally
Levelling is finished, the flashing symbol goes
out, the laser is active
During and for 30 seconds after the levelling the laser can be placed in the fi-
nal vertical position/height without warning, e.g. using an elevator tripod.
After 30 seconds, the TILT alarm function is switched on. A vertical move-
ment of the laser triggers the warning C01. For description and remedies, see
Chapter 9.
AUTOMATIC operating mode is active. The following functions can be
invoked:
Use the button to switch to MANUAL operating mode (Chapter 7.2).
Use the button to exit the operating mode, switch off the laser.
7.2 MANUAL operating mode
In MANUAL operating mode the laser does not detect any vibrations and
does not level itself horizontally.
AUTOMATIC opera-
ting mode is active
Set MANUAL opera-
ting mode
The hand symbol is
displayed
NOTE
Use the button to switch to MANUAL operating mode immediately after switching
on .
MANUAL operating mode is active. The following functions can be invoked:
Use the button to switch to AUTOMATIC operating mode (Chapter 7.1).
Use the button to exit the operating mode, switch off the laser.

25EN Operating Instructions
8 Maintenance/Care
8.1 Maintenance
The PRIMUS 2 H laser is a robust, maintenance-free laser for professional use
indoors and outdoors.
If the laser no longer works due to an internal error or damage, send the laser
to the following address to be repaired:
NEDO GmbH & Co. KG
Service Department
Hochgerichtstraße 39 – 43
72280 Dornstetten
Germany
8.2 Care
The laser diode of the rotating laser is protected by glass covers. Use a soft
cloth to regularly clean the glass covers and ensure correct operation. Avoid
scratches in the glass covers.
Use standard cleaning agents to clean the dustproof and watertight, partly
rubberised housing. Use plenty of water to remove heavy soiling. Do not
immerse the laser in water.

26 EN Operating Instructions
8.3 Checking the horizontal accuracy
The accuracy of the laser should be checked regularly. This requires a free
measuring length of 30 m. Four measurements are taken in total in AUTOMA-
TIC mode (two measurements each in X/Y axis). The check is carried out in
two steps. The position of the laser beam is determined with the help of the
receiver.
Step 1 – X-axis
• Set up the laser along the X-axis
with a 30 m distance from the
wall.
• Mark the position of the laser
beam (A) on the wall.
30 m
A
X
Step 2 – X-axis
• Rotate the axis through 180°.
Attention:
The tripod may not be changed
– ideally you should use Nedo
Quickfix®!
• Mark position Bof the laser
beam and measure the verti-
cal distance Hbetween marking
Aand marking B. This can be
above or below marking A.
• The laser is within the tolerance if
H #3 mm!
30 m
A
X
B
H
NOTE
Steps 1 and 2 now have to be repeated as described for the Y-axis.
If the value of H is outside the tolerance, the Primus 2 must be adjusted by an autho-
rised customer service agent or by Nedo.

27EN Operating Instructions
9 Warnings and error messages
9.1 Warnings
Warnings always indicate particular or special operating circumstances. The
red LED of the display panel and the warning symbol min the display flash
with the display of the warning.
To reset the warning, use the button to switch the laser Off and then back
On again or use the button to switch to MANUAL operating mode.
Display Description of the warning
C00 Laser is tilted by more than ±5° and cannot horizontally level itself.
C01 TILT alarm, vertical/height error. The laser was moved after 30 seconds had
expired following levelling.
C02 Time exceeded during automatic levelling.
C03 Unallowed change in horizontal position WXvertical position.
9.2 Error messages
Display Description of the error message
ERR1 – ERR11 Internal unit error XSend laser to NEDO's Service department.
ERR12 If this error occurs more than once, XSend laser to NEDO's Service
department.
Table of contents
Other Nedo Measuring Instrument manuals

Nedo
Nedo Messfix-S User manual

Nedo
Nedo PRIMUS 2 H1N + User manual

Nedo
Nedo SIRIUS 1 HV User manual

Nedo
Nedo COMMANDER2 HVA2N User manual

Nedo
Nedo TUBUS 2 User manual

Nedo
Nedo F Series User manual

Nedo
Nedo ACCEPTOR 2 digital User manual

Nedo
Nedo Quasar 6 User manual

Nedo
Nedo ACCEPTOR 430336 User manual

Nedo
Nedo mEsstronic User manual