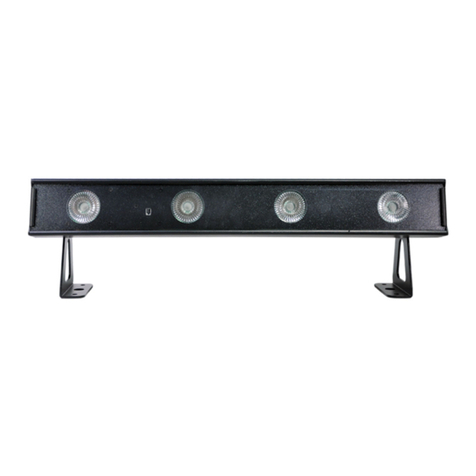
NEO BLINDER MKII User manual

PLEASE READ THE INSTRUCTIONS CAREFULLY BEFORE USE /
POR FAVOR LEA LAS INSTRUCCIÓNES ANTES DE USAR
USER MANUAL / MANUAL DE USUARIO
NEO BLINDER
MKII

NEO BLINDER MKII
P.
2
1. OVERVIEW
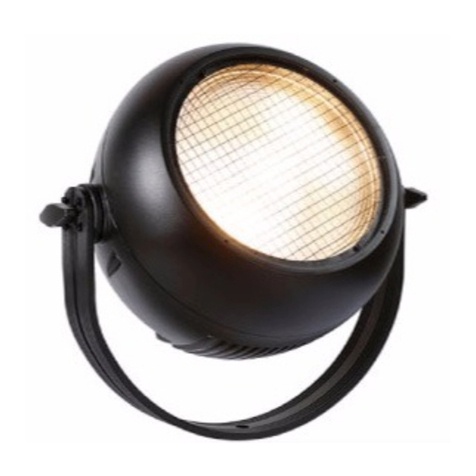
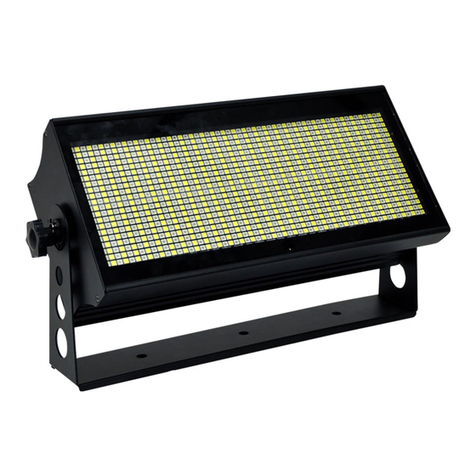
Neo Blinder MKII is a LED professional blinder for outdoor
use powered by 4 x 100W White COB LEDs. Thanks to its
chip-on-board technology it reaches an amazing power and
coverage. Its 4 outputs have independent focus regulation
and can be controlled separately thanks to its pixel by pixel
technology. Ideal for big scenarios, Neo Blinder MKII is the
nowadays response to the classic & powerful MiniBrut, add-
ing a soft dimming and strobe effects that make it stand out
naturally apart from an ideal power/consumption relation.
SPECIFICATIONS
Source & Optic
• Light source: 4 x 100W Warm White COB LEDs
• LEDs life: 50,000 hours
• Beam angle: 49º
• Field Angle: 79º
Photometric Data
• Luminous flux: 640 Lux @ 5m (16 ft)
• Color temperature: 3100K
Effects & Functions
• Professional blinder
• Pixel by pixel control
• Manual directional adjustment for every integrat-
ed projector
• COB LED technology: More power output with
less heat generation
• Dimmer: 0-100% with 4 different modes
• Strobe effect: 0-30Hz
• Flicker free operation
Control
• DMX Channels: 1/3/4/9
• Operational modes: DMX, Master/Slave, Static
and Built-in programs
• DMX software update (optional)
• Advanced RDM function
Electrical
• Input voltage range: AC100–240V, 50-60Hz
• Power consumption: 400W
Physical
• IP Rating: IP20
• OLED display
• DMX connectors: 2 XLR connectors (XLR-5 inp-
ut and output)
• PowerCON® IN/OUT power supply connectors
• Dimensions: 362x163x362 mm. / 14.2x6.4x14.2 in.
• Weight: 8.7 Kg. / 19 Lbs.
ENGLISH VERSION

NEO BLINDER MKII
P.
3
2. SAFETY INSTRUCTIONS
1. The products referred to in this manual conform
to the European Community Directives and are
there- fore marked with .
2. The unit is supplied with hazardous network
voltage (230V~). Leave servicing to skilled per-
sonnel only. Never make any modifications on
the unit not described in this instruction manual,
otherwise you will risk an electric shock.
3. Connection must be made to a power supply sys-
tem fitted with efficient earthing (class I appliance
according to standard EN 60598-1). It is, moreo-
ver, recommended to protect the supply lines of
the units from indirect contact and/or shorting to
earthbyusingappropriatelysizedresidualcurrent devices.
4. The connection to the main network of electric
distribution must be carried out by a qualified
electrical installer. Check that the main frequency
and voltage correspond to those for which the
unit is designed as given on the electrical data label.
5. Thisunitisnotforhomeuse,onlyprofessionalapplications.
6. Never use the fixture under the following conditions:
- in places subject to vibrations or bumps;
- in places with a temperature of over 45 °C.
7. Make certain that no inflammable liquids, water or
metal objects enter the fixture.
8. Do not dismantle or modify the fixture.
9. All work must always be carried out by a qualified
technical personnel. Contact the nearest sales
pointforaninspectionorcontactthemanufacturerdirectly.
10. If the unit is to be put out of operation definitvely,
take it toa local recycling plant for a disposal which
is not harmful to the environment.
ENGLISH VERSION
WARNING AND INSTALLATION PRECAUTIONS
• If this device will be operated in any way different
to the one described in this manual, it may suffer
damage and the guarantee becomes void. Further
more, any other operation may lead to dangers like
short circuit, burns, electric shock, etc.
• Before starting any maintenance work or cleaning
the projector, cut off power from the main supply.
• Always additionally secure the projector with the
safety rope. When carrying out any work, always
comply scrupulously with all the regulations (par-
ticularly regarding safety) currently in force in the
country in which the fixture’s being used.
• Install the fixture in a well ventilated place.
• Keep any inflammable material at a safe distance
from the fixture.
• Shields, lenses or ultraviolet screens shall be
changed if they have become damaged to such an
extent that their effectiveness is impaired.
• The lamp (LED) shall be changed if it has become
damaged or thermally deformed.
• Never look directly at the light beam. Please note
that fast changes in lighting, e.g. flashing light, may
trigger epileptic seizures in photosensitive per-
sons or persons with epilepsy.
• Do not touch the product’s housing when operat-
ing because it may be very hot.
NEO BLINDER MKII
P.
4
ENGLISH VERSION
3. OVERVIEW
Rear View

NEO BLINDER MKII
P.
5
ENGLISH VERSION

NEO BLINDER MKII
P.
6
ENGLISH VERSION
DIMENSIONS

NEO BLINDER MKII
P.
7
ENGLISH VERSION
4. CONTROL MENU OVERVIEW
Control Panel
BUTTON FUNCTION
Menu Selects operating mode or exits submenus
Up Scrolls up through option lists or selects higher value
Down Scrolls down through option lists or selects lower
value
Enter Activates displayed menu option or selected value

NEO BLINDER MKII
P.
8
ENGLISH VERSION
Function Menu
MODE OPTIONS/VALUES DESCRIPTION
Static
Autoshow
DMX Channel
DMX Address
Master/Slave
Dimmer Mode
Temperature
LED Frequency
Fan Mode
Back Light
Information
Automatic programs
Sets the intensity of the light output
Selects the strobe frequency
No dimmer
Select curves
Dimmer 1 (fast) ~ Dimmer 3 (slow)
Display backlight always on
Turns o display backlight after 10 seconds of
inactivity
Turns o display backlight
after 20 seconds of inactivity
Turns o display backlight
after 30 seconds of inactivity
Turns on all LEDs in sequence for testing
Shows total usage hours
Shows installed software version
Selects DMX address (upper channel limit de-
pends on personality chosen)
1-channel: dimmer
3-channel: dimmer H, dimmer L, Strobe
4-channel: Heads 1 - 4
9-channel: Heads 1 - 4, auto programs, dimmer
speed, dimmer H, dimmer L, strobe
DMX mode (Master)
Slave mode
Fan c ontrol
Individual head temperature
PWM frequency
Auto 1-6
Dimmer
Strobe
Off
Dimmer 1-3
On
10S
20S
30S
001-512
1 Ch
4 Ch
9 Ch
Version
Fixture hours
Speed 0-100
Auto Te s t
3 Ch
0-255
Auto
Slave
Master
LED2
LED1
High
600 Hz
LED4
LED3
4000 Hz
2000 Hz
1200 Hz
25 KHz

NEO BLINDER MKII
P.
9
ENGLISH VERSION
CHANNEL FUNCTION PERCENT/SETTINGVALUE
9-CHANNEL MODE
1-CHANNEL MODE
3-CHANNEL MODE
4-CHANNEL MODE
1
2
3
4
5
6
7
8
9
1
2
3
1
2
3
4
Dimmer H
Dimmer L
Strobe
White 1
White 2
White 3
White 4
Auto Programs
Dimmer Speed
No function
Auto 1
Auto 2
Auto 3
Auto 4
Auto 5
Auto 6
No function
Preset dimmer speed from display menu
Nonlinear dimming curve 1 (fastest)
Nonlinear dimming curve 2
Nonlinear dimming curve 3 (slowest)
Preset dimmer speed from display menu
000-255
000-255
No function
0-20HZ (All pods)
0-20hz(Random strobe macros)
000 - 010
011 - 040
041 - 080
081 - 120
121 - 160
161 - 200
201 - 240
241 - 255
000 - 010
011 - 132
133 - 255
0 - 100%
0 - 100%
0 - 100%
0 - 100%
0 - 100%
0 - 100%
000-255
000-255
000-255
000-255
000 - 010
011 - 040
041 - 080
081 - 120
121 - 255
1Dimmer H 000-255 0 - 100%
Dimmer H
Dimmer L
Strobe
000-255
000-255
No function
0-20HZ (All pods)
0-20hz(Random strobe macros)
000 - 010
011 - 132
133 - 255
0 - 100%
0 - 100%
White 1
White 2
White 3
White 4
0 - 100%
0 - 100%
000-255
000-255
000-255
000-255
0 - 100%
0 - 100%

NEO BLINDER MKII
P.
10
ENGLISH VERSION
8. MAINTENANCE AND CLEAN-
ING THE UNIT
• Make sure the area below the installation place is
free from unwanted persons during setup.
• Switch off the unit, unplug the main cable and wait
until the unit had cooled down.
• All screws used for installing the device and any
of its parts should be tightly fastened and should
not be corroded.
• Housings, fixations and installation spots (ceilling,
trusses, suspensions) should be totally free from
any deformation.
• The main cables must be in impeccable condition
and should be replaced immediately even when a
small problem is detected.
• It is recommended to clean the front at regular
intervals, from impurities caused by dust, smoke
or other particles to ensure that the light is radi-
ated at maximum brightness. For cleaning, discon-
nect the main plug from the socket. Use a soft,
clean cloth moistened with a mild detergent. Then
carefully wipe the part dry. For cleaning other
housing parts use only a soft, clean cloth. Never
use a liquid, it might penetrate the unit and cause
damage to it.
FUSE REPLACEMENT
1. Remove the safety cap by a screwdriver.
2. Replace the blown fuse with a fuse of the exact
same type and rating (T2A-250V).
3. Install the safety cap, and reconnect power.

NEO BLINDER MKII
P.
11
ENGLISH VERSION
TROUBLESHOOTING

NEO BLINDER MKII
P.
12
VERSION ESPAÑOL
1. DESCRIPCIÓN
Neo Blinder MKII es un blinder LED profesional para uso
exterior que tiene 4 LEDs COB blancos cálidos de 100W.
Gracias a su tecnología chip-on-board brinda una potencia
y una cobertura sin precedentes. Sus 4 salidas cuentan con
regulación de foco independiente y pueden ser controla-
dos de manera separada, gracias a su tecnología pixel por
pixel. Finalmente llegó la respuesta LED al clásico y potente
MiniBrut, agregando un dimming suave, efectos de estrobo
que lo hacen destacarse naturalmente y una relación po-
tencia/consumo ideal.
ESPECIFICACIONES
Fuente & Óptica
• Fuente de luz: 4 LEDs COB blancos cálidos de 100W
• Vida útil promedio: 50.000 horas
• Ángulo de haz: 49º
• Ángulo de campo: 79º
Datos fotométricos
• Flujo lumínico: 640 Lux @ 5m (16 ft)
• Temperatura color: 3100K
Efectos & Funciones
• Blinder profesional
• Control pixel por pixel
• Ajuste manual del direccionamiento de cada
proyector integrado
• Tecnología LED COB: Mayor potencia con menor
generación de calor
• Dimmer: 0-100% con 4 modos diferentes
• Efecto estrobo: 0-30Hz
• Opción para operación sin parpadeo
Control
• Canales DMX: 1/3/4/9
• Modos de operación: DMX, Master/Slave, pro-
gramas integrados & estático
• Actualización de software vía DMX (opcional)
• Función RDM avanzada
Eléctrico
• Rango de voltaje de entrada:AC100–240V, 50-60Hz
• Consumo de potencia: 400W
Físico
• Certificación IP20
• Display OLED
• Conectores DMX: 2 conectores XLR (XLR-5 en-
trada y salida)
• Conectores de alimentación de entrada y salida
powerCON®
• Dimensiones: 362x163x362 mm. / 14.2x6.4x14.2 pulg.
• Peso: 8.7 Kg. / 19 Lbs.

NEO BLINDER MKII
P.
13
VERSION ESPAÑOL
2. SEGURIDAD
1. Este equipo cumple con las Directivas de la Co-
munidadEuropeay,porlotanto,cuentaconcertificaciónCE.
2. El equipo funciona con un voltaje de entrada de
230V~. Para su instalación, póngase en contacto
con un profesional calificado. Para evitar el riesgo
de shock eléctrico, no introduzca modificaciones no
autorizadas en el equipo.
3. El equipo requiere de un sistema de suministro
eléctrico con puesta a tierra (equipo clase I, nor-
ma IEC 60598-1). A su vez, se recomienda prote-
ger los cables de alimentación de los contactos in
directos y cortocircuitos mediante el uso de inter-
ruptores diferenciales del tamaño adecuado.
4. La instalación eléctrica debe realizarla un electri-
cista certificado. Procure que el voltaje y la fre-
cuencia coincidan con los requeridos por la unidad.
5. La unidad está diseñada para uso profesional. No
es de uso residencial.
6. Procure no utilizar el equipo bajo las siguientes
condiciones:
- En lugares proclives a vibraciones y sacudidas.
- En lugares con temperatura superior a 40°C.
- En lugares con altos niveles de humedad.
7. Evite que líquidos inflamables, objetos de metal o
agua entren en contacto con el equipo.
8. No desarme o modifique el equipo.
9. El mantenimiento o reparación del equipo deben
ser realizados por personal calificado. Pónganse en
contacto con el servicio técnico autorizado más
cercano o directamente con su proveedor.
10. Con el fin de respetar el medio ambiente, procure
desecharlaunidad en la planta derecicladomás cercana.
ADVERTENCIAS Y PRECAUCIONES
- La garantía no cubre daños provocados por el
uso inapropiado del equipo. El uso inadecuado
del equipo puede ocasionar quemaduras, corto
circuitos, shock eléctrico, etc.
- Desconecte el equipo del suministro eléctrico an-
tesde realizarcualquier tareadelimpiezaomantenimiento.
- Procure utilizar un cable de seguridad para afirmar
la instalación. Al utilizar la unidad, cumpla en todo
momento con las regulaciones (especialmente de
seguridad) actualmente vigentes en su país.
- Instale el equipo en una zona con ventilación.
- Mantenga cualquier tipo de material inflamable le-
jos de la unidad.
- Reemplace la cubierta, los lentes o la luz ultravio-
leta si se dañan y comprometen el óptimo funcion-
amiento del equipo.
- Reemplace la lámpara de LED si se daña o sufre
deformación por el calor.
- No mire de forma directa hacia la fuente de luz
cuando el equipo esté encendido. La luz puede
generar convulsiones en las personas fotosensiti-
vas o con epilepsia.
- No toque el equipo durante su funcionamiento ya
que su temperatura puede ser muy elevada.

NEO BLINDER MKII
P.
14
VERSION ESPAÑOL
3. DESCRIPCIÓN DEL EQUIPO
Vista Dorsal
Abrazadera de montaje
Pantalla
Salida de potencia
Entrada de potencia
Orificio para el
cable de seguridad
Conector DMX
de entrada
Conector DMX de salida
Teclas del
menú

NEO BLINDER MKII
P.
15
VERSION ESPAÑOL
Nota sobre la progra-
mación DMX: La nu-
meración de las salidas
corresponde a la secuencia
de dirección DMX de los
cabezales individualmente.

NEO BLINDER MKII
P.
16
VERSION ESPAÑOL
DIMENSIONES

NEO BLINDER MKII
P.
17
VERSION ESPAÑOL
4. DESCRIPCIÓN DEL MENÚ
Panel de Control
BOTÓN FUNCIÓN
Menu Selecciona la función deseada o abandona los sub-
menús.
Up Se desplaza hacia arriba o aumenta el valor de la
selección.
Down Se desplaza hacia abajo o disminuye el valor de la
selección.
Enter Accede a la función deseada o confirma el valor
seleccionado.

NEO BLINDER MKII
P.
18
VERSION ESPAÑOL
Menu de Funciones
MODO OPCIONES/VALORES DESCRIPCIÓN
Static
Autoshow
DMX Channel
DMX Address
Master/Slave
Dimmer Mode
Temperature
LED Frequency
Fan Mode
Back Light
Information
Programas automáticos.
Intensidad de la salida de luz.
Frecuencia de estrobo.
Dimmer apagado.
Selección de curvas de dimmer (dimmer 1: rápi-
do, dimmer 3: lento).
Luz de fondo siempre encendida.
Apagado luego de 10 segundos.
Apagado luego de 20 segundos.
Apagado luego de 30 segundos.
Prueba de encendido de todos los leds en secuencia.
Total de horas de uso de la unidad.
Versión de software.
Selección de la dirección DMX (Límite de canal
superior sujeto a la personalidad seleccionada).
1 canal: dimmer.
3 canales: dimmer H, dimmer L, estrobo.
4 canales: cabezales 1-4.
9 canales: cabezales 1-4, programas automáti-
cos, velocidad de dimmer, dimmer H, dimmer L,
estrobo.
Modo DMX (maestro).
Modo esclavo
Modo del ventilador: automático o alto.
Temperatura individual de los cabezales.
Frecuencia PWM (modulación por ancho de
pulsos).
Auto 1-6
Dimmer
Strobe
Off
Dimmer 1-3
On
10S
20S
30S
001-512
1 Ch
4 Ch
9 Ch
Version
Fixture hours
Speed 0-100
Auto Te s t
3 Ch
0-255
Auto
Slave
Master
LED2
LED1
High
600 Hz
LED4
LED3
4000 Hz
2000 Hz
1200 Hz
25 KHz

NEO BLINDER MKII
P.
19
VERSION ESPAÑOL
CANAL FUNCIÓN PORCENTAJE/AJUSTESVALOR
MODO 9 CANALES
1
2
3
4
5
6
7
8
9
Dimmer H
Dimmer L
Strobe
White 1
White 2
White 3
White 4
Auto Programs
Dimmer Speed
Sin función
Auto 1
Auto 2
Auto 3
Auto 4
Auto 5
Auto 6
Sin función
Velocidad preestablecida desde el menú de la pantalla.
Curva de dimming no lineal 1 ( más rápida)
Curva de dimming no lineal 2
Curva de dimming no lineal 3 (más lenta)
Velocidad preestablecida desde el menú de la pantalla.
000-255
000-255
Sin función
0-20HZ (todas las salidas)
0-20hz(macros de estrobo aleatorios)
000 - 010
011 - 040
041 - 080
081 - 120
121 - 160
161 - 200
201 - 240
241 - 255
000 - 010
011 - 132
133 - 255
0 - 100%
0 - 100%
0 - 100%
0 - 100%
0 - 100%
0 - 100%
000-255
000-255
000-255
000-255
000 - 010
011 - 040
041 - 080
081 - 120
121 - 255
MODO 1 CANAL
MODO 3 CANALES
MODO 4 CANALES
1
2
3
1
2
3
4
1Dimmer H 000-255 0 - 100%
Dimmer H
Dimmer L
Strobe
000-255
000-255
000 - 010
011 - 132
133 - 255
0 - 100%
0 - 100%
White 1
White 2
White 3
White 4
0 - 100%
0 - 100%
000-255
000-255
000-255
000-255
0 - 100%
0 - 100%
Sin función
0-20HZ (todas las salidas)
0-20hz(macros de estrobo aleatorios)

NEO BLINDER MKII
P.
20
VERSION ESPAÑOL
8. LIMPIEZA Y MANTENIMIENTO
• Asegúrese de que no haya personas ajenas a la in-
stalación al momento de fijar el equipo.
• Apague el quipo, desconéctelo de la corriente
eléctrica y aguarde a que se enfríe antes de re-
alizar cualquier tarea de mantenimiento.
• Ajuste bien todos los tornillos que se utilicen para
la instalación del equipo y procure que no mues-
tren signos de corrosión.
• La cubierta, las herramientas de fijación y los pun-
tos de instalación (cielos rasos, suspensiones y sis
temas de truss) deben estar libres de deformaciones.
• Conserve los cables principales en buenas condi-
ciones. Reemplácelos de forma inmediata si detec-
ta algún problema.
• Para garantizar el óptimo desempeño del equi-
po, es indispensable limpiar el frente con frecuen-
cia para remover impurezas causadas por el exce-
so humo, polvo u otras partículas. Antes de limpi-
arlo, desconecte el equipo de la corriente eléctri-
ca. Utilice un paño suave humedecido con un de
tergente suave. Luego seque el frente con cuidado.
Para otras partes del equipo solo emplee un paño
suave y limpio. No utilice ninguna clase de líquidos
ya que podrían filtrarse en el equipo y causar
daños severos.
SUSTITUCIÓN DEL FUSIBLE
1. Extraiga la tapa de seguridad con un destornillador.
2. Sustituya el fusible quemado por uno nuevo del
mismo tipo (T2A-250V).
3. Vuelva a colocarla tapa de seguridad y conecte el equipo
Table of contents
Languages:
Other NEO Dj Equipment manuals

NEO
NEO PROTON IP 7 QA User manual

NEO
NEO PROTON IP 12 QA User manual

NEO
NEO STORMER QUAD User manual

NEO
NEO FOLLOWER 35ST User manual

NEO
NEO Blinder 64 User manual

NEO
NEO Sion User manual

NEO
NEO Moving Torch User manual

NEO
NEO STEAM INFINITE 450 User manual

NEO
NEO NEO DOTZ User manual

NEO
NEO Ion 280 3-en-1 User manual