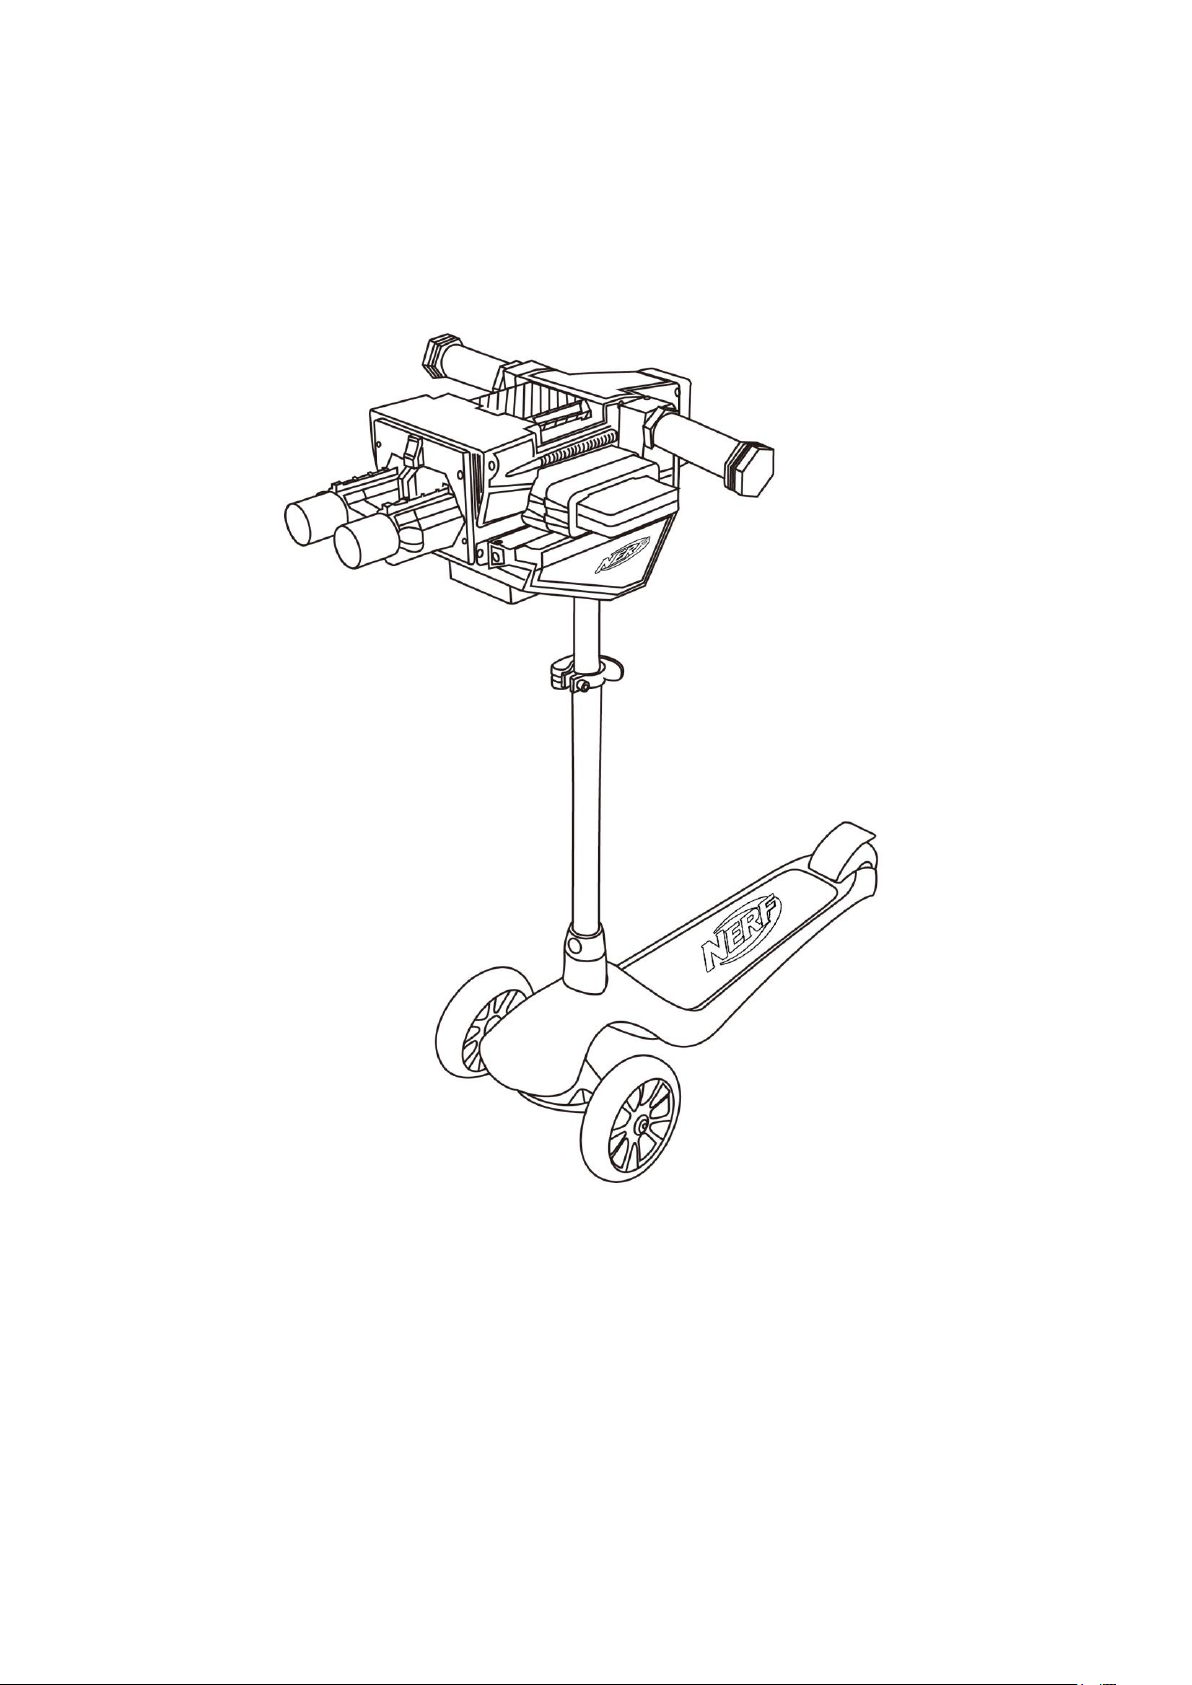
Nerf Blaster Scooter User manual

Nerf Blaster Scooter
3 Wheel Tilt&Turn Rapid Fire Scooter
MODEL NO.: M5
Owner’s Manual
Ages 6+

ATTENTION:
1. Before you allow your child to use Nerf Blaster Scooter, ensure that the steering rod is
fully engaged and that all the screws are tight. Also ensure that the wheels have been
correctly secured and that they show no signs of
wear.
2. Warning: Protective equipment should be worn.
Ensure that your child always wears a helmet, wrist, elbow and knee pads, as well as
shoes with rubber soles.
3. Ensure that your child does not ride down any steep hills. The brake is not designed to
decelerate from high downhill speeds.
4. The brake pad becomes hot when it is used. Make especially sure that your child does
not keep the brake on for a long period of time. Explain to your child that direct skin
contact may cause burns.
5. Do not allow your child to travel at speeds exceeding 6 mph. (10 Kmph)
6. Ensure that your child does not ride on roads, paths or other places with motor vehicle
traffic.
7. Only one child may ride on the Nerf Blaster Scooter at any one time.
8. Never allow your child to ride the Nerf BlasterScooter at dusk or at night.
9. The Nerf BlasterScooter must not be used on wet, oily, sandy, dirty, icy, rough or uneven
surfaces.
10.Parental or adult suspension is strongly recommended.
11.Do not make any modifications to the Nerf BlasterScooter.
12.Suitable for children up to approx.150cm is height for the Nerf Blaster and approx.
(consider removing this line).
13.Important: Undoing the axle screws several times will reduce the effect of the screw
securing products. This means that the screws may come loose by themselves. You
should therefore always use a conventional screw securing product.
14.Some metal parts may corrode after a certain time, especially when used near the sea
or left outdoors too often.
15.Warning! The toy needs to be used with caution, since skill is required to avoid falls or
collisions causing injury to the useror third parties.
16.User age and maximum loading weight.
175lbs. (80kg) max and 6+ years
1

ASSEMBLY
Adult assembly required.
Warning! Not to be used by children under 36 months due to small parts while unassembled.
Choking Hazard.
Parts List
Tips: Please verify that all pieces are included prior to beginning assembly.
2

•Note: To remove blaster once installed – you must remove M6 Bolt form inside battery
compartment first.
Step 1: Press the button and insert the
stem into the base.
Step 2: Remove M6 bolt from blaster, slide
the blaster into cradle, and then tighten
blaster to cradle the M6 bolt completely.
Step 3: Load 6 pcs batteries (C type,
1.5V), close the cover and tighten 4pcs
M3 screws completely.
Step 4: Insert the handlebar grips into
the bare handlebars until both locking
buttons “click” into place.

HOW TO ADJUST THE HEIGHT
The handlebar can be locked into place at 2 different heights. Please make the following
adjustment to reach required height.
Open the Quick Release Lock, press the locking button, adjust the handlebar to a suitable
height, and then close the Quick Release Lock.
Blaster Use
CAUTION!
[MAIN IMAGE]
Do not aim at eyes or face. TO AVOID INJURY: Use only darts designed for this product. Do not modify darts
or dart blaster.
Be sure to read and follow all instructions carefully before using this product.
NOTE: JAM CLEARING DOOR must be fully closed for blaster to fire.
FIRING
Press and hold either button trigger till you here motors engage and dart blasts - then release. If you keep
trigger button pressed – darts will blast in rapid fire mode very quickly.
[IMAGE OF TRIGGERS]
3

LOADING AMMO:
[IMAGE OF DART LOAD FROM PDF]
Load DARTS into the QUICK RELOAD CLIPS. • Be sure DARTS are inserted in direction indicated on CLIP. • Insert
1 DART at a time and push down. • EACH Included CLIP can hold up to 6 DARTS. Do not insert more than 6
darts.
Insert CLIP into MAIN BLASTER UNIT (make sure arrow on CLIP points away from TRIGGER).
Press CLIP release buttons and remove CLIPS to store or reload.
[IMAGE POINTING OUT RELAESE BUTTONS]
CLEARING JAMS:
[IMAGE OF ACCESS DOOR OPEN]
Check BARREL area for a jammed DART. Open the JAM CLEARING DOOR and remove any jammed DARTS. •
Close JAM CLEARING DOOR.
NOTE: Blaster will not function unless JAM CLEARING DOOR is fully closed.
STORING YOUR BLASTER
NOTE: Do not store blaster ready to fire. • Be sure to unload DARTS from blaster before putting it away.
Remove batteries if storing Blaster Scooter for an extended period of time
IMPORTANT: BATTERY INFORMATION
[Caution Logo] CAUTION: 1. TO AVOID BATTERY LEAKAGE a. Always follow the instructions carefully. Use only
batteries specified and be sure to insert them correctly by matching the + and – polarity markings. b. Do not
mix old batteries and new batteries or standard (carbon-zinc) with alkaline batteries. c. Remove exhausted or
dead batteries from the product. d. Remove batteries if product is not to be played with for a long time. e.
Do not short-circuit the supply terminals. f. RECHARGEABLE BATTERIES: Do not mix these with any other types
of batteries. Always remove from the product before recharging. Recharge batteries under adult supervision.
DO NOT RECHARGE OTHER TYPES OF BATTERIES. 2. Should this product cause, or be affected by, local
electrical interference, move it away from other electrical equipment. Reset (switching off and back on again
or removing and re-inserting batteries) if necessary.

MAINTENANCE AND CHECK BEFORE RIDING
●Check that all parts are sufficiently tightened, and the handlebar is securely fixed.
●Check that all wheels can be spun smoothly and that the footplate is securely fastened.
●All nuts and bolts may lose their tightness over time, please check the tightness of all nuts and bolts every time you
ride.
●The wheels may become worn out with natural wear and tear over time. Please check the condition of the wheels
regularly and replace them when necessary. Please contact Manufacturer – Flybar, Inc. for replacements.
●DO NOT use a wet cloth, alcohol, industrial cleaners or solvents to clean the scooter as this may result in loss of gloss,
the removal of decals or dissolve the materials in the scooter.
●Do not use attachments not included with the scooter. Do not attempt to make any modifications to the scooter by
yourself.
[Hasbro Legal Lines and logo as on Sample PDF]
Manufacturer: [Flybar LOGO] Flybar, Inc, New Jersey USA. www.flybar.com 845-647-8400
[DO NOT RETURN TO STORE BADE]
3
This manual suits for next models
1
Table of contents
Other Nerf Scooter manuals