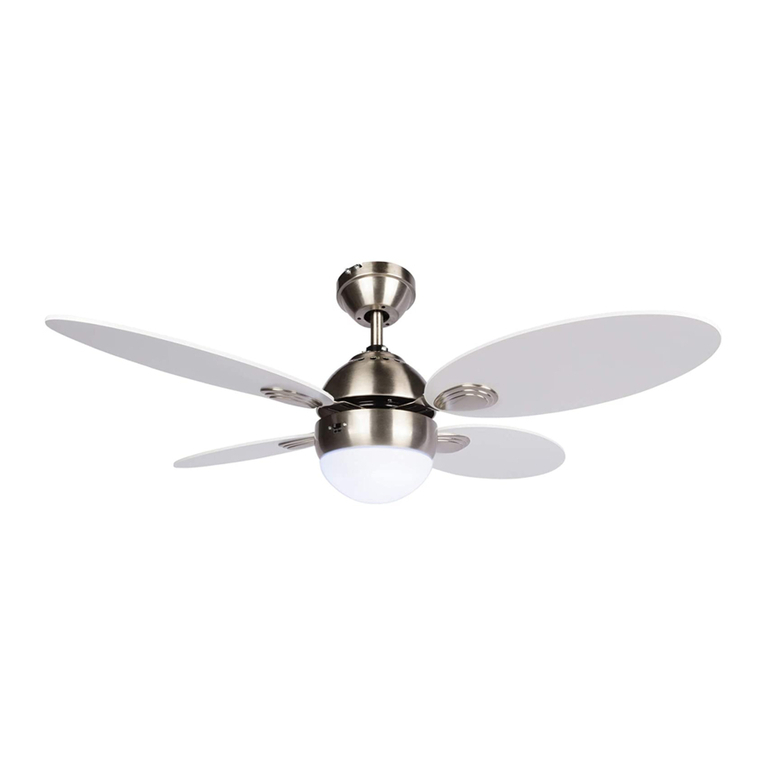
NOMA Mercer 54" User manual

READ AND SAVE THESE INSTRUCTIONS
052-6967-0
Mercer 54" Ceiling Fan
Owner’s Manual

2
Warning: To reduce the risk of personal injury, do not bend the blade arms (also referred to as flanges), when installing the brackets,
balancing the blades or cleaning the fan. Do not insert foreign objects between rotating fan blades.
Warning: To reduce the risk of fire, electric shock or personal injury, mount fan to outlet box marked "acceptable for fan support" with
the screws provided with the outlet box.
Safety Rules – Read and Save These Instructions
1. To reduce the risk of electric shock, ensure electricity has been turned off at the circuit breaker or fuse box before beginning.
2. All wiring must be in accordance with the national” and local electrical codes. Electrical installation should be performed by a
qualified licensed electrician.
3. WARNING: To reduce the risk of electrical shock or fire, do not use this fan with any solid-state fan-speed control device. It will
permanently damage the electronic circuitry.
4. CAUTION: To reduce the risk of personal injury, use only the screws provided with the outlet box.
5. The outlet box and support structure must be securely mounted and capable of reliably supporting a minimum of 35 lb (15.9 kg).
Use only UL listed outlet boxes marked “FOR FAN SUPPORT.”
6. The fan must be mounted with a minimum of 7' (2.13 m) from the trailing edge of the bladeblades to the floor.
7. Avoid placing objects in the path of the blades.
8. To avoid personal injury or damage to the fan and other items, be cautious when working around or cleaning the fan.
9. Do not use water or detergents when cleaning the fan or fan blades. A dry dust cloth or lightly dampened cloth will be suitable for
most cleaning.
10. After making electrical connections, spliced conductors should be turned upward and pushed carefully up into the outlet box. The
wires should be spread apart with the grounded conductor and the equipment-grounding conductor on one side of the outlet box
and the ungrounded conductor on the other side of the outlet box.
11. All set screws must be checked and retightened where necessary before installation.
Warning: To reduce the risk of fire, electric shock, or personal injury, mount to outlet box marked "acceptable for fan support of 35 lb
(15.9 kg) or less" and use mounting screws provided with the outlet box. Most outlet boxes commonly used for the support of light
fixtures are not acceptable for fan support and may need to be replaced. Due to the complexity of the installation of this fan, a qualified
licensed electrician is strongly recommended.
!
!
!
Attention: This product is equipped with a 190 W limiting device. If lamping exceeds 190 W the light kit will shut off automatically
until the proper wattage of bulbs is installed. Reset the light kit by turning it off, replacing the bulbs with the correct wattage, and then
turning the light kit back on.
!

3
Required
Helpful
Flathead
screwdriver
Crosshead
screwdriver Safety glasses
Pliers
Step ladder
Wire strippers
Wire cutters
Soft cloth
Electrical tape
To Beging: Tools Needed (not supplied)

Unpacking Your Fan
Unpack and inspect fan carefully to be certain all contents are included.
1. Set of blades (5)
2. Canopy assembly
3. Ball/downrod assembly
4. Coupling cover
5. Fan motor assembly
6. Mounting plate
7. Light kit
8. Glass shade
9. Balance kit
Installing Your Fan
4
1
2
3
8
9
7
4
5
6
Remote Control
Transmitter
& Holder
Receiver
Hardware bag
Wood screws
Wire nuts
Battery
2 pcs
6 pcs
1 pc
Hardware bag
Blade screws 16 pcs
16 pcs
Fibre washers
3 pcs
Wire nuts
Wood screws 2 pcs
2 pcs
2 pcs
Flat washers
2 pcsStar washers
2 pcsSpring washers
Mounting screws
Turn off power at breaker box to
avoid possible electric shock. (Fig. 1)
Use metal outlet box (sold separately)
suitable for fan support. Secure outlet box
directly to the building structure using wood
screws (included). Outlet box must support
35 lb (15.9 kg) minimum. (Fig. 2)
Install mounting plate to outlet box
in the ceiling using washers and the
mounting screws provided with the
outlet box. (Fig. 3)
Fig. 2Fig. 1
Mounting bracket
Outlet box
Spring washers
Mounting screws
Flat washers
Fig. 3

5
1. Remove the decorative canopy bottom cover from the canopy
by turning the cover counter clockwise. (Fig. 4)
2. Remove the mounting bracket from the canopy by removing
1 of the 2 screws from the bottom of the mounting bracket and
loosening the other one a half turn from the screw head. Next,
turn the canopy counter clockwise to remove the canopy cover
from the canopy. (Fig. 4)
REMEMBER to turn off the power. Follow the steps below to
hang your fan properly.
1. Remove the clevis pin, cotter pin and set screws from the top
of the motor assembly. (Fig. 5)
2. Route wires exiting from the top of the fan motor through the
coupling cover, canopy cover, canopy and then through the
ball/downrod. (Fig. 5)
NOTE: If a longer downrod (not included) is needed, take out
the screw located in the hanger ball, lower the hanger ball and
remove the pin, remove all 3 pieces from the downrod and
assemble them onto the new longer downrod before proceeding
to step 2.
3. Align the holes at the bottom of the downrod with the holes in
the coupling on top of the motor housing (Fig. 5). Carefully
insert the clevis pin through the holes in the collar and
downrod. Be careful not to jam the clevis pin against the
wiring inside the downrod. Insert the cotter pin through the
hole near the end of the clevis pin until it snaps into its locked
position, as noted in the circle inset in Fig. 5.
4. Tighten two set screws at top of the fan motor collar firmly
and evenly. (Fig. 5)
5. Carefully lift the fan assembly up to the ceiling mounting
bracket and seat the hanger ball in the mounting bracket
socket. Make sure the tab on the mounting bracket socket is
properly seated in the groove in the hanger ball (Fig. 6).
This will help to balance the ceiling fan.
6. Secure the safety cable to the building structure using a wood
screw (not included).
Disassemble the Canopy Assembly
Hanging the Fan
Warning: Failure to properly install cotter pin as noted in
step 5 could result in fan loosening and possibly falling.
!
Motor wires
Ball/downrod
assembly
Canopy
Canopy bottom
cover
Pin in locked
positioon
Motor collar
Coupling cover
Set screws
Cotter pin
Clevis pin
Fig. 4
Fig. 5
Fig. 6
Warning: The tab in the ring must rest in the groove of the
hanger ball as fig. 6. Failure to properly seat the tab in the
groove could cause damage to wiring.
!
Warning: Do not use the existing mounting bracket in the
outlet box; replace it with new mounting bracket.
!
Groove
Tab
Safety cable
Ceiling
mounting
bracket
Canopy
Canopy bottom
cover

6
If you feel you do not have enough electrical wiring knowledge
or experience, have your fan installed by a licensed electrician.
Follow the steps below to connect the fan to your household
wiring. Use the wire nuts supplied with your fan. Secure the wire
nuts with electrical tape. Make sure there are no loose strands or
connections.
1. This remote control unit is equipped with 16 code combina-
tions to prevent possible interference from or to other remote
units. The frequency switches on your receiver and transmitter
have been preset at the factory. Please check to make sure
the switches on the transmitter and the receiver are set to the
same position. Any combination of settings will operate the fan
as long as the transmitter and receiver are set to the same
position. (Fig. 7)
2. Insert the receiver into the mounting bracket with the flat side
of the receiver facing the ceiling. (Fig. 8)
3. Motor to receiver electrical connections: Connect the black wire
from the fan to the black wire marked "To Motor L" from the
receiver. Connect the white wire from the fan to the white wire
marked "To Motor N" from the receiver. Connect the blue
wire from the fan to the blue wire marked "For Light" from the
receiver. Secure the wire connections with the plastic wire-
connecting nuts provided. (Fig. 9)
4. Receiver to house supply wires electrical connections:
Connect the black (hot) wire from the ceiling to the black wire
marked "AC in L" from the receiver. Connect the white
(neutral) wire from the ceiling to the white wire marked "AC
in N" from the receiver. Secure the wire connections with the
plastic wire-connecting nuts provided. (Fig. 9)
5. If your outlet box has a ground wire (green or bare copper)
connect it to the fan ground wires; otherwise connect the
hanging bracket ground wire to the mounting bracket. Secure
the wire connection with a plastic wire-connecting nut provided.
After connecting the wires spread them apart so that the green and
white wires are on one side of the outlet box and black and blue
wires are on the other side. Carefully tuck the wire connec-
tions up into the outlet box. (Fig. 9)
Making the Electrical Connections
Fig. 7
Fig. 8
Fig. 9
Warning: To avoid possible electric shock, be sure
electricity is turned off at the main fuse box before
wiring.
!
Note: Fan must be installed at a maximum distance of 20' (6.1 m)
from the transmitting unit for proper signal transmission
between the transmitting unit and the fan's receiving unit.
!
Caution: Do not use wall switch with dimmer function.
!
!
!
Warning: Check to see that all connections are tight, includ-
ing ground, and that no bare wire is visible at the wire nuts,
except for the ground wire.
Warning: Electrical diagrams are for reference only.
Optional use of any light kit must be UL listed and marked
suitable for use with this fan.
Frequency switch
Receiver
Ceiling
mounting
bracket
SUPPLY CIRCUIT
WHITE
WHITE
BLACK
BLACK
BLUE
Ground
conductor
Outlet box
Green
ground
lead
GREEN
GREEN
Ground from
downrod
Ground from
mounting bracket
BLACK BLACK
BLUE
WHITE
WHITE
7
Fig. 10
Fig. 11
Outlet box
Mounting
bracket
Screw
Screw
Canopy
Canopy
bottom cover
Screws with
fibre washers
Blades
1. Tuck connections neatly into ceiling outlet box.
2. Slide the canopy up to the mounting bracket and place the key
hole on the canopy over the screw on the mounting bracket,
turn the canopy until it locks in place at the narrow section of the
key holes. (Fig. 10)
3. Unscrew the screws and washers from the bottom of the motor.
Align the circular hole on the canopy with the remaining hole on
the mounting bracket and secure by tightening the two set screws.
Note: Adjust the canopy screws as necessary until the canopy
and canopy cover are snug.
Finishing the Fan Installation
Attaching the Fan Blades
Warning: Make sure the tab on the hanging bracket
properly sits in the groove in the hanger ball before
attaching the canopy to the bracket by turning the
housing until it drops into place.
!
1. Insert the blade through the blade slot in the decorative
housing. Align the holes on the blade and blade arm, making
sure the holes are also aligned and secure with fibre washers
and screws provided. (Fig. 11)
2. Repeat the procedure with the remaining blade arms.
Warning: To reduce the risk of personal injury, do not
bend the blade arms while installing, balancing the
blades, or cleaning the fan. Do not insert foreign objects
between rotating fan blades.
!

8
1. Remove 1 of the 3 screws from the mounting ring and loosen the
other 2 screws. Do not remove them.
2. Place the key holes on the mounting plate over the 2 screws
previously loosened from the mounting ring and turn the mounting
plate until it locks in place at the narrow section of the key
holes. Secure by tightening the 2 screws previously loosened
and the one previously removed. (Fig. 12)
Attaching the Mounting Plate
Fig. 12
Mounting ring
Mounting plate
Screws
Note: Before starting installation, disconnect the power
by turning off the circuit breaker or removing the fuse
at the fuse box. Turning power off using the fan switch is
not sufficient to prevent electric shock.
!

1. Remove the 1 of the 3 screws from the mounting plate and keep it
for future use. Loosen the other 2 screws. Do not remove them.
2. While holding the light holder under your fan, make the
polarized plug connections:
- White to white
- Blue to black
3. Place the key holes on the light kit over the 2 screws previously
loosened from the mounting plate, and turn light kit until it locks in
place at the narrow section of the key holes. Secure by tightening
the 2 screws previously loosened and the one previously
removed. (Fig. 13)
4. Install three 40 W E12 bulbs (not included). (Fig. 14)
5. Remove the plastic nut and decorative nut from the light kit.
6. Raise the glass shade up against the light kit, place the plastic
nut over the light kit and turn it clockwise until it locks up
against the light kit. Do not over-tighten. Secure the decorative
nut provided. (Fig. 14)
9
Installing the Light Kit
Fig. 13
Fig. 14
Note: Before starting installation, disconnect the power
by turning off the circuit breaker or removing the fuse
at fuse box. Turning power off using the fan switch is
not sufficient to prevent electric shock.
!
Mounting plate
Light kit
Connection plugs
Screws
Glass
Bulb
(not included)
shade
Plastic nut
Decorative nut
Light kit

10
Restore power to the ceiling fan and test for proper operation.
Install the 9 V battery (included). To prevent damage to transmitter,
remove the battery if not used for long periods. (Fig. 15)
A. 1, 2 and 3 buttons: (Fig. 16)
These three buttons are used to set the fan speed as follows:
1 = low speed
2 = medium speed
3 = high speed
B. button:
This button turns the fan off.
C. button:
This button controls the light and also controls
the brightness setting. Press and release the button to turn the
light ON or OFF. Press and hold the button to set the desired
brightness. The light key has an auto-resume; it will stay at
the same brightness as the last time it was turned off.
The Reverse switch is located on top of the motor housing. Slide
the switch to the left for warm weather operation. Slide the switch
to the right for cool weather operation.
Speed settings for warm or cool weather depend on factors such
as the room size, ceiling height, number of fans, and so on.
Warm weather - (Counter-Clockwise direction) A downward
air flow creates a cooling effect as shown in Fig. 17. This
allows you to set your air conditioner on a higher setting without
affecting your comfort.
Cool weather - (clockwise direction) An upward air flow moves
warm air off the ceiling as shown in Fig. 18. This allows
you to set your heating unit on a lower setting without affecting
your comfort.
Operating Your Transmitter
Fig. 16
Fig. 15
Fig. 17
Fig. 18
Note: Wait for the fan to stop before changing the setting of
the slide switch.
!
9V
Battery
123

11
The following procedure should correct most fan wobble. Check
after each step.
1. Check that all blade and blade bracket screws are secure.
2. Most fan wobble problems are caused when blade levels are
unequal. Check this level by selecting a point on the ceiling
above the tip of one of the blades. Measure from a point on the
centre of each blade to the point on the ceiling. Measure this
distance as shown in Fig. 19. Rotate the fan until the next
blade is positioned for measurement. Repeat for each blade.
Measurements deviation should be within 1/8" (3.2 mm). Run
the fan for 10 minutes.
3. Use the enclosed blade balancing kit if the blade wobble is
still noticeable.
Blade Balancing
Fig. 19
Touching ceiling

12
Here are some suggestions to help you maintain your fan.
1. Because of the fan's natural movement, some connections may become loose. Check the support connections, brackets, and blade
attachments twice a year. Make sure they are secure. (It is not necessary to remove fan from ceiling.)
2. Clean your fan periodically to help maintain its new appearance over the years. Use only a soft brush or lint-free cloth to avoid
scratching the finish. The plating is sealed with a lacquer to minimize discolouration or tarnishing. Do not use water when cleaning.
This could damage the motor, the wood, or possibly cause an electric shock.
3. You can apply a light coat of furniture polish to the wood blades for additional protection and enhanced beauty. Cover small
scratches with a light application of shoe polish.
4. There is no need to oil your fan. The motor has permanently lubricated sealed ball bearings.
PROBLEM
Fan will not start
Fan sounds noisy
Lights shut off and
will not come back on.
SOLUTION
Check main and branch circuit fuses or breakers.
Check line wire connections to the fan and switch wire connections in the switch housing.
Make sure all motor housing screws are snug.
Make sure the screws that attach the fan blade bracket to the motor hub are tight.
Make sure wire nut connections are not rattling against each other or the interior wall of the switch housing.
Allow a 24-hour "breaking-in" period. Most noises associated with a new fan disappear during this time.
If using ceiling fan light kit, make sure the screws securing the glassware are tight. Check that the light bulb is
also secure.
Make sure there is a short distance from the ceiling to the canopy. It should not touch the ceiling.
Make sure your ceiling box is secure and rubber isolator pads are used between mounting bracket and outlet
box.
This unit is equipped with a wattage limiting device. Lamping in excess of 190 W will disable your ceiling
fan's light kit. To reset your light kit you must turn the power off and install bulbs of lower wattage,, keeping
the wattage under 190 W. Restore power to your ceiling fan and continue normal operation.
Warning: Make sure the power is off at the electrical panel box before you attempt any repairs. Refer to the section,
This Noma® product carries a limited ten (10) year warranty against defects in the motor, and a one (1) year warranty
against defects in workmanship and materials. Trileaf Distribution agrees to replace the defective product free of charge
within the stated warranty period, when returned by the original purchaser with proof of purchase. This product is not
guaranteed against wear or breakage due to misuse and/or abuse.
"making electrical connections".
!
Care of Your Fan
Troubleshooting
Warranty

LISEZ ET CONSERVEZ CES CONSIGNES
052-6967-0
Ventilateur de plafond de 54 po Mercer
Guide de l'utilisateur

2
Avertissement : pour réduire le risque de blessure, ne pliez pas les bras des pales (également appelés brides) lorsque vous installez
les supports, équilibrez les pales ou nettoyez le ventilateur. N'introduisez pas de corps étranger entre les pales rotatives du
ventilateur.
Avertissement : pour réduire le risque d'incendie, de choc électrique ou de blessure, montez le ventilateur sur une boîte de sortie
indiquant « Convient au support d'un ventilateur » avec les vis fournies avec la boîte de sortie.
Règles de sécurité – Lisez et conservez ces consignes
1. Pour réduire le risque de choc électrique, assurez-vous que le courant est coupé au niveau du disjoncteur ou du coffret de fusibles
avant de commencer.
2. Tout câblage doit être installé conformément aux codes électriques nationaux et locaux. L'installation électrique devrait être effectuée
par un électricien qualifié et agréé.
3. AVERTISSEMENT : pour réduire le risque de choc électrique ou d'incendie, n'utilisez pas ce ventilateur avec n'importe quel appareil
à commande de vitesse transistorisée. Cela endommagera la circuiterie électronique de façon permanente.
4. ATTENTION : pour réduire le risque de blessure, n'utilisez que les vis fournies avec la boîte de sortie.
5. La boîte de sortie et la structure de support doivent être solidement fixées et doivent pouvoir supporter un poids d'au moins 35 lb
(15,9 kg). N'utilisez que les boîtes de sortie listées par UL et portant la mention « CONVIENT AU SUPPORT D'UN
VENTILATEUR ».
6. Le ventilateur doit être monté en conservant une distance minimum de 7 pi (2,13 m) entre le plancher et le bord de fuite des pales.
7. Évitez de placer des objets sur la trajectoire des pales.
8. Pour éviter de vous blesser ou d'endommager le ventilateur et d'autres objets, soyez prudent lorsque vous travaillez près du
ventilateur ou le nettoyez.
9. N'utilisez ni eau ni détergents lorsque vous nettoyez le ventilateur ou les pales du ventilateur. Un chiffon à poussière sec ou
légèrement humidifié est généralement suffisant pour le nettoyage.
10. Après avoir procédé aux branchements électriques, les conducteurs épissés doivent être tournés vers le haut et soigneusement
rangés dans la boîte de sortie. Les fils doivent être étalés séparément, avec le conducteur de masse et le conducteur de protection
d'un côté de la boîte de sortie et le conducteur non mis à la terre de l'autre côté de la boîte de sortie.
11. Toutes les vis de réglage doivent être vérifiées et resserrées si nécessaire avant l'installation.
Avertissement : pour réduire le risque d'incendie, de choc électrique ou de blessure, montez l'appareil sur une boîte de sortie
indiquant « Convient au support d'un ventilateur de 35 lb (15,9 kg) ou moins » et utilisez les vis de montage fournies avec la
boîte de sortie. La plupart des boîtes de sortie généralement utilisées pour la pose d'un appareil d'éclairage ne conviennent pas à l
a suspension d'un ventilateur et peuvent nécessiter un remplacement. En raison de la complexité de l'installation de ce ventilateur,
le recours à un électricien qualifié et agréé est fortement recommandé.
!
!
!
Attention : ce produit est équipé d'un limiteur de puissance de 190 W. Si la puissance des lampes dépasse 190 W, le luminaire s'éteint
automatiquement jusqu'à ce que des ampoules de puissance appropriée soient installées. Pour redémarrer le luminaire, éteignez-le,
remplacez les ampoules par celles de puissance appropriée, puis rallumez le luminaire.
!

3
Indispensables
Utiles
Tournevis plat Tournevis
cruciforme Lunettes de
protection
Pinces
Escabeau
Outil à dénuder
Coupe-fils
Chiffon doux
Ruban isolant
Pour commencer : outils nécessaires (non fournis)

Déballage de votre ventilateur
Déballez et inspectez soigneusement le ventilateur pour vous assurer qu'il ne manque aucune pièce.
1. Ensemble de pales (5)
2. Bloc du couvercle
3. Ensemble boule/tige
4. Couvercle de raccordement
5. Bloc moteur
6. Plaque de montage
7. Luminaire
8. Abat-jour en verre
9. Trousse d'équilibrage
Installation de votre ventilateur
4
1
2
3
8
9
7
4
5
6
Remote Control
Télécommande
& Transmetteur et support
Récepteur
Trousse de quincaillerie
Vis à bois
Capuchons de
connexion
Pile
2 pièces
6 pièces
1 pièce
Trousse de quincaillerie
Vis de pale 16 pièces
16 pièces
Rondelles en fibre
3 pièces
Capuchons de connexion
Vis à bois 2 pièces
2 pièces
2 pièces
Rondelles plates
2 piècesRondelles éventail
2 piècesRondelles à ressort
Vis de montage
Coupez le courant au niveau du
disjoncteur pour éviter tout risque de
choc électrique. (Fig. 1)
Utilisez une boîte de sortie en métal (vendue
séparément) qui convient au support de
ventilateur. Fixez la boîte de sortie directement
à la structure du bâtiment à l'aide de vis à bois
(incluses). La boîte de sortie doit pouvoir
supporter au moins 35 lb (15,9 kg). (Fig. 2)
Fixez la plaque de montage à la boîte
de sortie du plafond à l'aide des
rondelles et des vis de montage
fournies avec la boîte de sortie.
(Fig. 3)
Fig. 2Fig. 1
Support de montage
Boîte de sortie
Rondelles à ressort
Vis de montage
Rondelles plates
Fig. 3

5
1. Ôtez le chapeau inférieur du couvercle décoratif en tournant le
premier dans le sens inverse des aiguilles d'une montre. (Fig. 4)
2. Ôtez le support de montage du couvercle en enlevant 1 des 2 vis
situées au fond du support de montage et en desserrant la tête de
l'autre vis d'un demi-tour. Ensuite, tournez le couvercle dans le
sens inverse des aiguilles d'une montre pour ôter le chapeau du
couvercle. (Fig. 4)
N'OUBLIEZ PAS de couper le courant. Suivez les étapes
ci-dessous pour suspendre correctement votre ventilateur.
1. Ôtez la broche, la goupille fendue et les vis de réglage situées
au sommet du bloc moteur. (Fig. 5)
2. Faites passer les câbles sortant du sommet du moteur du
ventilateur à travers le couvercle de raccordement, le chapeau
du couvercle, le couvercle, puis la boule/tige. (Fig. 5)
REMARQUE : si une tige plus longue (non incluse) est nécessaire,
ôtez la vis située dans la boule de suspension, abaissez la boule de
suspension, ôtez la broche, ôtez les 3 pièces de la tige et assemblez-les
sur la nouvelle tige plus longue avant de procéder à l'étape 2.
3. Alignez les trous situés au bas de la tige sur ceux du raccordement
au sommet du boîtier du moteur (fig. 5). Insérez délicatement la
broche dans les trous de la bague et de la tige. Prenez garde de ne
pas bloquer la broche contre le câblage à l'intérieur de la tige. Insérez
la goupille fendue dans le trou situé près de l'extrémité de la broche
jusqu'à ce que le verrouillage s'enclenche, tel qu'inscrit dans le cercle
de la fig. 5.
4. Serrez fermement et uniformément les deux vis de réglage situées
sur la bague au sommet du boîtier du moteur. (Fig. 5)
5. Soulevez précautionneusement le bloc du ventilateur jusqu'au support
de montage du plafond et logez la boule de suspension dans la cavité
du support de montage. Assurez-vous que la patte située sur la cavité
du support de montage est bien logée dans l'encoche de la boule de
suspension (fig. 6). Ceci vous permettra d'équilibrer le ventilateur de
plafond.
6. Fixez le câble de sécurité à la structure du bâtiment à l'aide d'une vis
à bois (non incluse).
Démontage du bloc du couvercle
Suspendre le ventilateur
Avertissement : une installation de la goupille fendue non conforme
aux indications de l'étape 5 pourrait entraîner le dévissage et la chute
du ventilateur.
!
Fils du moteur
Ensemble
boule/tige
Couvercle
Chapeau inférieur
du couvercle
Goupille en position
verrouillée
Bague du moteur
Couvercle de raccordement
Vis de réglage
Goupille fendue
Broche
Fig. 4
Fig. 5
Fig. 6
Avertissement : l'onglet situé dans l'anneau doit reposer dans l'encoche
de la boule de suspension, tel qu'illustré par la fig. 6. Ne pas insérer
correctement l'onglet dans l'encoche pourrait endommager le câblage.
!
Avertissement : n'utilisez pas le support de montage situé dans la
boîte de sortie; remplacez-le avec un nouveau support de montage.
!
Encoche
Onglet
Câble de sécurité
Support de montage
du plafond
Couvercle
Chapeau inférieur
du couvercle

6
Si vos connaissances ou votre expérience en électricité sont limitées,
faites installer votre ventilateur par un électricien agréé.
Suivez les étapes ci-dessous pour brancher correctement le
ventilateur au câblage de votre maison. Utilisez les capuchons
de connexion fournis avec votre ventilateur. Fixez les capuchons
de connexion avec du ruban isolant. Assurez-vous qu'il n'y a aucun
fil ni branchement mal fixé.
1. Cette télécommande est équipée de 16 combinaisons à code pour
empêcher de possibles interférences avec d'autres appareils de commande
à distance. Les interrupteurs de fréquence sur votre récepteur et votre
transmetteur ont été préprogrammés en usine. Veuillez vérifier que les
interrupteurs du transmetteur et du récepteur sont réglés sur la même
position. Toutes les combinaisons de réglages commandent le ventilateur
à partir du moment où le transmetteur et le récepteur sont sur la même
position. (Fig. 7)
2. Insérez le récepteur dans le support de montage, la face plate du
récepteur face au plafond. (Fig. 8)
3. Branchements électriques du moteur au récepteur : branchez le fil noir
du ventilateur au fil noir du récepteur portant la mention « To Motor L »
(pour moteur L). Branchez le fil blanc du ventilateur au fil blanc du
récepteur portant la mention « To Motor N » (pour moteur N). Branchez
le fil bleu du ventilateur au fil bleu du récepteur portant la mention
« For Light » (pour luminaire). Fixez les branchements de fils à l'aide des
capuchons de connexion en plastique fournis. (Fig. 9)
4. Branchements électriques du récepteur aux fils d'alimentation de la maison :
branchez le fil noir (chargé) du plafond au fil noir du récepteur portant la
mention « AC in L » (CA en L). Branchez le fil blanc (neutre) du plafond
au fil blanc du récepteur portant la mention « AC in N » (CA en N).
Fixez les branchements de fils à l'aide des capuchons de connexion en
plastique fournis. (Fig. 9)
5. Si votre boîte de sortie possède un fil de mise à la terre (vert ou en cuivre
nu), branchez-le aux fils de mise à la terre du ventilateur ou branchez le
fil de mise à la terre du support de suspension au support de montage.
Fixez le branchement de fils à l'aide d'un des capuchons de connexion
en plastique fournis. Après le branchement, les fils doivent être étalés
séparément de façon à ce que les fils vert et blanc se trouvent d'un côté
de la boîte de sortie et les fils noir et bleu de l'autre côté. Rangez
soigneusement les branchements dans la boîte de sortie. (Fig. 9)
Établissement des branchements électriques
Fig. 7
Fig. 8
Fig. 9
Avertissement : pour éviter tout risque de choc électrique,
assurez-vous que le courant est coupé au niveau de la boîte
principale des fusibles avant de procéder au câblage.
!
Remarque : le ventilateur doit être installé à une distance maximum
de 20 pi (6,10 m) de l'unité de transmission pour que la transmission
du signal soit bonne entre l'unité de transmission et l'unité de réception
du ventilateur.
!
Attention : n'utilisez pas d'interrupteur mural avec gradateur de lumière.
!
!
!
Avertissement : contrôlez pour vous assurer que tous les branchements
sont bien serrés, notamment la mise à la terre, et qu'aucun fil nu n'est
visible au niveau des capuchons de connexion, à l'exception du fil de mise
à la terre.
Avertissement : les schémas électriques ne sont qu'à titre indicatif. Tout
type de luminaire utilisé en option doit être listé par UL et porter la mention
« Convient à une utilisation avec ce ventilateur ».
Interrupteur de fréquence
Récepteur
Support de
montage du
plafond
CIRCUIT D'ALIMENTATION
BLANC
BLANC
NOIR
NOIR
BLEU
Conducteur de masse
Boîte de sortie
Fil vert de mise
à la terre
VERT
VERT
Mise à la terre
de la tige
Mise à la terre du
support de montage
NOIR NOIR
BLEU
BLANC
BLANC

7
Fig. 10
Fig. 11
Boîte de sortie
Support de
montage
Vis
Vis
Couvercle
Chapeau inférieur
du couvercle
Vis avec rondelles
en fibre
Pales
1. Rangez soigneusement les branchements dans la boîte de sortie
du plafond.
2. Faites coulisser le couvercle vers le haut jusqu'au support de
montage et placez le trou de clé situé sur le couvercle par-dessus
la vis du support de montage, puis tournez le couvercle jusqu'à
ce que le verrouillage s'enclenche au niveau de la section étroite
des trous de clé. (Fig. 10)
3. Ôtez les vis et les rondelles situées sous le moteur. Alignez le trou
circulaire du couvercle sur le trou restant sur le support de montage
et fixez en serrant les deux vis de réglage.
Remarque : ajustez les vis du couvercle si besoin, jusqu'à ce que
le couvercle et son chapeau soient bien ajustés.
Finir l'installation du ventilateur
Fixation des pales du ventilateur
Avertissement : assurez-vous que la patte située sur le support
de suspension est bien logée dans l'encoche de la boule de
suspension avant d'attacher le couvercle au support en tournant
le boîtier jusqu'à ce qu'il se mette en place.
!
1. Insérez la pale dans la fente de la pale située dans le boîtier décoratif.
Alignez les trous de la pale et du bras de la pale en veillant à ce qu'ils
soient également alignés et fixés avec les rondelles en fibre et les vis
fournies. (Fig. 11)
2. Répétez ce processus avec les autres pales.
Avertissement : pour réduire le risque de blessure, ne pliez
pas les bras des pales lorsque vous installez et équilibrez les
pales, ou lorsque vous nettoyez le ventilateur. N'introduisez
pas de corps étranger entre les pales rotatives du ventilateur.
!

8
1. Ôtez 1 des 3 vis de l'anneau de fixation et desserrez les 2 autres.
Ne les ôtez pas.
2. Placez les trous de clé de la plaque de montage sur les 2 vis
précédemment desserrées sur l'anneau de fixation, puis tournez
la plaque de montage jusqu'à ce que le verrouillage s'enclenche
au niveau de la section étroite des trous de clé. Fixez en serrant
les 2 vis précédemment desserrées et celle précédemment ôtée.
(Fig. 12)
Fixation de la plaque de montage
Fig. 12
Anneau de fixation
Plaque de montage
Vis
Remarque : avant de procéder à l'installation, coupez le courant
en éteignant le disjoncteur ou en ôtant le fusible du coffret de fusibles.
Couper le courant à l'aide de l'interrupteur du ventilateur n'est pas
suffisant pour empêcher les chocs électriques.
!
This manual suits for next models
1
Table of contents
Languages:
Other NOMA Fan manuals

NOMA
NOMA MILTON 052-9717-8 User manual

NOMA
NOMA 043-5711-6 User manual

NOMA
NOMA OLLIE 052-9255-6 User manual

NOMA
NOMA Alabaster User manual

NOMA
NOMA 052-8687-4 User manual

NOMA
NOMA 052-6972-6 User manual

NOMA
NOMA 043-7023-2 User manual

NOMA
NOMA 052-4345-2 User manual

NOMA
NOMA Arctic User manual

NOMA
NOMA ASHTON User manual