Nova susi User manual


Thank you...........................................................................................................4
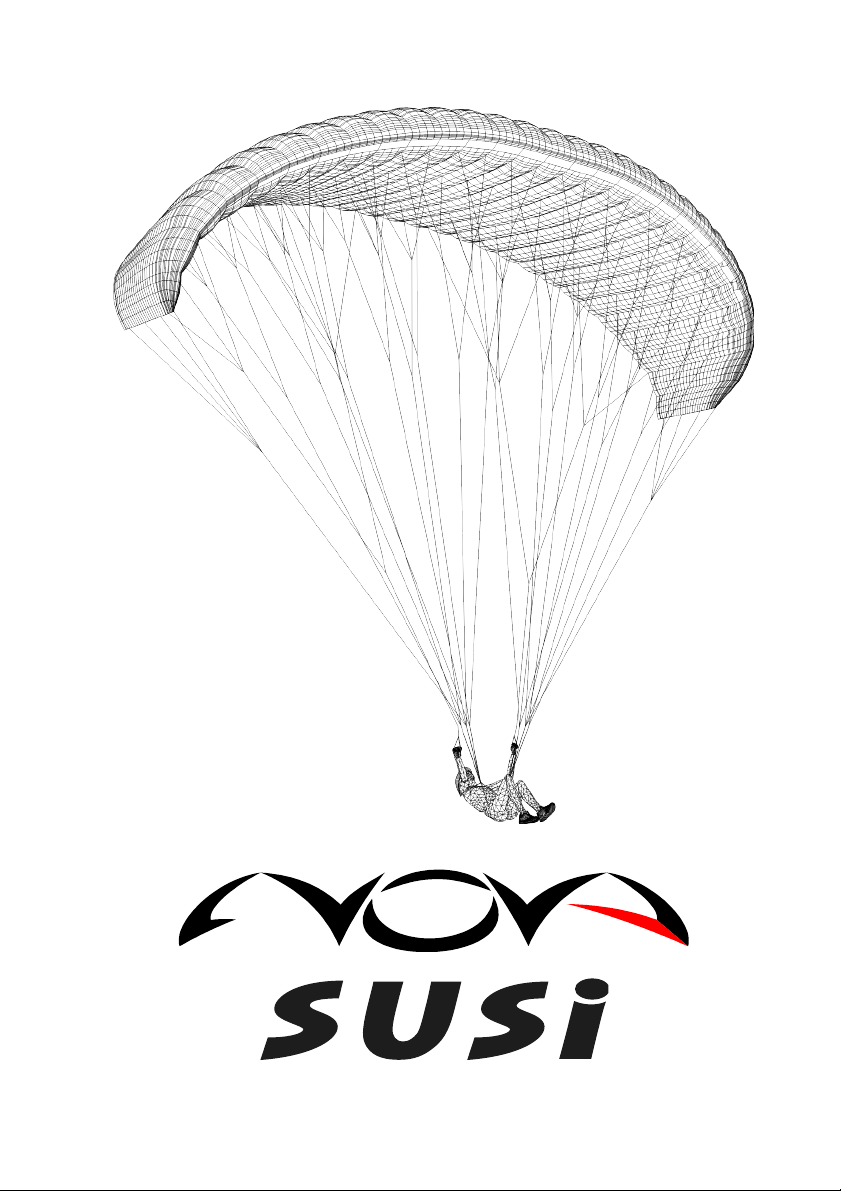
NOVA..................................................................................................................5
The SuSi .............................................................................................................6
Short technical description...........................................................................6
Safety...............................................................................................................6
Handling Characteristics..............................................................................6
erformance...................................................................................................7
Target Group.................................................................................................7
ilots requirements........................................................................................7
General information......................................................................................7
First flight...............................................................................................................7
Registration............................................................................................................7
Scope of delivery....................................................................................................8
Modifications on the glider.....................................................................................8
Suited harnesses.....................................................................................................8
Weight range..........................................................................................................9
Flying the SuSi....................................................................................................9
Launch............................................................................................................9
Normal flight................................................................................................10
Turning.........................................................................................................11
Landing.........................................................................................................12
Manoeuvres for fast descent.......................................................................12
Big ears................................................................................................................12
B Stall..................................................................................................................12
Deep spiral...........................................................................................................13
C Stall..................................................................................................................14
Collapses.......................................................................................................14
Vers.1.1 S. 2 / 28

Asymmetric collapse............................................................................................14
Front tuck.............................................................................................................15
Stall manoeuvres..........................................................................................15
Spin......................................................................................................................15
Full Stall...............................................................................................................15
Deep/Parachutal stall............................................................................................16
Cravates........................................................................................................17
Winch launch...............................................................................................18
Speed system................................................................................................18
Mounting the speed system..................................................................................18
Using the accelerator in flight...............................................................................18
Service and maintenance.................................................................................19
General advice..............................................................................................19
Cleaning........................................................................................................19
Repair...........................................................................................................20
Check............................................................................................................20
Environment friendly behaviour:...................................................................20
Disposal:............................................................................................................20
Technial Data....................................................................................................21
Overview risers.................................................................................................22
Overview Glider...............................................................................................23
Line plans..........................................................................................................24
Vers.1.1 S. 3 / 28

Thank you
Congratulations, for choosing to fly a NOVA SuSi. You have got a glider, to
experience exiting and safe flights for many years.
This manual contains important information and instructions to use your glider.
Please read the following pages carefully before your first flight. For questions
and suggestions please contact us: info@nova wings.com.
To find further information about this or other products please visit our
website: www.nova wings.com
To fully use all our maintainance and guarantee services you have to register
your glider on our website. (click LOGIN & REGISTRATION)
For more information on our guarantee services have a look here:
http://www.nova wings.com/english/nova/guarantee.html
We wish you many nice hours in the air and a safe landing at the end of every
flight.
The NOVA Team
Vers.1.1 S. 4 / 28

NOVA
Since the company was founded in 1989, NOVA has become one of the
world’s leading paraglider manufacturers with their head office in Terfens /
Tirol / Austria in the core of the Alps.
NOVA consists of a highly qualified team and most of the team members share
the passion of flying with those pilots, who decided to fly a NOVA glider.
This passion and our Know How are the fundamental parts of our work. By
now, the passion and the Know How are continuously growing. This is why we
are for example pioneers in the area of air flow simulations, which allows us to
predict certain properties of a new wing quite accurately on the computer.
Last but not least we have outstanding test pilots who provide a substantial
contribution to make every new wing an unmistakable NOVA glider, which
impresses in every aspect.
But NOVA doesn’t only just stand for the development and the design of
paragliders. We also want to take the responsibility for the manufacture of our
gliders. That’s why the production of NOVA gliders takes place in our factory
in the Hungarian town of Pécs. This allows us to influence important factors,
for example quality assurance during the whole production process.
Furthermore we can guarantee fair working conditions for about 100 NOVA
employees in Hungary.
We are convinced that the customer benefits from better employee working
conditions, in terms of high quality products.
What we want to achieve are happy and enthusiastic pilots, because the future
of our sport depends on the enthusiasm of the people who are part of this
wonderful sport.
Vers.1.1 S. 5 / 28

The SuSi
The SuSi (SuperSimple) is our new development, which mainly aims towards
beginners and occasionally flying pilots.
Flying the SuSi is as simple as it can get: Launch behaviour, turning behaviour
and landing is easier than on any other wing we have built. The level of passive
safety is on a new level as well.
Short technical description
The SuSi has 29 cells. Three of those cells are closed stabilo cells on each side.
There are three layers of lines. The first layer, the A lines are red. B and C lines
are yellow. The brake layer, which is not one of the three line layers, is orange.
(the stabilo lines are orange as well.)
The risers consist of 4 belts. On the first two belts (red) the three main lines are
attached. Furthermore the speed system is fixed on the first A belt. On the next
two belts the B and C main lines are attached.
Safety
The SuSi is the glider with the highest level of passive safety we have ever
built. The SuSi has a very long brake travel until stall and soft collapse
behaviour. Even with a very high wing loading, the reactions to collapses are
very well damped.
This is why we could certify the SuSi in quite small sizes and with a high wing
loading and still get an EN A rating.
With a normal wing loading the SuSi is well within the EN A class.
When flying in turbulent conditions the SuSi excels with a very high level of
stability – even in accelerated flight.
Handling Characteristics
Despite the very large available brake travel, the SuSi can be piloted very
precisely through thermals. It is easy to do tight turns if needed. But the SuSi
doesn't tend to “dive” in turns. This flat turning behaviour reduces the
dynamics to a level which is easily manageable by beginners.
Vers.1.1 S. 6 / 28

erformance
The SuSi, size M, glides with a glide ratio of around 1:8. This is more than
sufficient for extensive thermal flights, as well as for traverses on XC flights.
The strength of the SuSi is the thermalling behaviour in various conditions. It is
easy to climb the SuSi efficiently and without stress.
Target Group
The SuSi aims to appeal to beginners and recreational pilots in search for
maximum safety. The SuSi is the perfect glider to gain experience without
being overburdened.
ilots requirements
The SuSi is our wing with the highest level of safety, so of course we don’t
make any demands on the pilot’s skills, but we would like to remind every pilot
of the importance of individual responsibility at this point.
Every pilot, who flies on their own has to be able to decide if their skills and
equipment is adequate for the respective conditions. The SuSi offers superior
safety but even on such a glider with maximum passive safety, misjudgements
may have serious consequences.
The best way to avoid misjudgements is a defensive approach to the sport.
Some times it makes sense to pass on a flight, instead of getting yourself into
conditions you cannot handle. Regular training improves your skills and
enables you to enjoy your flights, even in more difficult conditions.
Please consider these thoughts!
General information
First flight
Every NOVA glider has to be flown and checked through a NOVA dealer. This
flight (date and pilot) has to be entered on the stabilo of the wing.
Registration
Vers.1.1 S. 7 / 28

To get all warranty and service features, you have to register your glider on our
Homepage. Please choose “LOGIN®ISTRATION” and follow the advice
for registration
Scope of delivery
The SuSi is shipped with a back pack, an inner bag, a riser bag, the speed
system, a windsock, the manual and a patch.
Modifications on the glider
Any modification (e.g. change of line lengths, changes on the speed system)
causes a loss of certification. We recommend that you contact NOVA before
performing any kind of change.
Suited harnesses
The SuSi is approved for any harness of the class “GH” (without diagonal
bracing). This means almost every harness which is currently available.
The choice of the harness has a big influence on the flight characteristics of the
SuSi. There are harnesses which allow very effective weight shifting on the one
hand, but which tip to the side in turbulences quite undamped on the other
hand.
Other harnesses don’t allow extreme weight shifting, but they will give the pilot
a calmer feel in turbulent conditions.
A good flying school can help on this topic with individual advice.
Vers.1.1 S. 8 / 28

Weight range
Each size of the SuSi is certified for a certain weight range. The weight refers
to the “overall take off weight”. This means the weight of the pilot, the glider,
the harness and all other equipment.
We differentiate between the “classical” and the “extended” weight range. The
“extended” weight range are the upper 10kg of the weight range.
We recommend to fly the SuSi within the classical weight range because we
think that the wing is better balanced for the group of beginners and occasional
pilots. The extended weight range is mainly for pilots who like to fly the light
version of the SuSi as a mountain glider with a higher wing loading.
Flying the SuSi
We suggest performing your first flights with a new wing in calm conditions to
get used to the flight behaviour without any stress. We also recommend to do
some take offs on a training hill or some ground handling to get a good feeling
for your glider from the very beginning.
Launch
Before every take off the pilot has to ensure that the equipment is in a proper
condition, especially the glider, the harness and the reserve system.
Just before launch we recommend a check routine, which should be performed
carefully. (Many accidents at take off could be avoided by a proper check!)
We recommend the following routine:
1. Strapped up (Leg strap and chest strap on the harness and helmet
strap all done up)
2. Clipped in (Risers untwisted and connected to the karabiners,
speed system attached and karabiners properly closed)
3. Lines (A lines on top, all lines sorted, brake line unlooped between
brake handle and pulley)
4. Glider (glider lies arched with opened cell openings at take off.)
5. Wind and airspace (wind suitable for launch and airspace in front
of take off free of other gliders)
Vers.1.1 S. 9 / 28

The SuSi has a very well balanced and easy take off behaviour. Corrections are
easy to perform at any time and no special advice is needed for forward or
reverse launches.
Note:
It is sufficient to pull gently on the A risers to launch the SuSi. Pulling too hard
on the A risers has a counterproductive effect .
A proper take off technique can only be learnt by intensive training. That’s why
we recommend to spend some time on a training hill every once in a while.
Also some ground handling will improve your take off skills. The best thing is
to have an experienced pilot with you who can help with some advice.
Like this, you will soon be able to launch your glider confidently, even in
difficult conditions. This will add a lot of safety to your flying and it allows you
to enjoy your flights from the very beginning.
Normal flight
If you release both brakes (“Hands up”) the SuSi glides at the so called “trim
speed”. At this speed, the glide ratio reaches its maximum.
If you fly into a headwind or through sinking air, you should use the accelerator
to maximise your glide ratio. If you use the accelerator in turbulent conditions,
you have to consider more demanding reactions in the case of a collapse. So
you should keep more distance from the ground if you fly accelerated.
If you fly in strong turbulences we recommend applying both brakes slightly.
This increases the stability and you get good feedback through the brakes,
which is necessary to fly your wing actively.
Flying actively means permanent control and correction of the angle of attack
in turbulent air. If you fly from lift into an area of sinking air, the angle of
attack will decrease and the wing will pitch down. A good pilot will realise this
even before the wing pitches down, by a reduced brake pressure. The right
reaction would be to apply the brakes more and thereby increase brake pressure
to prevent the wing from pitching down or even from collapsing in turbulent
conditions.
Vers.1.1 S. 10 / 28

Flying from sinking air into lift is just the opposite: Without any pilot action,
the angle of attack would increase and the wing would pitch up. The pilot can
feel this, by an increased brake pressure. In this situation, the pilot should
release the brakes to reduce the pitch movement.
To generalize:
If the brake pressure decreases and if the wing pitches down, the pilot should
apply more brakes. If the brake pressure increases and if the wing pitches up,
the brakes should be released.
With proper active flight control, the pilot can avoid most of the collapses and
keep control in every moment. The best way to learn this is of course flying,
but ground handling definitely helps to improve the feeling for the glider. A
good training exercise is to stabilise the wing above your head with the brakes,
without looking at it. This helps as well for improving the forward launch.
Turning
A smooth turn is an interaction of inner brake, outer brake and weight shifting.
The difficulty is finding the right amount, which is important if you want to
climb efficiently in thermals.
The SuSi turns quite sensitively, so only small inputs are needed for performing
precise turns. Tight and quick turns or fast changes of turning direction without
unwanted pendulum movement are quite complex and take some training. It
should be the goal of every pilot to master these skills perfectly.
Attention:
If you can’t use the brakes for steering the glider you can use the C-risers
instead. (This might be necessary for example, if the brake lines tangled up
due to a bad pre-launch check or less likely, if the main brake line tears).
The SuSi can be turned quite well with the C-risers combined with weight
shifting. You can also land the glider nice and smooth just with the C-
risers. Don’t pull the C-risers too much, to avoid a deep stall!
Vers.1.1 S. 11 / 28

Landing
Landing the SuSi is very easy. In turbulent conditions we recommend applying
brakes (approximately 20% of the available brake travel) during the whole
approach. This will increase the stability of the glider and the feeling of the
wing.
Just before touch down you should apply more brake. Many times it makes
sense to induce a stall.
Attention:
A deep stall in just 2 meters height can cause a quite violent touch down.
Make sure to not fully apply the brakes until you are close enough to the
ground.
Manoeuvres for fast descent
Big ears
Big ears are very effective and easy to perform with the SuSi. For initiation,
pull the outer A risers symmetrically. Keep the brake handles (without extra
wraps) in your hands.
As long as you keep both outer A risers pulled, the wingtips will be folded and
the sink speed will increase. We recommend to additionally push the speed bar
to increase the sink speed further and to also increase forward speed. The drag
of the folded wingtips increases the angle of attack. By pushing the speed bar,
this effect is compensated.
To end the manoeuvre, release the A risers. If the wingtips don’t open
automatically, you can inflate them by applying the brakes with a short impulse
movement.
If the ears don't properly deflate, you should try to pull the outer A Line
quicker. It also helps to grab the line above the shackle.
B-Stall
Vers.1.1 S. 12 / 28

You can enter a B Stall by symmetrically pulling both B risers approximately
20cm. The force is quite high at the beginning, but decreases when you pull
down further. To get a good hold of the risers, it makes sense to grab them on
top at the shackles.
As you pull the risers down, the gliders stops its forward motion and after a
pendulum swinging motion, the SuSi enters a very stable stall state. The sink
rate depends on the wing loading and on how much the pilot pulls the B risers.
The maximum sink rate is about 9m/s.
If you pull too far, the glider starts to rotate about the yaw axis. In this case,
release the risers, until the rotation stops. (Please note, that such a rotation can
also be induced by an asymmetric pulling of both risers)
To exit the B stall, raise up both hands speedily.
Keep the brake handles (without extra wraps) in your hands during the
manoeuvre. Make sure to not apply brakes during the exit!
Deep spiral
The deep spiral is the most demanding of the three manoeuvres. (Ears, B Stall
and Deep Spiral) You should only practise it with a lot of altitude. The best
way is to learn it under professional guidance.
Entering a deep spiral can be divided into two phases:
First, you fly a turn by applying one brake and by shifting your weight to the
same side, the glider will bank up and increase its turning speed. This phase
ends at a sink rate of roughly 8m/s – 10m/s. (depending on the wing loading)
Then at the beginning of the second phase the g forces increase rapidly and the
leading edge will lean towards the ground. In a fully developed deep spiral, the
leading edge is almost parallel to the ground. The maximum sink rate with the
SuSi can get up to 25m/s and more.
The first attempts to fly a deep spiral should be stopped clearly before reaching
the second phase to get used to the quick rotation and to practice the exit
without pendulum swinging. The exit should be performed by braking on the
outer side with a neutral weight shift. If necessary you can slightly release the
inner brake as well. The SuSi will then decrease its bank angle and go back to
Vers.1.1 S. 13 / 28

normal flight. To avoid a pendulum movement, the inner brake has to be pulled
in the moment the wing wants to reduce its bank rapidly.
By applying the inner brake again, you force the glider to exit the spiral
movement not rapidly but during two or three rotations. It is very important to
master this exercise before continuing to the second phase of the deep spiral.
The pilot will feel the entering of this phase by the suddenly increased g force.
In this moment, the pilot is being pushed to the outer side of the harness. It is
important to not counteract. So the pilot should lean to the outer side to avoid a
stable spiral. (See below)
If the pilot weight shifts to the outer side, the spiral movement will get slower
as soon as the pilot releases the inner brake. The rest of the exit works as
explained above for the first phase of the deep spiral.
If the pilot shifts his weight clearly to the inner side, the SuSi might stay in a
deep spiral, even when releasing both brakes. In this case, it helps to apply the
outer brake, or both brakes and of course to shift the weight to the outer side.
Please don’t underestimate the difficulty of learning the deep spiral. The sink
rates are a lot higher than what you are used to from other manoeuvres and the
fast rotation might lead to disorientation. The high g loads of up to 3g make the
manoeuvre even more demanding as you might have problems like the so
called “black out”, where you temporarily lose your vision due to the g load. It
is very important to get a feeling for the reactions of your body to this
manoeuvre.
If you practice it well, it is a fun manoeuvre that enables you to loose height
faster than with any other manoeuvre.
C-Stall
This manoeuvre can be found sporadically in some paragliding literature. We
don’t recommend it, because entering and exiting the C stall can be very
demanding and dangerous for many pilots.
Collapses
Asymmetric collapse
Vers.1.1 S. 14 / 28

If you fly in strong turbulences, one side of the glider might collapse. This
happens if one side of the wing doesn’t produce lift anymore, due to a low
angle of attack. If there is no lift, the lines get loose and the wing deforms or
collapses.
Most of these collapses are rather small – they only affect a small part of the
wingspan. In such a case, the SuSi continues to fly almost unaffected. If the
collapse affects 50% of the wingspan or more, the wing will react considerably:
Due to the increased drag of the collapsed wing, the glider will turn to the
collapsed side. Furthermore, the glider will pitch down because of the increased
wing loading. (The glider has to increase its speed because of the reduced area
– that’s what causes the pitching down.)
The pilot can prevent the glider from pitching and turning, by applying the
brake on the non collapsed side of the wing. If a collapse occurs close to the
ground it is essential to react properly. The proper reaction should be taught at
high altitude, ideally under professional guidance.
As explained above, most of the collapses can be prevented, if you fly actively!
Front tuck
A front tuck occurs, if the angle of attack gets too low on the whole wingspan,
then the whole leading edge will collapse. After the asymmetric tuck, the SuSi
will go back to normal flight automatically. The pilot can expedite the opening
process by slightly applying both brakes.
Stall manoeuvres
Spin
If you pull one brake too much, you might induce a so called spin. The centre
of rotation is no longer far outside the wing (like during a normal turn), but it
moves inside the wing. Furthermore the rotation speed increases. The SuSi will
go back to normal flight, if the pilot releases both brakes. The SuSi’s spin
behaviour is easily manageable: It takes a lot of brake travel to induce the spin,
and then the pilot has quite some time to react and release both brakes.
Full Stall
Vers.1.1 S. 15 / 28

If you pull both brakes too far, the wing will perform a so called full stall. The
wing suddenly stops its forward motion, but the pilot is still moving forward.
So from the pilots view, the glider will tilt backwards. It is very important to
not release the brakes in this moment. Otherwise the glider might surge forward
below the pilot.
The Full Stall is a complex manoeuvre and the perfect execution can not be
explained in this manual. If you want to learn a proper full stall, it makes sense
to do this under professional guidance.
The available brake travel before stalling the wing depends on the size. It is
approximately 60cm for the SuSi 19, 63cm for the SuSi 21, 66cm for the SuSi
23, 70cm for the SuSi 25, and 73cm for the SuSi 27. Those numbers are just a
rough indication. (The publication of the brake travel is claimed by the EN
926.)
It would be dangerous to use the brake travel according to those numbers,
because it is not practicable to measure the brake travel during flight, and in
turbulences the stall might occur with less brake travel. If you want to use the
whole brake travel of your glider safely, it is necessary do many intended spins
and full stalls to get a feeling for the stall behaviour.
Deep/ arachutal stall
The Deep Stall, or Parachutal Stall is kind of the pre stage to a Full Stall. The
wing has no forward motion and a high sink speed, but it is almost fully
inflated. The pilot can enter the Deep Stall by applying both brakes. It is very
difficult to keep the wing in a Deep Stall: If you pull the brakes a little too
much, the glider will enter a Full Stall. If you release the brakes too much, the
glider will go back to normal flight. To practice a Deep Stall, it is necessary to
master the Full Stall first.
A very old or worn out glider with a porous cloth or with a changed trim (due
to many winch launches, or deep spirals) might stay in a deep stall even after
releasing both brakes. Do not apply the brakes in such a situation, because the
wing would then enter a full stall ! You can exit the deep stall by pushing the
speed bar, or by simply pushing the A risers forward. If you fly through rain,
the risk of a deep stall is higher. We strongly advice against flying in rainy
conditions. If it happens, that you get into rainfall, we recommend not
performing a B stall or Big Ears. Our recommendation is to leave the rain as
Vers.1.1 S. 16 / 28

soon as possible and to fly with both brakes released, or even accelerated, as
this reduces the risk of a deep stall.
Cravates
After a big collapse or after a badly executed Full Stall, a part of the wing
might be tangled up in the lines, and won’t reopen automatically. This is what
you call a cravate. During our extensive test flights with the SuSi we never
experienced a cravate but this situation can not be eliminated with any
paraglider.
In case of a cravate we recommend the following actions:
1. Counter steer: Probably the wing wants to turn to the side of the
cravate. In some cases, the turning happens quickly and will end in a
stable deep spiral without the pilot’s action. So it is important to react
quickly by counter steering.
2. Opening the cravate by applying the brake with an impulse
movement: Some cravats can be opened with this method. It is
important to keep the wing in straight flight by pulling the other brake
all the time.
3. ulling the stabilo line: Some cravats can be opened by strongly
pulling the stabilo line. (It is the orange line on the B riser. Have a
look at it or grab it every once in a while and you will be able to react
quicker in a moment of danger.)
4. Induce a collapse on the side with the cravate. Sometimes this helps
as well to get rid of the cravate.
5. Full stall: Many cravats can be opened by using the Full Stall. But of
course you have to have solid experience with this manoeuvre to be
able to use it properly.
6. Reserve: If you loose control or if you are not absolutely sure that you
have enough height for further attempts to recover, immediately use
your reserve!
Many pilots wait way too long before using their reserve. Some don’t use the
reserve at all if they lose control of their glider. We strongly recommend to at
least mentally practice the use of the reserve from time to time: Grab the handle
of the reserve in flight, like you would do it in case of emergency. Many clubs
or schools offer to throw the rescue for example in a gym. The most realistic
way of training is to use the reserve in real flight. Many SIV Clinics offer that
as part of their training.
Vers.1.1 S. 17 / 28

Please use these possibilities: There are already too many pilots, who almost
forgot that they have a reserve they could use, which is a very bad precondition
to use it without hesitating in a dangerous moment.
Winch launch
The SuSi is very easy to launch on the winch. You should start to climb at a flat
angle.
We recommend the use of a towing device which accelerates the glider during
the winch launch.
Speed system
Mounting the speed system
Most harnesses have two pulleys on each side. Some light harnesses have
simple rings instead. Guide the accelerator ropes (included in the delivery)
from top to bottom through these pulleys. Then fix the speed bar on the bottom
of the ropes.
It is important to adjust the length correctly. If you set it too short, the glider
might fly accelerated all the time, which definitely has to be avoided. If you set
it too long, you might not be able to use the full accelerator travel.
We suggest adjusting the length quite long and then try to estimate the free
travel in flight to shorten it after the flight.
Using the accelerator in flight
If you push the speed travel all the way, the SuSi will gain approximately
13km/h speed. (Compared to “hands off”speed) It makes sense to use the
accelerator when flying into a headwind or through sinking air – or simply to
move forward faster.
Attention:
It doesn’t make sense to apply the brakes during accelerated flight. This
will reduce the glide performance considerably, and it will make the wing
more unstable. (Unlike in non accelerated flight!)
Vers.1.1 S. 18 / 28

To turn, simply shift weight, or push the speed bar asymmetrically. (If you push
the right side further, the wing will perform a left turn.)
You can also use the accelerator for pitch control: If the glider pitches up, push
the speed bar more, if it pitches down, release the speed bar.
Measurements of the speed systems (publication required by EN 926)
If you use all the available accelerator travel, the A riser is shortened by 17,5cm
compared to the C riser, which keeps its initial length.
Service and maintenance
General advice
To keep your glider in good condition for many years, please consider the
following advice:
•Don’t expose your glider to unnecessary UV radiation – for example
by leaving it on the landing site unpacked.
•Don’t fold the Mylar reinforcements at the cell openings too hard.
•If you pack the glider when it is wet or just damp, it has to be dried
later. Don’t leave it packed in a wet condition!
•When you practice ground handling, avoid crashing the glider hard on
the ground with the leading edge, as this might lead to damage.
•Avoid unnecessary dirt or sharp stones touching the lines and the
cloth. Don’t step on the lines if they are laying on a stony surface!
•Humidity combined with dirt can lead to shrinking of the lines and
thereby to the wrong trim on your glider. Salt water (sweat) may
damage the lines in the long run.
•To store your glider for a longer time, avoid a humid or a very hot
environment. (Like in a car during hot summer days)
Cleaning
To clean the wing, only use water and a cleaning cloth. Never use any solvents.
If there is sand, dirt or small stones inside the canopy, you should remove them
because they will damage the coating of the cloth and the seams in the long run.
Vers.1.1 S. 19 / 28

Repair
Repairs may only be performed by authorised service centres or by NOVA.
You can repair small holes or tears in the cloth (smaller than 5cm) yourself
with a special self adhesive repair tape. (You can order it at NOVA or in any
service centre.) If you are not sure about the damage, or if the damage affects
parts of a seam, please contact NOVA. (info@nova wings.com)
Check
We suggest a trim inspection (Nova Trim Tuning NTT) in the first year after
the date of purchase. In the case that the NTT is done, the next full check (NFS:
NOVA full service) has to be done 3 years after purchase. In the case that the
NTT is not done, the wing needs a full check after 2 years. The check expert
can define the next check interval on the basis of the wing’s condition. In areas
where conditions are harsh on the material (i.e. by salty air next to the coast),
an annual complete check (NFS) is strongly recommended! The check has to be
confirmed with the check stamp on the stabilo. All necessary documents for the
inspection can be found on the NOVA homepage (http://www.nova
wings.com): Downloads: Check.
More information about our check system:
http://www.nova wings.com/english/info_zone/ntt.html
Environment friendly behaviour:
Apart from self evident things, like not leaving your rubbish behind, we would
like to appeal for a thoughtful behaviour towards animals, like birds of prey or
game animals. If you notice, that your fly by affects those animals (like
causing a shortening reaction) please increase your distance.
Disposal:
Disused paragliders need a proper disposal. If you are not sure about the correct
removal, please send your glider to NOVA
Vers.1.1 S. 20 / 28
Table of contents
Other Nova Aircraft manuals