NuStep, Inc. •
5111 Venture Drive, Ann Arbor MI 48108
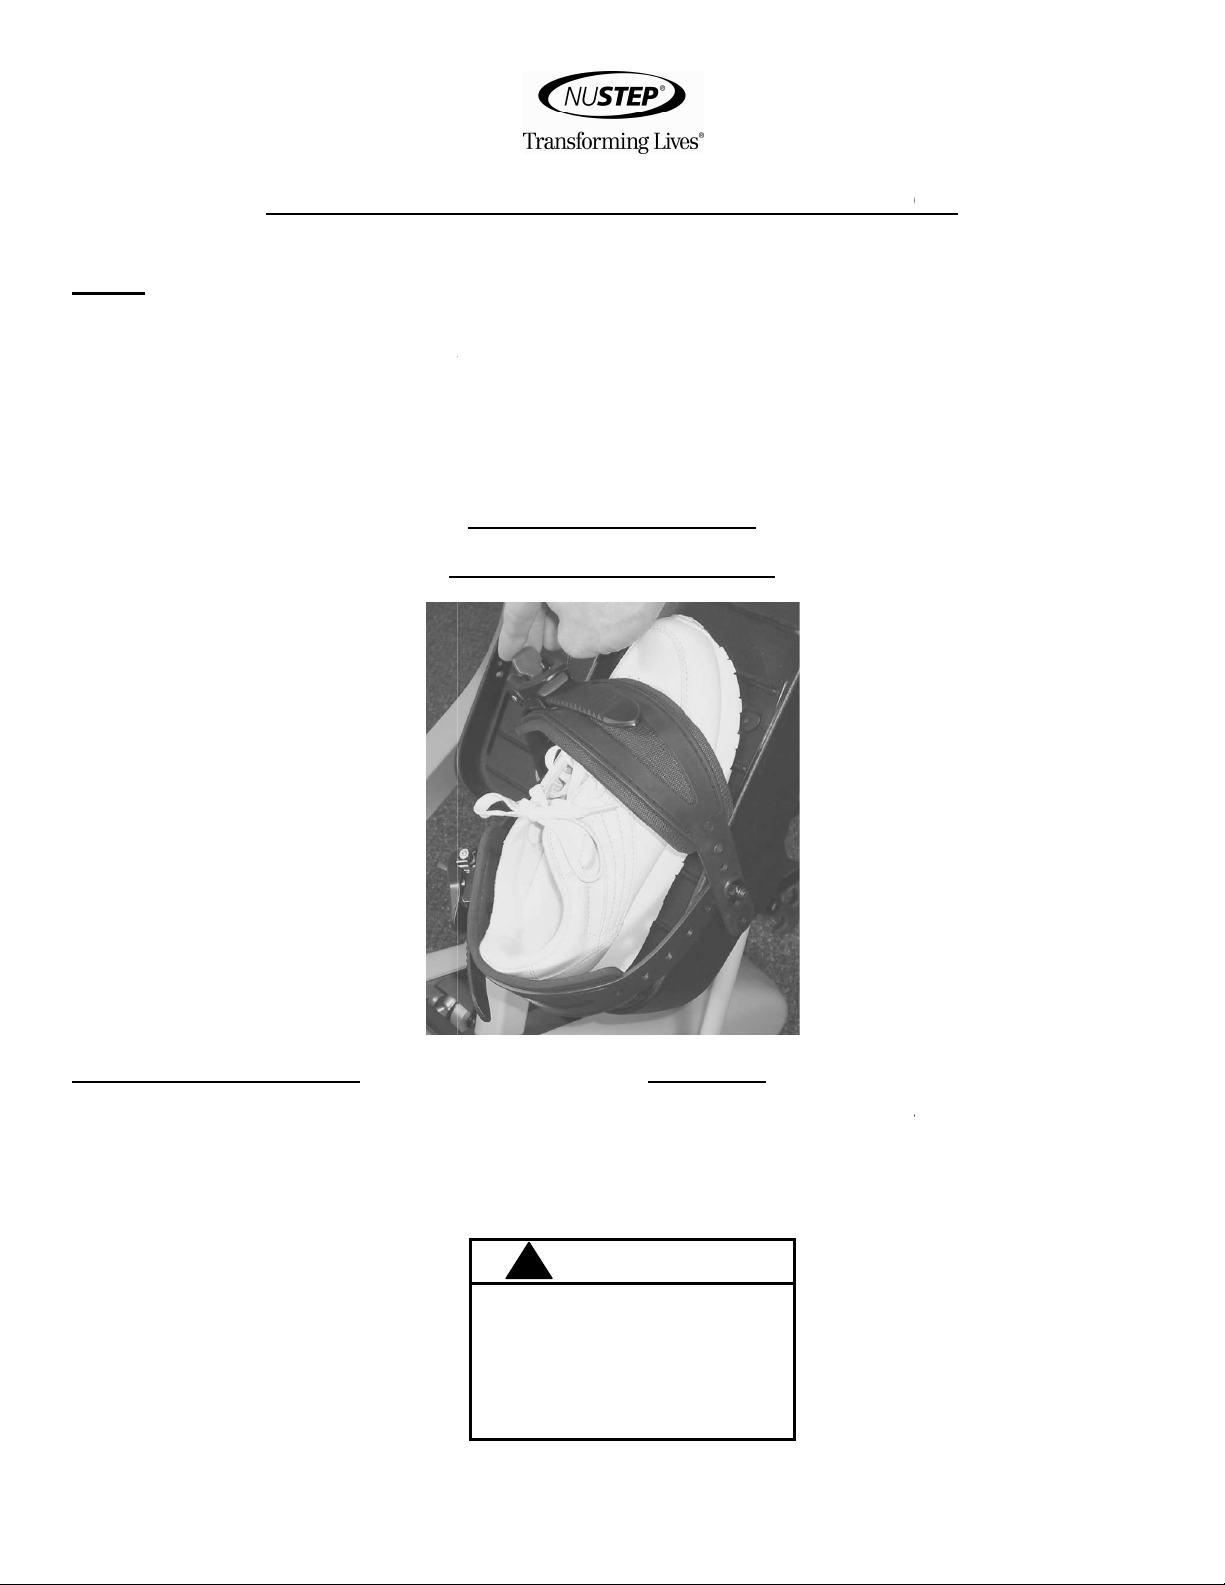
How to Use
To Use
Simply place foot on the foot pedal
, thread the ladder strap into the ratchet strap buckle,
strap using the ratchet until the desired tightness is reached. Then, position and secure the ankle strap in
place using its ratchet straps.
Use of the heel st
rap will prevent a user’s foot from falling off the pedal during the stepping motion if their heel
raises, or if a user cannot produce enough dorsal flexion.
Push BLACK Lever to BUCKLE
Strap Materials (Latex Free)
•EVA foam padding
•PU strapping
•Rubber
•Nylon
5111 Venture Drive, Ann Arbor MI 48108
USA • 800-322-
- T4 Foot Secure System, Retrofit Kit Installation, Rev A
® T4
(Right foot pedal shown)
, thread the ladder strap into the ratchet strap buckle,
strap using the ratchet until the desired tightness is reached. Then, position and secure the ankle strap in
rap will prevent a user’s foot from falling off the pedal during the stepping motion if their heel
raises, or if a user cannot produce enough dorsal flexion.
Pull RED lever to RELEASE
Push BLACK Lever to BUCKLE
Care Guide
Use an all-purpose non-
cleaner and a soft cloth.
Foot restraint.
User may not be able to remove
foot once installed.
To avoid injury, do not over
tighten straps.
Supervise use of product.
Page 3 of 3
, thread the ladder strap into the ratchet strap buckle,
and tighten the heel
strap using the ratchet until the desired tightness is reached. Then, position and secure the ankle strap in
rap will prevent a user’s foot from falling off the pedal during the stepping motion if their heel
-bleach