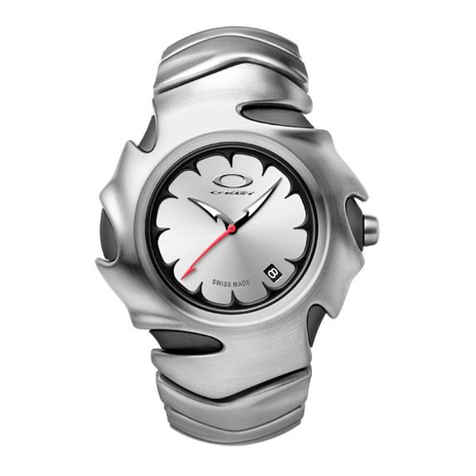
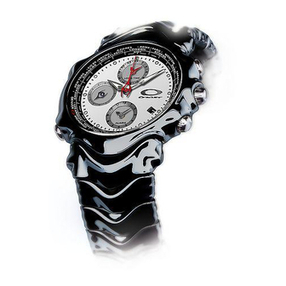
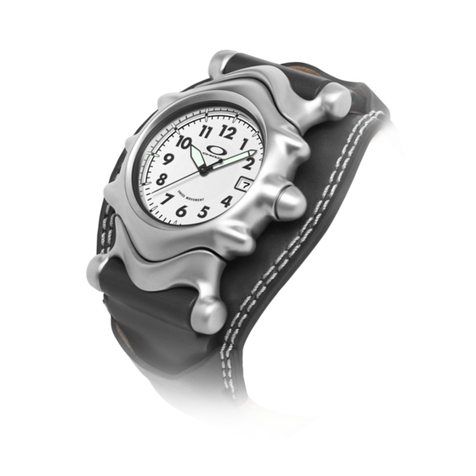
Oakley Hollow Point User manual

®


TABLE OF CONTENTS
ENGLISH 2-13
DEUTSCH 14-25
ESPAÑOL 26-37
FRANCAIS 38-49
ITALIANO 50-61
JAPANESE 62-73
MAGYAR 74-85
PORTUGUÊS 86-97

2| Hollow Point™inStRUCtion MAnUAl

Hollow Point™inStRUCtion MAnUAl | 3
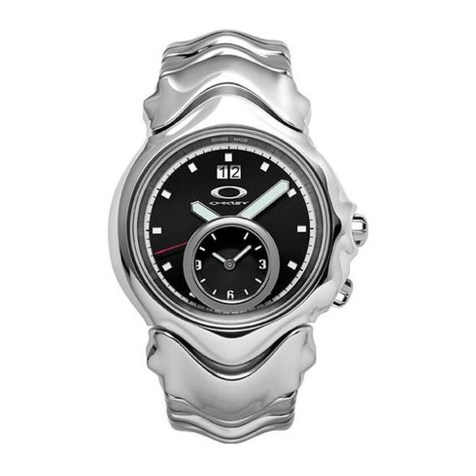
HOLLOw POiNT™
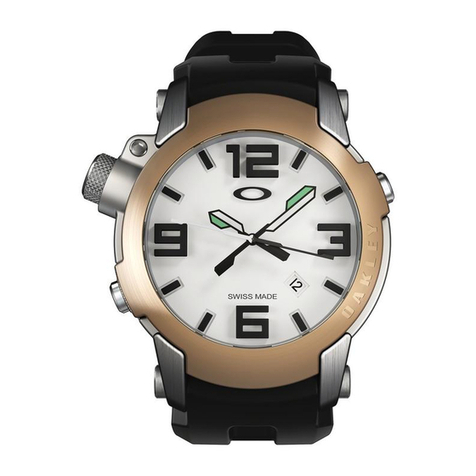
A peerless time machine that features Swiss Made 13-jewel movement with gold plating for optimized accuracy,
Hollow Point™measures each second with 32,768 vibrations of a tuning fork. The case and bracelet are composed
of titanium to offer the premium comfort of low weight with durability that surpasses steel. Hollow Point honors the
purity of machine language with the art of an analog display.
Cutaways form subtle dimensional reliefs in the dial face of this exceptional Oakley rendition. Sub dials show elapsed
seconds, minutes and hours for the chronograph, and an easy-to-read date indicator highlights the display. Anti-
reflective coating augments a crystal composed of pure sapphire, the hardest crystal used in watchmaking. A screw-
down crown enhances water resistance that can withstand 10 bar pressure, equivalent to a depth of 330 feet (100m).
Hollow Point performs with the longevity of a 48-month battery.

4| Hollow Point™inStRUCtion MAnUAl
The timepiece has a locking screw-down crown for
water resistance. You must unscrew the crown before
pulling it out to the click positions that let you set the
date and time.
The first click position is for setting the date. The second
click position is for setting the time.
To set the timepiece the first time (or to reset the date
and time after the battery is replaced), do the following:
1. Unscrew the crown from the case. Pull the crown out
to the first click position (a).
2. Turn the crown clockwise until yesterday’s date appears.
3. Pull the crown out to the second click position (b).
4. Turn the hands clockwise until today’s date appears,
then continue forward until the current time is
reached. If the current time is in the afternoon or
evening, move the hour hand all the way around the
dial to pass 12 o’clock noon.
5. Push the crown back in. Gently turn the crown
clockwise while pushing it inward toward the case,
until it screws back into the case. Be careful not to over
tighten the crown, as this will damage the mechanism.
To set the exact second, wait until the hand on the
second-counting sub dial (at the right of the main dial
face) reaches “60” before you pull out the crown to
the second click position (b). Set the time then wait
until the exact second is reached before pushing the
crown back in.
SETTiNG THE DATE AND TiME
a b
Date
Crown

Hollow Point™inStRUCtion MAnUAl | 5
TO SET THE TIME
1. Unscrew the crown from the case.
2. Pull the crown out to the second click position (b).
3. Turn the crown until you reach the correct time.
4. Push the crown back in. Gently turn the crown
clockwise while pushing it inward toward the case,
until it screws back into the case. Be careful not to over
tighten the crown, as this will damage the mechanism.
TO SET THE DATE
1. Unscrew the crown from the case.
2. Pull the crown out to the first click position (a).
3. Turn the crown clockwise until you reach the correct date.
If the current time is between 9 PM and midnight, set
the date to the following day. (This is necessary to
ensure the display will normally change at midnight
instead of 12 noon.)
4. Push the crown back in. Gently turn the crown
clockwise while pushing it inward toward the case,
until it screws back into the case. Be careful not to over
tighten the crown, as this will damage the mechanism.
Setting the date too quickly can result in the incorrect
date being displayed. To restore synchronization,
turn the crown clockwise to go through the range of
date settings (from 01 to 31) when performing the
instructions above.
TO ADjuST THE TiME AND DATE FOr SuBSEquENT SETTiNGS, uSE THESE SHOrT PrOCEDurES

6| Hollow Point™inStRUCtion MAnUAl
The chronograph includes three separate hands:
•Thelarge,narrowhandonthemaindialfacecounts
seconds. One full rotation is 60 seconds.
•The sub dial at the left of the dial face counts
minutes. One full rotation is 30 minutes.
•When timing begins, the sub dial at the bottom of the
dial face counts 1/10 seconds. One full rotation is 1
second. After 30 minutes, the sub dial counts hours.
One full rotation is 10 hours.
The chronograph is controlled with two push buttons:
•Button“A”startsandstopsthetimer.
•Button“B”hasseveralfunctions.Itisusedtopause
the display at the current split time (also called
“intermediate time”). It is also used to make the
chronograph hands move forward to the ongoing
time being measured. Finally, it is used to reset the
chronograph hands to the zero position.
Before using the chronograph, ensure the crown is fully
screwed in against the case and not at one of the click
positions used for setting time and date. The three
chronograph hands should align precisely at the zero
position. If they do not, see the section on Adjusting the
Chronograph Hands.
uSiNG THE CHrONOGrAPH
a b
Chronograph
Second Hand
Chronograph
1/10 Second Button B
Button A
Seconds
Counter
Chronograph
Minutes

Hollow Point™inStRUCtion MAnUAl | 7
to MEASURE ADDED tiME
Added time (cumulative time) is a measure of how much
time has passed without including pauses. This feature lets
you exclude the time intervals you do not want to measure.
START TIMING
•Pressbutton“A”.
STOP TIMING TEMPORARILY
•Pressbutton“A”tostoptimingtemporarily.
•Pressbutton“A”againtocontinuetiming.
Continue to use button “A” to add additional time
intervals to the total measure of time. When using
button “A” only, the time that passes while the
chronograph hands are not moving IS NOT ADDED to
the total measure of time. See below if you wish to
include this “split time” in the total measure of time.
RESET
•Whiletimingisstopped,pressbutton“B”.
to MEASURE SPlit tiME
Split time (intermediate time) is a measure of the current
time total, taken without stopping the timing circuit. The
hands pause so you can read them, then they catch up to
the ongoing time total.
START TIMING
•Pressbutton“A”.
PAUSE THE HANDS BUT CONTINUE TIMING
•Pressbutton“B”topausethechronographhandsand
read the current time total.
Although the hands are no longer moving, time is still
being measured.
•Press button “B” again to move the hands to the
currently running time total.
Continue to use button “B” to pause the hands when
desired. Time continues to be measured.
STOP TIMING AND DISPLAY THE FINAL TIME TOTAL
•Whilethehandsaremoving,pressbutton“A”tofully
stop timing and display the total time measured.
RESET
•Whiletimingisstopped,pressbutton“B”.
uSiNG THE CHrONOGrAPH - CON’T

8| Hollow Point™inStRUCtion MAnUAl
to ADJUSt tHE CHRonoGRAPH HAnDS
1. If the chronograph hands currently show a measured
time, use button “B” to reset them near the zero position.
Note that the hands must be stopped before using
button “B” to reset them. If necessary, use button “A”
to stop the hands.
2. Unscrew the crown from the case. Pull the crown out
to the second click position (b).
3. Push button “A” and button “B” simultaneously and
keep them pressed for at least 2 seconds.
4. Adjust the chronograph hands by doing the following:
• Press button “A” to adjust the chronograph hand
that counts seconds. (Press and hold the button for
continuous movement.)
• Pressbutton“B”tofinishwiththathandandmove
on to the other hands.
• Press button “A” to adjust the chronograph hand
that counts 1/10 seconds, then the hand that
counts minutes. (Press and hold the button for
continuous movement.)
5. Push the crown back in. Gently turn the crown
clockwise until it screws back into the case. Be
careful not to over tighten the crown, as this will
damage the mechanism.
a b
Chronograph
Second Hand
Chronograph
1/10 Second Button B
Button A
Seconds
Counter
Chronograph
Minutes
ADjuSTiNG THE CHrONOGrAPH HANDS
When the chronograph is reset with button “B,” the three chronograph hands return to the zero position. If these
hands do not align precisely with the zero position (such as after the battery is replaced), use the following procedure
to adjust them.

Hollow Point™inStRUCtion MAnUAl | 9
POwEr SAViNG MODE
When the timepiece is not in use, the battery life can be prolonged by pulling the crown out to the second click
position (b). This will stop the hands and reduce power consumption.
BATTErY rEPLACEMENT
The miniature battery that powers the timepiece is designed to last approximately 48 months. However, because
the battery is inserted at the factory for extensive performance checks, its actual life, once in your possession, may
be less.
Battery replacement may be performed only by an Authorized Oakley Service Center. Any attempt to open the watch
case by persons other than Authorized Oakley Service Professionals will void the product warranty.
Within the United States, call Oakley global headquarters at 1-800-403-7449 to find an Authorized Oakley Timepiece
Service Professional near you. Customers outside the United States should contact their local Authorized Oakley
Timepiece Dealer or visit the Oakley website at www.oakley.com for the number of the nearest Oakley distributor.
BAND ADjuSTMENT
If links need to be added or removed from the metal band, the adjustment should be done by an Authorized Oakley
Timepiece Dealer. Do not attempt to shorten the band by removing links yourself, as this may result in damage to
the bracelet.
CLEANiNG
Failure to keep the case and bracelet clean may result in a skin rash. Use a soft, clean cloth to wipe off any moisture
that adheres to the case or bracelet.

10 | Hollow Point™inStRUCtion MAnUAl
COMPOSiTiON
CASE BODY...............................................................................................................................Impact-forged titanium
CASE BACK.................................................................................................................................Screw-down titanium
MANUFACTURING.......................................................... High-precision Computer Numeric Control (CNC) machining
CRYSTAL.............................................................................................................Sapphire with anti-reflective coating
CROWN............................................................................................Locking screw-down design for water resistance
BRACELET........................................................................................................................Titanium w/ deployant clasp
SPECiFiCATiONS
MOVEMENT...........................................................................................................Swiss Made, gold plated, 13-jewel
TYPE OF OSCILLATOR .......................................................................................................................Quartz tuning fork
FREQUENCY OF OSCILLATOR.....................................................................................................32,768 cycles per sec.
ACCURACY .................................................................................................................................-10 /+20 sec. per mo.
THERMAL OPERATING MIN...........................................................................................................................0ºC (32ºF)
THERMAL OPERATING MAX...................................................................................................................... 50ºC (122ºF)
BATTERY................................................................................................................ Silver oxide: No. 395 / SR 927 SW
BATTERY ENDURANCE................................................................................................................... Approx. 48 months

Hollow Point™inStRUCtion MAnUAl | 11
SAFEGuArDiNG
WATER EXPOSURE
Prior to exposing the timepiece to water, ensure the crown is pushed fully down against the case then turn it clock-
wise to tighten the water seal. (Be careful not to over tighten the crown, as this will damage the mechanism.) Rated
at 10-bar hydrophobic, the timepiece may be worn during bathing, swimming and shallow diving. It is not designed for
scuba or saturation diving. Do not pull out the crown or use the buttons if the timepiece is wet. If used in seawater,
rinse the timepiece with fresh water and dry completely.
TEMPERATURE
For precision timekeeping, normal operating temperature is 0°C to 50°C (32°F to 122°F).
MAGNETISM
Strong magnetic fields can have an adverse effect on the timepiece. Keep it away from magnetic objects.
CHEMICALS
The timepiece may become discolored or damaged if exposed to cosmetic spray, detergents, adhesives, solvents,
or paints.
SHOCK WAVE
Although the timepiece resists shock damage, impact against a hard surface may cause damage to the movement
or crystal.
PERIODIC MAINTENANCE
To ensure that the case, crown, crystal seal, and gasket remain resistant to water exposure, it is recommended that
the timepiece be inspected once every 2 to 3 years by an Authorized Oakley Service Center.

12 | Hollow Point™inStRUCtion MAnUAl
OAKLEY LiMiTED wArrANTY
All authentic Hollow Point®timepieces are warranted to the original purchaser for two years from the date of
purchase against manufacturer’s defects. Coverage is valid only with proof of purchase from an Authorized Oakley
Timepiece Dealer. If Oakley determines during the warranty period that the product is defective as a result of
manufacturing defects in materials and workmanship, Oakley will repair or replace (at its sole option) the product.
IMPORTANT
This limited warranty does not cover the crystal, strap/band/bracelet, or attachments. The deterioration of leather
components is not covered, nor are scratches to the case caused by use, nor is moisture damage if the timepiece is
a non-hydrophobic model, nor is damage caused by natural disaster such as fire, flood, or earthquake. We reserve
the right to relinquish all responsibility under this guarantee for repair of damage when misuse or abuse is evident,
including defects related to tampering or servicing done by agents other than Authorized Oakley Service Facilities.
This warranty gives you specific rights, and you may also have other rights which vary from state to state.
To qualify for service under the above guarantee, you must present a valid proof of purchase which clearly shows
the purchase date and the name of the Authorized Oakley Timepiece Dealer when making a repair claim during the
warranty period.
Swiss Movement
Swiss Made

Hollow Point™inStRUCtion MAnUAl | 13
HOw TO MAKE A wArrANTY CLAiM
Within the United States, call the Oakley Global Headquarters number listed below. Please have your purchase
information ready. Customers outside the United States should contact their local Authorized Oakley Timepiece
Dealer or use the list below to call the nearest regional Oakley headquarters.
Oakley Global Headquarters, USA: 1 (800) 403-7449
Oakley Africa: +27 21 486 6100
Oakley Brasil Ltda.: +55-11-4003 7822
Oakley Canada: +1-877-625-5396
Oakley Europe: 00 800 62 55 39 38
Oakley Japan: +81-120-009-146
Oakley UK +44-(0)1727-795-791
Oakley South Pacific (Australia): +61-(1)800-637-001
Oakley South Pacific (New Zealand): +0800 NZ OAKLEY (Toll Free) or +64-09-366-7667

14 | Hollow Point™BEDiEnUnGSAnlEitUnG

Hollow Point™BEDiEnUnGSAnlEitUnG | 15
HOLLOw POiNT™
Die Hollow Point™, eine unvergleichliche Zeitmaschine mit einem Swiss Made-Uhrwerk mit 13 Edelsteinen und
Goldbeschichtung für optimale Präzision, misst jede Sekunde mit 32.768 Schwingungen einer Stimmgabel. Das
Gehäuse und das Armband sind aus Titan gefertigt, um den erstklassigen Komfort einer Kombination aus niedrigem
Gewicht und Beständigkeit zu bieten, der die Eigenschaften von Stahl bei Weitem übertrifft. Die Hollow Point ehrt die
Reinheit der Maschinensprache mit der Kunst eines analogen Zifferblatts.
Schnittzeichnungen bilden subtile dreidimensionale Reliefs im Zifferblatt dieses außerordentlichen Oakley-
Modells. Kleinere Zifferblätter zeigen die verstrichenen Sekunden, Minuten und Stunden für den Chronographen
an. Abgerundet wird das Erscheinungsbild durch eine leicht lesbare Datumsanzeige. Die Antireflexbeschichtung
optimiert das Kristallglas aus reinem Saphir - dem härtesten für die Herstellung von Uhren verwendeten Glas. Eine
Schraubkrone erhöhte die Wasserfestigkeit bis auf einen Druck von 10 bar, was einer Tiefe von 100 m (330 Fuß)
entspricht. Angetrieben wird die Hollow Point durch eine beständige, 48 Monate lang haltbare Batterie.

16 | Hollow Point™BEDiEnUnGSAnlEitUnG
Die Uhr ist mit einer fest schließenden Schraubkrone
versehen, die eine optimale Wasserfestigkeit
gewährleistet. Sie müssen die Krone aufschrauben,
bevor Sie sie in die Klickpositionen herausziehen können,
mit denen Datum und Uhrzeit eingestellt werden.
Über die erste Klickposition wird das Datum eingestellt.
Über die zweite Klickposition wird die Uhrzeit eingestellt.
Gehen Sie folgendermaßen vor, um die Uhr erstmalig
einzurichten (oder um Datum und Uhrzeit neu einzustellen,
nachdem die Batterie ersetzt wurde):
1. Schrauben Sie die Krone vom Gehäuse weg. Ziehen
Sie die Krone in die erste Klickposition (a).
2. Drehen Sie die Krone im Uhrzeigersinn, bis das
gestrige Datum angezeigt wird.
3. Ziehen Sie die Krone in die zweite Klickposition (b).
4. Drehen Sie die Zeiger im Uhrzeigersinn, bis das heutige
Datum angezeigt wird. Drehen Sie ihn dann weiter
vorwärts, bis die aktuelle Zeit erreicht wurde. Wenn
Sie dies am Nachmittag oder Abend tun, bewegen Sie
den Stundenzeiger einmal um das Zifferblatt herum, an
der Position für 12 Uhr Mittags vorbei.
5. Drücken Sie die Krone wieder hinein. Drehen Sie
die Krone sanft im Uhrzeigersinn, und drücken Sie
sie dabei gegen das Gehäuse, bis sie wieder an das
Gehäuse angeschraubt ist. Achten Sie darauf, die
Krone nicht zu stark anzuziehen, da hierdurch der
Mechanismus beschädigt werden kann.
Um die genaue Sekundenzeit einzustellen, warten Sie, bis
der Zeiger des Sekundenzifferblatts (auf der rechten Seite
des Hauptzifferblatts) „60“ erreicht hat, bevor Sie die
Krone in die zweite Klickposition (b) herausziehen. Stellen
Sie dann die Uhrzeit ein, und warten Sie die genaue
Sekunde ab, bevor Sie die Krone wieder hineindrücken.
DATuM uND uHrZEiT EiNSTELLEN
a b
Datum
Krone

Hollow Point™BEDiEnUnGSAnlEitUnG | 17
EINSTELLUNG DER UHRZEIT
1. Schrauben Sie die Krone vom Gehäuse weg.
2. Ziehen Sie die Krone in die zweite Klickposition (b).
3. Drehen Sie die Krone, bis Sie die richtige Zeit
erreicht haben.
4. Drücken Sie die Krone wieder hinein. Drehen Sie
die Krone sanft im Uhrzeigersinn, und drücken Sie
sie dabei gegen das Gehäuse, bis sie wieder an das
Gehäuse angeschraubt ist. Achten Sie darauf, die
Krone nicht zu stark anzuziehen, da hierdurch der
Mechanismus beschädigt werden kann.
EINSTELLUNG DES DATUMS
1. Schrauben Sie die Krone vom Gehäuse weg.
2. Ziehen Sie die Krone in die erste Klickposition (a).
3. Drehen Sie die Krone im Uhrzeigersinn, bis Sie das
richtige Datum erreicht haben.
Wenn Sie dies zwischen 21:00 Uhr und Mitternacht tun,
richten Sie das Datum auf den folgenden Tag ein. (Dies
ist erforderlich, um sicherzustellen, dass die Anzeige
normal um Mitternacht und nicht mittags umspringt.)
4. Drücken Sie die Krone wieder hinein. Drehen Sie
die Krone sanft im Uhrzeigersinn, und drücken Sie
sie dabei gegen das Gehäuse, bis sie wieder an das
Gehäuse angeschraubt ist. Achten Sie darauf, die
Krone nicht zu stark anzuziehen, da hierdurch der
Mechanismus beschädigt werden kann.
Wird das Datum zu schnell eingestellt, so kann dies
dazu führen, dass das falsche Datum angezeigt wird.
Um die Synchronisierung wiederherzustellen, drehen
Sie bei Befolgung der obigen Anweisungen die Krone
im Uhrzeigersinn, um die Datumseinstellungen (von 01
bis 31) zu durchlaufen.
VErwENDEN SiE DiE NACHFOLGEND BESCHriEBENEN SCHNELLVErFAHrEN, uM DiE uHrZEiT
uND DAS DATuM iN DEr ZuKuNFT ANZuPASSEN

18 | Hollow Point™BEDiEnUnGSAnlEitUnG
Der Chronograph umfasst drei separate Zeiger:
•Der große enge Zeiger im Hauptzifferblatt zählt die
Sekunden. Eine volle Umdrehung entspricht 60 Sekunden.
•DaskleinereZifferblattlinkszähltdieMinuten.Eine
volle Umdrehung entspricht 30 Minuten.
•Bei Beginn der Zeiterfassung zählt das kleine Zifferblatt
unten die Zehntelsekunden. Eine volle Umdrehung
entspricht 1 Sekunde. Nach 30 Minuten zählt das kleine
Zifferblatt die Stunden. Eine volle Umdrehung entspricht
10 Stunden.
Der Chronograph wird über zwei Drucktasten kontrolliert:
•Taste„A“startetundstopptdenZeitmesser.
•Taste „B“ hat mehrere Funktionen. Sie wird verwendet,
um die Anzeige bei der aktuellen Zwischenzeit
anzuhalten. Sie wird außerdem verwendet, um die
Zeiger des Chronographen zur laufenden derzeit
gemessenen Zeit vor zu bewegen. Darüber hinaus wird
sie noch verwendet, um die Zeiger des Chronographen
auf die Nullposition zurückzusetzen.
Bevor Sie den Chronographen verwenden, sollten
Sie sicherstellen, dass die Krone ganz ans Gehäuse
geschraubt ist und sich nicht in einer der für die
Einstellung der Uhrzeit bzw. des Datums verwendeten
Klickposition befindet. Die drei Zeiger des Chronographen
sollten genau in der Nullposition ausgerichtet sein.
Wenn dies nicht der Fall ist, siehe Abschnitt Anpassung
der Zeiger des Chronographen.
VErwENDuNG DES CHrONOGrAPHEN
a b
Chronograph
Zweiter Zeiger
Chronograph
Zehntelsekunden
Taste B
Taste A
Sekunden
Zähler
Chronograph
Minuten
Table of contents
Languages:
Other Oakley Watch manuals

Oakley
Oakley Jury II User manual

Oakley
Oakley D2 User manual

Oakley
Oakley BLADE II User manual

Oakley
Oakley Chronograph User manual

Oakley
Oakley TimeBomb User manual

Oakley
Oakley DETONATOR User manual

Oakley
Oakley Bullet User manual

Oakley
Oakley D1 User manual

Oakley
Oakley Crush User manual

Oakley
Oakley OAKLEY GEARBOX AUTOMATIC User manual

Oakley
Oakley OAKLEY GEARBOX User manual

Oakley
Oakley JUDGE II User manual

Oakley
Oakley Jury II User manual

Oakley
Oakley D2 User manual

Oakley
Oakley Bottle Cap User manual

Oakley
Oakley OAKLEY TRANSFER CASE User manual
Oakley
Oakley DOUBLE TAP User manual
Oakley
Oakley kill switch User manual

Oakley
Oakley Full Metal Jacket User manual

Oakley
Oakley GMT User manual