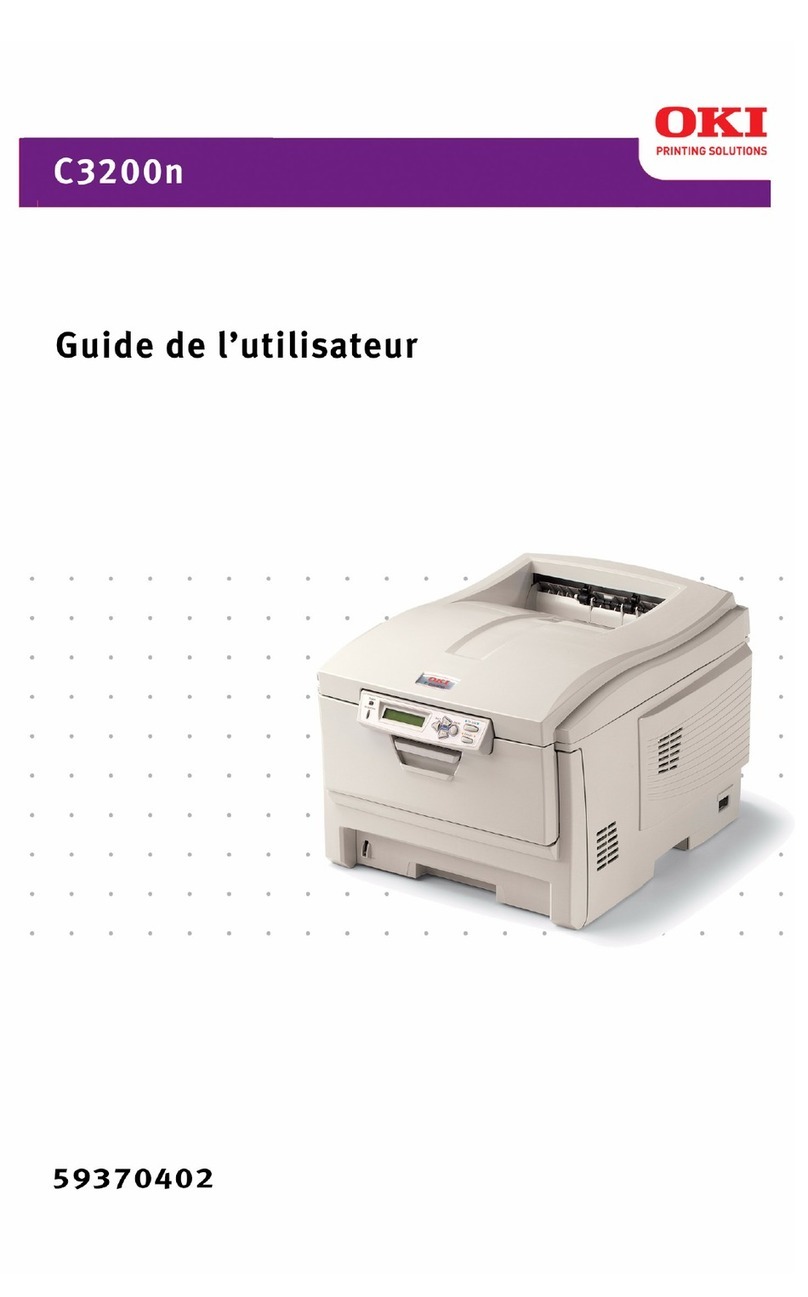
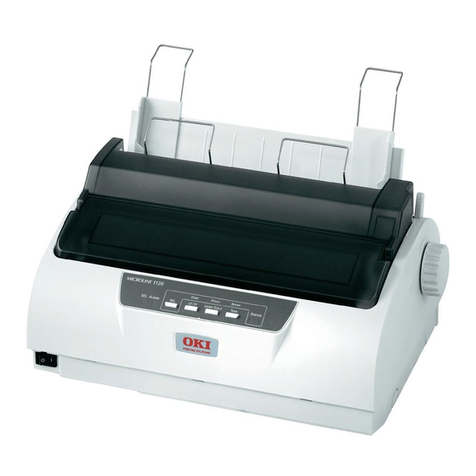
Oki LP470s User manual

1
Quick Guide
Guide rapide
Guía rápida
Guia rápido
LP470, LP480

2
English .....................................5
Français ...................................37
Español ...................................71
Português ................................105

3
Preface
Thank you for purchasing the Barcode Printer, LP470/LP480.
This manual is created so that a first-time user of LP470/LP480 can learn its
basic operations in a short time.
Please read this manual carefully to make full use of the functions of LP470/
LP480.
Cautions
1 Reproduction of all or part of this manual is prohibited.
2 The content of this manual is subject to change without notice.
3 This manual was created with utmost care regarding its content. However,
if you find any unclear points, errors, or omissions, please contact the
retail store or dealer where you purchased this printer.
To customers purchasing the Bluetooth or wireless LAN options:
Cautions regarding radio waves
This product is certified to meet technical standards based on the Radio Law.
Therefore, no wireless license is required to use this printer.
The following actions can be punishable by law:
•Disassemblyormodicationofthisprinter
•Removingthecerticationlabel(seriallabel)onthisprinter
Use in the following locations may drastically shorten the communication distance, or
prevent communication.
•Nearamicrowaveoven;locationswherestaticelectricityorradiowave
interferenceisabundant;nearwirelessLANequipment.
“Bluetooth” is a registered trademark of Bluetooth SIG, Inc.
USA.
Our company is using this trademark based on a licensing
contract with this association.
BeforeusingthewirelessLANinterface,besuretosetallsecurity-relatedsettingsfor
thewirelessLANequipmentaccordingtothismanual.
Caution! This printer can be damaged by exposure to water. Whenever you use it
outdoors, or in any area where it might be exposed to water, always place it in the
optionalwaterproofcase(OKI#70061205)toprotectitfromdamage.
Second Edition March 2010
©2010OkiDataAmericas,Inc.

4
Table of contents
Unpacking ...................................................... 5
NamesofParts .................................................. 6
NamesandFunctionsofOperatingParts........................... 8
Preparing for First-time Operation ................................... 9
Charging the Battery Pack....................................... 9
Installing and Removing the Battery Pack ......................... 11
UsingACAdapter............................................. 12
Loading Labels............................................... 13
Continuous printing mode ................................... 13
Dispensemodeprinting ..................................... 15
SwitchingfromDispensemodeprintingto
Continuous printing mode ................................. 17
Turning the Power On ............................................ 18
Test Printing.................................................... 19
Operation with an RS-232C Cable .................................. 20
Operation with a USB Cable....................................... 21
Operation via Infrared Communication .............................. 22
OperationwithBluetoothorWirelessLANOptions .................... 23
Printing........................................................ 23
DailyCare...................................................... 25
Operation Modes ............................................. 27
DIPSwitch .................................................. 35

5
Unpacking
Make sure you have all the printer components shown here. If any component
is missing, contact the retail store or dealer where you purchased the product
from.
Unpacking
2
9
2. Unpacking
Make sure you have all the printer components shown here. If any component is
missing, contact the retail store or dealer where you purchased the product from.
Reference
14
44
Head check setting mode
In the head check setting mode, a check can be performed in two checking areas: the
printing area and the barcode printing area.
The presence of the head check function and the head check range settings are set by the
DIP switch (DSW) settings when the power is turned on, by button pressing status, and by
the cover status.
DIP switch settings
Setting head check function
(STATUS LED flashes green)
DSW settings (A/B) + cover open + PRINT/FEED button + POWER
Setting completes
(STATUS LED lights green)
Note: When the buzzer sound mode is enabled, the buzzer sounds upon startup.
Release the PRINT/FEED button to stop the buzzer. To check the settings for head
check setting mode, see the test print output (See P. 23).
To end head check setting, confirm that the STATUS LED is on in green, then turn
power off. After changing the head check setting mode, be sure to restore the DSW
to their original settings.
(A)
(B)
DSW-1
OFF
ON
DSW-2
ON
OFF
DSW-3
OFF
OFF
DSW-4
ON
ON
DSW
settings
(A)
(B)
Button and cover status
PRINT button + cover open
FEED button + cover open
PRINT button + cover open
FEED button + cover open
Function
Head check range set as printing
area
Head check function set as disabled
Head check range set as barcode
printing area only
Head check function set as disabled
Default
Head check
range set as
printing area
Warranty
Quick Guide
Printer unit
Battery pack
Shoulder belt
* Theappearanceofanycushioningmaterialsupplied(suchasprotectorpadsonthe
printerholder)maybechangedacrossdifferentproductionbatches.

6
Names of Parts
Names of Parts
3
10
POWER button
Reference
14
43
Dispense mode printing
Dispense mode printing setting
Changing the dispense mode printing setting
The
dispenser
operation mode setting is changed by the DIP switch (DSW) settings when the
power is turned on, and by
button
settings. The settings are enabled upon turning the power
off.
Type
Automatic
printing setting
Manual printing
setting
Operation
Prints one label after receiving data, then waits for label to
be peeled. After the label is peeled, the next label is
printed automatically.
Prints one label after receiving data, then enters offline
status. When the PRINT button is pressed, the next label is
printed. After the specified number of labels are printed,
printing is ended, and no labels are printed when the
PRINT button is pressed.
Default
Manual
printing
setting
Note: When the buzzer sound mode is enabled, the buzzer sounds upon startup.
Release the PRINT/FEED button to stop the buzzer.
To end the dispenser operation mode setting, confirm that the STATUS LED is on in
green, then turn the power off. After changing the dispenser operation mode setting,
be sure to restore the DSW to their original settings.
1Automatic dispenser printing setting
DSW-1,2,3,4=(OFF,OFF,OFF,ON) + cover open+ PRINT button + POWER
2Manual dispenser printing setting
DSW-1,2,3,4=(OFF,OFF,OFF,ON) + cover open + FEED button + POWER
Processing dispenser operation mode setting
(STATUS LED flashes green)
Setting completes
(STATUS LED lights green)
Easy cutter
Label dispenser
Main cover
Cover release lever
Dispenserunit
Battery life
indicator(LED)
STATUS(LED)
Infrared communication sensor
USB/DIPswitchcover
Battery cover
RS-232C cover
Names of Parts
3
10
Battery life indicator
(LED) *2
3. Names of Parts
Easy cutter
Main cover
Cover release lever
Dispenser unit
Battery cover
Label dispenser
USB/DIP switch cover
Reference
14
43
Dispense mode printing
Dispense mode printing setting
Changing the dispense mode printing setting
The
dispenser
operation mode setting is changed by the DIP switch (DSW) settings when the
power is turned on, and by
button
settings. The settings are enabled upon turning the power
off.
Type
Automatic
printing setting
Manual printing
setting
Operation
Prints one label after receiving data, then waits for label to
be peeled. After the label is peeled, the next label is
printed automatically.
Prints one label after receiving data, then enters offline
status. When the PRINT button is pressed, the next label is
printed. After the specified number of labels are printed,
printing is ended, and no labels are printed when the
PRINT button is pressed.
Default
Manual
printing
setting
Note: When the buzzer sound mode is enabled, the buzzer sounds upon startup.
Release the PRINT/FEED button to stop the buzzer.
To end the dispenser operation mode setting, confirm that the STATUS LED is on in
green, then turn the power off. After changing the dispenser operation mode setting,
be sure to restore the DSW to their original settings.
1Automatic dispenser printing setting
DSW-1,2,3,4=(OFF,OFF,OFF,ON) + cover open+ PRINT button + POWER
2Manual dispenser printing setting
DSW-1,2,3,4=(OFF,OFF,OFF,ON) + cover open + FEED button + POWER
Processing dispenser operation mode setting
(STATUS LED flashes green)
Setting completes
(STATUS LED lights green)
DCinputterminalcover
LCD*1
FEEDbutton
PRINTbutton
POWER button

7
Names of Parts
3
11
234
4
D
1
ON
110
100
90
80
70
60
*1Only provided on wireless LAN interface operating panel (manufacturer option). For
other options, see “Options” on page 35.
*2On a wireless LAN interface operating panel (manufacturer option), a CHARGE LED is
provided.
Reference
14
42
Test printing mode (FEED button + POWER ON)
FEED
button
FEED
button
FEED
button
The LED display for the test printing mode is as follows.
Operation status STATUS (LED)
Starting test printing mode ON (orange)
Test printing initializing Blinking (green)
Test printing ON (green)
Stop printing OFF
* When the buzzer sound mode is enabled, the buzzer sounds upon startup.
Release the FEED button to stop the buzzer.
POWER ON
Start test printing
Test printing
Stop printing
FEED button + POWER
Label guide Label width scale Label guide stopper
Label guide
Platen
RS-232C connector
DIPswitch
USB connector
*1 OnlyprovidedonwirelessLANinterfaceoperatingpanel(manufactureroption).
*2 OnawirelessLANinterfaceoperatingpanel(manufactureroption),aCHARGELED
is provided.

8
Names and Functions of Operating Parts
RS-232C cover:
This covers the RS-232C connector.
RS-232C connector:
Connects with a PC etc.
USB/DIP switch cover:
CoverstheUSBconnectorandDIP
switch.
USB connector:
Connects with a PC etc.
Main cover:
Open this cover to set the labels.
Cover release lever:
Use this to release the main cover.
Easy cutter:
Cuts the printed label.
Infrared communication sensor:
Contains an infrared receiver/
transmitter element.
DIP switch:
Setstheoperationmode.(Seep.34)
Dispenser unit:
MovethiswhenusingDispensemode
printing for the labels.
POWER button:
Turns the power on and off.
Battery cover:
Aspecializedbatterypackisplaced
inside.
Battery life indicator (LED):
Displaystheavailablebatterypower.
Label guide:
Setthistomatchthesizeofthelabel
width used.
Label guide stopper:
Press this toward the back to unlock
the label guide and adjust the label
guide.
Label dispenser:
Printed labels are ejected here.
Label width scale:
Use this scale to match the label width
used.
DC input terminal:
ConnecttheACadapter.
DC input terminal cover:
CoverfortheDCinputterminal.
FEED button:
Feeds the labels.
PRINT button:
TakestheprinterONLINEandOFFLINE.
STATUS (LED):
Displaystheprinterstatus.(See
p.27-33)

9
Preparing for First-time Operation
Charging the Battery Pack
•Chargingbyinstallingthebatterypackinthebatterycharger(optional)
Installthebatterypackinthebatterycharger(optional)andchargeit.
The optional battery charger set provided for this printer is specific to this
printer.
Donotuseitforotherelectricequipment.
➊Connect the power cord to the
charger unit, then plug it into the
outlet.
•Whenchargingiscomplete,theCHARGE
lamplightsgreen(fullycharged).
Preparing for First-time Operation
4
13
1Connect the power cord to the
charger unit, then plug it into the
outlet.
•When charging is complete, the
CHARGE lamp lights green (fully
charged).
4. Preparing for First-time Operation
Charging the Battery Pack
•Charging by installing the battery pack in the battery charger (optional)
Install the battery pack in the battery charger (optional) and charge it.
CHARGE
The optional battery charger set provided for this printer is specific to this printer.
Do not use it for other electric equipment.
Charging time
It takes about 1.5 hours for the CHARGE lamp to turn off when charging a completely
depleted battery.
2Insert the battery pack. Insert the
battery pack into the slot, with
the terminal pointing downward.
•When charging begins, the
CHARGE lamp (red) lights. When
charging is complete, the CHARGE
lamp lights green (fully charged).
3Remove the battery pack when
charging is complete.
Reference
14
40
Operation Modes
There are two printer operation modes: continuous printing mode, and dispense
mode printing. Test printing and online printing are available in both modes.
* Use the printer setting tool to set dispense mode printing (non-separated labels).
1234567
ABCDEFG
abcdefg
1234567
ABCDEFG
abcdefg
1234567
ABCDEFG
abcdefg
1234567
ABCDEFG
abcdefg
Continuous printing Dispenser printing
(label paper)
Dispenser printing
(non-separated labels)
Test printing
Continuous printing
Dispenser printing
Online printing
Continuous printing
Dispenser printing
Prints the printer status
(Receives data from a PC or
handheld terminal and prints it)
➋Insert the battery pack. Insert the
battery pack into the slot, with the
terminal pointing downward.
•Whenchargingbegins,theCHARGE
lamp(red)lights.Whenchargingis
complete,theCHARGElamplightsgreen
(fullycharged).
Preparing for First-time Operation
4
13
1Connect the power cord to the
charger unit, then plug it into the
outlet.
•When charging is complete, the
CHARGE lamp lights green (fully
charged).
4. Preparing for First-time Operation
Charging the Battery Pack
•Charging by installing the battery pack in the battery charger (optional)
Install the battery pack in the battery charger (optional) and charge it.
CHARGE
The optional battery charger set provided for this printer is specific to this printer.
Do not use it for other electric equipment.
Charging time
It takes about 1.5 hours for the CHARGE lamp to turn off when charging a completely
depleted battery.
2Insert the battery pack. Insert the
battery pack into the slot, with
the terminal pointing downward.
•When charging begins, the
CHARGE lamp (red) lights. When
charging is complete, the CHARGE
lamp lights green (fully charged).
3Remove the battery pack when
charging is complete.
Reference
14
40
Operation Modes
There are two printer operation modes: continuous printing mode, and dispense
mode printing. Test printing and online printing are available in both modes.
* Use the printer setting tool to set dispense mode printing (non-separated labels).
1234567
ABCDEFG
abcdefg
1234567
ABCDEFG
abcdefg
1234567
ABCDEFG
abcdefg
1234567
ABCDEFG
abcdefg
Continuous printing Dispenser printing
(label paper)
Dispenser printing
(non-separated labels)
Test printing
Continuous printing
Dispenser printing
Online printing
Continuous printing
Dispenser printing
Prints the printer status
(Receives data from a PC or
handheld terminal and prints it)
➌Remove the battery pack when
charging is complete
Charging Time
Ittakesabout1.5hoursfortheCHARGElamptoturnoffwhencharginga
completely depleted battery.
10
Note
• WhentheCHARGElampisnotlit,checkthatthebatterypackisinstalledsecurely.
The battery may not be charged when not securely installed.
• Whenachargedbatterypackisinstalled,theCHARGElamprstlightsred,then
lights green.
•ChargingbyinstallingthespecializedACadapter(optional)ontheprinter
This charges the battery pack while it is installed in the printer
TheACadaptersetprovidedforthisprinterisspecictothisprinter.Donot
use it for other electric equipment.
➊ RemovetheDCinputterminal
cover,andinserttheDCoutput
terminal.
Preparing for First-time Operation
4
16
1Remove the DC input terminal
cover, and insert the DC output
terminal into the input terminal.
Using AC Adapter
Install the specialized AC adapter (optional) on the printer for use.
The AC adapter set provided for this printer is specific to this printer. Do not use it
for other electric equipment.
•Use AC ADAPTER: Model No. TG-5001+19v
(LEAD YEAR ENTERPRISE Co.,LTD.)
2Connect the AC adapter into the
outlet.
* Be sure to turn the printer power off before detaching the DC output
terminal for the AC adapter, or disconnecting the power supply.
Note that disconnecting the power supply in ways other than described
above may prevent the printer from correctly storing any settings in
memory.
No battery pack is necessary when the AC adapter is used. When the
battery pack and AC adapter are used simultaneously, charging begins if
the battery is not fully charged. The display becomes normal when fully
charged (See P. 14).
ACadapter
DCinputterminal
DCoutputterminal
➋PlugtheACadapterintotheoutlet.
When charging begins, the battery life
indicator lights red. When charging
is complete, the battery life indicator
disappears(fullycharged).
* OnawirelessLANinterfaceoperating
panel(manufactureroption),theCHARGE
LEDlightsredwhenchargingbegins.
Whenchargingiscomplete,theCHARGE
LEDturnsoff(fullycharged).
Charging Time
It takes about 5 hours for the battery remaining power display to turn off when
charging a completely depleted battery.
11
Installing and Removing the Battery Pack
➊Open the battery cover.
Preparing for First-time Operation
4
15
Installing and Removing the Battery Pack
Battery pack
Hook
Terminal
Handle
1Open the battery cover.
2While pressing the gray hook,
insert the battery pack, then
close the battery cover.
Insert the battery pack with the terminal
side toward the printer.
3To remove the battery, press the
gray hook to unlock it, then hold
the handle and pull out the
battery.
* Be sure to turn the power off before removing or replacing the battery
pack.
When the power is off, the STATUS LED turns off (see “Power OFF” on
page 22). Do not remove the battery pack until this light turns off.
Make sure to check that the STATUS LED has turned off before
removing the battery pack.
* Note that removing the battery pack by the operation above may
prevent updating the information in the printer memory.
➋While pressing the gray hook, insert
the battery pack, then close the
battery cover.
Insert the battery pack with the terminal
side toward the printer.
Preparing for First-time Operation
4
15
Installing and Removing the Battery Pack
Handle
Terminal
➌To remove the battery, press the
gray hook to unlock it, then hold
the handle and pull out the battery.
Preparing for First-time Operation
4
15
Installing and Removing the Battery Pack
Handle
1Open the battery cover.
2While pressing the gray hook,
insert the battery pack, then
close the battery cover.
Insert the battery pack with the terminal
side toward the printer.
3To remove the battery, press the
gray hook to unlock it, then hold
the handle and pull out the
battery.
* Be sure to turn the power off before removing or replacing the battery
pack.
When the power is off, the STATUS LED turns off (see “Power OFF” on
page 22). Do not remove the battery pack until this light turns off.
Make sure to check that the STATUS LED has turned off before
removing the battery pack.
* Note that removing the battery pack by the operation above may
prevent updating the information in the printer memory.
Hook Battery pack
* Be sure to turn the power off before removing or replacing the battery
pack.
When the power is off, the STATUS LED turns off (see “Power OFF” on
page 18). Do not remove the battery pack until this light turns off.
Make sure to check that the STATUS LED has turned off before removing
the battery pack.
* Note that removing the battery pack by the operation above may prevent
updating the information in the printer memory.

12
Using AC Adapter
InstallthespecializedACadapter(optional)ontheprinterforuse.
TheACadaptersetprovidedforthisprinterisspecictothisprinter.Donot
use it for other electric equipment.
• UseACADAPTER:ModelNo.TG-5001+19v(LEADYEARENTERPRISECo.,LTD.)
➊ RemovetheDCinputterminal
cover,andinserttheDCoutput
terminal into the input terminal
Preparing for First-time Operation
4
16
1Remove the DC input terminal
cover, and insert the DC output
terminal into the input terminal.
Using AC Adapter
Install the specialized AC adapter (optional) on the printer for use.
The AC adapter set provided for this printer is specific to this printer. Do not use it
for other electric equipment.
•Use AC ADAPTER: Model No. TG-5001+19v
(LEAD YEAR ENTERPRISE Co.,LTD.)
2Connect the AC adapter into the
outlet.
* Be sure to turn the printer power off before detaching the DC output
terminal for the AC adapter, or disconnecting the power supply.
Note that disconnecting the power supply in ways other than described
above may prevent the printer from correctly storing any settings in
memory.
No battery pack is necessary when the AC adapter is used. When the
battery pack and AC adapter are used simultaneously, charging begins if
the battery is not fully charged. The display becomes normal when fully
charged (See P. 14).
ACadapter
DCinputterminal
DCoutputterminal
➋ConnecttheACadapterintothe
outlet.
* Be sure to turn the printer power off before detaching the DC output
terminal for the AC adapter, or disconnecting the power supply.
Note that disconnecting the power supply in ways other than described
above may prevent the printer from correctly storing any settings in
memory.
No battery pack is necessary when the AC adapter is used. When the
battery pack and AC adapter are used simultaneously, charging begins if
the battery is not fully charged. The display becomes normal when fully
charged(Seep.9).

13
Loading Labels
The label installation method differs by printing mode.
Preparing for First-time Operation
4
17
Loading Labels
The label installation method differs by printing mode.
Continuous printing mode
(See figure on P. 40)
Label guide stopper
1Slide the cover release lever in
the arrow direction to open the
cover.
First, slide the dispenser unit to the
continuous printing mode position.
(See P. 21)
2While pressing the label guide
stopper, slide the label guide to
the label size to be used.
3Load the paper in the printer.
Make sure the roll is oriented correctly.
Continuous printing mode
(Seegureonp.26)
Label paper Journal paper
➊Slide the cover release lever in the
arrow direction to open the cover.
First, slide the dispenser unit to the
continuousprintingmodeposition.(See
p.16)
Preparing for First-time Operation
4
17
Loading Labels
The label installation method differs by printing mode.
Continuous printing mode
Label paper Journal paper
(See figure on P. 40)
Label guide stopper
1Slide the cover release lever in
the arrow direction to open the
cover.
First, slide the dispenser unit to the
continuous printing mode position.
(See P. 21)
2While pressing the label guide
stopper, slide the label guide to
the label size to be used.
3Load the paper in the printer.
Make sure the roll is oriented correctly.
➋While pressing the label guide
stopper, slide the label guide to the
labelsizetobeused.
Label guide stopper
Preparing for First-time Operation
4
17
Loading Labels
The label installation method differs by printing mode.
Continuous printing mode
Label paper Journal paper
1Slide the cover release lever in
the arrow direction to open the
cover.
First, slide the dispenser unit to the
continuous printing mode position.
(See P. 21)
2While pressing the label guide
stopper, slide the label guide to
the label size to be used.
3Load the paper in the printer.
Make sure the roll is oriented correctly.
➌Load the paper in the printer.
Make sure the roll is oriented correctly.
Preparing for First-time Operation
4
17
Loading Labels
The label installation method differs by printing mode.
Continuous printing mode
Label paper Journal paper
(See figure on P. 40)
Label guide stopper
1Slide the cover release lever in
the arrow direction to open the
cover.
First, slide the dispenser unit to the
continuous printing mode position.
(See P. 21)
2While pressing the label guide
stopper, slide the label guide to
the label size to be used.
3Load the paper in the printer.
Make sure the roll is oriented correctly.

14
➍Confirm that the label roll can be
rotated easily by hand.
If rotation is labored, this can cause a feed
error. Remove the label roll and adjust the
labelguide.Notethatthelabelguidesdo
not require adjustment when you are using
labels with the same width.
Preparing for First-time Operation
4
18
5Check that the label tip is
protruding. Then close the main
cover by pressing the middle of
the cover.
Close the main cover slowly, while
pulling the cover release lever.
4Confirm that the label roll can be
rotated easily by hand.
If rotation is labored, this can cause a
feed error. Remove the label roll and
adjust the label guide. Note that the
label guides do not require adjustment
when you are using labels with the
same width.
This completes loading the labels for continuous printing mode.
➎Check that the label tip is
protruding. Then close the main
cover by pressing the middle of the
cover.
Close the main cover slowly, while pulling
the cover release lever.
Preparing for First-time Operation
4
18
5Check that the label tip is
protruding. Then close the main
cover by pressing the middle of
the cover.
Close the main cover slowly, while
pulling the cover release lever.
4Confirm that the label roll can be
rotated easily by hand.
If rotation is labored, this can cause a
feed error. Remove the label roll and
adjust the label guide. Note that the
label guides do not require adjustment
when you are using labels with the
same width.
This completes loading the labels for continuous printing mode.

15
Preparing for First-time Operation
4
17
Loading Labels
The label installation method differs by printing mode.
Continuous printing mode
(See figure on P. 40)
Label guide stopper
1Slide the cover release lever in
the arrow direction to open the
cover.
First, slide the dispenser unit to the
continuous printing mode position.
(See P. 21)
2While pressing the label guide
stopper, slide the label guide to
the label size to be used.
3Load the paper in the printer.
Make sure the roll is oriented correctly.
Dispense mode printing
(Seegureonp.26)
Label paper Non-separatedlabels
➊Slide the cover release lever in the
arrow direction to open the cover.
First, slide the dispenser unit to the
continuousprintingmodeposition.(See
p.16)
* Neverslidethedispenserunitwhilethe
main cover is open.
Preparing for First-time Operation
4
17
Loading Labels
The label installation method differs by printing mode.
Continuous printing mode
Label paper Journal paper
(See figure on P. 40)
Label guide stopper
1Slide the cover release lever in
the arrow direction to open the
cover.
First, slide the dispenser unit to the
continuous printing mode position.
(See P. 21)
2While pressing the label guide
stopper, slide the label guide to
the label size to be used.
3Load the paper in the printer.
Make sure the roll is oriented correctly.
➋While pressing the label guide
stopper, slide the label guide to the
labelsizetobeused.
Label guide stopper
Preparing for First-time Operation
4
17
Loading Labels
The label installation method differs by printing mode.
Continuous printing mode
Label paper Journal paper
1Slide the cover release lever in
the arrow direction to open the
cover.
First, slide the dispenser unit to the
continuous printing mode position.
(See P. 21)
2While pressing the label guide
stopper, slide the label guide to
the label size to be used.
3Load the paper in the printer.
Make sure the roll is oriented correctly.
➌Peel the label at the tip of the label
paper.
Dispensemodeprintingisnotrequiredfor
non-separated labels.
Preparing for First-time Operation
4
19
Dispense mode printing
(See figure on P. 40)
Label guide stopper
1Slide the cover release lever in
the arrow direction to open the
cover.
First, slide the dispenser unit to the
continuous printing mode position. (See
P. 21)
*Never slide the dispenser unit while
the main cover is open.
2While pressing the label guide
stopper, slide the label guide to
the label size to be used.
3Peel the label at the tip of the
label paper.
Dispense mode printing is not required
for non-separated labels.
Daily Care
13
34
Platen
Paper sensor
■Caring for the platen/
dispenser roller/paper sensor
Dispenser roller
1Slide the cover release lever to
open the main cover.
When in dispense mode printing, first
slide the dispenser unit to the
continuous printing mode position. (See
P. 21)
2Wipe off any smudges with a
cloth dipped in alcohol.
*Do not use thinner, benzene, or
kerosene.

16
➍Load the paper in the printer.
Make sure the roll is oriented correctly.
Preparing for First-time Operation
4
17
Loading Labels
The label installation method differs by printing mode.
Continuous printing mode
Label paper Journal paper
(See figure on P. 40)
Label guide stopper
1Slide the cover release lever in
the arrow direction to open the
cover.
First, slide the dispenser unit to the
continuous printing mode position.
(See P. 21)
2While pressing the label guide
stopper, slide the label guide to
the label size to be used.
3Load the paper in the printer.
Make sure the roll is oriented correctly.
➎Confirm that the label roll can be
rotated easily by hand.
If rotation is labored, this can cause a feed
error. Remove the label roll and adjust the
labelguide.Notethatthelabelguidesdo
not require adjustment when using labels
with the same width.
Preparing for First-time Operation
4
18
5Check that the label tip is
protruding. Then close the main
cover by pressing the middle of
the cover.
Close the main cover slowly, while
pulling the cover release lever.
4Confirm that the label roll can be
rotated easily by hand.
If rotation is labored, this can cause a
feed error. Remove the label roll and
adjust the label guide. Note that the
label guides do not require adjustment
when you are using labels with the
same width.
This completes loading the labels for continuous printing mode.
➏Check that the label tip is
protruding(10mmormore).Then
close the main cover by pressing
the middle of the cover.
Close the main cover slowly, while pulling
the cover release lever.
Preparing for First-time Operation
4
18
5Check that the label tip is
protruding. Then close the main
cover by pressing the middle of
the cover.
Close the main cover slowly, while
pulling the cover release lever.
4Confirm that the label roll can be
rotated easily by hand.
If rotation is labored, this can cause a
feed error. Remove the label roll and
adjust the label guide. Note that the
label guides do not require adjustment
when you are using labels with the
same width.
This completes loading the labels for continuous printing mode.
➐For non-separated labels, press
theFEEDbuttontofeedonesheet,
and pull upward to tear along the
perforated line.
If the labels clog at the label dispenser,
restart the label loading process from the
beginning

17
Slide the dispenser unit until it
stops.
Preparing for First-time Operation
4
21
8Slide the dispenser unit until it
stops.
This completes loading of the labels for dispense mode printing.
•Switching from Dispense mode printing to Continuous printing mode
Holding the dispenser/continuous switching lever upward, slide the dispenser unit toward
you. Never pull it with the lever still engaged. This may damage the dispenser unit.
When using dispense mode printing, be sure to follow the procedure above to switch
the dispenser unit from dispense mode printing to continuous printing mode, before
changing the paper.
This completes loading of the labels for dispense mode printing.
•SwitchingfromDispensemodeprintingtoContinuousprintingmode
Holding the dispenser/continuous switching lever upward, slide the dispenser unit
towardyou.Neverpullitwiththeleverstillengaged.Thismaydamagethedispenser
unit.
Preparing for First-time Operation
4
21
8Slide the dispenser unit until it
stops.
This completes loading of the labels for dispense mode printing.
•Switching from Dispense mode printing to Continuous printing mode
Holding the dispenser/continuous switching lever upward, slide the dispenser unit toward
you. Never pull it with the lever still engaged. This may damage the dispenser unit.
When using dispense mode printing, be sure to follow the procedure above to switch
the dispenser unit from dispense mode printing to continuous printing mode, before
changing the paper.
When using dispense mode printing, be sure to follow the procedure above to
switch the dispenser unit from dispense mode printing to continuous printing
mode, before changing the paper.

18
Turning the Power On
When the preparation steps are complete, turn the power on or off.
Power ON
➊Hold down the POWER button until
theSTATUSLEDlightsgreen.Then
release the POWER button.
Turning the Power on
5
22
5. Turning the Power On
When the preparation steps are complete, turn the power on or off.
POWER
PRINT
FEED
POWER
PRINT
FEED
Power ON
1Hold down the POWER button
until the STATUS LED lights
green. Then release the POWER
button.
Power OFF
2Hold down the POWER button
again, until the STATUS LED
turns off. Then release the
POWER button.
Power OFF
➋Hold down the POWER button
again,untiltheSTATUSLEDturns
off. Then release the POWER
button.
Turning the Power on
5
22
5. Turning the Power On
When the preparation steps are complete, turn the power on or off.
POWER
PRINT
FEED
POWER
PRINT
FEED
Power ON
1Hold down the POWER button
until the STATUS LED lights
green. Then release the POWER
button.
Power OFF
2Hold down the POWER button
again, until the STATUS LED
turns off. Then release the
POWER button.

19
Test Printing
➊ WhenpressingtheFEEDbutton
and holding down the POWER
button simultaneously, the printer
enters the test mode. Press the
FEEDbuttonagaintostarttest
printing.
Test Printing
6
23
6. Test Printing
POWER
PRINT
FEED
1
2
1234567
ABCDEFG
abcdefg
1234567
ABCDEFG
abcdefg
2Verify the following using the
output of the test print.
•
There are no chipped characters.
•Printing condition is good.
In test printing, the estimated
remaining battery power is
displayed as “
”. (
when
completely charged.) When the
remaining battery power is
,
charge the battery.
* If a problem occurs, contact the retail store or dealer where you purchased the printer
from, or our sales personnel or service center.
1When pressing the FEED button
and holding down the POWR
button simultaneously, the printer
enters the test mode. Press the
FEED button again to start test
printing.
➋Verify the following using the output
of the test print.
• Therearenochippedcharacters.
• Printingconditionisgood.
In test printing, the estimated
remaining battery power is
displayed as “ ”.( when
completelycharged.)Whenthe
remaining battery power is ,
charge the battery.
Test Printing
6
23
6. Test Printing
POWER
PRINT
FEED
1
2
1234567
ABCDEFG
abcdefg
1234567
ABCDEFG
abcdefg
2Verify the following using the
output of the test print.
•
There are no chipped characters.
•Printing condition is good.
In test printing, the estimated
remaining battery power is
displayed as “
”. (
when
completely charged.) When the
remaining battery power is
,
charge the battery.
* If a problem occurs, contact the retail store or dealer where you purchased the printer
from, or our sales personnel or service center.
1When pressing the FEED button
and holding down the POWR
button simultaneously, the printer
enters the test mode. Press the
FEED button again to start test
printing.
* If a problem occurs, contact the retail store or dealer where you purchased the printer
from, or our sales personnel or service center.

20
Operation with an RS-232C Cable
To print with an optional RS-232C cable connected to a PC or a handheld
terminal, perform the following operations.
➊ RemovetheUSB/DIPswitchcover,
andsettheDIPswitch(DSW)to
DSW-1,2,3,4=(OFF,OFF,OFF,
OFF).
Operation with an RS-232C Cable
7
24
4Connect the other end of the
RS-232C cable to the connector
on the PC or the handheld
terminal.
For the connector on the PC or the
handheld terminal, see the manuals
provided with that equipment.
3Insert the RS-232C cable into
the connector.
Match the arrow on the RS-232C cable
connector with the arrow beside the
printer connector, and insert it firmly.
2Remove the RS-232C connector
cover.
7. Operation with an RS-232C Cable
To print with an optional RS-232C cable connected to a PC or a handheld
terminal, perform the following operations.
1Remove the USB/DIP switch
cover, and set the DIP switch
(DSW) to DSW-1, 2, 3, 4 = (OFF,
OFF, OFF, OFF).
2 3 41
ON
RS-232C cable
RS-232C cover
Printing
11
29
■When the next label is not printed
12345
67
ABCDEF
G
abcdefg
1
A
BC
ab
cd
FEED button
PRINT button
1234567
ABCDEFG
abcdefg
1234567
ABCDEFG
abcdefg
1With the printer online, press the
PRINT button to take the printer
offline (STATUS LED turns off).
2Press the FEED button to feed
the labels.
3When the paper stops, pull it in
the direction of the arrow to cut
the label.
4Press the PRINT button to put
the printer online (STATUS LED
lights green).
➋Remove the RS-232C connector
cover.
Operation with an RS-232C Cable
7
24
4Connect the other end of the
RS-232C cable to the connector
on the PC or the handheld
terminal.
For the connector on the PC or the
handheld terminal, see the manuals
provided with that equipment.
3Insert the RS-232C cable into
the connector.
Match the arrow on the RS-232C cable
connector with the arrow beside the
printer connector, and insert it firmly.
2Remove the RS-232C connector
cover.
7. Operation with an RS-232C Cable
To print with an optional RS-232C cable connected to a PC or a handheld
terminal, perform the following operations.
1Remove the USB/DIP switch
cover, and set the DIP switch
(DSW) to DSW-1, 2, 3, 4 = (OFF,
OFF, OFF, OFF).
2 3 41
ON
RS-232C cable
Printing
11
29
■When the next label is not printed
12345
67
ABCDEF
G
abcdefg
1
A
BC
ab
cd
FEED button
PRINT button
1234567
ABCDEFG
abcdefg
1234567
ABCDEFG
abcdefg
1With the printer online, press the
PRINT button to take the printer
offline (STATUS LED turns off).
2Press the FEED button to feed
the labels.
3When the paper stops, pull it in
the direction of the arrow to cut
the label.
4Press the PRINT button to put
the printer online (STATUS LED
lights green).
RS-232C cover
RS-232C cable
➌Insert the RS-232C cable into the
connector.
Match the arrow on the RS-232C cable
connector with the arrow beside the printer
connector, and insert it firmly.
➍Connect the other end of the RS-
232C cable to the connector on the
PC or the handheld terminal.
For the connector on the PC or the
handheld terminal, see the manuals
provided with that equipment.
This manual suits for next models
3
Table of contents
Languages:
Other Oki Printer manuals

Oki
Oki MPS730b Quick start guide

Oki
Oki 1220n User manual

Oki
Oki OKIPAGE 12i Series Programming manual

Oki
Oki B6100n User manual

Oki
Oki ML320 Turbo User manual

Oki
Oki C822n User manual

Oki
Oki C9600hdn Configuration guide

Oki
Oki C5500n Series User manual

Oki
Oki ES6405 User manual

Oki
Oki C9600hdn Configuration guide