CUT-SHEET FEEDER
FOR
MICROLINE 3320/3321/3390/3391
User's
Manual
TABLE
OF
CONTENTS
Page
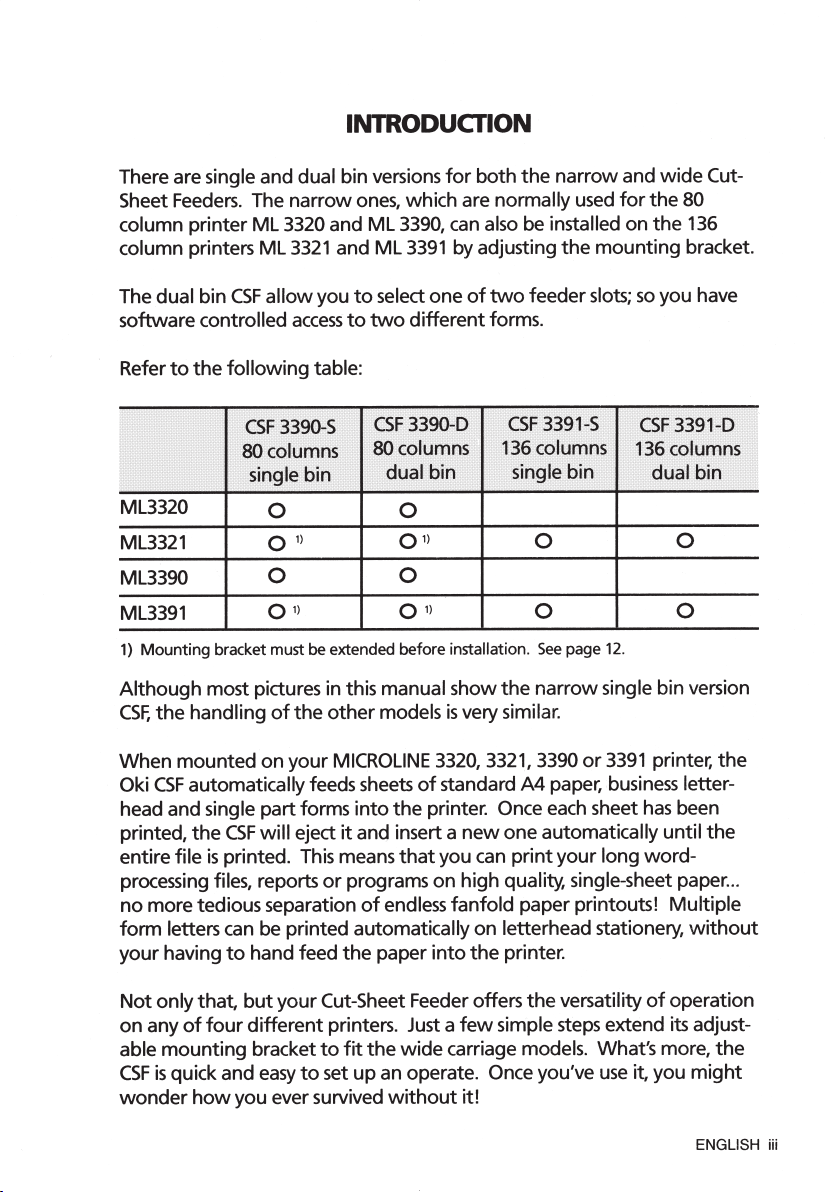
INTRODUCTION
........................................................................
iii
GENERAL
...................................................................................
iv
1.
INSTALLATION
......................................................................
1
Introducing
the
Cut-Sheet Feeder
(CSF
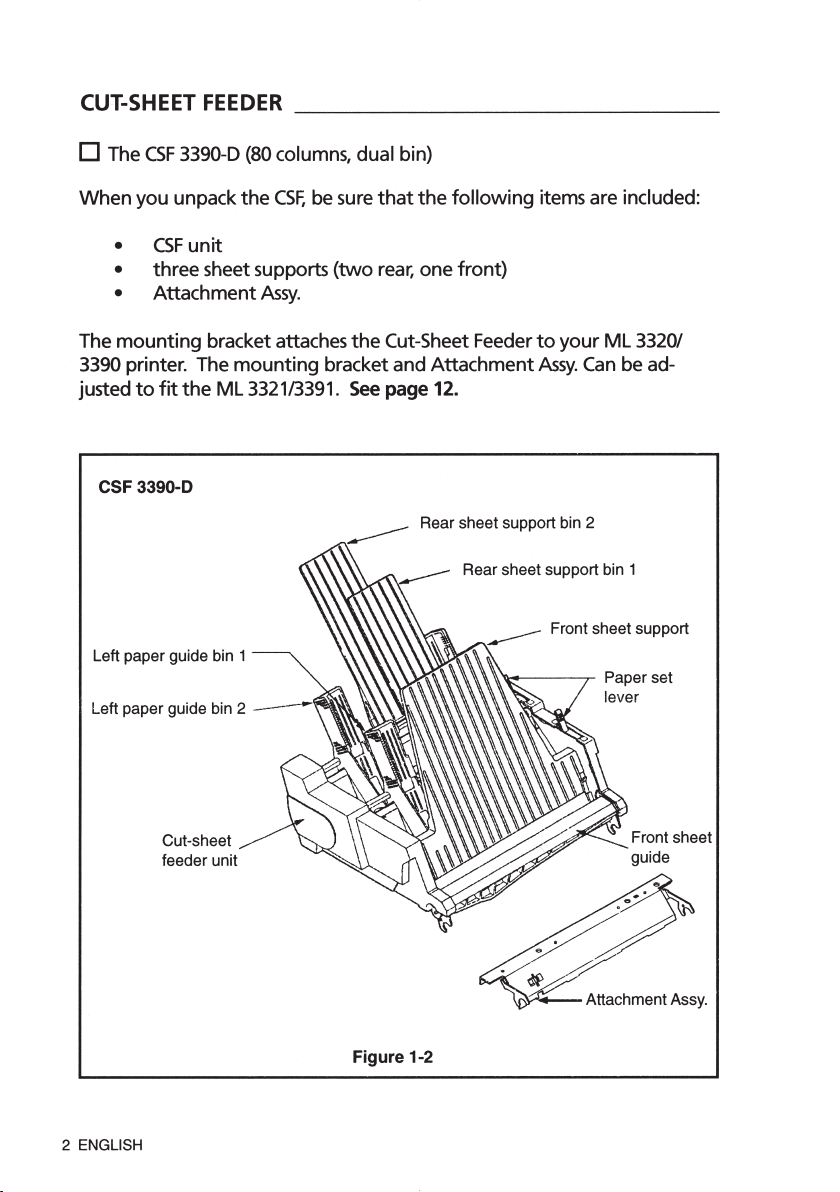
3390-S/3390-D/3391-S/3391-D) ..................................... 1
Mounting
the
Cut-Sheet Feeder ..................................................... 6
Removal
of
the
Cut-Sheet Feeder ..................................................
11
Adjusting
the
Mounting
Bracket
(for
use
of
a
CSF
3390-S
or
3390-D on
ML
3321/3391) ...........
12
How
to
modify
the
attachment
assembly
(for
use
of
a
CSF
3390-S
or
3390-D on
ML
3321/3391) ...........
14
2.
OPERATION
..................................................................
.......
15
Precautions
for
Setting
the
Paper ..................................................
15
Preparing
the
Loading Tray ........................................................... 16
Loading Paper...............................................................................
17
Removal
of
the
Ribbon Cartridge ..................................................20
Installation
of
the
Ribbon Cartridge ..............................................20
Cut-Sheet Feeder Controls .............................................................
21
Inserting Paper
from
the
Loading Tray ..........................................
21
Setting
the
Top
of
Form Position ...................................................
21
Page Margins ................................................................................22
Printing
with
the
Cut-Sheet Feeder ...............................................23
3.
SPECIAL
CSF
OPERATING SITUATIONS
...................................
25
Entering
the
Menu
Select
Mode
....................................................25
Printing
the
Self
Test
.....................................................................25
Clearing Paper
Jams
......................................................................26
Refilling
the
Loading Tray .............................................................26
APPENDIX
A:
CUT-SHEET
FEEDER
COMMAND
CHARTS
................
27
APPENDIX
B:
SPECIFICATIONS
....................................................
30
ML3320id8.indd6ML3320id8.indd6 2015/05/0817:542015/05/0817:54
プロセスシアンプロセスシアンプロセスマゼンタプロセスマゼンタプロセスイエロープロセスイエロープロセスブラックプロセスブラック