Manual Name: OKIDATA OL400e & 410e
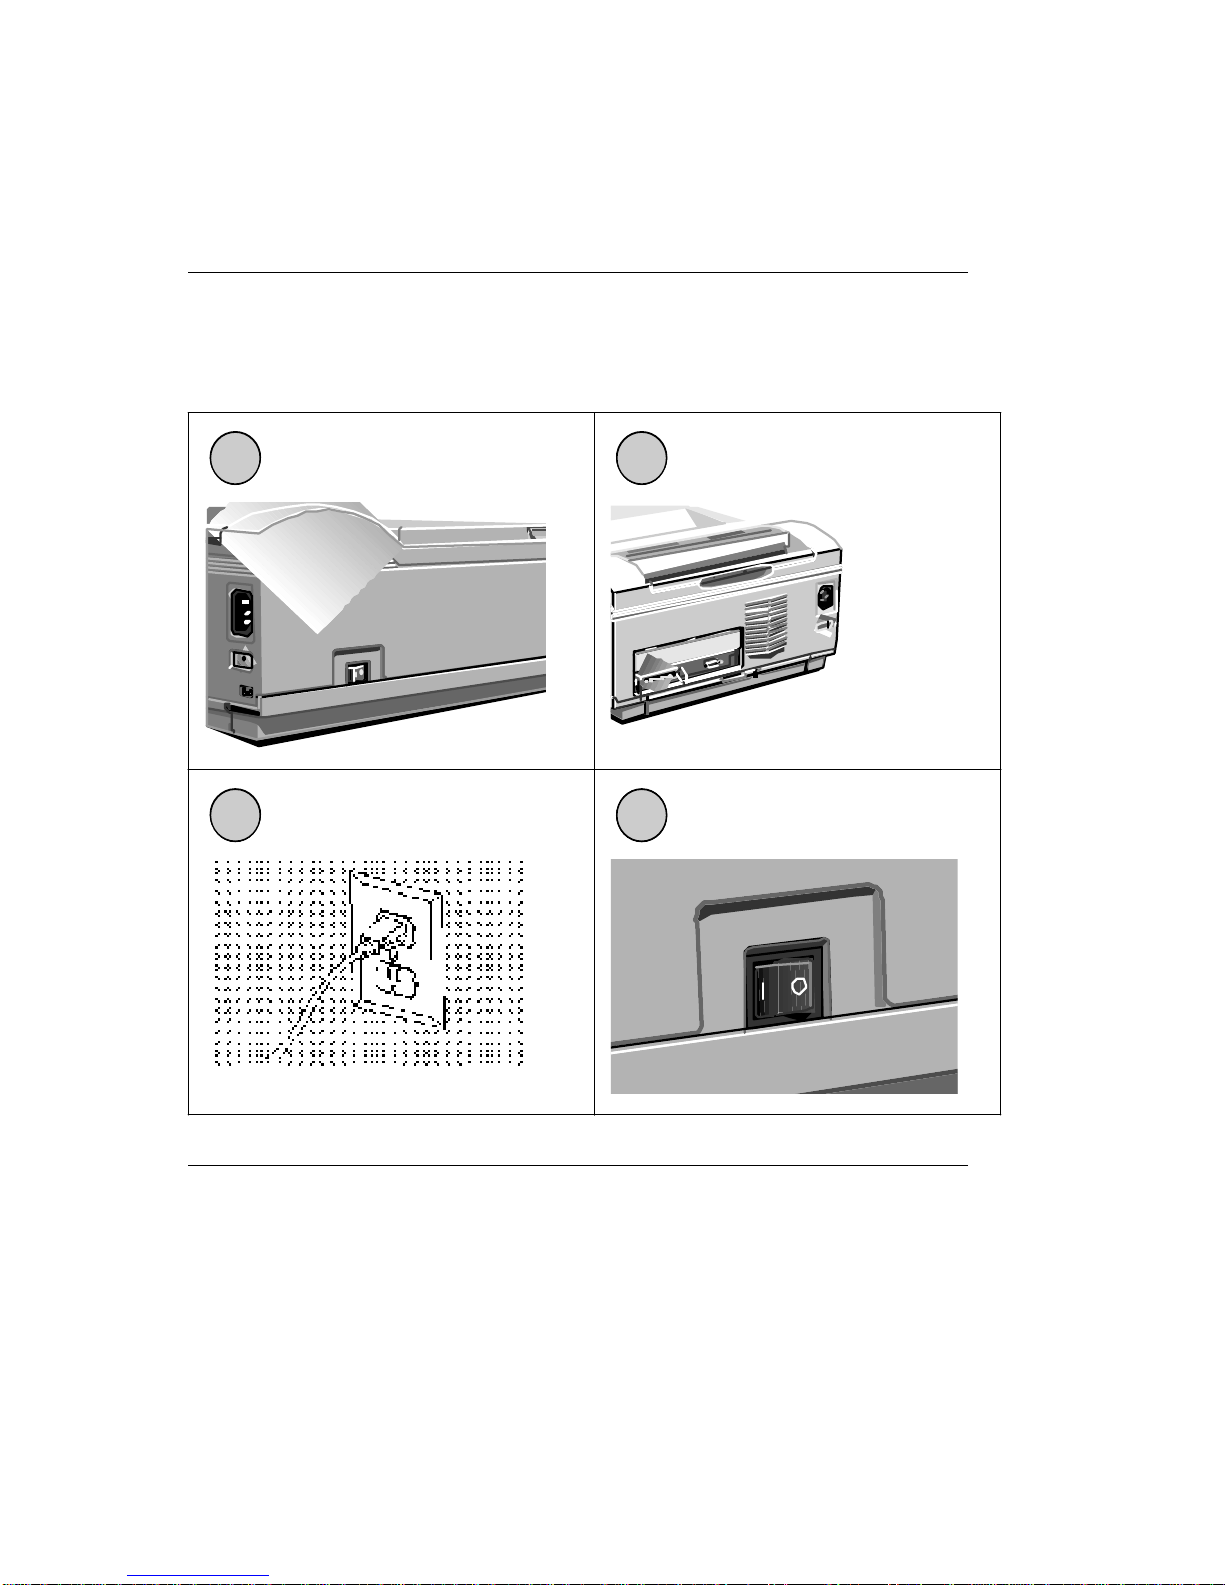
Chapter: 4 Plugging in & Testing
Changing the Display Language
Changing the Display Language
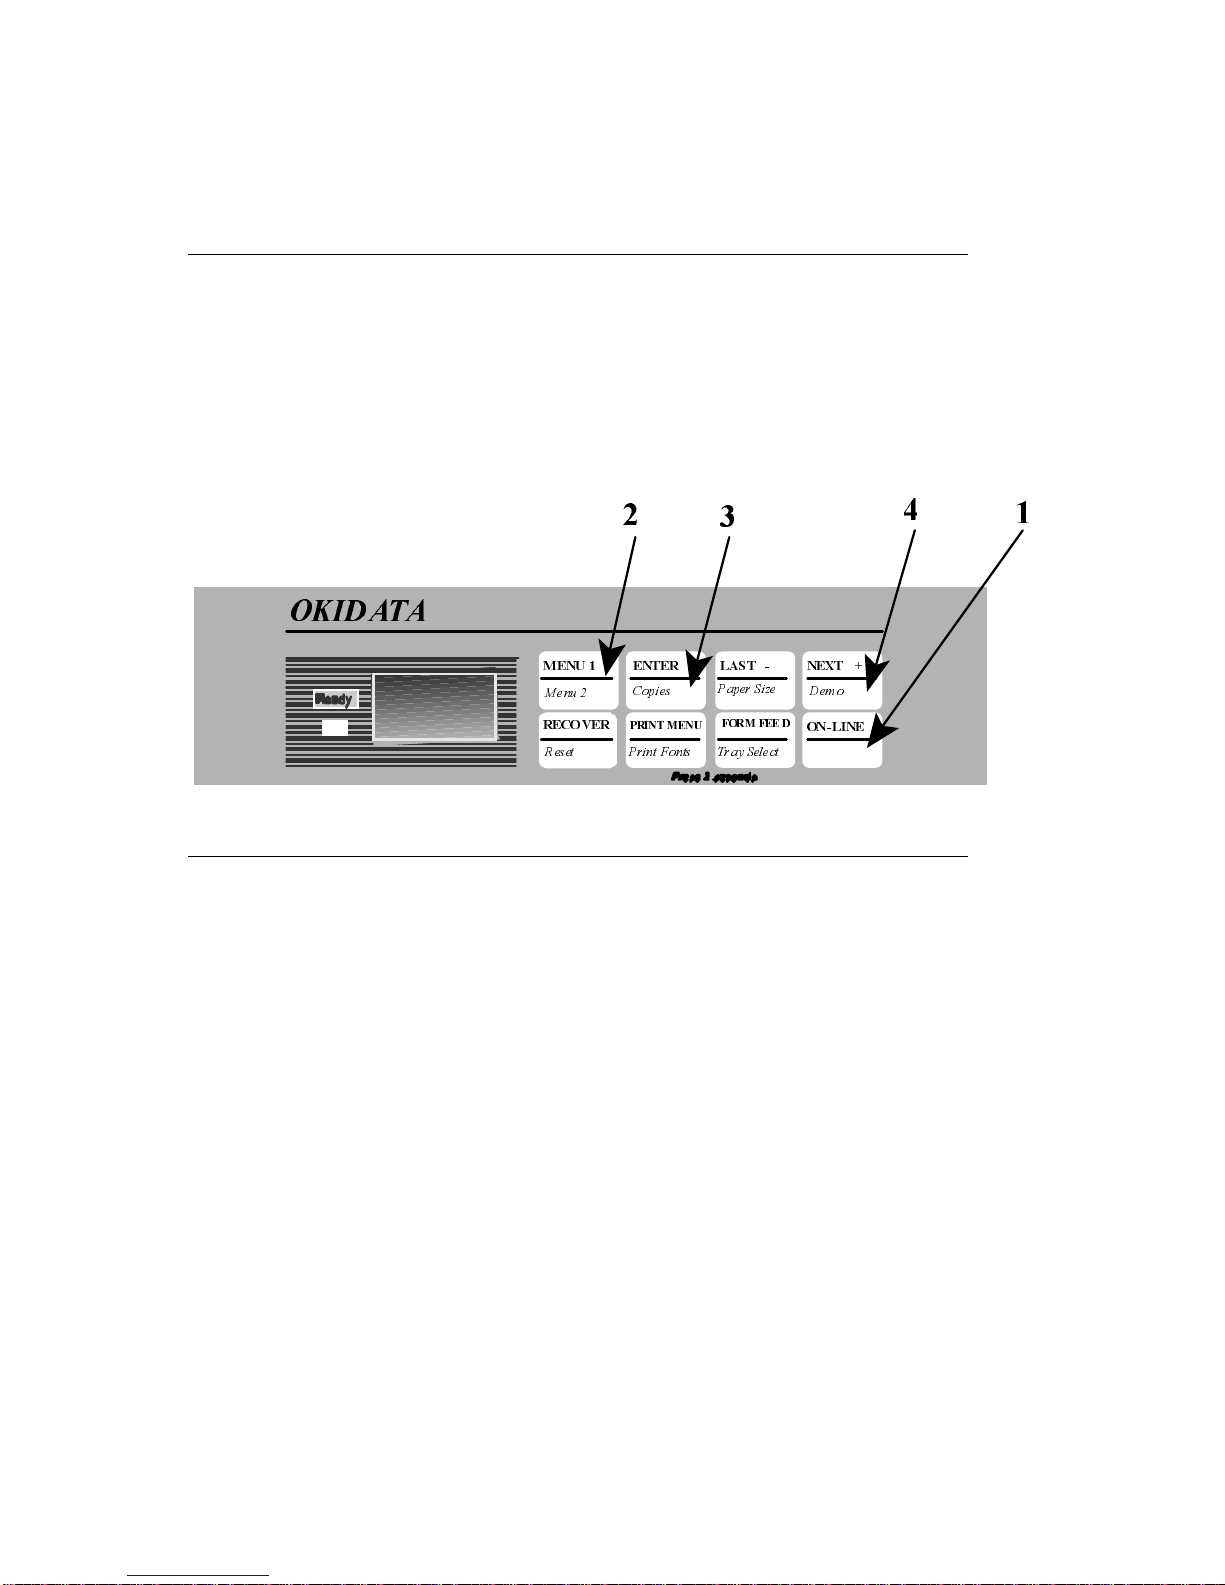
To change the language on the panel display and menu printout:
Press ON-LINE (1) until the READY light goes out. Press and hold MENU1/Menu2 (2)
until MEMORY USAGE (OL400e) or PRINT MODE (OL410e) displays. Press MENU1/Menu2 (2)
7 times until the display reads LANGUAGE. Press ENTER/copies (3).
The display now reads LANGUAGE ENGLISH*. Press NEXT+/Demo (4) until the language you
want appears. Press ENTER/Copies (3). Press ON-LINE (1).
OL4OOe
LED Page Printer
0(18 (17(5 /$67 1(;7
0HQX &RSLHV 3DSHU6L]H 'HPR
35,170(18
3ULQW)RQWV5HVHW
)250)(( '
21 /,1(
7UD\6HOHFW
5(&29(5
2.,'$7$
OL400/410ex (96-02-03)