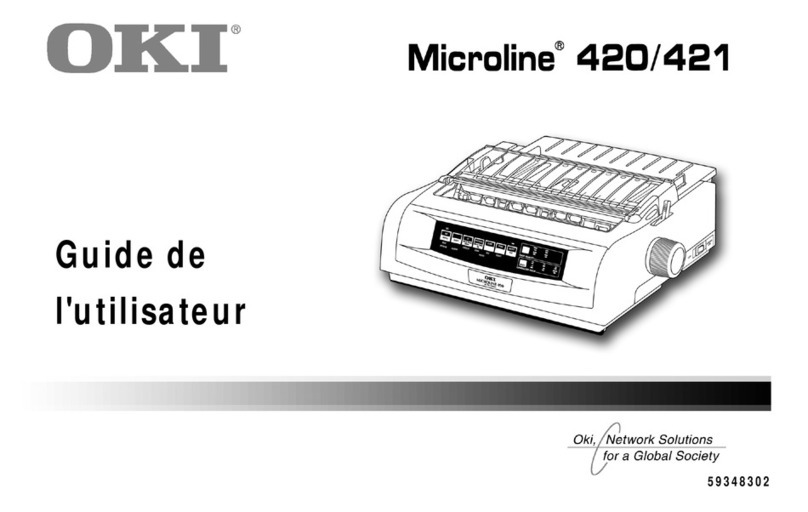
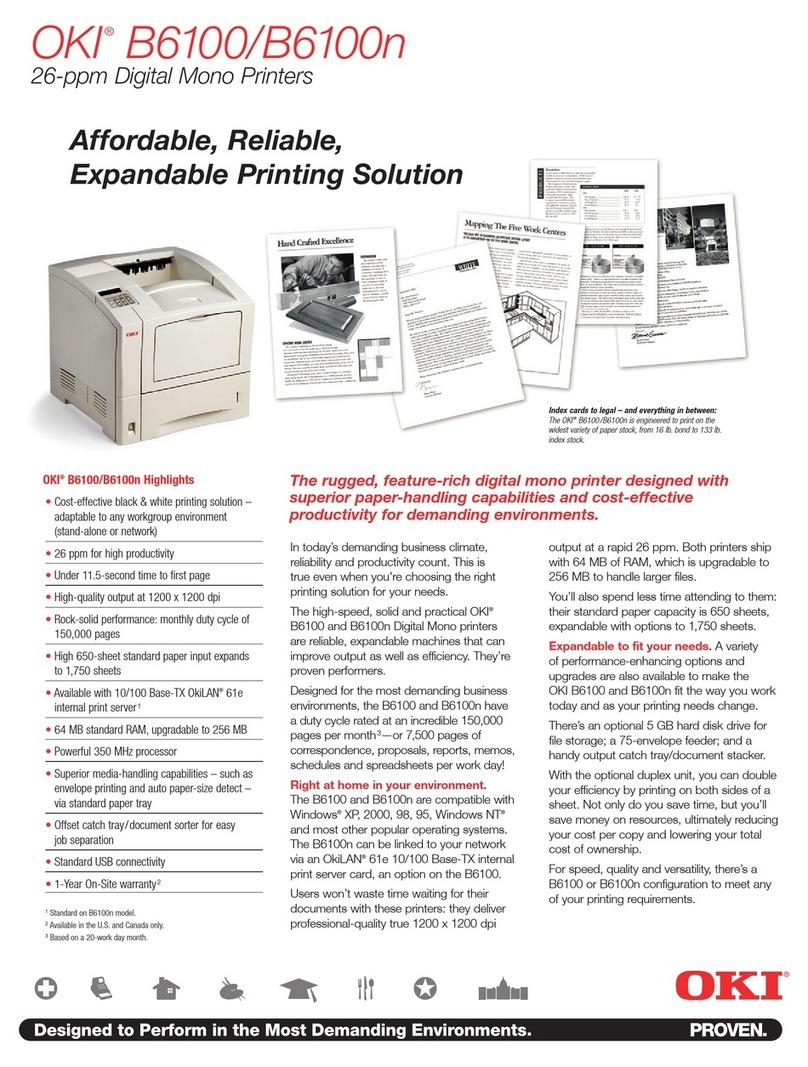
Oki Thermal A3+ Colour Desktop Printer DP-7000 User manual

Thermal A3+Colour Desktop Printer
User's Guide

ii User’s Guide
Preface
Every effort has been made to ensure that the
information in this document is complete, accurate, and
up-to-date. Oki assumes no responsibility for the results
of errors beyond its control. Oki also cannot guarantee
that changes in software and equipment made by other
manufacturers and referred to in this guide will not
affect the applicability of the information in it. Mention
of software products manufactured by other companies
does not necessarily constitute endorsement by Oki.
Copyright 2000 by Oki. All rights reserved.
Oki is a registered trademark of Oki Electric Industry
Co., Ltd.
E
NERGY
S
TAR is a U.S. registered mark.
Apple, Macintosh, Mac, Mac OS and TrueType are
registered trademarks of Apple Computer, Inc.
EEC compatibility
This product complies with the
requirements of the Council Directives
89/336/EEC and 73/23/EEC amended
by 93/68/EEC (EMC) and 73/23/EEC
(LVD), as amended where applicable,
on the approximation of the laws of the
members states relating to
Electromagnetic Compatibility and
Low voltage.
Energy Star
As an
E
NERGY
S
TAR
®
Partner,
Oki has determined that this product
meets the
E
NERGY
S
TAR
®
guidelines for energy efficiency.
Universal Serial Bus
This printer is fitted with an
industry Standard Universal
Serial Bus (USB) data interface.

English
Preface iii
Safety instructions
This printer has been carefully designed to give years of
safe, reliable performance. As with all electrical
equipment, however, there are a few basic precautions
that should be taken to avoid personal injury or
damaging the printer:
• Read this setup guide carefully and save it for
future reference.
• Read and follow all warning and instruction
labels on the printer itself.
• Disconnect the printer before cleaning. Use only
a damp cloth. Do not use liquid or aerosol
cleaners to clean the printer.
• Place the printer on a firm, solid surface. If the
printer is placed on something unsteady, it may
fall and become damaged or injure someone. If
the printer is placed on a soft surface, such as a
rug, sofa, or bed, the vents may become blocked
causing the printer to overheat.
• Do not put the printer on or near a heat source,
such as a radiator or heat register. Keep it out of
direct sunlight. Allow enough room around the
printer for adequate ventilation and easy access.
• Do not use the printer near water, or spill liquid of
any kind into it.
• Make sure that the power source matches the
rating listed on the back of the printer. If you are
not sure, check with your dealer or with your
local power company.
• This printer has an earthed plug as a safety
feature and will only connect to an earthed outlet.
If this plug cannot be connected to a power outlet,
then it is possible that the power outlet is of the
older, non-earthed type. Contact an electrician to
have the power outlet replaced. Do not use an
adapter to defeat the earthing.
• To avoid damaging the power cable, do not put
anything on it or place it where it will be walked
on. If the cable becomes damaged or frayed,
replace it immediately.
• If an extension cable or power strip is being used
with the printer, make sure that the total of the
amperage rating required by all the equipment is
less than the rating of the extension cable or
power strip. The total ratings of all equipment

iv User’s Guide
plugged into the outlet should not exceed 13
amperes.
• The power outlet into which the printer is
connected must remain accessible at all times.
• Opening any cover may expose hot surfaces.
These are clearly labelled. Do NOT touch them.
• Do not insert anything into the ventilation slots
on the printer; you could get a shock or cause a
fire.
• Aside from the routine maintenance described in
the user’s guide, do not try to service the printer
yourself. Opening a cover may expose you to
shocks or other hazards.
• Do not make any adjustments other than those
outlined in the user’s guide as damage may be
caused to the printer.
If anything happens that indicates that the printer is not
working properly or has been damaged, disconnect the
printer from the power source and contact your dealer.
These are some of the things to look for:
• The power cable or plug is frayed or damaged.
• Liquid has been spilled into the printer, or it has
been exposed to water.
• The printer has been dropped, or the cabinet is
damaged.
• The printer does not function normally when
following the operating instructions.

English
Preface v
Table of contents
Preface . . . . . . . . . . . . . . . . . . . . . . . . . . . . . . . . . . . . . ii
EEC compatibility . . . . . . . . . . . . . . . . . . . . . . . . . . . . ii
Energy Star . . . . . . . . . . . . . . . . . . . . . . . . . . . . . . . . . ii
Universal Serial Bus . . . . . . . . . . . . . . . . . . . . . . . . . . ii
Safety instructions . . . . . . . . . . . . . . . . . . . . . . . . . . . iii
Table of contents . . . . . . . . . . . . . . . . . . . . . . . . . . . . . v
Chapter 1 - Introduction
Introduction . . . . . . . . . . . . . . . . . . . . . . . . . . . . . . . . . 1
Features . . . . . . . . . . . . . . . . . . . . . . . . . . . . . . . . . . . . 2
Preparing your printer . . . . . . . . . . . . . . . . . . . . . . . . . 3
Removing package contents . . . . . . . . . . . . . . . . . 3
Opening front cover . . . . . . . . . . . . . . . . . . . . . 4
Closing front cover . . . . . . . . . . . . . . . . . . . . . . 5
Locating printer . . . . . . . . . . . . . . . . . . . . . . . . . . . 5
Fitting Paper Support . . . . . . . . . . . . . . . . . . . . . . . 5
Fitting Dust Cover . . . . . . . . . . . . . . . . . . . . . . . . . 6
Using Output Paper Tray . . . . . . . . . . . . . . . . . 7
Transporting the printer . . . . . . . . . . . . . . . . . . 7
Printer functions . . . . . . . . . . . . . . . . . . . . . . . . . . . . . 8
Front view of printer . . . . . . . . . . . . . . . . . . . . . . . 8
Rear view of printer . . . . . . . . . . . . . . . . . . . . . . . . 9
Rear view of printer with
SCSI interface module . . . . . . . . . . . . . . . . . . 10
Inside the printer . . . . . . . . . . . . . . . . . . . . . . . . . 10
Paper feed switch . . . . . . . . . . . . . . . . . . . . . . . . 12
Control panel . . . . . . . . . . . . . . . . . . . . . . . . . . . . 13
Indicator lights summary . . . . . . . . . . . . . . . . . . 14
Chapter 2 - Initial Setup
Computer connection . . . . . . . . . . . . . . . . . . . . . 15
Macintosh USB connection . . . . . . . . . . . . . . 15
Macintosh SCSI connection . . . . . . . . . . . . . 15
Fitting the SCSI adapter . . . . . . . . . . . . . . . . 16
Connecting the printer to a computer . . . . . . 16
How to uninstall SCSI adapter . . . . . . . . . . . 17
Connecting Power Cord . . . . . . . . . . . . . . . . . . . 18
Ink cartridges . . . . . . . . . . . . . . . . . . . . . . . . . . . . . . 19
Identifying ink cartridge and paper types . . . . . . 19
Installing ink cartridges . . . . . . . . . . . . . . . . . . . . 20
Replacing or changing ink cartridges . . . . . . . . . 22
Loading paper . . . . . . . . . . . . . . . . . . . . . . . . . . . . . . 24
Paper types and available feeding modes . . . . . . 24
Notes and precautions about paper . . . . . . . . 24
Loading paper in automatic feed mode . . . . . . . . 25
Loading high grade/laser paper
and Press Papers . . . . . . . . . . . . . . . . . . . 25
Loading paper in manual feed mode . . . . . . . . . . 27

vi User’s Guide
Chapter 3 - Installation and Operation, Macintosh
Installing the printer driver . . . . . . . . . . . . . . . . . . . . . 29
Purpose of the printer driver . . . . . . . . . . . . . . . . . 29
Preparing for installation . . . . . . . . . . . . . . . . . . . . 29
Turn on the power . . . . . . . . . . . . . . . . . . . . . . . . . 29
SCSI Connection . . . . . . . . . . . . . . . . . . . . . . . . . . . . 30
System requirements . . . . . . . . . . . . . . . . . . . . . . . 30
Contents of the installation disk . . . . . . . . . . . . . . 30
Installing the printer driver software . . . . . . . . . . . 30
Using balloon help . . . . . . . . . . . . . . . . . . . . . . . . 31
Selecting the correct driver . . . . . . . . . . . . . . . . . . 31
Testing the printer . . . . . . . . . . . . . . . . . . . . . . . . . 32
Page setup dialogue box . . . . . . . . . . . . . . . . . 32
Print dialogue box . . . . . . . . . . . . . . . . . . . . . . 32
Print preview . . . . . . . . . . . . . . . . . . . . . . . . . . 32
USB Connection . . . . . . . . . . . . . . . . . . . . . . . . . . . . . 33
System Requirements . . . . . . . . . . . . . . . . . . . . . . 33
Installing printer software . . . . . . . . . . . . . . . . . . . 33
Using the OKI USB printer . . . . . . . . . . . . . . . . . . 33
Printing operations . . . . . . . . . . . . . . . . . . . . . . . . . . . 34
Printing in monochrome . . . . . . . . . . . . . . . . . . . . 34
Requirements . . . . . . . . . . . . . . . . . . . . . . . . . . 34
Placing an ink cartridge in your printer . . . . . . 34
Setting up the printer driver
for Monochrome printing . . . . . . . . . . . . . 35
Printing in colour . . . . . . . . . . . . . . . . . . . . . . . . . 35
Requirements . . . . . . . . . . . . . . . . . . . . . . . . . . 35
Placing ink cartridges in your printer . . . . . . . 36
Setting up the printer driver
for colour printing . . . . . . . . . . . . . . . . . . . 36
Setting up colour matching option . . . . . . . . . 36
Printing on reverse side . . . . . . . . . . . . . . . . . . . . 38
Setting up the printer driver
for printing on reverse side . . . . . . . . . . . . 38
Chapter 4 - Specialised Printing Operations
VPhoto colour printing . . . . . . . . . . . . . . . . . . . . . . . 41
Colour printing on Press Paper and VPhoto film . 41
Requirements . . . . . . . . . . . . . . . . . . . . . . . . . 41
Prepare the image to be printed . . . . . . . . . . . 41
Install ink cartridges . . . . . . . . . . . . . . . . . . . . 41
Load VPhoto film in your printer . . . . . . . . . . 42
Setting up the printer driver for printing . . . . 42
Colour printing on High Grade Paper . . . . . . . . . . . . 43
Requirement . . . . . . . . . . . . . . . . . . . . . . . . . . 43
Prepare the image to be printed . . . . . . . . . . . 43
Install ink cartridges . . . . . . . . . . . . . . . . . . . . 43
Load the paper in your printer . . . . . . . . . . . . 43
Setting up the printer driver for printing . . . . 43
Printing in Metallic Colour . . . . . . . . . . . . . . . . . . . . 45
Single metallic colour printing . . . . . . . . . . . . . . . 45
Requirements . . . . . . . . . . . . . . . . . . . . . . . . . 45
Prepare the image to be printed . . . . . . . . . . . 46
Install ink cartridges . . . . . . . . . . . . . . . . . . . . 46
Load the paper in your printer . . . . . . . . . . . . 46
Setting up the printer driver for printing . . . . 46
English
Preface vii
Multi metallic colour printings . . . . . . . . . . . . . . 47
Requirements . . . . . . . . . . . . . . . . . . . . . . . . . 47
Prepare the image to be printed . . . . . . . . . . . 47
Install ink cartridges . . . . . . . . . . . . . . . . . . . . 48
Load the paper in your printer . . . . . . . . . . . . 48
Setting up the printer driver for printing . . . . 49
Simultaneous full colour and
metallic colour printing . . . . . . . . . . . . . . . . . 49
Requirements . . . . . . . . . . . . . . . . . . . . . . . . . 50
Prepare the image to be printed . . . . . . . . . . . 50
Install ink cartridges . . . . . . . . . . . . . . . . . . . . 51
Load the paper in your printer . . . . . . . . . . . . 51
Setting up the printer driver for printing . . . . 52
Printing in foil colour . . . . . . . . . . . . . . . . . . . . . . . . 53
Single foil colour printing . . . . . . . . . . . . . . . . . . 53
Requirements . . . . . . . . . . . . . . . . . . . . . . . . . 54
Prepare the image to be printed . . . . . . . . . . . 54
Install ink cartridges . . . . . . . . . . . . . . . . . . . . 54
Load the paper in your printer . . . . . . . . . . . . 54
Setting up the printer driver for printing . . . . 54
Multi foil colour printings . . . . . . . . . . . . . . . . . . 55
Requirements . . . . . . . . . . . . . . . . . . . . . . . . . 55
Prepare the image to be printed . . . . . . . . . . . 55
Install ink cartridges . . . . . . . . . . . . . . . . . . . . 56
Load the paper in your printer . . . . . . . . . . . . 56
Setting up the printer driver for printing . . . . 57
Simultaneous full colour and
foil colour printing . . . . . . . . . . . . . . . . . . . . . 57
Requirements . . . . . . . . . . . . . . . . . . . . . . . . . 58
Prepare the image to be printed . . . . . . . . . . . 58
Install ink cartridges . . . . . . . . . . . . . . . . . . . 59
Load the paper in your printer . . . . . . . . . . . . 59
Setting up the printer driver for printing . . . . 59
Printing on transparencies or transfer film . . . . . . . . 61
Requirements . . . . . . . . . . . . . . . . . . . . . . . . . . . 61
Prepare the image to be printed . . . . . . . . . . . . . . 61
Install ink cartridges . . . . . . . . . . . . . . . . . . . . . . 61
Load the transparency film or transfer film . . . . 62
Setting up the printer driver for printing . . . . . . . 62
Printing on transparencies
with opaque white ink or transfer film . . . . . . . . 63
Requirements . . . . . . . . . . . . . . . . . . . . . . . . . . . 63
Prepare the image to be printed . . . . . . . . . . . . . . 63
Install ink cartridges . . . . . . . . . . . . . . . . . . . . . . 63
Load the transparency film or transfer film . . . . 64
Setting up the printer driver for printing . . . . . . . 64
Setting up the film support . . . . . . . . . . . . . . . . . . . . 65
RGB Printing . . . . . . . . . . . . . . . . . . . . . . . . . . . . . . 67
Requirements . . . . . . . . . . . . . . . . . . . . . . . . . . . 67
Prepare the image to be printed . . . . . . . . . . . . . . 67
Install ink cartridge . . . . . . . . . . . . . . . . . . . . . . . 67
Load the paper in your printer . . . . . . . . . . . . . . . 67
Setting up the printer driver for printing . . . . . . . 67

viii User’s Guide
Chapter 5 - Maintenance
Cleaning the printer . . . . . . . . . . . . . . . . . . . . . . . . . . 69
Cleaning the main unit . . . . . . . . . . . . . . . . . . . . . 69
Cleaning the print head . . . . . . . . . . . . . . . . . . . . . 70
Cleaning the platen . . . . . . . . . . . . . . . . . . . . . . . . 70
Cleaning the feed roller . . . . . . . . . . . . . . . . . . . . . 71
Cleaning the paper transport rollers . . . . . . . . . . . 72
Chapter 6 - Troubleshooting
Troubleshooting - general . . . . . . . . . . . . . . . . . . . . . . 75
Printer errors . . . . . . . . . . . . . . . . . . . . . . . . . . . . . 75
Ready/insert button functions . . . . . . . . . . . . . . . . 75
Paper feed . . . . . . . . . . . . . . . . . . . . . . . . . . . . 75
Paper eject . . . . . . . . . . . . . . . . . . . . . . . . . . . . 75
Cancelling an alarm . . . . . . . . . . . . . . . . . . . . . 76
Forced printing and clearing data . . . . . . . . . . 76
Clearing paper jams . . . . . . . . . . . . . . . . . . . . . . . 76
Troubleshooting - Macintosh . . . . . . . . . . . . . . . . . . . 77
Troubleshooting for USB . . . . . . . . . . . . . . . . . . . . . . 88
The USB printer cannot be selected
in the Chooser . . . . . . . . . . . . . . . . . . . . . . . . . 88
Chapter 7 - Specifications & Settings
DIP switches . . . . . . . . . . . . . . . . . . . . . . . . . . . . . 90
Printable area . . . . . . . . . . . . . . . . . . . . . . . . . . . . 91
Using cardboard or thick paper . . . . . . . . . . . . 91
Available supplies . . . . . . . . . . . . . . . . . . . . . . . . . 92
Ink cartridges . . . . . . . . . . . . . . . . . . . . . . . . . . 92
Print media . . . . . . . . . . . . . . . . . . . . . . . . . . . 92
Appendix A
SCSI Interface module . . . . . . . . . . . . . . . . . . . . . . . . 93
Index

English
Chapter 1 - Introduction 1
Chapter 1 - Introduction
Introduction
Thank you for your purchase of the OKI DP-7000
Colour A3+ desktop printer. This printer represents the
most recent advances in printing quality and
technology. Whether you need a printer for your
Macintosh or the new iMac computer, this printer is the
solution you have been looking for.

2 User’s Guide
Features
The following is a summarised list of the many standard
features offered by your new printer:
• Variable-dot 2400 dots-per-inch printing
resolution.
• Nine-colour ink capacity, the most challenging
printing tasks are easily accomplished.
• Fully compatible with all of the standard inks and
foil colours.
• Fade-proof, smear-proof, and waterproof
printing.
• Reversable finish cartridge enabling the cartridge
to have a more extended life.
• USB Serial Interface allows a direct interface to
your Macintosh without an expensive converter
cable.

English
Chapter 1 - Introduction 3
Preparing your printer
Removing package contents
1. Lift the printer out of its container box. Remove
the packing materials from inside and outside the
printer.
Caution
The printer is shipped with tape, spacers, and other
packing materials to prevent delicate parts from being
damaged while in transit. Remove these packing materials
before using the printer. Damage to the printer or
malfunction may occur if the printer is used while these
packing materials are still present.
2. Remove the seven pieces of tape (1) and two
pieces of corrugated cardboard (2) at the front of
the printer. Remove the pieces of tape in the
output paper tray by taking hold of the handle and
pulling the output paper tray out.
3. Remove the three pieces of tape (1) at the back of
the printer.
1
2
1
3
1

4 User’s Guide
Opening front cover
1. Open the front cover to remove the inside
packing material.
2. To open the front cover (1), push the front cover
release button (2) to release the internal lock.
Gently lower the front cover with your hand.
3. Remove the piece of carriage packing material
(1) from inside the printer.
Caution:
Operating the printer without first removing the packing
materials may damage the printer.
Caution:
Do not remove the white pad (1) or the orange pad (2) at
the left end of the platen (3). They are there to clean the
print head. Removing them can cause the printer to
malfunction. The cleaning pad can be replaced when it
gets dirty. Do not touch the cover open sensor (4), which is
located on the left side of the printer.
1
621
3
4

English
Chapter 1 - Introduction 5
Closing front cover
Close the front cover after removing the carriage
packing material.
Caution:
When closing the front cover, never slam it shut. The ink
cartridges can become dislodged and damage to the
printer may result.
Locating printer
After removing the packing material and reading the
safety precautions (see page iii), choose a location
which offers a stable, firm surface for your printer. Try
to avoid places which are subject to extremes of heat,
cold, sunlight and damp. Also, choose a location from
which you can run the power cables safely to suitable
nearby connection points. Ensure that there is sufficient
space around the printer to allow the output paper tray
and the paper support to be pulled out when necessary.
Caution:
Do not allow the output paper tray hang over the edge
of a table or to protrude from the location of the printer
in any way.
Fitting Paper Support
Fit the paper support (1) so that the paper inserted in the
printer does not bend backwards. When fitting the
paper support (1), please make sure that the convex part
of the paper support fits into the hollow section of the
printer as shown in the drawing.
1
2

6 User’s Guide
Fitting Dust Cover
The dust cover is used when the printer is not used or is
printing. The dust cover prevents the paper inserted in
the printer, as well as the inside of the printer, from
getting dusty. Dust can cause not only poor printing
quality but also various other problems.
1. Fit the dust cover on the printer with the two
wings pulled out.
At this time, hook the dust cover onto the convex
part of the printer.
2. Fit the dust cover on the paper support by
pushing the two wings of the dust cover in and
insert the paper support between the dust cover
and the wings.
1

English
Chapter 1 - Introduction 7
Using Output Paper Tray
To use the output paper tray when printing, take hold of
the handle and pull the tray gently all the way out.
When you have finished printing, push it gently back in
again using the handle.
Transporting the printer
It is important to retain the packaging material to
protect the printer during transit if the printer has to be
moved.
To repack the printer for transportation:
1. Remove all ink cartridges.
2. Replace packing inserts that were removed when
the machine was first unpacked (see ‘Removing
Package Contents’ earlier in this guide).
3. Repack in original box with original packing
materials.

8 User’s Guide
Printer functions
The following paragraphs explain the name and
function of each part of the printer.
Front view of printer
1. Sheet feeder - Paper can fed into the printer either
automatically or manually. Place a stack of not
more than 100 sheets (plain laser paper) for
automatic feed. In manual feed, insert a single
sheet at a time.
2. Front cover release button - Pressing this button
opens the front cover. The front cover will need to
be opened when there is a paper jam or when
changing ink cartridges. Open the front cover
gently, using both hands.
3. Front cover - The front cover protects the internal
mechanisms of the printer. The cover is always
closed during printing.
4. Paper output slot - Paper exits the printer through
this slot.
5. Output paper tray - The output paper tray
receives printed paper.
Caution:
Never reach inside the printer while it is operating. Injury
may result. Do not open the front cover while the printer is
running.
6. Paper stopper - This stopper prevents the paper
from rising when the small size media is set
vertically for printing.
3
2
1
7
6
8
4
5

English
Chapter 1 - Introduction 9
7. Paper support - The paper support holds the
loaded paper upright. To extend the paper
support, pull up on the top edge.
8. Paper feed guide - This guide feeds the paper into
the printer. Set the adjustable guide on the left to
match the paper size being used.
9. Paper transport rollers - The paper transport
rollers for feeding sheets of paper loaded on the
sheet feeder (at 5 places which are enclosed in a
wavy line box).
Rear view of printer
1. Parallel interface connector - The printer cable is
connected to the parallel interface connector.
2. USB Interface Connector - The USB Interface
Connector connects to the USB cable.
3. Accessory connector - This connector is used to
connect Macintosh interface module to the
printer. Make sure you remove the rectangular
plastic connector cover before connecting either
of these options.
4. Paper feed switch - This switch sets the paper
feeding method to automatic feed mode or
manual feed mode.
5. Power socket - The power cable connects to the
power socket.
9
12
3
4
5

10 User’s Guide
Rear view of printer with SCSI interface
module
1. DIP switches - The DIP switches are used to set
the SCSI device number for the printer.
2. SCSI connector - The SCSI connectors are used
for connecting to the Macintosh computer and/or
other SCSI devices.
3. Paper feed switch - This switch sets the paper
feeding method to automatic feed mode or
manual feed mode.
4. Power socket - The power cable connects to the
power socket.
Inside the printer
1. Marking sticker (Black and Silver sticker)
The marking sticker confirms that the carriage is
in the standard position. Try not to smear the
sticker. If the sticker gets dirty, please clean it
with a dry cotton swab gently so as not to peel it
off.
2. Latch (the blue part)
This latch fixes the ink cartridge into the ink
cartridge holder.
3. Ink cartridge holder plate
There are five holder plates which hold two ink
cartridges. A maximum of nine ink cartridges is
allowed.
1
23
4
1
23

English
Chapter 1 - Introduction 11
4. PE lever
This lever detects whether or not there is any
paper left.
5. Paper eject roller
The paper eject roller discharge paper sheets.
6. Feed roller (metal roller)
The feed roller feeds loaded sheets.
7. Cleaning Pad (Orange)
This pad is used for cleaning the print head. Do
not remove this pad.
8. Cleaning Pad (White)
This pad is used for cleaning the print head. Do
not remove this pad.
9. Platen
This is a rubber plate which is pressed by the
print head while printing. Dust on the platen may
result in poor printing quality.
10. Cover open sensor
The cover open sensor detects whether or not the
front cover is open.
11. Carriage
The carriage automatically selects and picks up
the necessary ink cartridges from any ink
cartridge holders. The carriage is usually
positioned more to the left than is shown in the
drawing.
12. Release lever (Blue lever)
The release lever is used to clear paper jams.
Press the lever down to remove the jammed
4
5
621
3
4

12 User’s Guide
paper. When the front cover is closed, the lever
will automatically go back to its original position.
13. Print head
The print head is on the carriage and prints the
characters. Please take care not to touch the print
head except when cleaning.
14. RE sensor (at the Black part)
The RE sensor detects used-up ink cartridges.
15. HP sensor (two at the Black parts)
The HP sensor detects the type and standard
position of an ink cartridge.
16. Bobbin axis
Winds the ink cartridge around.
Caution:
Mishandling the print head or carriage can cause damage
to the printer. Also, never load an ink cartridge directly
into the carriage. Malfunction or damage to the printer
may result.
Paper feed switch
Caution:
Do not move the paper feed switch while paper is being
fed, otherwise the paper may feed in incorrectly. Move the
paper feed switch until it clicks into position “M” or “A”.
Paper will not feed properly unless the switch is correctly
set to either “M” or “A”.
11
13
12
14
15
16
Table of contents
Other Oki Printer manuals

Oki
Oki B410D How to use

Oki
Oki C110 Quick start guide

Oki
Oki LE810DT User manual

Oki
Oki MAC TECHNICAL REFERANCE C7350 User manual

Oki
Oki C6000dn Installation instructions

Oki
Oki C C5510 MFP User manual

Oki
Oki MPS9650c User manual

Oki
Oki Pacemark PM4410 Parts list manual

Oki
Oki C 5650dn User manual

Oki
Oki C7350hdn Firmware update

Oki
Oki B6500 Series Installation and maintenance instructions

Oki
Oki OKIPAGE8c Instruction Manual

Oki
Oki C6100dn Service manual

Oki
Oki PAGE 8p Plus User manual

Oki
Oki C710dn User manual

Oki
Oki Teriostar LP-1040 Series User manual

Oki
Oki C6100dn User manual

Oki
Oki OKIPAGE4w User manual

Oki
Oki Pacemark PM4410 Quick start guide

Oki
Oki C7100 User manual