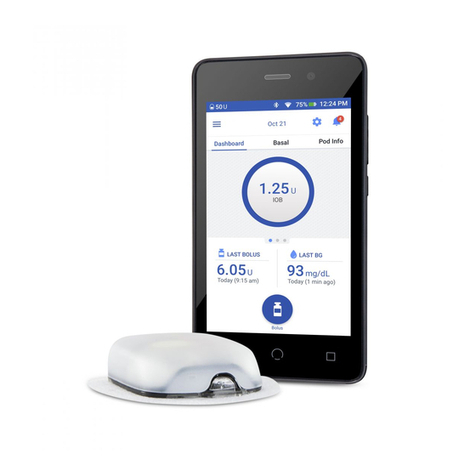
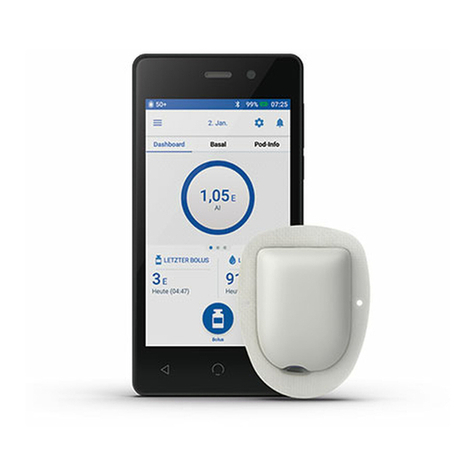
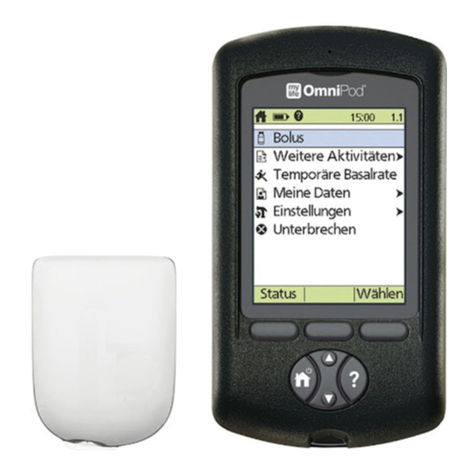
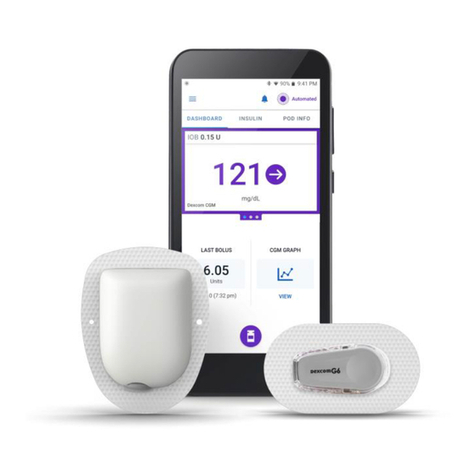
OmniPod 5 Manual

i
Omnipod®5 Automated Insulin Delivery System Technical User Guide
Contacts and Important Information
Customer Care - 24 hours/7 days
Website: omnipod.com
Address: Insulet Corporation, 100 Nagog Park, Acton MA 01720
Controller Model: PDM-M001-G-XX
Serial Number:
Controller FCC ID: 2ADINN5004L
Controller FCC ID: 2ADINN5004LR1
Pod FCC ID: RBV-029
Pod FCC ID: RBV-029C
Omnipod® 5 Automated Insulin Delivery System
Start Date:
Name
Street Address
City County Post Code
Phone
Email
Healthcare Provider
Name
Street Address
City County Post Code
Phone
Policy Number
Health Insurance
Name
Street Address
City County Post Code
Phone
Email
Omnipod® Trainer
Name
Street Address
City County Post Code
Phone
Email
Pharmacy

ii
© 2022 Insulet Corporation. Insulet, Omnipod and the Omnipod logo are
trademarks or registered trademarks of Insulet Corporation in the United States
and other various jurisdictions. All rights reserved.
e Bluetooth® word mark and logos are registered trademarks owned by
Bluetooth SIG, Inc. and any use of such marks by Insulet Corporation is under
licence.
All other trademarks are the property of their respective owners. e use of third-
party trademarks does not constitute an endorsement or imply a relationship or
other aliation.
Patent information at www.insulet.com/patents.
PT-001298-AW REV 001 12/22

iii
Contents
Section 1: Before You Begin 1
Chapter 1: Introduction ..................................................3
1.1. Welcome to Your Omnipod® 5 System ................................4
1.2. About This User Guide .................................................6
1.3. Indications For Use .....................................................6
1.4. Compatible Insulins ....................................................7
1.5. General Warnings ......................................................7
1.6. General Precautions..................................................11
Section 2: Omnipod 5 Pump Features 15
Omnipod 5 Pump Important Safety Information .......................17
Chapter 2: SystemTerminology and Navigation ........................25
2.1. Terminology ..........................................................26
2.2. Using the Touchscreen and Entering Information...................29
Chapter 3: Omnipod 5 System Overview................................33
3.1. Omnipod 5 App and Dexcom Communication .....................34
3.2. Omnipod5 App ......................................................35
3.3. Lock Screen and Security ............................................36
3.4. Status Bar .............................................................38
3.5. Home Screen .........................................................39
3.6. Home Screen Main Menu............................................47
3.7. Notications and Messages..........................................48
3.8. Manual and Automated Mode Overview ...........................49
Chapter 4: Setting Up Your Omnipod 5 Application .....................53
4.1. Setting Up Your Account .............................................54
4.2. Preparing for Your Training...........................................54
4.3. General Settings on the Insulet-provided Controller ................55
4.4. Basal Settings.........................................................60
4.5. Bolus Settings ........................................................64
4.6. Your App Set-up is Complete ........................................68
4.7. Saving Your Settings for Reference ..................................69
Chapter 5: Activating and Changing Your Pod ..........................71
5.1. Beginning the Pod Activation Process ...............................72
5.2. Setting Up a New Pod................................................74
5.3. Fill the Syringe with Insulin...........................................74
5.4. Filling, Activating, Applying and Starting the Pod ...................75

Contents
iv
Contents
5.5. Checking Your Infusion Site ..........................................83
5.6. Switching to Automated Mode......................................84
5.7. Deactivating an Active Pod ..........................................85
5.8. More Information about Pod Use....................................86
Chapter 6: Basal Programmes...........................................89
6.1. About Basal Programmes ............................................90
6.2. Reviewing All Basal Programmes ....................................90
6.3. Creating New Basal Programmes....................................91
6.4. Editing a Basal Programme ..........................................91
6.5. Deleting a Basal Programme.........................................92
6.6. Switching to a Dierent Basal Programme ..........................92
6.7. Basal Insulin Delivery.................................................93
Chapter 7: Temporary Basal Rates and Presets ..........................95
7.1. About Temporary Basal Rates........................................96
7.2. Starting a Temp Basal ................................................97
7.3. Cancelling a Temp Basal or Temp Basal Preset.......................99
7.4. Creating a New Temp Basal Preset...................................99
7.5. Editing a Temp Basal Preset .........................................100
7.6. Deleting a Temp Basal Preset .......................................101
7.7. Temporary Basal Rates Delivery.....................................101
Chapter 8: Blood Glucose Readings ................................... 105
8.1. About Blood Glucose Readings.....................................106
8.2. Entering Your Blood Glucose Reading ..............................107
8.3. High and Low Blood Glucose Readings ............................108
Chapter 9: Pausing and Starting Insulin Delivery...................... 111
9.1. Pausing Insulin Delivery.............................................112
9.2. Methods to Temporarily Pause Insulin Delivery in Manual Mode..113
9.3. Starting Insulin Delivery.............................................114
Chapter 10: Changing Settings. . . . . . . . . . . . . . . . . . . . . . . . . . . . . . . . . . . . . . . . 115
10.1. General Settings ...................................................116
10.2. Reminder Settings .................................................120
10.3. Basal and Temp Basal Settings.....................................123
Chapter 11: Browsing Your History and Records ...................... 125
11.1. About Your Recent History and Past Records .....................126
11.2. Viewing the Sensor Graph .........................................126
11.3. Sensor Graph States ...............................................127
11.4. History Information Overview.....................................129
11.5. Calculations for History Summaries ...............................132
11.6. History Details Section.............................................133
v
ContentsContents
Chapter 12: Managing Software Updates ............................. 139
12.1. Insulet-provided Controller .......................................140
Chapter 13: Alarms, Action and Reminder Notications .............. 143
13.1. Types of Alarms and Notications .................................145
13.2. Alarms and Notications Screen ..................................146
13.3. Sounds and Vibrations ............................................147
13.4. Informational Sounds and Vibrations .............................148
13.5. Responding to Alarms .............................................150
13.6. Hazard Alarm List ..................................................152
13.7. Advisory Alarm List ................................................160
13.8. Action Item Notication List .......................................165
13.9. Silencing Unresolved Alarms ......................................173
13.10. Responding to Reminder Notications ..........................174
13.11. Reminder Notications List. . . . . . . . . . . . . . . . . . . . . . . . . . . . . . . . . . . . . . .175
Chapter 14: Taking Care ofYour Controller and Pod ................... 177
14.1. Pod and Insulin Storage and Care .................................178
14.2. Controller Storage and Care .......................................179
14.3. Controller Battery Care.............................................182
Chapter 15: Living with Diabetes. . . . . . . . . . . . . . . . . . . . . . . . . . . . . . . . . . . . . . 185
15.1. Infusion-Site Checks ...............................................186
15.2. Being Aware of Your Glucose ......................................187
15.3. Travelling and Holidays ............................................188
15.4. Avoiding Lows, Highs and Diabetic Ketoacidosis .................190
15.5. Handling Special Situations .......................................198
Section 3: SmartBolus Calculator 201
SmartBolus Calculator Important Safety Information................. 203
Chapter 16: Delivering a Bolus ........................................ 205
16.1. Delivering a Manual Bolus .........................................206
16.2. Delivering Immediate and Extended Boluses.....................207
16.3. Tracking the Progress of a Bolus ...................................208
16.4. Cancelling a Bolus in Progress .....................................209
16.5. Reminder Settings .................................................210
Chapter 17: Delivering a Bolus with the SmartBolus Calculator ....... 213
17.1. About the SmartBolus Calculator .................................214
17.2. Entering Meal Information. . . . . . . . . . . . . . . . . . . . . . . . . . . . . . . . . . . . . . . . .216
17.3. Entering a Blood Glucose Reading or Using a
Sensor Glucose Value ..............................................216
17.4. Insulin On Board (IOB) .............................................218

Contents
vi
Contents
17.5. Adjustments toYour Calculation ..................................219
17.6. Delivering an Immediate Bolus....................................219
17.7. Delivering an Extended Bolus .....................................220
17.8. Bolus Settings ......................................................222
Chapter 18: Understanding SmartBolus Calculator Calculations...... 227
18.1. The SmartBolus Calculator.........................................228
18.2. SmartBolus Calculator Examples ..................................240
Section 4: Using a Sensor with Omnipod 5 243
Sensor Important Safety Information................................. 245
Chapter 19: About the Dexcom G6 .................................... 247
19.1. Dexcom G6 Overview .............................................248
19.2. Dexcom G6 Sensor Placement ....................................249
19.3. Using the DexcomG6 with Omnipod 5 ...........................250
19.4. Sensor Glucose Values .............................................251
19.5. Sensor Glucose Trend Arrows......................................252
19.6. Communication Messages ........................................253
Chapter 20: Connecting Dexcom G6 to the Pod ....................... 255
20.1. About Connecting DexcomG6 to the Pod........................256
20.2. Connecting the DexcomG6 during Initial Pod Set-up............256
20.3. Connecting the DexcomG6 Transmitter ..........................257
20.4. Disconnecting the Transmitter from the Pod .....................258
Section 5: Automated Mode 259
Automated Mode Important Safety Information ..................... 261
Chapter 21: About Automated Mode ................................. 263
21.1. About Automated Mode ..........................................264
21.2. About the DexcomG6 in Automated Mode ......................267
21.3. Bolus Settings and the Importance of a Bolus ....................268
21.4. Pod Adaptivity .....................................................268
21.5. About Automated Mode: Limited.................................269
21.6. Automated Delivery Restriction ...................................271
Chapter 22: Switching Between Manual Mode and Automated Mode 273
22.1. Switching from Manual Mode to Automated Mode..............274
22.2. Switching from Automated Mode to Manual Mode..............276
Chapter 23: Activity Feature .......................................... 277
23.1. About the Activity Feature.........................................278
23.2. Starting the Activity Feature .......................................279

vii
ContentsContents
23.3. Cancelling the Activity Feature ....................................279
Chapter 24: Automated Mode Alarms ................................ 281
24.1. Advisory Alarm List ................................................282
Chapter 25: Omnipod 5 Clinical Studies............................... 285
25.1. Studies in Children, Adolescents and Adults with
Type 1 Diabetes ...................................................286
25.2. Studies in Very Young Children with Type 1 Diabetes ............300
Section 6: Additional Information 309
Chapter 26: Troubleshooting ......................................... 311
26.1. Omnipod 5 Pump FAQs ...........................................312
26.2. SmartBolus Calculator FAQs .......................................316
26.3. Sensor FAQs........................................................317
26.4. Automated Mode FAQs............................................322
26.5. Pod Communication Issues –“Try Again”. . . . . . . . . . . . . . . . . . . . . . . . . .323
26.6. About Keeping Your Omnipod 5 Controller Nearby ..............325
26.7. Device Complaints.................................................325
26.8. Boot Mode .........................................................326
Appendix ............................................................. 327
Index ................................................................. 351
My Settings ........................................................... 356

viii
is page intentionally le blank.

BEFORE YOU BEGIN
1 Introduction

2
is page intentionally le blank.

3
CHAPTER 1
Introduction
Contents
1.1. Welcome to Your Omnipod® 5 System...............................4
The Omnipod 5 System Features ...........................................4
1.2. About This User Guide .................................................6
1.3. Indications For Use..................................................6
Indications for use......................................................6
Contraindications ......................................................7
1.4. Compatible Insulins.................................................7
1.5. General Warnings ...................................................7
1.6. General Precautions ...............................................11
Potential Risks .............................................................12
Important User Information. . . . . . . . . . . . . . . . . . . . . . . . . . . . . . . . . . . . . . . . . . . . . . . 13
Emergency Kit .............................................................14

Introduction 1
4
1 Introduction
1.1. Welcome to Your Omnipod® 5 System
e Omnipod® 5 System is the rst wearable, on-body, tubeless, automated
insulin delivery system, when used with the Dexcom G6® Continuous Glucose
Monitoring System, to continuously adapt and automatically deliver insulin
according to your personal needs. e Omnipod 5 System consists of a tubeless
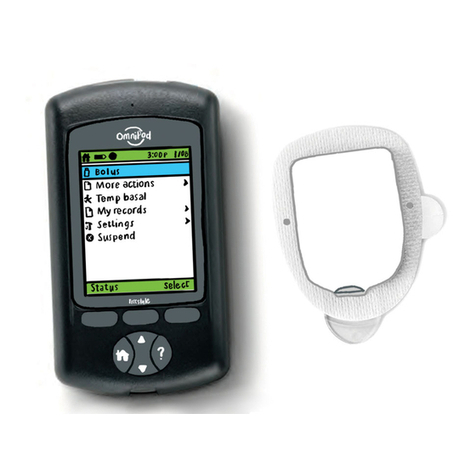
insulin Pod and the Omnipod® 5 App on an Insulet-provided Controller.
Note: Smartphone compatibility not available in all markets.
The Omnipod 5 System Features
• Pod: e Pod provides continuous subcutaneous insulin delivery. It may be
worn for up to 3 days and can be lled with up to 200 units of U-100
rapid-acting insulin (minimum 85 units).
• No tubing: ere is no tubing with the Pod, allowing you to place the Pod
almost anywhere you would give yourself an injection. e Pod is waterproof
for depths of up to 7.6 metres (25 feet) for up to 60 minutes (IP28).
• Omnipod® 5 App: e Omnipod 5 App allows you to select a basal prole,
target glucose and bolus settings, activate and deactivate the Pod, connect
with the Dexcom G6 Continuous Glucose Monitoring System, and select
insulin delivery mode. e Omnipod 5 App comes installed on an
Insulet-provided Controller.
• Dexcom G6 Continuous Glucose Monitoring (CGM) System: e
Omnipod 5 System is designed to work with the Dexcom G6, which must be
obtained separately. Sensor glucose values and trends from the Dexcom G6
are used for automated insulin delivery in Automated Mode, as well as bolus
calculations in both Automated and Manual Mode. e Dexcom G6 Sensor
must be started in the Dexcom app in order to use sensor glucose values and
trends in the Omnipod 5 System.
• Two modes of operation: e Omnipod 5 System provides the following
modes of operation: Automated and Manual. e Omnipod 5 System
enables you to switch between modes when required conditions are met.
e System behaves dierently depending on which mode you select.
• Automated Mode: Each Pod contains SmartAdjust™ technology that
adjusts insulin every 5 minutes to bring your glucose value to your
customised glucose target, or Target Glucose. e adjustment is based on
a prediction of where your glucose will be 60 minutes in the future and
considers your sensor glucose value and trend, adaptive basal rate and
insulin that is still working in your body.
• Manual Mode: e Omnipod 5 System delivers insulin based on
user-dened Basal Programmes. During Manual Mode, there is no
automated adjustment of insulin delivery.

5
Introduction 11 Introduction
• Activity feature: While in Automated Mode, you can enable the Activity
feature in times when you need less insulin, for example, when you are getting
ready to exercise. When the Activity feature is enabled, the system gives less
insulin and aims for a Target Glucose of 8.3 mmol/L.
• SmartBolus Calculator: If you are planning to eat or if your glucose is high,
the SmartBolus Calculator can suggest a bolus amount of insulin based on
your individual settings, entered values and sensor glucose value and trend,
when available. e SmartBolus Calculator allows for the immediate delivery
of the bolus insulin in both Automated and Manual Mode. In Manual Mode,
the SmartBolus Calculator also allows for an extended bolus. e extended
bolus can be customised to deliver the bolus dose over a period of time.
• Keeping Track of Sensor Glucose and Insulin: e Omnipod 5 System
records up to 90 days of information, including basal delivery, bolus doses,
carbohydrates, alarms and glucose-related data. In Automated Mode, the
system records automated insulin delivery and corresponding sensor glucose
values every 5 minutes. e Home screen features a Sensor Graph that allows
for reference of your sensor glucose values and displays some information
about insulin delivery.
• Pod Site tracker: When activating a new Pod, the System provides the option
to track the site on which you have applied a Pod. is allows you to reference
past Pod sites when deciding where to place your next Pod.

Introduction 1
6
1 Introduction
1.2. About This User Guide
e purpose of this User Guide is to assist you with the features and functions of
the Omnipod 5 System. It provides step-by-step instructions on how to properly
operate the System, as well as important warnings and cautions to ensure your
safety during use.
Note: is User Guide is intended for use only with the Insulet-provided
Controller with the Omnipod 5 App, model PDM-M001-G-XX. To learn which
version of the Insulet-provided Controller you have, turn it over. If you see “PDM-
M001-G-XX” on the back of the Controller, this is the correct User Guide. If you
do not see it, contact Customer Care. Using an incorrect User Guide can lead to
improper use of the Omnipod 5 System.
Note: Screen images shown in this User Guide are examples only and are not
suggestions for user settings. Always consult with your healthcare provider to
determine the appropriate settings for you.
Healthcare and treatment are complex subjects requiring the services of qualied
healthcare providers. is User Guide is informational only and not intended
as medical or healthcare advice or recommendations to be used for diagnosis,
treatment or any other individual needs. is User Guide is not a substitute for
medical or healthcare advice, recommendations and/or services from a qualied
healthcare provider. is User Guide may not be relied upon in any way in
connection with your personal healthcare, related decisions and treatment.
All such decisions and treatment should be discussed with a qualied healthcare
provider who is familiar with your individual needs.
1.3. Indications For Use
Indications for use
e Omnipod 5 Automated Insulin Delivery Systemis a single-hormone
insulin delivery system intended to deliver U-100 insulin subcutaneously for the
management of type 1 diabetes in persons aged 2 and older requiring insulin.
e Omnipod 5 System is intended to operate as an automated insulin delivery
system when used with compatible Continuous Glucose Monitors (CGM).
When in Automated Mode, the Omnipod 5 System is designed to assist people
with type 1 diabetes in achieving glycaemic targets set by their healthcare
providers. It is intended to modulate (increase, decrease or suspend) insulin
delivery to operate within predened threshold values using current and
predicted sensor glucose values, to maintain blood glucose at variable target
glucose levels, thereby reducing glucose variability. is reduction in variability
is intended to lead to a reduction in the frequency, severity and duration of both
hyperglycaemia and hypoglycaemia.

7
Introduction 11 Introduction
e Omnipod 5 System can also operate in a Manual Mode that delivers insulin at
set or manually adjusted rates.
e Omnipod 5 System is intended for single-patient use. e Omnipod 5 System
is indicated for use with NovoLog®/NovoRapid®, Humalog® and Admelog® U-100
insulin.
Contraindications
e Omnipod 5 System is NOT recommended for people who:
• are unable to monitor glucose as recommended by their healthcare provider
• are unable to maintain contact with their healthcare provider
• are unable to use the Omnipod 5 System according to instructions
• are taking hydroxyurea, as it could lead to falsely elevated sensor glucose
values and result in over-delivery of insulin, which can lead to severe
hypoglycaemia
• do NOT have adequate hearing and/or vision to allow recognition of all
functions of the Omnipod 5 System, including alerts, alarms and reminders
Device components including the Pod, Sensor and Transmitter must be removed
before Magnetic Resonance Imaging (MRI), a Computed Tomography (CT) scan
or diathermy treatment. In addition, the Controller should be placed outside of
the procedure room. Exposure to MRI, CT or diathermy treatment can damage
the components.
1.4. Compatible Insulins
e Omnipod 5 System is compatible with the following U-100 insulins:
NovoLog®/NovoRapid®, Humalog® and Admelog®.
1.5. General Warnings
Warning: Read all the instructions provided in this User Guide before using the
Omnipod 5 System. Monitor your glucose with the guidance of your healthcare
provider. Undetected hyperglycaemia or hypoglycaemia can develop without
proper monitoring.
Warning: DO NOT start to use your system or change your settings without
adequate training and guidance from your healthcare provider. Initiating and
adjusting settings incorrectly can result in over-delivery or under-delivery of
insulin, which could lead to hypoglycaemia or hyperglycaemia. Settings that
impact insulin delivery mainly include: Pod Shutdown, basal rate(s), Max Basal

Introduction 1
8
1 Introduction
Rate, Max Bolus, Correction Factor(s), Insulin to Carb (IC) Ratio(s), Minimum
Glucose for Calculations, Target Glucose, Correct Above and Duration of Insulin
Action.
Warning: DO NOT rely upon this User Guide in any way in connection with
your personal healthcare, related decisions and treatment. is User Guide
is informational only and not intended as medical or healthcare advice or
recommendations to be used for diagnosis, treatment or any other individual
needs. is User Guide is not a substitute for medical or healthcare advice,
recommendations and/or services from a qualied healthcare provider. All such
decisions and treatment should be discussed with a qualied healthcare provider
who is familiar with your individual needs.
Warning: DO NOT use the Omnipod 5 System if you are unable or unwilling to
use it as instructed by this User Guide and your healthcare provider. Failure to use
this system as intended could result in over-delivery or under-delivery of insulin,
which can lead to hypoglycaemia or hyperglycaemia.
Warning: ALWAYS keep an emergency kit with you to quickly respond to any
diabetes emergency or in the case that your Omnipod 5 System stops working.
Always carry supplies to perform a Pod change should you need to replace your
Pod at any time.
Warning: ALWAYS dispose of the Pod according to local waste disposal
guidelines. e Pod is considered biohazardous aer use and can potentially
transmit infectious diseases.
Warning: DO NOT use SmartAdjust technology in pregnant women, critically
ill patients or those on dialysis. e safety of SmartAdjust technology has not been
evaluated in these populations. Consult with your healthcare provider if any of
these conditions apply to you before using SmartAdjust technology.
Warning: DO NOT use the Omnipod 5 System if you do not have adequate
vision and/or hearing to recognise all functions of the Omnipod 5 System
including alerts, alarms and reminders according to instructions.
Warning: ONLY use rapid-acting U-100 NovoLog®/ NovoRapid® (insulin
aspart), Humalog® (insulin lispro) and Admelog® (insulin lispro) insulin in the
Omnipod 5 System as they have been tested and found to be safe for use with
this system. NovoLog/NovoRapid, Humalog and Admelog are compatible with
the Omnipod 5 System for use up to 72 hours (3 days). Follow your healthcare
provider’s directions on how oen to replace the Pod.
Warning: AVOID administering insulin, such as by injection or inhalation, while
wearing an active Pod, as this could result in hypoglycaemia. e Omnipod5
System cannot track insulin that is administered outside of the system. Consult
your healthcare provider about how long to wait aer manually administering
insulin before you start Automated Mode.
Warning: AVOID changing your SmartBolus Calculator settings before
consulting with your healthcare provider. Incorrect changes could result in

9
Introduction 11 Introduction
over-delivery or under-delivery of insulin, which can lead to hypoglycaemia or
hyperglycaemia. Settings that impact bolus calculations mainly include: Max
Bolus, Minimum Glucose for Calculations, Correct Above, Correction Factor(s),
Insulin to Carb (IC) ratio(s), Duration of Insulin Action and Target Glucose.
Warning: ALWAYS follow your healthcare provider's guidance on appropriate
glucose monitoring to avoid hyperglycaemia and hypoglycaemia.
Warning: Glucose below 3.9 mmol/L may indicate hypoglycaemia
(low glucose). Glucose above 13.9 mmol/L may indicate hyperglycaemia
(high glucose). Follow your healthcare provider's suggestions for treatment.
Warning: ALWAYS promptly treat hypoglycaemia. Glucose at or below
3.1 mmol/L indicates signicant hypoglycaemia (very low glucose). If le
untreated, this could lead to seizure, loss of consciousness or death. Follow your
healthcare provider's recommendations for treatment.
Warning: ALWAYS promptly treat glucose below 3.9 mmol/L (hypoglycaemia)
according to your healthcare provider's recommendations. Symptoms of
hypoglycaemia include weakness, sweating, nervousness, headache or confusion.
If le untreated, hypoglycaemia can lead to seizure, loss of consciousness or death.
Warning: DO NOT wait to treat hypoglycaemia (low glucose) or symptoms
of hypoglycaemia. Even if you cannot check your glucose, waiting to treat
symptoms could lead to severe hypoglycaemia, which can lead to seizure, loss of
consciousness or death.
Warning: ALWAYS promptly treat hyperglycaemia (high glucose) according
to your healthcare provider's recommendations. Symptoms of hyperglycaemia
include fatigue, thirst, excess urination or blurry vision. If le untreated,
hyperglycaemia can lead to diabetic ketoacidosis (DKA) or death.
Warning: DO NOT wait to treat DKA. If le untreated, DKA can quickly lead to
breathing diculties, shock, coma or death.
Warning: ALWAYS treat “LOW”or “HIGH”sensor glucose values and blood
glucose readings according to your healthcare provider's recommendations.
ese values can indicate potentially serious conditions requiring immediate
medical attention. If le untreated, these situations can quickly lead to diabetic
ketoacidosis (DKA), shock, coma or death.
Warning: NEVER drive yourself to the emergency department if you need
emergency medical care. Ask a friend or family member to take you tothe
emergency department or call an ambulance.
Warning: ALWAYS be aware of your current sensor glucose value, trust how
your body feels, and do not ignore symptoms of high and low glucose. Even
though insulin delivery adjusts automatically in Automated Mode, with the
goal of bringing your glucose level to your dened Target Glucose, severe
hypoglycaemia or hyperglycaemia may still occur.

Introduction 1
10
1 Introduction
If your sensor glucose values do not match your symptoms, ALWAYS check your
blood glucose using a BG meter, and consider treatment and/or Sensor calibration
if necessary. ALWAYS switch to Manual Mode if you feel you are receiving
inaccurate sensor glucose values.
• Erroneously high sensor glucose values can cause excessive insulin delivery,
leading to severe hypoglycaemia, seizure, loss of consciousness or death.
• Erroneously low sensor glucose values can cause prolonged insulin
suspension, leading to hyperglycaemia, DKA or death.
If you are having symptoms that are not consistent with your blood glucose
readings and you have followed all instructions described in this User Guide,
contact your healthcare provider.
Warning: ALWAYS make sure you are using the Sensor as per the manufacturer's
instructions. Do not extend the Sensor wear beyond the recommended duration
and do not start a Sensor past its Use-By date. e Omnipod 5 System relies on
accurate, current sensor glucose values to determine your insulin needs. Incorrect
use of the Sensor could result in over-delivery or under-delivery of insulin, which
could lead to hypoglycaemia or hyperglycaemia.
Warning: Do NOT use the Omnipod 5 System if you are taking hydroxyurea,
a medication used in the treatment of diseases including cancer and sickle cell
anaemia. Your Dexcom G6 sensor glucose values could be falsely elevated and
could result in over-delivery of insulin, which can lead to severe hypoglycaemia.
Warning: ALWAYS respond to Hazard Alarms as soon as they occur. Pod
Hazard Alarms indicate that insulin delivery has stopped. Failure to respond
to a Hazard Alarm could result in under-delivery of insulin, which can lead to
hyperglycaemia.
Warning: ALWAYS monitor your glucose and follow your healthcare provider's
treatment guidelines when you stop receiving insulin due to a blockage
(occlusion). Not taking action promptly could result in under-delivery of insulin,
which can lead to hyperglycaemia or diabetic ketoacidosis (DKA)
(see “ Blockage Detected”on page 152).
Warning: ALWAYS keep your Controller safe and within your control to ensure
that others cannot make changes to your insulin therapy. Unintended changes to
your insulin delivery could result in over-delivery or under-delivery of insulin,
which can lead to hypoglycaemia or hyperglycaemia. Be careful who you share
your Controller PIN with.
Warning: DO NOT use the Omnipod 5 System at low atmospheric pressure
(below 700 hPA). You could encounter such low atmospheric pressures at
high elevations, such as when mountain climbing or living at elevations above
3,000metres (10,000 feet). Change in atmospheric pressure can also occur during
take-o with air travel. Unintended insulin delivery can occur if there is expansion
of tiny air bubbles that may exist inside the Pod. is can result in hypoglycaemia.

11
Introduction 11 Introduction
It is important to check your glucose frequently when ying to avoid prolonged
hypoglycaemia.
Warning: DO NOT use the Omnipod 5 System in oxygen-rich environments
(greater than 25% oxygen), which include home or surgical areas that use
supplementary oxygen, and hyperbaric chambers. Hyperbaric, or high-pressure,
chambers are sometimes used to promote healing of diabetic ulcers, or to
treat carbon monoxide poisoning, certain bone and tissue infections, and
decompression sickness. Exposure to oxygen-rich environments could result in
combustion of the Pod or Omnipod 5 Controller, which can cause severe burns to
the body.
Warning: DO NOT use the Omnipod 5 System in high atmospheric pressure
environments (above 1060 hPA), which can be found in a hyperbaric chamber.
Hyperbaric, or high-pressure, chambers are sometimes used to promote healing
of diabetic ulcers, or to treat carbon monoxide poisoning, certain bone and tissue
infections, and decompression sickness. Exposure to high-atmospheric-pressure
environments can damage your Pod and Omnipod 5 Controller, which could
result in under-delivery of insulin, which can lead to hyperglycaemia.
1.6. General Precautions
Caution: DO NOT use any component of the Omnipod 5 System (Controller,
Pod) if you suspect damage aer an unexpected event such as dropping or hitting
on a hard surface. Using damaged components may put your health at risk as
the system may not be working properly. If you are unsure if one or more of your
components are damaged, stop using the system and contact Customer Care for
support.
Caution: ONLY use the Omnipod 5 System with authorised devices (Omnipod 5
App, Controller and Pod, and Dexcom G6 CGM). DO NOT attempt to use the
Omnipod 5 System with unauthorised devices. Attempting to use the Omnipod 5
System with unauthorised devices could interrupt your insulin delivery and put
your health and safety at risk.
Caution: Connect ONLY to trusted Wi-Fi networks with your Controller.
AVOID connecting to public Wi-Fi networks, such as those found in airports,
coee shops, etc., as these networks are not secure and could result in exposing
your Controller to malware. DO NOT connect to public Wi-Fi networks during
rst-time set-up of your Omnipod 5 System.
Caution: ALWAYS activate a new Pod in a timely manner. Waiting too long
between Pod changes could result in under-delivery of insulin, which can lead
to hyperglycaemia. If another Pod is not available, use a dierent insulin delivery
method.

Introduction 1
12
1 Introduction
Caution: DO NOT navigate away from the Omnipod 5 App while you are in the
process of making changes to your insulin delivery settings. If you leave the App
before you are able to save the setting change and before the App is able to put the
setting change into eect, the system will continue to use your last saved settings.
As a result, you may continue with therapy settings that you did not intend. If you
are unsure about whether your changes were saved, review your settings.
Caution: AVOID leaving your Controller in a place that would prevent you from
hearing alarms and notications from your Omnipod 5 App. Delivery of insulin
in Manual Mode or Automated Mode continues as programmed if you move
away from your Controller.
Caution: ALWAYS respond to Pod Expired, Low Pod Insulin, and Pod Shutdown
Advisory Alarms when they occur. ese alarms escalate to Hazard Alarms if no
action is taken. When Hazard Alarms occur, insulin delivery stops.
Caution: ALWAYS be aware of possible changes to your time zone when
travelling. If you do not update your time zone, your insulin therapy will be
delivered based on your old time zone, which may cause disruptions in your
insulin delivery schedule and inaccurate history logs. Talk to your healthcare
provider about how to manage your insulin delivery while travelling between time
zones.
Caution: You cannot use the Dexcom G6 receiver with the Omnipod 5 System
because the Omnipod 5 System is only compatible with the G6 app on a
smartphone.
Caution: ALWAYS check your glucose frequently during amusement park
rides and ying, or other situations where sudden changes or extremes of air
pressure, altitude or gravity may occur. ough the Omnipod 5 System is safe to
use at atmospheric pressures typically found in aeroplane cabins during ight,
the atmospheric pressure in an aeroplane cabin can change during ight, which
may aect the Pod's insulin delivery. Rapid changes in altitude and gravity, such
as those typically found on amusement park rides or ight take-o and landing,
can aect insulin delivery, leading to possible hypoglycaemia or injury. If needed,
follow your healthcare provider's treatment instructions.
Potential Risks
• e Omnipod 5 System uses sensor glucose values and trends to calculate
insulin delivery. If the sensor glucose values are inaccurate, the System could
deliver an inaccurate dose of insulin, which can lead to hypoglycaemia or
hyperglycaemia.
• e Omnipod 5 System uses the information and settings that you enter
to calculate and adjust insulin delivery. If the information you enter is
inaccurate, or if you don’t give the System information about carbs and
glucose, the System could deliver an inaccurate dose of insulin, which can
lead to hypoglycaemia or hyperglycaemia.
Other manuals for 5
3
Table of contents
Other OmniPod Medical Equipment manuals

OmniPod
OmniPod DASH System User manual

OmniPod
OmniPod 5 User manual

OmniPod
OmniPod Pod User manual

OmniPod
OmniPod DASH SYSTEM PODDER Firmware update

OmniPod
OmniPod PODDER Firmware update

OmniPod
OmniPod DASH System User manual

OmniPod
OmniPod 5 User manual

OmniPod
OmniPod DASH System User manual

OmniPod
OmniPod ENT450 User manual

OmniPod
OmniPod PDM Series Firmware update