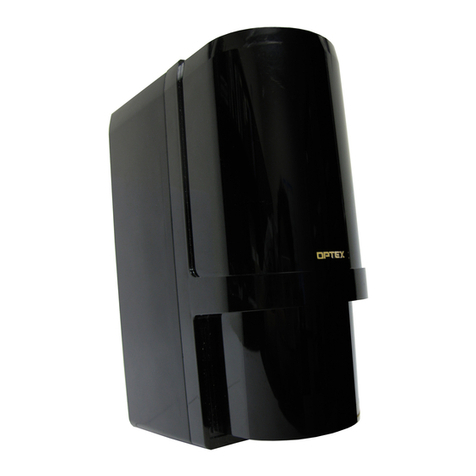
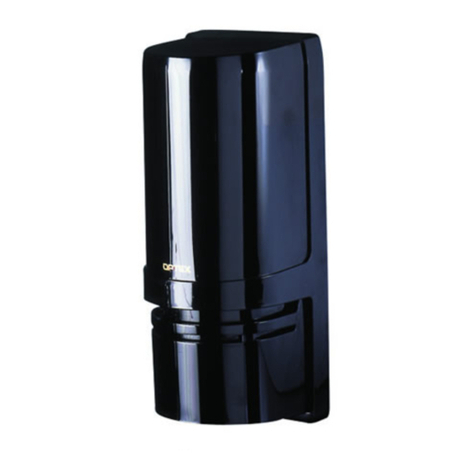
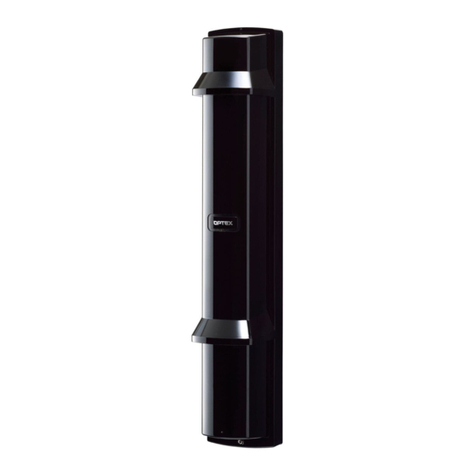
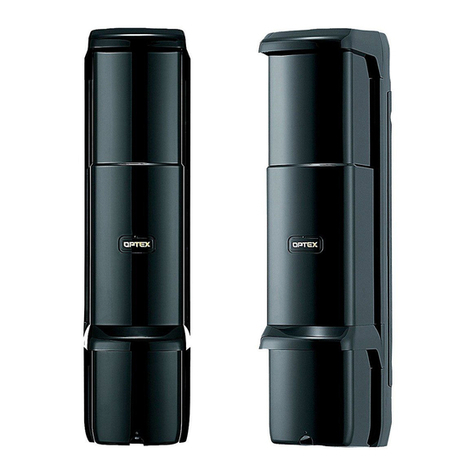
Optex OVS-50TNR User manual

- 1 -
FEATURES
This symbol requires an action or gives an instruction.
This symbol indicates recommendation.
INTRODUCTION
1
1-1 BEFORE YOUR OPERATION
No. 59-2882-1
INSTALLATION INSTRUCTIONS
MODEL
OVS-50TNR
DETECTION RANGE
50 ft. / 15 m
•Slim body design
•Easy to see LED optical alignment
•IP65 waterproof structure
•Outdoor use / Usage extérieur
•Easy installation with battery driven transmitter
•8 years battery life with 2pcs. of SAFT LSH-20
•Simplified optical adjustment -Sniper View Finder with ×2 magnification
Warning
Caution
Indicates a potentially hazardous situation which, if not avoided,
will result in minor or moderate injury, or may result in serious
injury or death.
Additionally there may be significant property damage.
Indicates a potentially hazardous situation which, if not avoided,
may result in minor or moderate injury or in property damage.
This symbol indicates prohibition. The specific prohibited action is provided in
and/or around the figure.
BATTERY OPERATED
PHOTOELECTRIC DETECTOR
OVS-50TNR
1-2 PRECAUTIONS
Do not install the unit on an unstable
surface.
Do not install the pole in a location
where sufficient stability can not be
ensured.
Do not install the unit in trees, leaves,
or other objects that may swing in the
wind and block the beam.
Avoid installing the receiver in a location
where rising or setting sun may go
directly into the receiver.
Install the unit at 13” height from the
ground level.
13” ± 2”
(330 ± 50 mm)
※No less than 11”
・The system must install in ordinary locations in accordance with the in Canada general requirements are given in CSA Standard C22.2 No.0, General Requirements
– Canadian Electrical Code, Part II.
• Read this instruction manual carefully prior to installation.
• After reading, store this manual carefully in an easily accessible place for reference.
• This manual uses the following warning indications for correct use of the product, harm to you or other people and damage to your assets, which are described below.
Be sure to understand the description before reading the rest of this manual.
Ce symbole signifie interdiction. L'action interdite est décrite dans et/ou autour de l'image.
Ce symbole demande une action ou donne une instruction.
Avertissement
Attention
Le non respect des instructions indiquées par signe et un
mauvais maniement peuvent causer la mort ou des blessures
graves.
Le non respect des instructions indiquées par ce signe et un
mauvais maniement peuvent causer des blessures et/ou des
dommages matériels.
Caution
Do not pour water over the product with a bucket, hose, etc. The water may
enter, which may cause damage to the devices.
Clean and check the product periodically for safe use. If any problem is found, do not
attempt to use the product as it is and have the product repaired by a professional
engineer or electrician.
Attention
Ne pas verser d'eau sur le produit avec un seau, un tuyau, etc. De l'eau
pourrait pénétrer et endommager l'appareil.
Nettoyer et vérifier périodiquement le produit pour une utilisation en toute
sécurité. Si vous rencontrez un problème, n'essayez pas d'utiliser le produit
en l'état, faites le réparer par un ingénieur ou électricien professionnel.
Warning
Do not use this product for any other purpose other than its intended use on automatic gates.
This product is not intended for use on Industrial Doors or Vertical gates and does not comply
with UL 325 for those applications.
Do not touch the unit base or power terminals of the product with a wet
hand (do not touch when the product is wet with rain, etc.). It may cause
electric shock.
Never attempt to disassemble or repair the product. It may cause fire or
damage to the devices.
Do not use batteries that have different levels of power remaining (i.e., new and
used batteries). Not observing the above may result in an explosion, leakage of
electrolyte, emission of toxic gases or other outcomes that may be harmful to
people and property.
[Handling of Batteries] Do not recharge, short circuit, crush, disassemble, exceed heat
above 100°C (212°F), incinerate, or expose contents to water. Do not solder directly to
the cell.
Avertissement
Ne jamais essayer de démonter ou de réparer le produit. Cela pourrait
causer un incendie ou endommager le dispositif.
Ne pas utiliser des batteries avec des niveaux de charges différents
(par ex., des batteries neuves avec des usagées). Le non respect de ce
qui précède peut causer une explosion, une fuite d'électrolyte, une émission
de gaz toxiques ou une conséquence nocive aux personnes et aux biens.
[Manipulation des batteries] Ne pas recharger, court-circuiter, écraser,
démanteler, porter à une température supérieure à 100°C (212°F), incinérer,
ou exposer le contenu à de l’eau. Ne pas souder directement à la cellule.
Ne pas toucher l'unité ou les bornes électriques du produit avec une main
humide (ne pas toucher si le produit a été mouillé par la pluie, etc.).
Il y a un risque de choc électrique.
N'utilisez pas ce produit à d'autres fins que son utilisation prévue sur les
portails automatiques. Ce produit n'est pas destiné à être utilisé sur des
portes industrielles ou des portails verticaux et n'est pas conforme à la
norme UL 325 pour ces applications.
- 2 -
1-3 PARTS IDENTIFICATION
Main unit cover
Battery cover
Main unit Back box
Viewfinder
Optical alignment dial
Optical lens
Main unit mounting
bracket
Accessories>>
U-brackets: 2Pole brackets: 2
M4×16 screws for pole mounting
(with rubber washer): 4
4×25 self tapping for wall mounting
(with rubber washer): 4
Dip SW
(Receiver only)
Main unit cover
lock screw
Battery cover
lock screw
Battery
Plate
Optical unit
INSTALLATION
2
2-1 SEPARATING (Transmitter & Receiver)
1
4Remove the main unit from the back box.
2 3 Remove the connectors.
22
11
2
1
3
1
2
Remove the battery cover. Remove the main unit cover.
Loosen the battery cover
lock screw.
Pull Loosen the main unit
cover lock screw.
Pull
Turn the optical unit 90 degrees
and loosen the screw.
Take the main unit out of the
back box.
2-2
WIRING (
Receiver only)
2 3
Using a screwdriver or similar tool, break the
knockout position in the back box as shown.
1Open the battery plate, eject InterfaceBoard.
Battery Plate
Interface
board
Open the battery plate and then route the Gate Operater
wires from the rear of the back box through the knockout
holes. Adjust the wires so that they extend about 100mm
(4 inch) from the holes.
Gate Operater
Interface board
Ce symbole signifie interdiction. L'action interdite est décrite dans et/ou autour de l'image.
Ce symbole demande une action ou donne une instruction.
※Swivel Optical unit.

- 3 -
45Insert Interface board into the slots on the back box and then connect
the wires to nterface board terminals. 6Close the battery plate .
Fill the holes with the wires
using the some putty.
2-3 WALL MOUNTING (Transmitter & Receiver)
12
3
Replace batteries (Transmitter only).
5
Attach the connectors.
4
Mount the main unit.
Warning
Mount the back box to the wall.
Caution
12
2
3
Knockout position
WALL
POLE(1)
POLE(2)
Using a screwdriver or similar tool, break the knockout position (×2)
in the back box as shown.
Open the screw holes from the
inside of the back box to the
outside.
Route the two connectors of the
back box through the slits on the
upper part of the main unit.
Tighten the main unit fixing screw
and turn the optical unit 90
degrees.
2
3
1Open the battery plate in the direction of the arrow.
Insert the two batteries into their compartment.
Ensure the positive terminals are facing toward the
front.
Close the battery plate.
1
3
2
3.6 VDC D size
Lithium batteries
• Do not mix batteries that have different levels of power remaining
(i.e., new and used batteries or batteries of different manufacturers).
Not observing the above may result in an explosion, leakage of electrolyte,
emission of toxic gases or other outcomes that may be harmful to people
and property.
• Remove all batteries prior to replacing with new ones. If this is
not followed, the low battery indicator LED will not reset and will
continue to blink.
Disposal method for batteries
Dispose of used batteries in accordance with local
government regulations/low and EU Battery
Directive (2006/66/EU).
1
Note>>
• Avoid placing the cables in a position where
they can be caught between the main unit and
cover.
• Ne pas mélanger des batteries avec des niveaux de charges différentes
(par ex. des batteries neuves avec des batteries usagées, ou des
batteries de fabriquants différents). Le non respect de ce qui précède
peut causer une explosion, une fuite d'électrolyte, une émission de gaz
toxiques ou d'autres conséquences dangereuses pour les personnes ou
les biens.
Avertissement
Attention
• Enlever toutes les batteries avant d'en remettre de nouvelles.
Cela empêcherait la remise à zéro de la LED qui continuera de clignoter.
• Lors du retour de ce détecteur au fournisseur, retirez toutes les batteries
de l'émetteur et le récepteur.
4×20 self tapping
(with rubber washer)
Pitch : 3.3 inch (83.5mm)
For connection to gang
electric box
Distance from the ground
13”±2” (330±50mm)
Gate
In order to minimize some
reflection from the gate,adjust
horizontal angle away from
the gate.

- 4 -
6
7Close the main unit cover. 8Close the battery cover.
Caution
21 32
Close the battery cover.
1
1
2
3
Referring to “4 SETTING” on page 5, perform the necessary settings.
Hook on the upper part
of the back box.
Push the lower part of
the main unit cover.
Fasten the main unit
cover lock screw.
• Do not touch the optical unit when mounting the cover.
Otherwise, the resulting shift of the optical axis may result
in malfunction of the unit and require readjustment.
1
2
Tighten the fixing screw for
the battery cover.
Just fit
• When closing the cover, be careful that the cables are not
caught by the cover.
2-4 POLE MOUNTING
1
3
Knockout position
WALL
POLE(1)
POLE(2)
Using the guide below, break the knockout positions (×2) in the back
box with a screwdriver.
• If you accidentally open an unnecessary knockout, be sure
to fill the knockout. Not doing so may result in waterproof
failure and malfunction of the product.
Open the screw holes from the
inside of the back box to the
outside.
One detector
Two detectors in
opposing directions
Knockout position
Detector No. 1 Detector No. 2
POLE (1) -
POLE (1) POLE (2)
Instruction
condition
Perform the wall mounting procedure of 5 to 8 on page 3.
2Fix the back box on the pole.
Caution
Attention
• Ne touchez pas à l’unité optique lors du montage du
couvercle. Sinon, le déplacement résultant de l’axe
optique peut entraîner un dysfonctionnement de l’unité et
nécessiter un réajustement.
Attention
• Lors de la fermeture du couvercle, veillez à ce que les
câbles ne se prennent pas dans le couvercle.
Caution
Attention
• Entrée défonçable inutile mal cassée : elle doit être refermée
avec un matériau imperméable à l’eau. Sinon, cela peut
entraîner un problème d’imperméabilité et un mauvais
fonctionnement du produit.
2-5
WIRING (
Receiver only)
Gate
Pole bracket
U-bracket
Pole : 1.69” to 1.89” dia.
(43 to 48 mm dia.)
M4×20 screw
(with rubber washer)
Distance from the ground
13”±2” (330±50mm)
In order to minimize some
reflection from the gate,adjust
horizontal angle away from
the gate.
The Receiver Beam unit must power by UL approved Class 2 power supply.
Receiver
NO NC COM
PWR
ー+
Interface board
Power
12-24VDC
Output
Fome C
Power
Input
Gate Operator
Receiver
Main unit

- 5 -
Refer to “1-3 PARTS IDENTIFICATION”.
SETTINGS
3
3-1 FUNCTIONS
1DIP SWITCH BEAM INTERRUPTION ADJUSTMENT
2
Note>>
• Do not press the tamper when you set
the DIP switches. Otherwise the
settings will not actually be changed.
Initial setting is at 20ms.
Set the beam interruption adjustment switches of the Receiver according to
the required response time.
If get longer, less false alaarm.
※UL-325 complied setting.
Interruption Time
1234
ON
1234 12341234
20msec 100msec 250msec 500msec
※
Selector Position
Receiver
ON
Beam interruption adjustment switch
SELECTOR
POSITION
1234
(factory default)
OVS-TNR
Disabled
3-2 OPTICAL ALIGNMENT
Horizontal alignment angle Vertical alignment angle
1
2
< How to look into the viewfinder >
Note>>
< Receiver >
Fine adjustment with monitor jack
Checking of the indicator < Receiver >
Note>>
Left eye Right eye
From right side From left side
90° 90°
5°
5°
• When making the adjustments by the monitor jack, be careful not
to cover the optical unit with your hand, the voltmeter pin cord, etc.
• After the rough alignment using the view finder,
check the light receiving status by the
Alignment / Level Indicator.
• After checking the receiving level of optical axis by using the alarm indicator, make
sure to make fine alignment for both transmitter and receiver with voltmeter until it
reaches maximum monitor output over “Good” level.
Alignment / Level Indicator LED
Caution
• The Alignment / Level indicator LED is a supporting tool for easy alignment.
Be sure to perform fine alignment to ensure the maximum output level
through the monitor jack.
• The Alignment / Level indicator LED should only be used for rough alignment.
For fine or good alignment, always use the monitor jack output level.
Look into the viewfinder and perform fine alignment of the horizontal and
vertical angles using the alignment dial.
Adjust until another side
sensor comes to center.
Viewfinder
Checking the Indicator LED and fine alignment
Set the voltmeter range to 5 to 10VDC and connect
the voltmeter probes and to and of the
monitor jack respectively.
Optical alignment is an important procedure to increase reliability. Be sure to take
alignment step
1 through 2 described below to attain the maximum level of the output through
the monitor jack.
<
Vertical alignment
>
Turn the vertical alignment dial
with a screwdriver to make
alignment
Turn the horizontal alignment
dial by fingers to make
alignment
<
Horizontal alignment
>
Alignment / Level
indicator LED
Beam
interrupted
Beam received
Adjustment level
Monitor jack output
Realign Fair Good
Excellent
0 V0.1
VDC
2.4 VDC 2.8 VDC
ON
Fast blink
Slow blink
OFF
※Goodmorethan2.4VDC.
Attention
• Le témoin de l’alarme/de niveau est un outil d’aide pour faciliter l’alignement.
Assurez-vous de réaliser réglage précis pour obtenir le niveau maximum de
sortie du point de test.

- 6 -
1
2
3
4-2 OPERATION CHECK
Make sure that the Alignment / Level indicator LED is OFF.
If it is illuminated even when the beams are not blocked,
make optical alignment again.
Check that the Power / Low battery indicator LEDs on both
transmitter and receiver are ON.
If the Power / Low battery indicator LED is blinking, the battery
power is low. Replace with new batteries.
Conduct a walk test to check that Alignment / Level indicator
LED on the receiver turns ON as the walker interrupts the
beams.
After installation is complete, be sure to check the operation.
A B
Transmitter Receiver
C
OPERATION CHECK
4
4-1 LED INDICATION
Alignment / Level indicator LED (Receiver only) Power / Low battery indicator LED
Transmitter and Receiver
Alignment / Level
indicator LED
Power / Low battery
indicator LED
DETECTOR
Beam Interruption
Beam not
received sufficiently
Beam Aligned
LED
ON
(continue)
OFF
or
Fast
blink
Slow
blink
BATTERY
CONDITION
Normal
Transmitter is
low battery • • •
Fast blink
LED
ON
(continue)
Be sure to conduct a walk test at the following three points:
A. In front of the transmitter
B. In front of the receiver
C. At the mid point between the transmitter and receiver
The detector is installed properly when Alignment / Level
indicator LED turns solid
ON in the tests at all the three points.
TROUBLESHOOTING
5
Power / Low battery indicator LEDs are not
illuminated. (Receiver)
Power / Low battery indicator LEDs are not
illuminated. (Transmitter)
Output is not sent.
When the beam is blocked, the “OUTPUT” indicator
LED is illuminated but the Output is not activated.
Output is activated even if the light is not
blocked.
Batteries are running out too quickly.
Frost, snow or heavy rain causes activation.
Improper output
Even if new batteries are used, Low battery
indicator LED is ON.
Power may not be supplied.
The supply voltage may not be correct.
The power supply polarity is wrong.
Reversed battery polarity.
Reflection from the floor or wall.
Beam has not been blocked.
Signal line short-circuited.
Surface of Transmitter/Receiver cover
soiled.
Optical alignment was not performed properly.
Main unit cover is not set properly.
Optical alignment not optimized.
Too much snow or frost accretion.
Problem with wiring.
Batteries are inactive condition.
Connect power supply of 12-24VDC.
Check Power supply voltage 12-24VDC.
Check power supply polarity.
Check the battery polarity.
Align beams away from the floor or wall.
Block all two beams.
Check the wiring.
Clean the cover (wipe the cover with a soft cloth dampened with water or
diluted neutral detergent).
See “3-2 OPTICAL ALIGNMENT” on page 5 and make realignment.
Set the cover properly.
See “3-2 OPTICAL ALIGNMENT” on page 5 and make realignment.
Remove snow or frost on the cover.
Install the correct wiring.
Clean up the battery terminal if it is covered with an oxide film or soil.
PROBLEM POSSIBLE CAUSE CORRECTIVE ACTION

- 7 -
SPECIFICATIONS
6
OPTEX CO., LTD. (JAPAN)
URL: http://www.optex.net
OPTEX (EUROPE) LTD. / EMEA HQ (U.K.)
www.optex-europe.com
OPTEX SECURITY SAS (France)
www.optex-security.com
OPTEX SECURITY Sp.z o.o. (Poland)
www.optex.com.pl
OPTEX (DONGGUAN) CO.,LTD.
SHANGHAI OFFICE (China)
www.optexchina.com
OPTEX KOREA CO.,LTD. (Korea)
www.optexkorea.com
OPTEX PINNACLE INDIA, PVT., LTD. (India)
www.optex.net/in/en/sec
OPTEX TECHNOLOGIES B.V.
(The Netherlands)
www.optex.eu
Copyright (C) 2020 OPTEX CO., LTD.
Specifications and design are subject to change without prior notice.
* The value is based on the condition that it is used within the ambient temperature range of 20 to 25°C.
** Using batteries other than those recommended may shorten the battery life.
DIMENSIONS
7
Unit : inch (mm)
11.6 (295)
3.3 (83.5)
(WALL)
4.6 (117)
2.7 (69)
OPTEX INC. (U.S.)
www.optex-vs.com
Model
Detection range
Detection method
Interruption time
Operation frequency
Power source
Current draw
Operating temperature
Operating humidity
Alignment angle
Dimension
Weight
International protection
LSH-20 by SAFT
Output
Output hold time
Resistive Termination
Output / Level indicator
(Receiver)
Power/ Low battery indicator
(Transmitter )
Battery life *
OVS-50TNR
50 ft. / 15 m
Twin infrared beam interruption detection
Variable between 20/100/250/500 ms (4 steps)
200Hz
Transmitter : 3.6 VDC D size lithium batteries (2 units)
Receiver : 12 - 24 VDC
Transmitter : 130µA (25°C, DC3.6V)
Receiver : 80mA (max.)
Approx. 8 years (Transmitter)
Form C relay ; 30VDC. 0.2A
Blocked beam period +0.5 sec
10K ohm across NO contact
ON : Beam not received
Blinking :Beam not received sufficiently
OFF : Beam received
ON : Power ON
Blinking :Low voltage
OFF : Power OFF
-20°C to +60°C (-4°F to 140°F)
95 % (max.)
±90° Horizontal / ±5° Vertical
H ×W ×D inch (mm) : 11.6 (295) ×2.7 (69) ×4.6 (117)
1200 g (42.3 oz)
(Total weight of Transmitter + Receiver, excluding accessories)
IP65
**
Indicator
LED
Output
This manual suits for next models
1
Table of contents
Other Optex Security Sensor manuals

Optex
Optex AX-70TN User manual

Optex
Optex CX-702 MKII User manual

Optex
Optex Fit Series User manual

Optex
Optex BX SHIELD Series User manual

Optex
Optex VX SHIELD Series User manual

Optex
Optex RXC-DT-X5 User manual

Optex
Optex RLS-3060 User manual

Optex
Optex X-ZONE User manual

Optex
Optex HX-80N User manual

Optex
Optex FMX-DT-X5 User manual

Optex
Optex OVS-50TNR User manual

Optex
Optex VX Shield Series User manual

Optex
Optex CDX Series User manual

Optex
Optex CX-702 MKII User manual

Optex
Optex AX-350DH MK III User manual

Optex
Optex HX-40 User manual

Optex
Optex FLX-S-ST User manual

Optex
Optex HX-40 User manual

Optex
Optex CDX-AM Quick start guide

Optex
Optex FlipX Series User manual