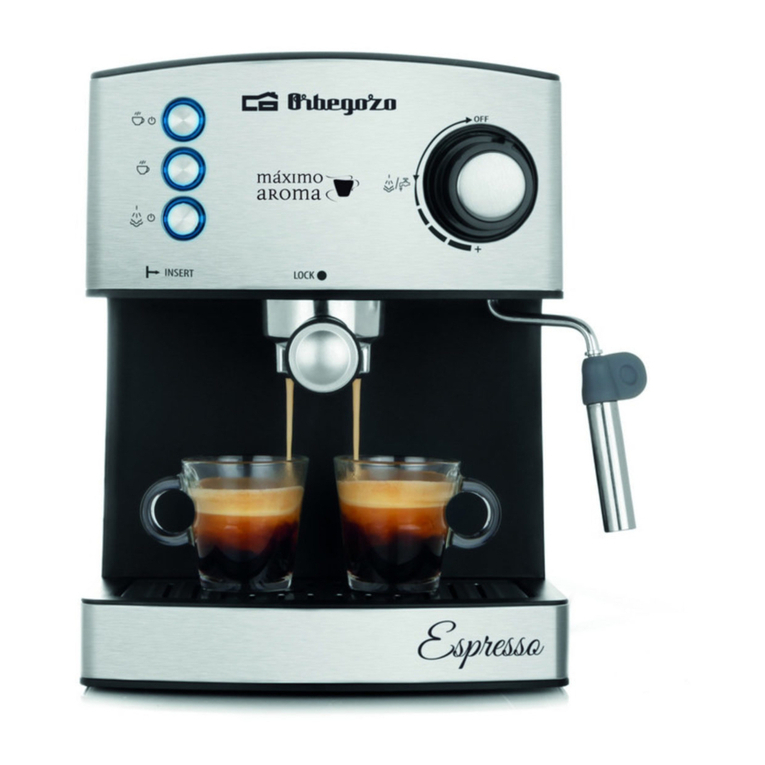
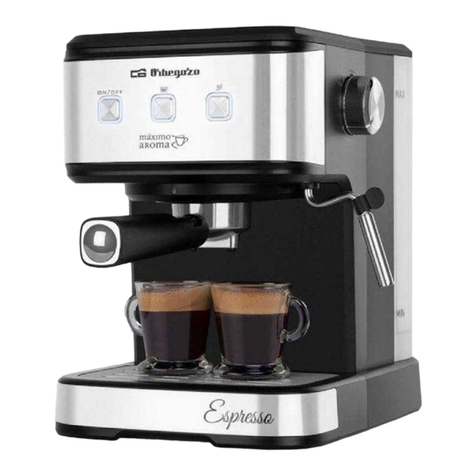
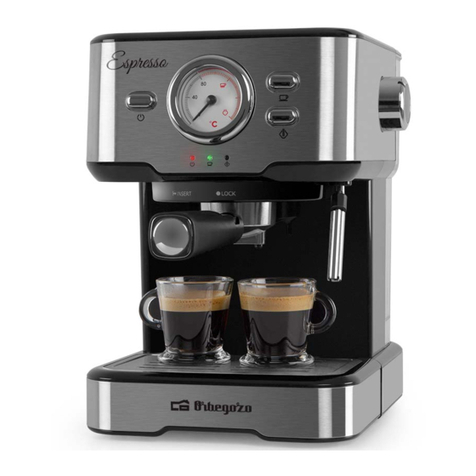
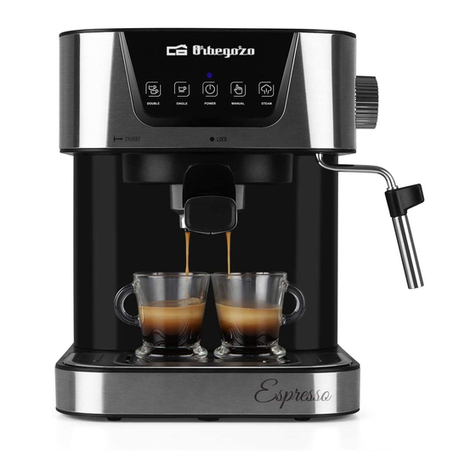
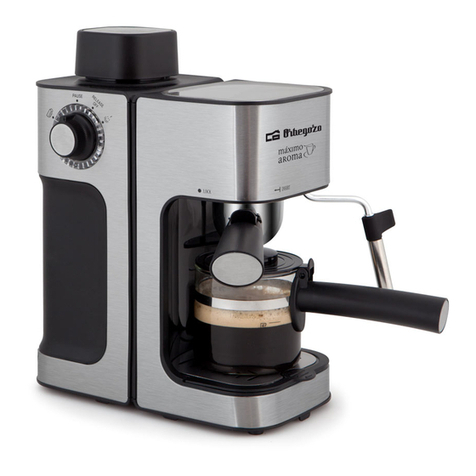
Orbegozo EX 5000 User manual

CAFETERAESPRESSO–MANUAL DEINSTRUCCIONES
EXPRESSOCOFFEEMAKER -INSTRUCTION MANUAL
MACHINEÀEXPRESSO-MANUELD’INSTRUCTIONS
CAFETEIRAESPRESSO-MANUAL DEINSTRUÇÕES
EX 5000
Sonifer,S.A.
AvenidadeSantiago,86
30007 Murcia
España
E-mail: sonifer@sonifer.es
MADEINP.R.C.
Lea atentamenteestemanualantesdeutilizaresteaparatoyguárdeloparafuturas consultas.Sóloasípodráobtener
losmejoresresultadosylamáximaseguridaddeuso.
Readthismanualcarefullybeforerunning thisappliance andsaveit forreferencein ordertoobtainthebestresults
and ensuresafeuse.
Veuillezlireattentivement ce manuelavant d’utilisercetappareiletconservez-lepour touteconsultationfuture.C’est
laseulefaçond’obtenir lesmeilleursrésultatsetunesécuritéoptimaled’utilisation.
Leiaestemanualcuidadosamenteantesdeutilizaresteaparelhoeguarde-oparaconsultafutura.Sóassim,poderá
obterosmelhoresresultadoseamáximasegurança nautilização.

EX 5000
2
ESPAÑOL
INDICACIONESDE SEGURIDAD
EstimadoCliente: Sisiguelasrecomendacionesincluidas
enestemanualde instrucciones,el electrodoméstico le
ofrecerá unaltorendimientoconstanteyfuncionará
correctamentedurantemuchosaños.
Antesde lapuestaenserviciodeesteaparatolea
detenidamenteel manualde instruccionesyguardeeste
bienincluidalagarantía,el recibode pagoysiesposible
tambiénel cartónde embalaje conelembalaje interior.En
casode dejar el aparatoaterceros,tambiénentregueel
manualde instrucciones.
GENERALES
1.Esteaparatopuedenutilizarloniñosconedadde 8años
ysuperior ypersonasconcapacidadesfísicas,sensoriales
omentalesreducidasofaltade experienciay
conocimiento,siseleshadadolasupervisióno
formaciónapropiadasrespectoalusodel aparatode una
manerasegura ycomprendenlospeligrosqueimplica.
Losniñosnodebenjugarconel aparato.Lalimpiezayel
mantenimientoarealizar por el usuarionodeben
realizarlolosniños sinsupervisión.
2.Sedeberá supervisar alosniñospara asegurarsede que
nojueganconesteaparato.

EX 5000
3
3.Mantengael aparatoysucable fuera del alcancedelos
niños menores de 8años.
4.PRECAUCIÓN:Para laseguridadde susniñosnodeje
materialde embalaje (bolsasde plástico,cartón,
polietilenoetc.)asualcance.
5.Siel cable de alimentaciónestádañado,debe ser
sustituidopor el fabricante, el serviciotécnicoo
cualquierotroprofesionalcualificado.
6.No desconectenuncatirandodel cable.
7.No lopongaenfuncionamientosiel cable oelenchufe
estándañadososiobserva queel aparatonofunciona
correctamente.
8.No manipule el aparatoconlasmanos mojadas.
9.No sumergirel aparatoenaguaocualquierotrolíquido.
10. Antesde sulimpiezaobservequeel aparatoestá
desconectado.
11. El aparatodebe instalarsede acuerdoconla
reglamentaciónnacionalpara instalaciones eléctricas.
12. Esteaparatoes sólopara usodoméstico.
13. Encasode necesitar unacopiadel manualde
instrucciones,puede solicitarlapor correoelectrónico a
través de sonifer@sonifer.es
14. ADVERTENCIA:En casode malautilización,existe
riesgode posibles heridas.

EX 5000
4
PRECAUCIONESESPECÍFICAS
•No permitaqueel cable cuelguesobreel borde de una
mesaoencimera otoqueunasuperficie caliente.
•Para desconectarla,desenchúfelade latomaeléctrica de
lapared.
•Llevecuidadode noquemarseconel vapor.
•No toquelassuperficiescalientes.Utiliceúnicamentelas
asasy losbotones.
•No utiliceelaparatosieldepósitomuestracualquier
signode grietas.Utiliceúnicamenteel depósitoconeste
dispositivo.Utiliceel depósitoconcuidadoyaquees
muyfrágil.
•Nunca utilicelacafetera sinagua.
•Coloqueel aparatosobreunamesaounasuperficie
plana.
•PRECAUCIÓN:Lassuperficie puede permanecer
calienteduranteodespués de suuso.

EX 5000
5
CONOZCASUCAFETERA
1. Indicador decalentamiento
2. Botón decalentamiento
3. Indicador delisto
4. Cacillofiltro del café(2tipos:
mono-dosisy2tazas)
5. Porta-filtros
6. Pestañasujetafiltro
7. Mangodel porta-filtro
8. Plataformaextraíble
9. Bandejadegoteo
10. Tapadel depósitodeagua
11. Asadel depósitodeagua
12. Depósitodeaguade1.30L
13. Selector defunción (caféo
vapor)
14. Tubo parael vapor
15. Accesorioespumador
16. Pulsador ON/OFF
17. Cucharamedidorayprensadora
18. Bandejacalientatazas
ANTESDEL PRIMER USO
Paragarantizarque el sabor delaprimeratazadecaféseaexcelente, tendráque enjuagarlacafeteracon
aguacalientetal comoseindicaacontinuación:
1. Viertaaguaen eldepósitodelaguasinsobrepasarlamarcade“MAX”deldepósito. Despuésvuelvaa
colocarlatapadel depósitodel agua.
2. Coloque el filtro deaceroen el porta-filtros metálico(sincaféen el filtro deacero).
3. Paracolocarelfiltro hagacoincidirlamuescadeéstecon lamuescadelporta-filtro (dondeestáel
mango).Paraquitarel filtro hagaestemismoproceso.
4. Coloque unatazaen laplataformaextraíble. Asegúrese deque elselectordefunción estéen posición
“ ”.
Nota: El aparatonovaequipadocon taza,utilicesu propiatazadecafé.
5. Enchufelacafeteraalared,pulse elpulsador ON/OFF, elpilotoindicador decalentamiento(rojo)se
encenderá.
6. Cuandolacafeterasehayacalentadose encenderáelindicador listo(blanco),asegúreseque elbotón de
vapor no estépulsado“ ”,gire el selector alaposición “ ”,el aguasaldrápor el portafiltro.
7. Cuandollene latazagire elselector alaposición“ ”parapararlacafetera,entonces puedetirarel
aguaque hayaen latazaylimpiarlabien. Ahorapuedeempezaraprepararcafé.

EX 5000
6
PRE-CALENTAMIENTO
Parahacerunabuenatazadecaféexpreso,lerecomendamos nosolocalentarlacafeteraantes de
hacer elcafé,sinotambién calentarelfiltro,elporta-filtroylataza,asíelsabordelcafénoseverá
influenciadoelfríodealgunadeestas partes.
1. Quiteel depósitodeagua,abralatapayllénelodeaguahastadondedesee, sinexceder el nivel máximo
señaladoen el depósito.Ahoracoloque el depósitoen lacafetera.
2. Coloque el filtro que necesite(mono-dosiso2tazas)en el porta-filtros, paracolocarel porta-filtro en la
cafeterael mangodebe estarhacialaizquierda,empujehaciaarribahastaque encajeygírelohaciala
derecha.
3. Coloque latazaque vayaautilizaren labandejacalientatazas, paraque secaliente.
4. Enchufelacafeteraalared.Asegúrese que el selector estáen posición “ ”.
5. Pulse el interruptor ON/OFF, el indicador decalentamiento(rojo)se encenderá,asegúrese deque el
botón devaporestáen suposición alta .
6. Cuandoel indicador listo(blanco)se encienda,yaestarálistaparahacer café
ELABORACIÓN DECAFÉESPRESSO
1. Quiteelporta-filtro girándoloalaizquierda.Añadacafémolidoalfiltro con lacucharamedidora,una
cucharadadecafémolidoes suficienteparahacerunatazadecafé. Prensebien elcaféen elfiltro con la
parteplanadelacuchara.
2. Coloque el porta-filtro enlacafeterael mangodebe estarhacialaizquierda,empujehaciaarribahasta
que encajeygírelohacialaderecha.
3. Coloque latazaen laplataformaextraíbledebajodel porta-filtro.
4. Cuandoelindicadorlisto(blanco)seencienda,gireelselector alaposición“ ”espere un momentoyel
caféempezaráacaer.
Nota:cuandoutilicemuchasveces deseguidolacafetera,elindicador listo(blanco)se apagaráenalguna
ocasión, estosignificaque latemperaturadelacalderahabrábajadounpoco, espere aque se vuelvaa
calentar, paravolver autilizarla.
5. Cuandoobtengalacantidaddecafédeseada(30 ml un expreso corto, 60ml un expreso doble)gire el
selector alaposición “ ”parapararla.
ADVERTENCIA: nodejelacafeteradesatendidamientrasestéhaciendocafé, alser manual,podríasalirse el
cafédelatazasi nose paraatiempo.
6. Al terminardehacer café, gire elporta-filtro hacialaizquierdacogiéndolopor elmango, sáquelodela
cafeterayvacíeelcafémolidodelfiltro. Utilicelapestañasujeta-filtro (en elmangodelporta-filtro),para
evitarque el filtro se caigaal vaciarel café.
7. Pulse el interruptor ON/OFF paraapagarlacafetera.
8. Dejeque se enfríe.
ESPUMADELECHE/ELABORACIÓNDEUN CAPPUCCINO
Se obtiene unatazadecappuccino cuandose rellenaunatazadeespressocon espumadeleche.
Método:
1. Prepare primero elcafécon un recipientelosuficientementegrandeconformealoindicadoen laparte
"ELABORACIÓNDE CAFÉESPRESSO", asegúrese deque el selector estálaposición " ".

EX 5000
7
2. Pulse el botón devapor “ ”,espere un momentohastaque laluzindicadoralisto(blanca) se encienda.
3. Llene unajarracon unos150gramos deleche paraprepararcadacappuccino, se recomiendaeluso de
leche enteraatemperaturadel frigorífico(¡que noestécaliente!).
Nota:paraeltamaño delajarra,recomendamosque eldiámetronoseamayora7cm.Paralaaltura,tenga
en cuentaque cuandoespumelaleche, doblarásuvolumen, por loque escojaunajarracon alturaacordea
laleche que vayaaespumar.
4. Inserteel accesorioespumador en lajarracon laleche (unos 2cm),entonces gire el selector alaposición
“”,empezaráasalirvaporpor el tubo. Paraespumarlaleche muevalajarradearribaabajo.
5. Cuandoobtengalaespumadeseadapare el espumador colocandoel selector en laposición “ ”.
Nota: limpielasalidadelvapor con unaesponjaotrapo húmedoinmediatamentedespués deusarlo, lleve
cuidadodeno quemarse.
6. Añadalaleche espumadaalespressopreparadoantes, su cappuccino yaestálisto. Endulcealgustoysi
lodesea,espolvoreelaespumacon cacaoen polvo.
7. Pulse el interruptor ON/OFF paraapagarlacafetera.
Nota: sideseahacer caféotravez,pulse elbotón devapor paraque quedeen laposición “ ”y gire el
selector alaposición “ ”.
Nota: Recomendamos que dejelacafeteraenfriarpor lomenos durante5minutos antes devolver ahacer
café. Delocontrariopuedeque se produzcaolor aquemadoen el caféespresso.
CALENTARLÍQUIDOSCON EL VAPORIZADOR
El tubo paravapor (sinel accesorioespumador)sepuedeutilizarparacalentarlíquidos comochocolateala
tazaoagua.
Método:
1. Extraigael depósitodeaguayllénelosinexceder el nivel máximo. Coloqueel depósitoen lacafetera.
2. Enchufelacafeteraalared.
3. Quiteel accesorioespumador
4. Pulse el interruptor ON/OFF, el indicador calentamiento(rojo)se encenderá.pulse el botón de
calentamiento“ ”.
5. Cuandoel indicador listo(blanco)se encienda,metalatazacon el aguaoel líquidoque quieracalentary
gire el selector hacialaposición “ ”.
6. Empezaráasalirvapor calientepor el tubo yéstecalentaráel líquido, cuandoestéalatemperaturagire
el selector alaposición " "parapararel vapor.
7. Desconectelacafeteradespués deestosi no lavaautilizarmás.
LIMPIEZAYMANTENIMIENTO:
1. Desenchufelacafeteraydejeque se enfríecompletamenteantes delimpiarla.
2. Limpielacarcasadelacafeteracon unabayetahúmedacon frecuenciaylimpieeldepósitodelagua,la
bandejadegoteo ylaplataformaextraíbleregularmenteydespués séquelos.
Nota: Nololimpiecon alcohol ni con limpiador disolvente. Nosumerjanuncalaestructuraen aguapara
limpiarla.
3. Retire elporta-filtros metálicogirándoloensentidoanti-horario,elimine los residuosdecafédelinterior
y,acontinuación, límpielocon aguajabonosayenjuague con aguaclara.

EX 5000
8
4. Limpietodos los accesorios en el aguayséquelos concienzudamente.
LIMPIEZADEDEPÓSITOS MINERALES
1. Paraasegurarse dequelacafeterafuncionaeficientemente, los conductos internos estánlimpios y
garantizarelcafécon elmejor sabor,habráque limpiarlos depósitosminerales que se formencada2o
3meses.
2. Llene eldepósitocon aguaydescalcificador hastaelnivelMAX.Laproporción entre laacumulación de
aguayeldescalcificador es de4:1;podráobtener los detalles en lasinstrucciones deldescalcificador.
Utiliceun "descalcificador doméstico".
3. Realiceelproceso dehacer cafésinincluircaféyexpulsarvapor hastaque se agotetodaelaguadel
depósito.
4. Repitael paso anterior, rellenandoestavezel depósitocon aguasindescalcificador.
LOCALIZACIÓNYSOLUCIÓN DEPROBLEMAS
Síntoma
Causa
Correcciones
El depósito pierdeaguao saleagua
delatapadeldepósito
El depósito noestácolocado
correctamente.
Lalínea centraldeldepósito debe
alinearsebienconlaaberturade
fugas delporta-filtros.
El niveldeaguadeldepósito
sobrepasa elnivelMAX. El niveldeaguadeldepósito debe
estarentrelamarca MIN yMAX.
Saleaguadelaparteinferiordela
cafetera.
Hay muchaaguaenlabandejade
goteo. Limpielabandejadegoteo.
Lacafeterano funcionabien. Póngaseencontactoconelservicio
autorizado paraquelareparen.
Saleaguadelaparteexteriordel
filtro. Hay caféenelbordedelfiltro.Quítelo.
El caféespresso tienesaborácido
(vinagre).
No sehalimpiado correctamente
despuésdelimpiarlosdepósitos
minerales.
Realice lospasosindicadosenel
punto “Limpiezadedepósitos
minerales”.
El cafésehaguardado durante
mucho tiempo enunsitiocaliente,
húmedo.El cafésehapuesto malo.
Utilice cafénuevo o guardeelcafé
no utilizado enunlugarfresco y
seco.Despuésdeabrir un paquete
decafé,vuelvaacerrarlo bieny
guárdeloenun refrigeradorpara
mantenersufrescura.
Lacafeterayano funciona.El enchufenoestábienenchufado.
Conecteelenchufecorrectamentea
lapared,sielaparato siguesin
funcionar,póngaseencontacto con
un servicio autorizado paraquelo
repare.
El vaporno puedehacerespuma. No sehaquedado fijo elindicador
quemuestraqueelvaporestálisto.
Solo despuésdequeelindicadorde
"vaporlisto" estéiluminado,se
puedeusarelvaporparahacer
espuma.

EX 5000
9
El recipienteesdemasiado grande
o laformano eslaadecuada. Useunatazaaltayestrecha.
Hautilizado lechedesnatadaUselecheentera.
IMPORTANTE
Síntoma
Causa
Correcciones
No salecafé
El depósito deaguaestámal
colocado Comprobareldepósito
Losagujerosdelcacilloestán
atascados
Vaciarelcacillo,limpiarlo conun
trapo sucio yrealizarun ciclo solo
conagua
El cafésalelentamenteo gotaa
gota El caféestádemasiado molido o
estádemasiado prensado.
Asegúresedequeelgrado de
molido eseladecuado para
cafeteras expreso yquenoseha
prensado enexceso.
Encasodeausenciadesalidadecafétranscurridos 10 segundos,pararlacafetera yrenovar elcafé
delcacillo.
Sinolocalizalacausadelaavería,nodesmonteelaparato,póngaseencontactoconuncentrode
servicioautorizado.
PARÁMETROSTÉCNICOS:
Modelo: EX 5000
Potencia:1050W
Voltage: 220 –240V~50Hz
Eliminacióndelelectrodomésticoviejo.
En basealaNormaeuropea 2002/96/CEdeResiduosdeaparatosEléctricosyElectrónicos(RAEE),los
electrodomésticosviejosnopuedenserarrojadosenloscontenedoresmunicipaleshabituales;tienenque
serrecogidosselectivamenteparaoptimizarlarecuperaciónyrecicladodeloscomponentesymateriales
quelosconstituyen,yreducir elimpactoenlasalud humanayelmedioambiente.El símbolodelcubo de
basuratachadosemarca sobretodoslosproductospararecordaralconsumidorlaobligacióndesepararlosparala
recogidaselectiva.
El consumidordebecontactarconlaautoridadlocaloconelvendedorparainformarseenrelaciónalacorrecta
eliminacióndesuelectrodoméstico viejo.
DECLARACIÓNDECONFORMIDAD:Este dispositivocumpleconlos requisitos delaDirectivadeBaja
Tensión2014/35/EUylos requisitos deladirectivadeCompatibilidadElectromagnética2014/30/EU.

EX 5000
10
ENGLISH
SAFETYINSTRUCTIONS
Dear Customer,if youfollowtherecommendations
contained in thisInstructionManual,ourappliancewill
giveyouconstanthigh performanceandwill remain
efficient for manyyearstocome. Readtheoperating
instructionscarefullybeforeputtingtheapplianceinto
operationand keep theinstructionsincludingthewarranty,
thereceiptand, if possible,theboxwiththeinternal
packing. If yougivethisdevicetootherpeople,pleasealso
pass ontheoperatinginstructions.
GeneralSafety Instructions
1.This appliancecanbe used by childrenaged from 8years
andaboveand personswithreduced physical,sensoryor
mentalcapabilitiesor lack ofexperienceandknowledge
if theyhavebeengivensupervisionor instruction
concerninguseoftheapplianceinasafe wayand
understandthehazardsinvolved. Childrenmustnever
playwith theappliance. Cleaningandusermaintenance
mustneverbe carried outbychildrenwithout
supervision.
2.Childrenshould be supervised toensurethattheydonot
play withtheappliance.
3.Keep theapplianceandthecable cordoutofthereach
ofchildrenless than8years old.

EX 5000
11
4.WARNING:Inordertoensureyourchildren‘ssafety,
pleasekeep all packaging(plasticbags,boxes,
polystyreneetc.)outoftheirreach.
5.If thesupplycordisdamaged itmustberepaired bythe
Authorized ServiceAgent.
6.Neverpull onthecordwhenunplugging.
7.Do notusetheunitwithadamaged cordor plug, orif it
is notworking properly.
8.Do nothandletheappliancewithwethands.
9.Neverimmersetheapplianceinwateror anyother
liquid.
10. Makesuretheappliancehasbeenunplugged before
cleaning.
11. Thisappliancemustbe installed followingthenational
regulations forelectricalinstallations.
12. This applianceis for household useonly.
13. Incasethatyouneed acopyoftheinstructionmanual,
youcanaskfor itwritinganemail to sonifer@sonifer.es
14. WARNING:In caseofmisuse, thereisariskofpossible
injury.
SPECIFICSAFEGUARDS
•Todisconnect,removeplug fromwall outlet.
•Becarefulnottoget burnedby thesteam.
•Do nottouchhot surface. Usehandles orknobsonly.

EX 5000
12
•Neverusetheapplianceifthetankshows anysignsof
cracks.Onlyusethetankwith thisappliance.Use
carefully asthetankis veryfragile.
•Neveruseyourcoffee makerwithout waterinit.
•Standtheapplianceonatable or flatsurface.
•CAUTION:Thesurfacecanremainhotduringor after
use.
KNOW YOURCOFFEE MAKER
1. Heating indicator
2. Heating button
3. Readyindicator
4. Steel mesh (2kind:1cuppod,2
cups)
5. Metal funnel
6. Press bar
7. Funnel handle
8. Dripplate
9. Driptray
10. Water tankcover
11. Water tankhandle
12. Water tank1.30L
13. Function knob (coffee or steam)
14. Steam wand
15. Frothdevice
16. ON/OFF push-button
17. Coffee spoon
18. Warmer cup tray
BEFORETHEFIRSTUSE
Toensure the first cup ofcoffee tastes excellent,you should rinse the coffeemaker withwarm wateras
follows:
1. Pourwater intowatertank,thewater levelshouldnotexceedthe “MAX”markinthe tank.Thenreplace
the water tankcover.
2. Set steel mesh intometal funnel (no coffee powderinsteel mesh).
3. Toplacesteelmesh intometalfunnelyou have tomatchthe notchofsteelmesh withnotchofmetal
funnel (where the handleis).Toremove steel mesh, dothissameprocess.
4. Placeajug on removableshelf.Makesure the function knob ison the “ ”position.

EX 5000
13
Note: The applianceisnot equipped withjug,please use yourselfjug or coffee cup.
5. Plug the coffee maker tomains, press ON/OFF push-button, the heating indicator lamp(red)will light.
6. When the coffeemaker haswarmed,readyindicator (white)will light,ensure heatingbuttonisnot
pushed “ ”,turn function knob to“ ”position, waterbrewsthrowthe metal funnel.
7. When the cup isfull,turnfunction knob to“ ”position tostop coffee maker, then youcanpour out
water ofcup and cleanit well.Nowyou canstart tomakecoffee.
PRE-HEATING
Tomakeacupof goodhotespressocoffee,werecommendyoupreheatingtheappliancebefore
makingcoffee,includingthefunnel, filterandcup, sothatthecoffee flavourcannotbeinfluenced
bycold parts.
1. Remove the detachabletankand open the tankcover tofill it withdesiredwater, the water level should
not exceed the “MAX”markinthe tank.Then placethe tankintothe applianceproperly.
2. Setsteelmesh intometalfunnel,makesure the tube on the funnelaligns withgroove inthe appliance,
tosetthe metalfunnelincoffee maker the handleshould be totheleft,push up until itfitsandturn to
right.
3. Placethe cup on warmercup tray,toget warm.
4. Plug the coffee maker tomains. Ensure function knob ison “ ”position.
5. Push ON/OFFpush-button, heatingindicator (red)will light,ensure heatingbutton ison higherposition
“”.
6. When readyindicator (white)lights, coffee maker will be readytobrewcoffee.
MAKEAN ESPRESSOCOFFEE
1. Remove metalfunnelturningtoleft.Add coffeepowder tosteelmeshwithspoon, one spoonfulof
coffee powderisenough tomakeacup ofcoffee. Well press thecoffeeinsteelmesh withplanepartof
spoon.
2. Placethe metalfunnelinthe coffeemaker, the handleshould betotheleftside, pushupwarduntil it fits
and turn toright.
3. Placethe cup on dripplacebelowmetal funnel.
4. When the readyindicator(white)lights, turn function knob to“ ”position, after fewsecondsthe coffee
will brew.
Note: when you use the coffee maker manytimesinarow,readyindicator(white)will turn off sometime; it
means the temperature ofboiler fallsalittle, wait for it warmsagain, touseit.
5. When you getthe desiredquantityofcoffee (30ml for espresso and60 ml for doubleespresso)turn the
function knob to“ ”position for stopping it.
WARNING: donotletthe coffee makerunattendedwhileyouare makingcoffee, because it ismanual,the
cup ofcoffee could overflowifyou don’t stop it ontime.
6. At the endofmakingcoffee, turnthe metalfunneltolefttakingit byhandle, remove it fromthe coffee
maker andemptythe coffee powderofsteelmesh. Use the press bar(inmetalfunnelhandle)toavoid
the filter fallswhen you are emptying the coffee powder.
7. Push the ON/OFF push-button toturn off the coffee maker.
8. Let it cooldown.

EX 5000
14
FROTHING MILK/MAKECAPPUCCINO
You get acup ofcappuccino when you top up acup ofespressowithfrothing milk.
Method:
1. Prepare espresso firstwithcontainer big enoughaccordingtothe part“MAKEESPRESSOCOFFEE”,make
sure that the function knob ison “ ”position.
2. Press the heating button “ ”,wait for amoment until the readyindicator (white)lights.
3. Fill ajugwithabout150 gramsofmilkfor eachcappuccino tobe prepared,youare recommendedto
use wholemilkat refrigerator temperature (not hot!).
Note: forjugsize, werecommenddiameter nothigher than7cm.for height,takeintoaccountwhen you
froththe milk,itsvolumewill be double, so takeajugwhichheightisaccordingthe quantityofmilkto
froth.
4. Insertthe frothdeviceintothe jugwithmilk(about2cm),then turn function knob to“ ”position,
steam will start tocomeout.For frothing milk,move the jug up and down.
5. When youget the desired froth, stop steam function turning function knobto“ ”position.
Note: cleansteam outletwithaspongeor dampclothimmediatelyafter using,takecare not toburn.
6. Add frothedmilktoespresso (preparedbefore),your cappuccino isready.Sweeten totasteand,ifyou
desire, sprinklethe frothwithcocoapowder.
7. Press ON/OFF push-button toswitchoff coffee maker.
Note: ifyou wanttomakeanother coffee, pushheatingbutton to“ ”position andturn the function knob
to“ ”position.
Note: werecommendyou letthe coffee maker cooldownfor 5minutes before tomakecoffeeagain.
Otherwise you could get espresso coffeewithburnt odor.
HEATLIQUIDSWITH STEAMER
Steam wand (withno frothdevice)canbe used toheat liquidsasdrinking chocolateor water.
1. Remove water tankand fill inwithout exceeding maximum level.Placewater tankincoffee maker.
2. Plug coffee maker tomains.
3. Remove frothdevice.
4. Press ON/OFF push-button, heating indicator (red)will light.Press heating button to“ ”.
5. When readyindicator (ready)lights, putsteamwandintocupwithwater orliquidyou wanttoheat,turn
function knob to“ ”position.
6.Steamstartstogetoutthrowsteamwandandit will heatthe liquid.When it reaches desired
temperature, turn function knob to“ ”position tostop steam function.
7.Unplug coffee maker ifyou aren’t going touse again.
CLEAN AND MAINTENANCE:
1. Cut off power sourceand let the coffee maker cool downcompletelybefore cleaning.
2. Cleanhousingofcoffee maker withmoisture-proofspongeoften andcleanwater tank,driptrayand
removableshelfregularlythen drythem.
Note: Donot cleanwithalcohol or solvent cleanser. Never immerse the housing inwater for cleaning.

EX 5000
15
3. Detachthe metalfunnel throughturn it anticlockwise, getrid ofcoffee residue inside, then you canclean
it withcleanser, but at last you must rinse withclearwater.
4. Cleanall the attachmentsinthe water and drythoroughly.
CLEANING MINERALDEPOSITS
1. Tomakesure your coffeemaker operatingefficiently,internalpipingiscleanlyandthe peakflavor of
coffee, you should cleanawaythe mineral depositsleft every2-3months.
2. Fill the tankwithwater andsoftenertothe MAX level(the scaleofwater andsofteneris4:1;you canget
more detailsfrom the user manual ofthe softener. Please makesure touse“household softener”.
3. Performthe process ofmakingcoffee withoutincludingcoffee andexpellingsteamuntil all thewater in
the tankisexhausted.
4. Repeat the previous step,filling the tankwithwater without softener.
TROUBLE SHOOTING
Symptom
Cause
Corrections
Carafeleakagewateror water
leaksout from lid ofcarafe
The carafeisnot located
properly
Let centreline ofcarafealigns
withleakageopening ofbrew
basket well.
The level ofwater inthe tank
exceedsthe scaleofMAX.
The water level inthe tank
should be withinthe scaleof
MINandMAX.
Water leaksfrom the bottom of
coffee maker.
There ismuchwater inthe drip
tray. Please cleanthe driptray.
The coffee makerismalfunction. Please contact withthe
authorized servicefacilityfor
repairing.
Water leaksout ofoutersideof
filter. There issomecoffee powder on
filter edge. Get rid ofthem.
Acid (vinegar)tasteexistsin
Espressocoffee.
Nocleancorrectlyafter cleaning
mineral deposits. Followall steps shownon
“cleaning mineral deposits”.
The coffee powder isstored ina
hot,wet placefor alongtime.
The coffee powder turns bad.
Please use fresh coffee powder,
or store unused coffee powder
inacool,dryplace. After
opening apackageofcoffee
powder, reseal it tightlyand
store it inarefrigerator to
maintainitsfreshness.
The coffee makercannotwork
anymore. The power outlet isnot plugged
well.
Plug the power cord intoawall
outlet correctly,ifthe appliance
still does not work,please
contact withthe authorized
servicefacilityfor repairing.

EX 5000
16
The steam cannot froth.
The steam readyindicator isnot
illuminated.
Onlyafter the steam ready
indicator isilluminated,the
steam canbe used tofroth.
The container istoo big or the
shape isnot fit. Use highand narrowcup.
You have used skimmedmilkUse wholemilk.
IMPORTANT
Symptom
Cause
Correc
tions
Coffee doesn’t goout
The water tankisincorrectly
placed Checkthe tank
The holes inthe panare stuck
Emptythe bowl,cleanit witha
dirtyclothand cycleonlywith
water
Coffee comes out slowlyor
drop bydrop Coffee istoo ground or too
pressed
Makesure that the grindis
suitablefor espressocoffee
makers and that it hasnot been
pressed too much.
Intheabsenceof coffeeleakageafter10 seconds,stopthecoffee maker andrenew thecoffee from
thepot.
Donottakeaparttheappliancebyyourself if thecauseof failure is notfound, youhadbetter
contactcertifiedservingcenter.
TECHNICALPARAMETERS
Model:EX5000
Power: 1050W
Voltage: 220 –240V~50Hz
Disposalof old electricalappliances.
The Europeandirective 2002/96/ECon WasteElectricalandElectronicEquipment(WEEE),
requires thatold household electricalappliances mustnotbe disposedofinthe normalunsorted
municipalwastestream.Oldappliances mustbecollectedseparatelyinorder tooptimizethe
recoveryandrecyclingofthe materialstheycontain, andreducethe impacton humanhealthand
the environment.The crossedout“wheeledbin”symbolon theproductremindsyou ofyour obligation,
that when you dispose ofthe appliance, it must be separatelycollected.
Consumersshould contacttheirlocalauthorityorretailer for informationconcerningthe correctdisposalof
theirold appliance.
DECLARATIONOFCONFORMITY:Thisdevicecomplieswiththerequirementsof theLowVoltage
Directive2014/35/EUandtherequirements of theEMC directive2014/30/EU.

EX 5000
17
FRANÇAIS
CONSEILSDE SECURITE
Cherclient,Sivoussuivezlesrecommandationsde ce
mode d’emploi,votreappareil sera trèsperformantetil
restera efficacependantde nombreusesannées.Lisez
attentivementcemode d’emploiavant de mettrel’appareil
enmarchepourlapremièrefois.Conservezlemode
d’emploiainsiquele bondegarantie,votreticketde caisse
etsipossible,le cartonavecl’emballage setrouvanta
l’interieur.Sivousremettezl‘appareil adestiers,veuillez-le
remettreavecsonmode d‘emploi.
Conseils générauxde sécurité
1.Cetappareil peut êtreutilisépar desenfants8ansou
plusetdespersonnesprésentantunhandicapphysique,
sensoriel,mentaloumoteurvoirenedisposantpasdes
connaissancesetde l'expériencenécessairesencasde
surveillanceoud'instructionssurl'usagede cetappareil
entoutesécuritéetde compréhensiondesrisques
impliqués.Lesenfantsnedoivent pasjoueravec
l'appareil. Lenettoyage etlamaintenancenedoivent
pas très effectuéspar des enfantssans surveillance.

EX 5000
18
2.Lesenfantsdoivent êtresurveillésafindes'assurerqu'ils
nejouent pasaveccetappareil.
3.Gardezl’appareil etle câble àlaportée desenfantsde
moinsde 8ans.
4.ATTENTION:Par mesuredesécuritévis-à-visdesenfants,
nelaissezpaslesemballages(sac enplastique, carton,
polystyrène) aleurportée.
5.Sile cordond’alimentationestendommagé, adressez-
vousàunservicetechnique agréé.
6.Nedébranchezjamaisentirant ducordon.
7.Nejamaislefairefonctionnersile cordonoulafiche
sontaumesousivousremarquezquel´appareilne
fonctionnepas correctement.
8.Nepasmanipulerl´appareil, les mains mouillées.
9.Nejamaisplacerl´appareil prèsdansl´eauouautre
liquide.
10. Avant denettoyerl´appareil, vérifiezs´il estbien
débranché.
11. L´appareil doitêtreinstallé suivantlesnormes
nationauxpourles installations électriques.
12. Cetappareil n’estaptequepouruneutilisation
domestique.

EX 5000
19
13. Dansle casoùvousavezbesoind'unecopie du
manuel d'instructions,vouspouvezdemanderpar
écritured'une-mail à sonifer@sonifer.es
14. AVERTISSEMENT:Encasde mauvaiseutilisationde
l'appareil, ilyaunrisquedeblessure.
CONSEILSSPÉCIFIQUES
•Pourdébrancherl’appareil,retirezlafichede laprise.
Teneztoujours lafiche.
•Attentionànepas vousbrûleraveclavapeur.
•Netouchez paslessurfaceschaudes.Utilisez
exclusivement les poignéeset les boutons.
•N’utilisezjamaisl'appareilsile réservoird'eaumontre
dessignesdefissures.Utilisezle réservoird'eauavec
l’appareil uniquement.Manipulez-laavecprécautioncar
elle est très fragile.
•N’utilisezjamais votrecafetièresans mettred’eau.
•Posezl’appareil surunetable ouunesurfaceplane.
•ATTENTION.Surfacechaude. Lasurfacepeutdevenir
très chaude pendant le fonctionnement.

EX 5000
20
DÉCOUVREZ VOTRE CAFETIÈRE
1. Indicateur dechauffage
2. Bouton dechauffage
3. Indicateur prêt
4. Mailleen acier (2types :1tassede
gousse, 2tasses)
5. Entonnoiren métal
6. Barre depresse
7. Poignée d’entonnoir
8. Plaque d’égouttement
9. Bacderécupération
10. Couverclederéservoird’eau
11. Poignée duréservoird’eau
12. Réservoird’eau1.30L
13. Bouton defonction (caféou
vapeur)
14. Baguetteàvapeur
15. Dispositifdemousse
16. Bouton-poussoirON/OFF
17. Cuillère àcafé
18. Réchaud àtasses plus chaud
AVANTLAPREMIÈRE UTILISATION
Pour vous assurerque lapremière tasse decaféaun goût excellent,vous devezrincer lacafetière avecde
l'eauchaudecommesuit:
1. Versezdel'eaudansleréservoird'eau,leniveaud'eaune doit pasdépasser lamarque«MAX»dans le
réservoir. Replacezensuitelecouvercleduréservoird'eau.
2. Mettre lamailleen acier dans l'entonnoiren métal (pasdepoudre decafédans lamailled'acier).
3. Pour placer lamailleen acier dans l'entonnoirenmétalvous devezfairecorrespondre l'entailledela
mailleen acier avecl'entailledel'entonnoiren métal(oùlapoignée est).Pourenlever lamailled'acier,
faites cemêmeprocessus.
4. Placezun pichetsur uneétagère amovible.Assurez-vousquelebouton defonction estsurlaposition
“”.
Remarque: L'appareil n'est paséquipé d'un pichet,veuillez-vous servirdepichet ou detasse àcafé.
5. Branchezlacafetière surlesecteur, appuyezsurlebouton ON/OFF, levoyantdechauffage(rouge)
s'allume.
6. Lorsque lacafetière s’estréchauffée, l’indicateurprêt(blanc)s’allume, assurez-vous que lebouton de
chauffagen’estpasenfoncé“ ”,tournezlebouton defunction sur “ ”,lesinfusion d’eaulancent
l’entonnoirmétallique..
7. Lorsque latasse estpleine, tournezlebouton defunction sur laposition“ ”pour arrêter lacafetière,
puisvous pouvezverser l’eaudelatasse etbien lanettoyer.Maintenantvous pouvezcommencer àfaire
ducafé.
Table of contents
Languages:
Other Orbegozo Coffee Maker manuals

Orbegozo
Orbegozo EX 6000 User manual

Orbegozo
Orbegozo EX 5500 User manual

Orbegozo
Orbegozo KF User manual

Orbegozo
Orbegozo CG 3025 User manual

Orbegozo
Orbegozo CG 4023 B User manual

Orbegozo
Orbegozo EXP 5000 User manual

Orbegozo
Orbegozo EX 5200 User manual

Orbegozo
Orbegozo EXP 4600 User manual

Orbegozo
Orbegozo KFP 350 User manual

Orbegozo
Orbegozo EX 3050 User manual