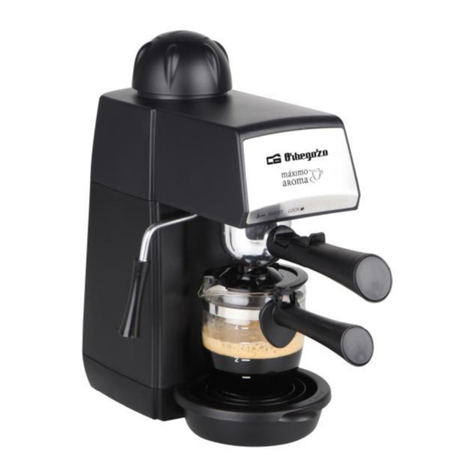
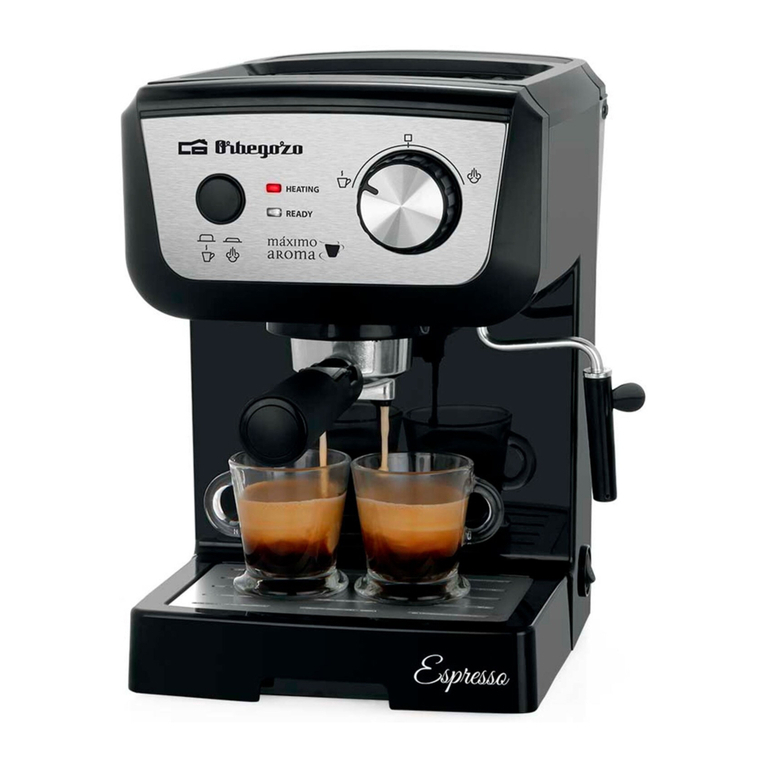
Orbegozo EX 6000 User manual

CAFETERAESPRESSO–MANUAL DEINSTRUCCIONES
EXPRESSOCOFFEEMAKER -INSTRUCTION MANUAL
MACHINEÀEXPRESSO-MANUELD’INSTRUCTIONS
CAFETEIRAESPRESSO-MANUAL DEINSTRUÇÕES
EX 6000
Sonifer,S.A.
AvenidadeSantiago,86
30007 Murcia
España
E-mail: sonifer@sonifer.es
MADEINP.R.C.
Lea atentamenteestemanualantesdeutilizaresteaparatoyguárdeloparafuturas consultas.Sóloasípodráobtener
losmejoresresultadosylamáximaseguridaddeuso.
Readthismanualcarefullybeforerunning thisappliance andsaveit forreferencein ordertoobtainthebestresults
and ensuresafeuse.
Veuillezlireattentivement ce manuelavant d’utilisercetappareiletconservez-lepour touteconsultationfuture.C’est
laseulefaçond’obtenir lesmeilleursrésultatsetunesécuritéoptimaled’utilisation.
Leiaestemanualcuidadosamenteantesdeutilizaresteaparelhoeguarde-oparaconsultafutura.Sóassim,poderá
obterosmelhoresresultadoseamáximasegurança nautilização.

EX 6000
2
ESPAÑOL
INDICACIONESDE SEGURIDAD
EstimadoCliente: Sisiguelasrecomendacionesincluidas
enestemanualde instrucciones,el electrodoméstico le
ofrecerá unaltorendimientoconstanteyfuncionará
correctamentedurantemuchosaños.
Antesde lapuestaenserviciodeesteaparatolea
detenidamenteel manualde instruccionesyguardeeste
bienincluidalagarantía,el recibode pagoysiesposible
tambiénel cartónde embalaje conelembalaje interior.En
casode dejar el aparatoaterceros,tambiénentregueel
manualde instrucciones.
GENERALES
1.Esteaparatopuedenutilizarloniñosconedadde 8años
ysuperior ypersonasconcapacidadesfísicas,sensoriales
omentalesreducidasofaltade experienciay
conocimiento,siseleshadadolasupervisióno
formaciónapropiadasrespectoalusodel aparatode una
manerasegura ycomprendenlospeligrosqueimplica.
Losniñosnodebenjugarconel aparato.Lalimpiezayel
mantenimientoarealizar por el usuarionodeben
realizarlolosniños sinsupervisión.
2.Sedeberá supervisar alosniñospara asegurarsede que
nojueganconesteaparato.

EX 6000
3
3.Mantengael aparatoysucable fuera del alcancedelos
niños menores de 8años.
4.PRECAUCIÓN:Para laseguridadde susniñosnodeje
materialde embalaje (bolsasde plástico,cartón,
polietilenoetc.)asualcance.
5.Siel cable de alimentaciónestádañado,debe ser
sustituidopor el fabricante, el serviciotécnicoo
cualquierotroprofesionalcualificado.
6.No desconectenuncatirandodel cable.
7.No lopongaenfuncionamientosiel cable oelenchufe
estándañadososiobserva queel aparatonofunciona
correctamente.
8.No manipule el aparatoconlasmanos mojadas.
9.No sumergirel aparatoenaguaocualquierotrolíquido.
10. Antesde sulimpiezaobservequeel aparatoestá
desconectado.
11. El aparatodebe instalarsede acuerdoconla
reglamentaciónnacionalpara instalaciones eléctricas.
12. Esteaparatoes sólopara usodoméstico.
13. Encasode necesitar unacopiadel manualde
instrucciones,puede solicitarlapor correoelectrónico a
través de sonifer@sonifer.es
14. ADVERTENCIA:En casode malautilización,existe
riesgode posibles heridas.

EX 6000
4
PRECAUCIONESESPECÍFICAS
•No permitaqueel cable cuelguesobreel borde de una
mesaoencimera otoqueunasuperficie caliente.
•Para desconectarla,desenchúfelade latomaeléctrica de
lapared. Llevecuidadode noquemarseconel vapor.
•No toquelassuperficiescalientes.Utiliceúnicamentelas
asasy losbotones.
•No utiliceelaparatosieldepósitomuestracualquier
signode grietas.Utiliceúnicamenteel depósitoconeste
dispositivo.Utiliceel depósitoconcuidadoyaquees
muyfrágil.
•Nunca utilicelacafetera sinagua.
•Coloqueel aparatosobreunamesaounasuperficie
plana.
•PRECAUCIÓN:Lassuperficie puede permanecer
calienteduranteodespués de suuso.
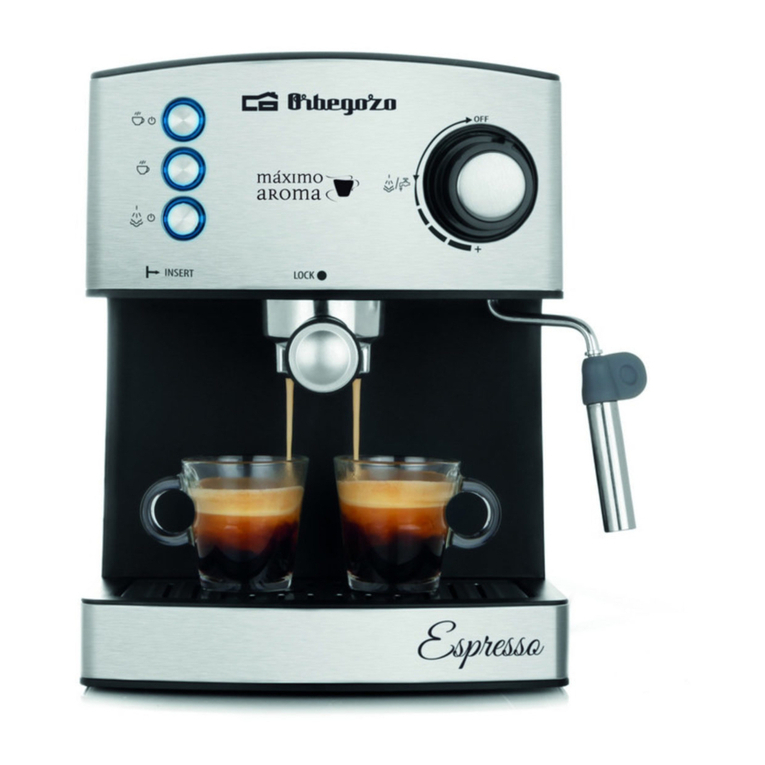
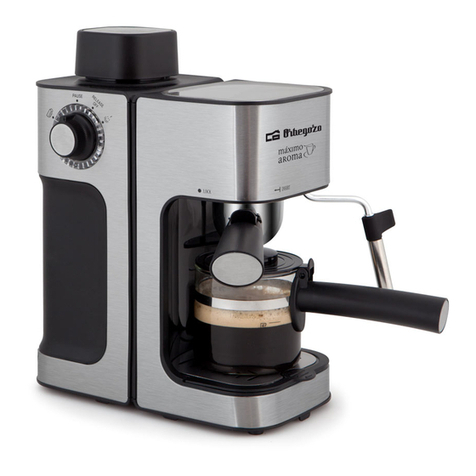
CONOZCASUCAFETERA

1. Bandejasuperior calientatazas.
2. Panel decontrol táctil.
3. Bandejadegoteo.
4. Tapadel depósitodeagua.
5. Depósitodeagua1.50L.
6. Mandodecontrol del vapor.
7. Varilladevapor.
8. Accesorioespumador.
9. Cuerpo principal.
10. Filtro deacero inoxidablede1taza(2tipos:1
tazamono-dosis, 1tazaparacafémolido).
11. Filtro deacero inoxidablepara2tazasdecafé
molido.
12. Porta-filtros metálico.
13. Cucharamedidoraycompactador.
ANTESDEL PRIMER USO
Paragarantizarque el sabor delaprimeratazadecaféseaexcelente, tendráque enjuagarlacafeteracon
aguacalientetal comoseindicaacontinuación:
1. Viertaaguaeneldepósitodelaguasinsobrepasarlamarcade“MAX”deldepósitoycierrelatapadel
depósitodel agua.
Nota: El aparatose suministracon un depósitodesmontableparafacilitarlalimpieza,puedellenarel
depósitocon aguaprimero y,acontinuación, colocarel depósitoen el aparato.
2. Coloque el filtro deaceroen el porta-filtros metálico(sincaféen el filtro deacero).
3. Coloque unajarraenlaplataformadesmontable.Asegúrese deque elmandodecontroldelvaporesté
en posición "OFF".
Nota: El aparatonovaequipadocon jarra,utilicesu propiajarraotazadecafé.
4. Conectealaredlacafetera,pulse elinterruptorPOWER elpilotoindicador parpadeará.Esperehasta
que el pilotoindicador se quedefijo.
5. Cuandoelpilotodelinterruptor de"CalentamientoparaelCafé" dejedeparpadearyse quedefijo,
indicaráque se haacabadoelcalentamientoprevio. Pulse elbotón MANUAL paraque elagua
circule.
6. Llenandolajarra2-3veces habráacabadoel proceso delimpiezayyapodrásprepararcafé.
LLENADO DEL DEPÓSITODEAGUA
1. Abralatapadel depósitodeaguayretire el depósitotirandohaciaarriba.
2. Llene el depósitocon aguafrescacon cuidadodeno exceder lamarcaMAX en el nivel.Vuelvaacolocar
el depósitoen su lugar, presione ligeramenteparaque quedebien ajustadoen su lugar.
3. El depósito, simplemente,puedeser llenadosinnecesidad desacarlodelacafetera,soloabriendola
tapayechandoaguadirectamentecon unajarra.
IMPORTANTE:Es normalque,devezen cuando,hayaun pocodeaguaen elespaciodebajodel
depósito.Simplemente séqueloconun trapoounaesponjaregularmente.

EX 6000
6
USOBÁSICODELACAFETERA
PRECALENTARLA CAFETERA
1. Abre latapadeldepósitoyeche cantidadsuficientedeaguaen él.Lacantidaddeaguano debe exceder
el nivel máximoni quedarpor debajodel nivel mínimo.
Aviso:en elcasodequeutilizar lacafeteracuandonohayaaguaeneldepósitopuedeafectar ala
vidaútil delabomba.Poresorecomendamos añadiragua cuandoeldepósitoesté pordebajodel
nivelMIN.
2. Enchufa lacafeteraalaredypulsaelbotónPOWER . Mientrasparpadea,lacafeteraestá
precalentando. Enestemomentolos botones DOUBLE SINGLE yMANUAL no funcionaránsi
se pulsan. Cuandolaluzse quedefija,estápreparadaparahacer café. Parapararelprecalentamiento,
pulse denuevo el botón POWER .
3. Coloque elfiltro que necesiteen elporta-filtros, colóqueloen lacafeteradesdelaposición “Insert”ygire
hacialaderechahastalaposición “Locked”.
4. Pongaunatazadecafédebajodelporta-filtros ycuandolacafeteraestélistapulse elbotón MANUAL
duranteunos 5-10 segundos parapurgarlacafetera.Tire el aguaque hayacaídoen lataza.
PREPARACIÓNDE UNCAFÉESPRESSO ITALIANO
1. Pon elfiltro enelporta-filtros. Llene elfiltrocon cafémolido(de7a10gr.)yextiéndaloycompáctelo
un pococon lacuchara/compactador.
2. Colocaelporta-filtros enlacafeteradesdelaposición “Insert”gire aladerechahastalaposición
“Locked”.
3. Dejalatazadecafédebajodelporta-filtros ypulsaelbotónPOWER paracomenzarelprocesode
precalentamiento.
4. Unavezque lacafeteraestélista(elindicador luminoso dejadeparpadear)pulse elbotón SINGLE
DOUBLE oMANUAL según que caféque desee preparar(para1tazaespressoitalianose
recomiendael programaSINGLE).
5. Con los botones SINGLE yDOUBLE lacafeterasepararáautomáticamentealser funcionespre-
programadas. SideseaunacantidaddecaféespecíficapulsaelbotónMANUAL ,deestamanera
podráspararlapreparación decafécuandodesees, pulsandodenuevoel botón MANUAL.
Aviso:serecomiendaestar pendiente delacafetera mientrasesté funcionandopara evitarcualquier
problema.
6. Cuandotermines deprepararcafé, dejaque lacafeterase enfríedurante5minutos yyapodrásretirarel
porta-filtrosyvaciarlos residuos del café.
7. Se recomiendalavarelfiltro yelporta-filtros después decadausocon aguafrescaparaevitarque se
obstruya.Puedes limpiarelcuerpo principaldelacafeteraylabandejadegoteo con untrapoobayeta
húmeda.

EX 6000
7
Descripcióndelas funciones:
-DOUBLE :lacafeterase pararáautomáticamentedespués de40segundos.
-SINGLE :lacafeterase pararáautomáticamentedespués de20segundos.
-MANUAL :modomanual,debe pararlael usuario,comomucho funcionarádurante80segundos.
-Cuandono utilicelacafetera,éstase apagaráalos20 minutos.
CambiarprogramacióndeSINGLE yDOUBLE : laprogramacióndeestos modospuedeser
cambiadaagustodelconsumidor. Laprogramación iniciales 20segundos paralafunción SINGLEy40
segundos paralaDOUBLE.Siquieres cambiarlashazlosiguiente: manténpulsadoelbotón SINGLE o
DOUBLE durantemásde3segundos,suéltaloylabombaempezaráafuncionar; vuelveapulsarel
botón SINGLE oDOUBLE cuandollegue al tiempo deseado. Ten en cuentaque el tiempo máximode
funcionamientoes80segundos. Lapróximavezque selecciones lafunciónque hasmodificado, utilizarátu
nuevaprogramación.Estacafeteratiene funciónmemoria,porloquetunuevo programaquedarágrabado
aunque se apague ydesenchufelacafetera.Siquieres restaurarlos ajustes iniciales defábrica,cuando
enciendaslacafetera,pulsalos botones SINGLE yDOUBLE alavezdurantemásde3segundos,
todaslasluces indicadorasparpadearán3veces yse habránrestauradolosvalores iniciales.
IMPORTANTE:para evitarsalpicaduras,noquite elporta-filtrosmientraslacafetera estépreparando
café.
PREPARACIÓNDE UNCAPPUCCINO U OTRO TIPO DE CAFÉESPECIAL
Uncappuccino se preparacon un espresso yleche espumada.Porlotantotienes que prepararun café
espresso siguendolasanteriores instruccionesyadespués seguirlasinstrucciones que se explicana
continuación.
Nota:es necesariocolocarel accesorioespumador en lavarilladevaporparapoder realizaresteproceso.
1. Primero prepareun caféespressoytenlistaunatazasuficientementegrandeparaprepararun
cappuccino.
2. Pulse elbotón STEAM silaluzparpadeaquiere decirque lacafeterase está
precalentando, cuandosequedefijaestarálistaparaser utilizada.
3. Vierteleche enteraen unajarraaltaparapoderespumarlabien. Giraelmandodel
vapor paraque empieceasalirvapor por lavarilla.Nopongaslajarraen el
vaporizador deinicioyaque tiraráun pocodeagua,unaque hayasalidoelagua
puedes empezaraespumarlaleche.
4. Sumergeelaccesorioespumador 1/3en laleche ygiraelmandodelvapor almáximo.
Gradualmentemueve lajarrahaciaabajo,sinque eltubo llegue asalirse delaleche,
en estemomentooirásun sonidoefervescente, loque significaqueelaire está
entrandoen laleche yseempiezaaformarlaespuma.
5. Cuandose hayacreadobastanteespuma,sumergeelespumador enelfondodelajarraydéjalounos
segundos paraquelaleche se calientebien. Yahabráterminadoelprocesodeespumado. Giraelmando
del vapor hastalaposición OFF ypulsael botón STEAM paradesconectarlafunción vaporización.
6. Paraterminardeprepararelcappuccino, viertelaleche espumadaen latazaconelespresso quehiciste
al principio. Yasoloquedaañadirazúcarycacaoenpolvo paradecorar.
Aviso: no debes colocarelespumador encimadelaleche yaque podríasalpicarycausarquemadurasal
estaraaltatemperatura.
EX 6000
8
Consejo: siaparecen burbujasmuygrandesen laleche golpealajarraenlabase ymuévelaen círculos
suavementeparaque se distribuyandemanerauniforme.
Nota:sivasaprepararvarios cappuccinos, recomendamos prepararprimero todosloscafésydespués
espumarlaleche paratodos los cappuccinos.
Nota:se recomienda,después deespumarleche, dejarenfriarlacafeteradurante10minutosantes de
volverlaausar.Deotromodo, el cafépuedetener un sabor comoaquemado.
Puedes enfriarlabombamanualmente: colocaunatazaen lasalidadeaguaypulsaelbotón manual,saldrá
aguaypáralacuandolaluzparpadee.
Notas:
1. Despuésdeespumarleche, eltuboespumadortiene que ser limpiadocon untrapohúmedopara
evitarqueden restos queloobstruyan.
2. Trasespumarleche, dejaque salgavapor poreltubo duranteunossegundos, después parael
vaporizador.
AGUACALIENTE
Estacafeteralepermitetambién tener aguacalienteparaprepararinfusiones.
1. Enciendelacafeteracon el botón POWER .
2. Colocalatazaovasodebajodel tubo devapor.
3. Pulsaelbotón MANUAL yalmismotiempo giraelmandodelvapor alaposición MAX,agua
calientecomenzaráasalirpor el tubo devapor.
4. Paradetener lasalidadeaguacaliente, vuelve apulsarelbotón MANUAL ygiraelmandodelvapor
alaposición OFF.
LIMPIEZA
1.Antes delimpiaruotromantenimiento, apagalacafetera,desenchúfaladelared ydejaque se enfríe.
2.Noutilices disolventes odetergentes cuandolimpies lacafetera.Solountrapo húmedo.
3.Retiralabandejaparael goteo ylímpialaregularmente.
4.Limpiael depósitoregularmenteparaevitarsabores extraños enel café.
5.Despuésdeprepararuncafé,quitaelporta-filtros, retiraelcaféenpolvo,limpialosresiduosdelfiltro yel
porta-filtrosparaque evitarque se obstruya.
6.Limpialaspartes móviles con aguaysécalasbien.
Consejos parahacercafé
-Molidodelcafé: sise formanterrones es porque elmolidoes muyfino; siquedacomoarenasueltael
molidoes grueso; loideal es que quedecomoarenacompacta.
-Cantidad decafémolido:paraun espresso se recomiendausar7-10g.Parauno doblesobre 16g.
-Presión delcafé: se debe presionarelcaféconunafuerzade3.6kg,solousandounamanoes
suficiente.
-Gancho del porta-filtros: se utilizaparasujetarel filtro cuandose vacíaésteyevitarque se caiga.
-Bandejasuperior calientatazas. Serecomiendaque latazaestétempladacuandose haceelcafépara
que éstetengaun mejor sabor, evitandoque se enfríepor el contrastedetemperatura.
-Recomendamos utilizarleche fríaporque se espumarádemaneramásrápida.

EX 6000
9
LIMPIEZAREGULARYMANTENIMIENTO
1. Paraasegurarse quelacafeterapreparacaféconbuen sabor, deberádescalcificarlacafetera1vezcada
3meses (con un usoregular).
2. Puedeutilizar“Desincrustanteparacafeteras”paradescalcificarlos conductos delacafetera.Mezcle4
partes deaguapor 1partededesincrustante. Sino tiene desincrustantepuedeutilizarácidocítricoo
vinagre, el ratioserá100partes deaguapor 3partes deácidocítrico.
3. Noes necesarioque pongacafémolidoen el filtro cuandolimpielos conductos.
4. Paralimpiarlasalidadeaguayel tubo devapor sigalos pasos parahacerun cappuccino.
5. Después, repitaelproceso dehacer un cappuccino 3veces con aguaparaque no queden restosdel
limpiador en los conductos.
6. Cadavezque quierarepetirelproceso delimpiezadeberáesperaraque lacafeterarepose durante3
minutos.
SOLUCIONADORDEPROBLEMAS
PROBLEMA
CAUSA
SOLUCIÓN
Elcafése saleporla
partedearribadel
portafiltro
Hayresiduos en lajuntadesellado Limpialos residuos delajunta
El cafése hamolidomuyfino Retiraese caféyusaunocon molido
másgrueso
El cafése haprensadodemasiado Presionaelcafécon unafuerzade
unos 3kg
Lajuntatiene tiempo yseha
deteriorado Contactacon el serviciotécnico
Elmangodel
portafiltrono puede
ser colocadoen la
posición LOCK
Lacantidaddecafémolidoexcedela
capacidad del filtro Quitaun pocodecaféhastallegarala
marcadeMAX.
Cantidadadecuadadecaféyaunasíno
se ajustael porta-filtro Contactacon el serviciotécnico
Caféfrío Laluzindicadorano estáencendida Preparacafécuandolaluzesté
encendida
Lacafeterano estáprecalentada Esperaaque lacafeteraesté
precalentada
Latazanose hacalentado Calientalatazaenlapartesuperiorde
lacafetera
Labombaes
demasiadoruidosa Nohayaguaenel depósito Llenael depósitocon agua
Eldepósitono se hacolocadobien en
su posición Colocaen laposición correctael
depósito
El cafésalemuyclaro El caféno se haprensadosuficiente Presionayaplanabien elcafé
Nohaysuficientecafémolido Añadecafémolido
El molidodel cafées muygrueso Elijeun cafécon elniveladecuadode
molido
Elcolor delcafées muy
oscuro El cafése haprensadomuyfuerte Presionaelcafécon unafuerzade
unos 3kg
Haydemasiadocafémolido Reducelacantidad decafé
El filtro estáobstruido Limpiael filtro
El molidodel cafées muyfino Utilizael nivel demolidoadecuado
Salidadel aguaestáobstruida Limpialasalidadeagua

EX 6000
10
Prepare cafépero no
espumaleche Lasalidadel vapor estáobstruida Limpialasalidadevaporcon un clip
Descalcificalacafeterasiguiendoel
proceso indicado
Noentraaguaenla
bomba El depósitodeaguano estáen su lugarColocabien el depósitodeagua
Hayaire en labombayen los
conductos Cuandolabombaestéfuncionando
abre lasalidadevapor hastaque salga
agua.
Sinolocalizalacausadelaavería,nodesmonteelaparato,póngaseencontactoconuncentrode
servicioautorizado.
PARÁMETROSTÉCNICOS:
Modelo: EX 6000
Potencia:1050W
Voltage: 220 –240V~50Hz
Eliminacióndelelectrodomésticoviejo.
EnbasealaNormaeuropea2002/96/CEdeResiduos deaparatosEléctricosyElectrónicos (RAEE),
los electrodomésticos viejos no pueden serarrojados en loscontenedoresmunicipales habituales;
tienen que ser recogidos selectivamenteparaoptimizarlarecuperación yrecicladodelos
componentes ymateriales que losconstituyen, yreducirelimpactoen lasaludhumanayel
medioambiente. Elsímbolodelcubo debasuratachadose marcasobre todos los productos pararecordar
al consumidor laobligación desepararlos paralarecogidaselectiva.
Elconsumidor debe contactarcon laautoridadlocalocon elvendedor parainformarse en relación ala
correctaeliminación desu electrodomésticoviejo.
DECLARACIÓNDECONFORMIDAD:Este dispositivocumpleconlos requisitos delaDirectivadeBaja
Tensión2014/35/EUylos requisitos deladirectivadeCompatibilidadElectromagnética2014/30/EU.

EX 6000
11
ENGLISH
SAFETYINSTRUCTIONS
Dear Customer,if youfollowtherecommendations
contained in thisInstructionManual,ourappliancewill
giveyouconstanthigh performanceandwill remain
efficient for manyyearstocome. Readtheoperating
instructionscarefullybeforeputtingtheapplianceinto
operationand keep theinstructionsincludingthewarranty,
thereceiptand, if possible,theboxwiththeinternal
packing. If yougivethisdevicetootherpeople,pleasealso
pass ontheoperatinginstructions.
GeneralSafety Instructions
1.This appliancecanbe used by childrenaged from 8years
andaboveand personswithreduced physical,sensoryor
mentalcapabilitiesor lack ofexperienceandknowledge
if theyhavebeengivensupervisionor instruction
concerninguseoftheapplianceinasafe wayand
understandthehazardsinvolved. Childrenmustnever
playwith theappliance. Cleaningandusermaintenance
mustneverbe carried outbychildrenwithout
supervision.
2.Childrenshould be supervised toensurethattheydonot
play withtheappliance.
3.Keep theapplianceandthecable cordoutofthereach
ofchildrenless than8years old.

EX 6000
12
4.WARNING:Inordertoensureyourchildren‘ssafety,
pleasekeep all packaging(plasticbags,boxes,
polystyreneetc.)outoftheirreach.
5.If thesupplycordisdamaged itmustberepaired bythe
Authorized ServiceAgent.
6.Neverpull onthecordwhenunplugging.
7.Do notusetheunitwithadamaged cordor plug, orif it
is notworking properly.
8.Do nothandletheappliancewithwethands.
9.Neverimmersetheapplianceinwateror anyother
liquid.
10. Makesuretheappliancehasbeenunplugged before
cleaning.
11. Thisappliancemustbe installed followingthenational
regulations forelectricalinstallations.
12. This applianceis for household useonly.
13. Incasethatyouneed acopyoftheinstructionmanual,
youcanaskfor itwritinganemail to sonifer@sonifer.es
14. WARNING:In caseofmisuse, thereisariskofpossible
injury.
SPECIFICSAFEGUARDS
•Todisconnect,removeplugfromwall outlet.Always
hold theplug.
•Becarefulnottoget burnedby thesteam.
•Do nottouchhot surface. Usehandles orknobsonly.

EX 6000
13
•Neverusetheapplianceifthetankshows anysignsof
cracks.Onlyusethetankwith thisappliance.Use
carefully asthetankis veryfragile.
•Neveruseyourcoffee makerwithout waterinit.
•Standtheapplianceonatable or flatsurface.
•CAUTION:Thesurfacecanremainhotduringor after
use.
KNOW YOURCOFFEE MAKER
1. Upper traycup warmer
2. Touchcontrol panel
3. Driptray
4. Water tankcover
5. Water tank1.50L
6. Steam control knob
7. Steam tube.
8. Frother tube.
9. Mainbody
10. Stainless steel 1cup mesh(2types: for coffee
pod or for coffee powder)
11. Stainless steel mesh for 2cups ofcoffee, with
coffee powder
12. Filter holder
13. Measuring spoon and tamper
BEFORETHEFIRSTUSE
Toensure the first cup ofcoffee tastes excellent,you should rinse the coffeemaker withwarm wateras
follows:
1. Fill the water tankwithfresh clearwater takingcare nottoexceedMAX levelandclose the lid ofwater
tank.
Note: Applianceissupplied withremovablewater tankfor easycleaning,you canfill tankwithwater first
and,then, placetankon appliance.

EX 6000
14
2. PlaceS.S. filter infilter holder (without coffee powder infilter).
3. Placeajaror cup on removabletray.Ensure that steam knob isinOFF position.
Note: Appliancedoesn’t includejaror cup, use your ownone.
4. Plugappliancetomains,press button POWER the indicator lightwill flash.Wait until indicator light
doesn’t flash.
5. When POWERindicator lightdoesn’tflash, it means preheatingiscomplete. Press MANUAL button
towater startscirculating.
6. Filling the jar2-3times, cleaning process isfinished and you canbrewcoffee.
FILLING OFWATER TANK
1. Open water tanklid andremove tankpulling up.
2. Fill intankwithfresh water taking care not toexceed the MAX level.Replacewater tank,pressing lightly
toopen the valve located on the bottom ofthe tank.
3. More simply,water tankcanfilled without removing it,just opening lid and pouring water directlyfrom a
jug.
IMPORTANT: Itis normal, occasionally,thereis abitof waterinthespacebelow tank.Simplydry it
with acloth orspongeregularly.
BASICUSEOFTHECOFFEE MAKER
PREHEATINGCOFFEEMAKER
1. Open tanklid andfill itwithenoughquantityofwater. Water quantityshould notexceedmaximum
level and not lower thanMINlevel.
Warning: incaseof nowaterinthetank,theuseof themachine will affectservicelifeof thepump.
Pleaseaddwater intimewhen thewaterlevelis below MINlevel.
2. Plugcoffee maker tomains andpress POWER button. Whileit flashes, coffee maker ispreheating.In
thismomentbuttons DOUBLE SINGLE yMANUAL don’tworkifyoupressthem.Whenlightis
on, coffee maker isreadytobrewcoffee. Tostop preheating,press againPOWER button.
3. Placethe filter you needinfilter-holder, putit incoffee maker from“Insert”position andturn rightto
“Locked”position.
4. Placecoffee cup belowfilter-holder andwhen coffee maker isreadypress MANUAL button for 5-10
secondstopurgecoffee maker. Discard water ofcup.

EX 6000
15
MAKEANESPRESSO COFFEE
1. Placefilter infilter-holder. Fill filter withcoffee powder (7-10 gr.)and distributeand compact it abit with
spoon/tamper.
2. Placefilter-holder incoffee maker from “Insert”position, turn right until “Locked”position”.
3. Leave the cup belowfilter-holder and press POWER button tostart preheating process.
4. Oncecoffee maker isready(indicator lightdoesn’tflash)press SINGLE DOUBLE oMANUAL
button dependingon kindofcoffee youwanttobrew(for 1cup ofitalianespresso werecommend
program SINGLE).
5. WithSINGLE yDOUBLE buttonscoffeemakerwill stop automaticallybecause theyarepre-
programmedfunction. Ifyou wantaspecificquantityofcoffee press MANUAL button, then you can
stop coffee brewwhen you desire, pressing againMANUAL button.
Notice:werecommendpay attentiontocoffee maker whileitis workingtoavoidany problem.
6. When you finishofbrewingcoffee, leavecoffeemaker coolsdownfor 5minutes andthenyouwill be
abletoremove filter-holder and throwcoffee waste.
7. We recommendyou cleaningfilter andfilter-holder after eachuse withfresh water toavoid obstruction.
You cancleanmainbodyand driptraywithdampcloth.
Descriptionof functions:
-DOUBLE :coffee maker will stop automaticallyafter 40 seconds.
-SINGLE :coffee maker will stop automaticallyafter 20 seconds.
-MANUAL :manualmode, coffee maker hastobestoppedbyuser, it willworkfor 80 secondsat
most.
-When youdon’t use coffee maker, it will turn off after 20minutes withno use.
Amendprogrammingof SINGLE yDOUBLE : programmingofthesemodes canbe amendedby
user. Inicialprogramis20secondforfunction SINGLEand40secondsforDOUBLE.Ifyouwanttochange
them,doasfollow:hold pressedSINGLE or DOUBLE button for 3seconds, release andpumpstart
working;press againSINGLE or DOUBLE button when itreachyour desire time. Takeintoaccount
thatmaxworkingtimeis80 seconds. Next timeyou choose amendedfunction, will workbyyour new
programming.Thiscoffeemaker hasmemoryfunction, therefore your newprogramwill be savedalthough
you turn off or unplugcoffee maker. Ifyou wanttorestore initialfactorysetting,when you turn oncoffee
maker, press buttons SINGLE yDOUBLE atthesametimefor morethan3seconds, all indicator
lightswill flash 3times and initial setting willbe restored.
IMPORTANT: toavoid splashes,donotremovefilter-holderwhilecoffee makeris brewingcoffee..

EX 6000
16
MAKINGCAPPUCCINOOROTHERKINDOFSPECIAL COFFEE
Acappuccino coffee ispreparedwithanespresso coffee andfrothedmilk.Therefore you have tomakean
espresso coffee followingprevious instructions andbefore you havetofollowthe instruction explained
below.
Note: it’s necessarytoplacefrother accessoryon steam tube for making frothed milk.
1. First makeanespresso coffee and prepare big enoughcup for cappuccinocoffee.
2. Press STEAM button, iflightflashes, means coffeemaker ispreheating,when light
ison coffee maker will be readyfor using.
3. Pour wholemilkinhighjarforwell frothing.Turnsteamknob tosteambegins come
outofsteamtube. Donotputjarinfrother atthe beginningbecause it will throwabit
ofwater, oncewater isout you canstartfrothingmilk.
4. Immerse frother 1/3inmilkandturn steamknobtomaxposition. Graduallymove jar
downwards, avoid frother comeoutfrommilk,inthismomentyou will hearfizzy
sound,it means airisentering intothe milkand startstofroth.
5. When youhave enoughfroth, immerse frother tothe bottomofjarandletit some
secondsforheatingmilk.Frothingprocess willbe over.Turn steamknob toOFF
position and press STEAM button tostop steamfunction.
6. For finishingofmakingcappuccino, pour frothermilkincup withespresso coffee whichyou prepare
firstly.Just add sugarand cocoapowder according toyour taste.
Notice: you should placefrother on the top ofmilkbecause it cansplash hot milkand scald you.
Advice: ifbig bubbles appearinmilk,hit bottomofjarand move it incircles softlyso bubbles will distribuite
uniformly.
Note: ifyou are goingtoprepare severalcappuccino coffees, werecommendtoprepare firstall espresso
coffee and after that frothmilkfor all cappuccinos.
Note: werecommend,after frothmilk,letcooldowncoffee maker for 10 minutes before use it again.
Otherwise, coffee willtasteabit burnt.You cancooldownpumpmanually:placeacup belowwater output
and press manual button,water will pour. You should stop coffee maker when light flashes.
Notes:
1. After frothing milk,frother tube hastobe cleanwithdampclothtoavoid obstruction withremains.
2. After frothing milk,allowsteam comes out byfrother for seconds, then stopsteamer.
HOTWATER
Thiscoffee maker allowspouring hot water toprepare infusions.
1. Turn on coffee maker withPOWER button.
2. Placecup or glass belowsteam tube.
3. Press MANUAL button andatthe sametimeturn steamknobtomaxposition, hotwater begins
pouring throwsteam tube.
4. Tostop hot water coming out,press againMANUAL button and turn steam knob toOFF position.

EX 6000
17
CLEANING
1.Before cleaning or other maintenance, turn offcoffee maker, unplug it and let it cool down.
2.Donot use solventsordetergentswhen you cleancoffee makers. Just dampcloth.
3.Remove driptrayand cleanit regularly.
4.Cleanwater tankregularlytoavoid rare tastes incoffee.
5.After brewacoffee, remove filter-holder,remove coffee poder, cleanremains ofcoffee offilter andfilter-
holder toavoid obstruction.
6.Cleanmoving partswithwater and drythem thoroughly.
Tips formakingcoffee
-Groundofcoffee: ifthecoffee powder ispulpy,it indicates thatthe coffee powder istoo fine; ifit’sinthe
shape oflosse sand,it indicates thatthe coffeepowder istoo coarse; ifthe coffee groundisincake
shape, it indicates that coffee powder issuitable.
-Quantityofcoffee powder: for espressocoffee werecommend touse 7-10g.for doubleuse about 16g.
-Pressing ofcoffee: you should press coffee powder withastrengthof3.6kg,using ahand isenough.
-Hookoffilter-holder: it uses for holding filter whenyou pourout coffee powder and avoid it fallsdown.
-Top traycup warmer. Itisrecommendedthatcup iswarmwhen you makecoffee, so it will have better
taste, avoiding it getscold because temperature difference.
-We recommend you using cold milkbecause it froths the quickest.
REGULARCLEANING AND MAINTENANCE
1. Toensure coffeemakerbrewsgoodtastecoffee,you should decalcifyonceeverythree months(regular
using).
2. You canuse “descaler forcoffee maker”todecalcifyductsofcoffee maker. Mix 4partsofwater with1
partofdescaler. Ifyou don’thave descaler you canuse citricacid or vinegar, the ratewould be 100 parts
ofwater with3partsofcitricacid.
3. It’s not necessarytoputcoffee powder infilter when you cleanducts.
4. For cleaning water outletand steam tuve followsteps tomakecappuccino.
5. After, repeat cappuccino process 3times withwater toavoid remains ofcleaner inducts.
6. Eachtimeyouwanttorepeatcleaningprocessyoushould waituntil coffee makercold downfor 3
minutes.

EX 6000
18
TROUBLE SHOOTING
Symptom
Cause
Corrections
Carafeleakagewateror water
leaksout from lid ofcarafe
The carafeisnot located
properly
Let centreline ofcarafealigns
withleakageopening ofbrew
basket well.
The level ofwater inthe tank
exceedsthe scaleofMAX.
The water level inthe tank
should be withinthe scaleof
MINandMAX.
Water leaksfrom the bottom of
coffee maker.
There ismuchwater inthe drip
tray. Please cleanthe driptray.
The coffee makerismalfunction. Please contact withthe
authorized servicefacilityfor
repairing.
Water leaksout ofoutersideof
filter. There issomecoffee powder on
filter edge. Get rid ofthem.
Acid (vinegar)tasteexistsin
Espressocoffee.
Nocleancorrectlyafter cleaning
mineral deposits. Followall steps shownon
“cleaning mineral deposits”.
The coffee powder isstored ina
hot,wet placefor alongtime.
The coffee powder turns bad.
Please use fresh coffee powder,
or store unused coffee powder
inacool,dryplace. After
opening apackageofcoffee
powder, reseal it tightlyand
store it inarefrigerator to
maintainitsfreshness.
The coffee makercannotwork
anymore. The power outlet isnot plugged
well.
Plug the power cord intoawall
outlet correctly,ifthe appliance
still does not work,please
contact withthe authorized
servicefacilityfor repairing.
The steam cannot froth.
The steam readyindicator isnot
illuminated.
Onlyafter the steam ready
indicator isilluminated,the
steam canbe used tofroth.
The container istoo big or the
shape isnot fit. Use highand narrowcup.
You have used skimmedmilk Use wholemilk.
Donottakeaparttheappliancebyyourself if thecauseof failure is notfound, youhadbetter
contactcertifiedservingcentre.
TECHNICALPARAMETERS
Model:EX6000
Power: 1050W
Voltage: 220 –240V~50Hz

EX 6000
19
Disposalof old electricalappliances.
The Europeandirective 2002/96/ECon WasteElectricalandElectronicEquipment(WEEE),requires
thatold household electricalappliances mustnotbe disposedofinthe normalunsorted
municipalwastestream.Oldappliances mustbecollectedseparatelyinorder tooptimizethe
recoveryandrecyclingofthe materialstheycontain, andreducethe impacton humanhealthand
the environment.
The crossedout“wheeledbin”symbolon the productremindsyou ofyour obligation, thatwhen you
dispose ofthe appliance,it must be separatelycollected.
Consumersshould contacttheirlocalauthorityorretailer for informationconcerningthe correctdisposalof
theirold appliance.
DECLARATIONOFCONFORMITY:Thisdevicecomplieswiththerequirementsof theLowVoltage
Directive2014/35/EUandtherequirements of theEMC directive2014/30/EU.

EX 6000
20
FRANÇAIS
CONSEILSDE SECURITE
Cherclient,Sivoussuivezlesrecommandationsde ce
mode d’emploi,votreappareil sera trèsperformantetil
restera efficacependantde nombreusesannées.Lisez
attentivementcemode d’emploiavant de mettrel’appareil
enmarchepourlapremièrefois.Conservezlemode
d’emploiainsiquele bondegarantie,votreticketde caisse
etsipossible,le cartonavecl’emballage setrouvanta
l’interieur.Sivousremettezl‘appareil adestiers,veuillez-le
remettreavecsonmode d‘emploi.
Conseils générauxde sécurité
1.Cetappareil peut êtreutilisépar desenfants8ansou
plusetdespersonnesprésentantunhandicapphysique,
sensoriel,mentaloumoteurvoirenedisposantpasdes
connaissancesetde l'expériencenécessairesencasde
surveillanceoud'instructionssurl'usagede cetappareil
entoutesécuritéetde compréhensiondesrisques
impliqués.Lesenfantsnedoivent pasjoueravec
l'appareil. Lenettoyage etlamaintenancenedoivent
pas très effectuéspar des enfantssans surveillance.
2.Lesenfantsdoivent êtresurveillésafindes'assurerqu'ils
nejouent pasaveccetappareil.
3.Gardezl’appareil etle câble àlaportée desenfantsde
moinsde 8ans.
Table of contents
Languages:
Other Orbegozo Coffee Maker manuals

Orbegozo
Orbegozo CG 4024 User manual

Orbegozo
Orbegozo CG 4016 User manual

Orbegozo
Orbegozo CG 5012 User manual

Orbegozo
Orbegozo EX 3050 User manual

Orbegozo
Orbegozo KFI Series User manual

Orbegozo
Orbegozo KF User manual

Orbegozo
Orbegozo CG 5011 User manual

Orbegozo
Orbegozo CG 3025 User manual

Orbegozo
Orbegozo EX 5200 User manual

Orbegozo
Orbegozo EXP 4600 User manual
Popular Coffee Maker manuals by other brands

West Bend
West Bend 54159 instruction manual

Breville
Breville INSTANT CAPPUCCINO CM8 Instructions for use

Nescafe
Nescafe GoldBlend Barista TPM9636 quick start guide

WITTENBERG
WITTENBERG ES 7100 PLUS Quick reference guide

Hamilton Beach
Hamilton Beach FlexBrew Use & care manual

Saeco
Saeco Syntia operating instructions