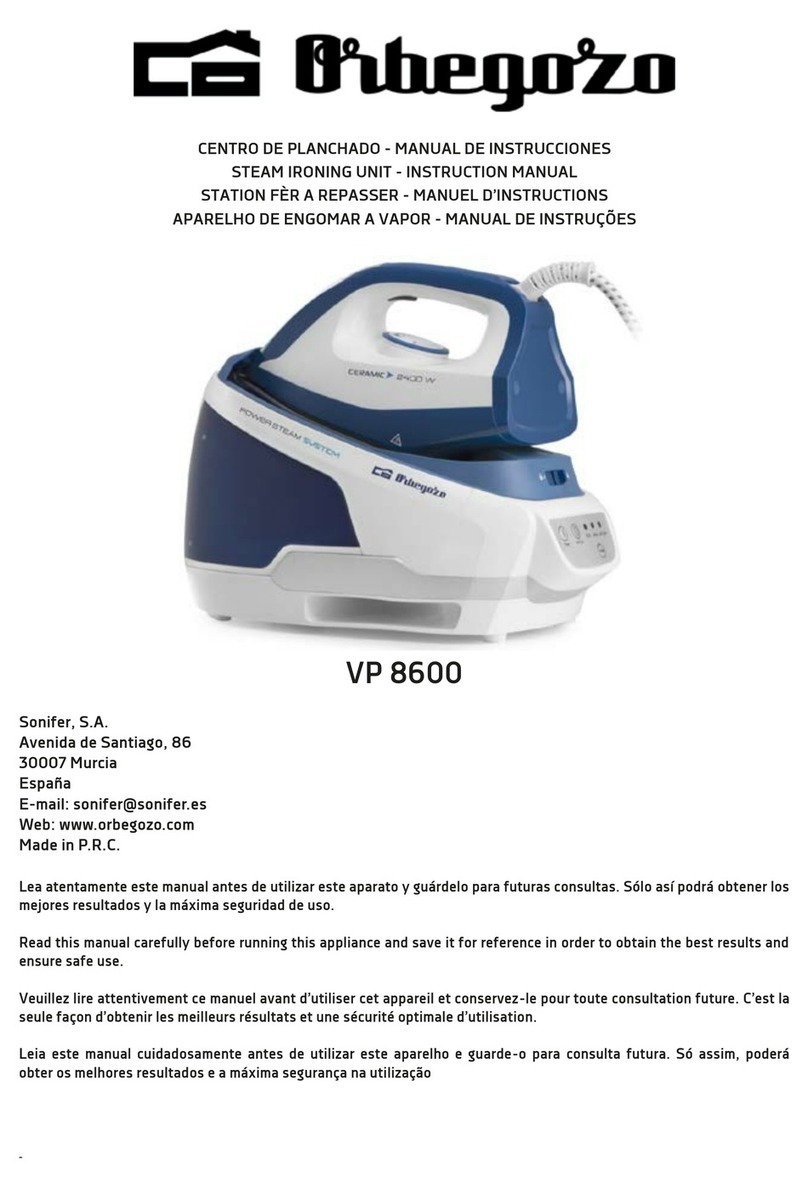
Orbegozo VP 7100 User manual

CENTRODEPLANCHADO -MANUALDEINSTRUCCIONES
STEAMIRONINGUNIT -INSTRUCTIONMANUAL
STATIONFÈR AREPASSER -MANUEL D’INSTRUCTIONS
APARELHODEENGOMARAVAPOR-MANUALDEINSTRUÇÕES
VP 7100
Sonifer,S.A.
AvenidadeSantiago,86
30007 Murcia
España
E-mail: sonifer@sonifer.es
MadeinP.R.C.
Lea atentamenteestemanualantesdeutilizaresteaparatoyguárdeloparafuturas consultas.
Sólo asípodráobtenerlosmejoresresultadosylamáximaseguridaddeuso.
Readthismanualcarefullybeforerunningthisappliance and saveitforreference in orderto
obtain thebestresultsand ensuresafeuse.
Veuillezlireattentivementcemanuelavant d’utilisercetappareiletconservez-lepourtoute
consultationfuture.C’estlaseulefaçond’obtenir lesmeilleursrésultatsetunesécuritéoptimale
d’utilisation.
Leiaestemanualcuidadosamenteantesdeutilizaresteaparelhoeguarde-oparaconsulta
futura.Só assim,poderáobterosmelhoresresultadoseamáximasegurançanautilização

VP7100
2
ESPAÑOL
INSTRUCCIONESDE SEGURIDAD
Leaatentamenteysigaestasinstrucciones.
Guarde estemanualparafuturasconsultas.
Generales:
1.Esteaparatopuedenutilizarloniñosconedad
de 8añosysuperiorypersonascon
capacidadesfísicas,sensorialesomentales
reducidasofaltade experienciay
conocimiento,siseleshadadolasupervisión
oformaciónapropiadasrespectoalusodel
aparatode unamanera segura ycomprenden
lospeligrosqueimplica.Losniñosnodeben
jugar conel aparato.Lalimpiezayel
mantenimientoarealizar por el usuariono
debenrealizarlolosniños sinsupervisión.
2.Sedeberá supervisar alosniños para
asegurarsede quenojueganconeste
aparato.
3.Mantengael aparatoysucable fuera del
alcancede los niñosmenores de 8años.

VP7100
3
4.PRECAUCIÓN:Para laseguridaddesusniños
nodeje materialde embalaje (bolsasde
plástico,cartón,polietilenoetc.)asualcance.
5.Siel cabledealimentaciónestádañado,debe
sersustituidopor el fabricante, el servicio
técnico ocualquierotro profesional
cualificado.
6.No desconectenuncatirandodel cable.
7.No lopongaenfuncionamientosiel cable o
el enchufe estándañadososiobserva queel
aparatonofuncionacorrectamente.
8.No manipuleel aparatoconlasmanos
mojadas.
9.No sumergirel aparatoenaguaocualquier
otrolíquido.
10. Antes de sulimpiezaobservequeel aparato
estádesconectado.
11. El aparatodebe instalarsede acuerdoconla
reglamentaciónnacionalpara instalaciones
eléctricas.
12. Esteaparatoes sólopara usodoméstico.
13. Encasode necesitar unacopiadel manual
de instrucciones,puede solicitarlapor correo
electrónico através de sonifer@sonifer.es

VP7100
4
14. ADVERTENCIA:Encasodemalautilización,
existeriesgode posibles heridas.
Específicas:
•Laplanchanodebe quedarsesinvigilancia
mientras estéconectada.
•Laclavijade tomade corrientedel cable de
alimentacióndebe retirarsede latomade
corrienteantesde rellenar el depósitode
agua.
•Laplanchasedebe usarydejar enuna
superficie estable.
•El orificiode rellenadonodebe estar abierto
duranteel funcionamiento
•Cuandosecoloquelaplanchaensusoporte,
asegurarsedequelasuperficie enlaqueel
soporteestásituadoes estable
•Laplanchanoestáprevistapara utilizarsesi
sehacaído,sihaysignosvisiblesdedañoosi
tienepérdidas de líquido.
•Mantenerlaplanchaysucable fuera del
alcancede losniñosmenoresde 8años
cuandoestáconectadaoestáenfriándose.
•ATENCIÓN.Superficie caliente.
Lasuperficie puede calentarseduranteel

VP7100
5
funcionamiento,calentamientoy
enfriamiento.
•Asegúresedequelatensióneléctrica esla
mismaquelaindicadaenlaplaca de
características del dispositivo.
•Giresiempreel selector de temperaturaala
posición“min”antesde enchufar o
desenchufar el centrode planchado.
•Evitetocar laspiezasdemetal,el agua
calienteoel vaporyaque puedenproducir
quemaduras.Tengacuidadoaltocar las
piezascalientesdelgenerador de vapor yla
plancha.

VP7100
6
INFORMACIÓNGENERAL
Estecompletocentro deplanchadoestácompuestopor unaplanchacon un generador
devapor por separado.Laplanchadispone deun botón paravapor que emiteun
golpe cortodevapor yun selector decontroldelatemperaturaparaajustarla
temperaturaen el nivel deseado.
1. Seguro del vapor
2. Regulador detemperatura
3. Tapón del depósitodelacaldera
4. Interruptor ON/OFF delaplancha
5. Interruptor ON/OFF delacaldera
6. Indicador luminoso devapour listo
7. Regulador del vapor
8. Botón paraemitirvapor
PREPARACIÓNDELCENTRODEPLANCHADO PARA SUUTILIZACIÓN
Se recomiendallenareldepósitodeaguacon unamezclade50%deaguadelgrifo y
50%deaguadestilada.Estose recomiendaespecialmenteen zonasdondeelaguaes
dura,yaque es unabuenamaneradeevitarunaacumulación excesivadecal.
Asegúrese deque eldepósitodeaguasiempre estálleno, aunquenopiense utilizarla
función deplanchadoconvapor.
1.Asegúrese deque el aparatono estáenchufado.
2.Desenrosque el tapón delacaldera.
3.Llene el depósitodeaguacon lacantidad deaguanecesaria.
4.Vuelvaacolocartapóndelacaldera.

VP7100
7
UTILIZACIÓN
•Noplanche nuncacremalleras, remaches en vaqueros, etc.yaque estoestropea
labase delaplancha.Planche siempre evitandolosmismos.
•Elsoportedelaplanchaen elgenerador devapor se calientabastante. Nolo
toque mientrasestáplanchando.
•Nuncadirijalaplanchaaotraspersonas, el vapor estámuycaliente.
•Compruebe lainformación deplanchadoque apareceen lasetiquetasdelas
prendas. Respetesiempreesasinstrucciones.
•Noretire el tapón delaestructuramientrasestéplanchando.
PLANCHADO ENSECO
1.Llene el depósitodeagua(0.8l Max.).
2.Coloque laplanchasobre el soportedel generador devapor.
3.Enchufeel centro del planchado.
4.Coloque elinterruptor deencendido/apagadodelaplanchaen laposición ON
(encendido)ygire elregulador detemperatura(nº2)paraajustarlatemperatura
deseada.Laplanchaempiezaacalentarse.
5.Ajustelatemperaturasiguiendolasinstrucciones que aparecen en latabla1.
6.Elpilotoindicador seapagacuandosealcanzalatemperaturaajustada.Ahorapuede
empezaraplanchar.
PLANCHADO AVAPOR
**Cuandonoutilicelafunción devapor durantealgún tiempoduranteelproceso de
planchado, elvaporexistenteen eltubo deunión con lacalderasecondensará.
Cuandoutilicedenuevolafunción devapor, es normalque salganunaspequeñas
gotasdeagua.
Paraevitarque lasgotasdeaguacaigansobrelaprendaqueestáplanchando, coloque
laplanchasobreun tejidoviejoypulse elbotón devaporhastaquelasalidadevapor
vuelvaaser normal.
1.Llene el depósitodeagua(0.8l Max.).
2.Coloque laplanchasobre el soportedel generador devapor.
3.Enchufeel centro del planchado.
4.Coloque elinterruptordeencendido/apagadodelgenerador devapor alaposición
"I". Elgenerador devapor comienzaabombearaguayacalentarla.Cuandoelvapor
estálisto, se enciendeel pilotoindicador "vapor listo".
6.Mientrastantoajustelatemperaturagirandoelselector decontroldetemperatura
delaplanchaalatemperaturadeseada.Ajustelatemperaturasiguiendolas
instrucciones que aparecen en latablasiguiente.

VP7100
8
EtiquetaTipo detejidoMaterialTemp.
El tejidono se puedeplanchar.
Sintético
Acrílico
Modacrílico
Polipropileno
Poliuretano
Sintético Acetato
Triacetato
Sintético
Metal
Cupro
Poliamida
(nailon)
Poliéster
Modal
Viscosa
SedaSeda
LanaLana
Vapor oseco
Algodón Algodón Vapor oseco
Lino Lino
7.Elpilotoindicador detemperaturadelaplanchase enciendemientrasque laplancha
se estácalentandoyse apagaunavezque laplanchaalcanzalatemperaturaadecuada.
Ahorapuedeempezaraplanchar.
8.Mientrasque estáplanchandopuedeemitirun golpe devapor pulsandoelbotón de
control devapor delaplancha.
9.Vuelvaacolocarlaplanchaen elsoporteenel generador devapor cuandono laesté
utilizandoduranteel planchado.
10.Unavezque hayaterminadodeplanchar, vuelvaacolocarlaplanchasobre el
soportedelgenerador devapor, apague elgenerador devapor ydesenchufeelcentro
deplanchado.
11.Dejeque el centro deplanchadose enfríe.

VP7100
9
LLENADO DELDEPÓSITO DEAGUA
1. Desconecteel interruptordeplancha.
2. Desenchufeyespere 5minutos.
3. Pulse elbotóndesalidadevapor hastaquedejedesalirvapor. Noolvideque la
tapadeldepósitodelacalderaestácalienteypor elloesmuyimportanteutilizarun
mangoopañoparaabrirlacorrespondientetapa.
4. Lasalidadevapor deesteaparatoen muyfuerteypor ellonuncase debedirigirla
planchahaciapersonas, animales uobjetos másdelicados.
5. Si caeaguaal llenareldepósitodelacaldera,debe limpiarlainmediatamentecon un
paño suave yseco.
6. Laacumulación devaportardaalgunos minutos yduranteese tiempolaplanchano
estáen su capacidadmáxima.Estoes normalycuandoelproceso decalentamiento
acaba,el indicador luminoso delacalderase enciende.
APAGADO Y ALMACENAMIENTODELCENTRODEPLANCHADO
1.Apague el generador devapor.
2.Desenchufeel aparatodelatomaeléctrica.
3.Permitaque el centro deplanchadose enfríecompletamente.
4.Limpielacarcasayvacíeelcentro deplanchado. (Consulteelapartado
“Mantenimientoylimpieza”).
5.Guardelaplanchaen un lugarsecoysinhumedad fueradel alcancedelos niños.
6.Guardelaplanchaen posición vertical paraevitardaños en labase delamisma.
MANTENIMIENTO
•Nomuevanuncaelgenerador devapor mientrasestáenchufadootodavíaestá
caliente. Apague elcentro deplanchadoyespere hastaque se enfríepara
moverlo.
•Nosumerjanuncaelaparato, elcabledealimentación oelenchufeen aguao
cualquier otro líquido. Siestoocurrierano utiliceelcentro deplanchadoy
deséchelo.
•Noutiliceproductos delimpiezacorrosivos oestropajos.
•Norasque labase con objetos metálicos.
•Utiliceun paño ligeramentehumedecido.
•Con eltiempo elaguatiendeadejarrestos decalque sedeben eliminar
periódicamentedelasiguientemanera:
-Llene lacalderacon unasolución deagua(75%)yvinagre blancopuro(25%).
-Dejeabiertoeltapóndelacaldera,conecteelaparatoalaredypulse el
interruptor deencendidohastaque lasolución comienceahervir.
-Dejereposarlasolución unos minutos, vacíelayenjuague acontinuación la
caldera2ó3veces.
VP7100
10
-Cuandoprocedaaladescalcificación no despidavapor con laplancha.
•Limpiebien el aparatodespués deutilizarlo.
•Asegúrese deque el aparatono estáenchufadocuandovayaalimpiarlo.
LIMPIEZA
1.Desenchufeelaparatodelatomaeléctricaypermitaque se enfríecompletamente
antes delimpiarlo.
2.Vacíecompletamenteel depósitodespués deutilizarel centro deplanchado.
3.Limpielacarcasadelaplanchacon un paño suave humedecido.
Eliminacióndelelectrodomésticoviejo.
Enbase alaNormaeuropea2002/96/CEdeResiduos deaparatos
Eléctricos yElectrónicos (RAEE),loselectrodomésticos viejos no pueden
ser arrojadosen loscontenedores municipales habituales; tienen que ser
recogidos selectivamenteparaoptimizarlarecuperación yrecicladode
los componentes ymateriales que los constituyen, yreducirelimpactoen la
saludhumanayelmedioambiente. Elsímbolodelcubo debasuratachadose
marcasobre todos los productos pararecordaralconsumidor laobligación de
separarlos paralarecogidaselectiva.Elconsumidor debe contactarcon la
autoridadlocalocon elvendedor parainformarse en relación alacorrecta
eliminación desu electrodomésticoviejo.
DECLARACIÓNDECONFORMIDAD:
Este dispositivocumpleconlos requisitos dela DirectivadeBajaTensión
2006/95/CEylos requisitos deladirectivadeCompatibilidadElectromagnética
2004/108/CE.

VP7100
11
ENGLISH
SAFETYINSTRUCTIONS
Readandfollowtheseinstructionscarefully.
Keep this manualfor futurereference.
General:
1. This appliancecanbe usedby childrenaged
from8yearsandaboveandpersonswith
reduced physical,sensoryor mentalcapabilities
or lack ofexperienceand knowledge if they
havebeengivensupervisionor instruction
concerninguseoftheapplianceinasafe way
andunderstandthehazardsinvolved. Children
mustneverplaywith theappliance. Cleaning
andusermaintenancemustneverbecarried
out bychildrenwithoutsupervision.
2. Childrenshould be supervised toensure
thatthey donot playwiththeappliance.
3. Keep theapplianceandthecable cordout
ofthereachofchildrenless than8years old.
4. WARNING:Inordertoensureyour
children‘ssafety,pleasekeep all packaging
(plasticbags,boxes,polystyreneetc.)out of
theirreach.

VP7100
12
5. If thesupplycordisdamaged itmustbe
repaired by theAuthorizedServiceAgent.
6. Neverpull onthecordwhenunplugging.
7. Do notusetheunitwithadamaged cordor
plug, or if it isnotworkingproperly.
8. Do nothandletheappliancewithwet
hands.
9. Neverimmersetheapplianceinwateror
anyotherliquid.
10. Makesuretheappliancehasbeen
unplugged beforecleaning.
11. Thisappliancemustbe installed following
thenationalregulationsfor electrical
installations.
12. This applianceis for household useonly.
13. Incasethatyouneed acopyofthe
instructionmanual,youcanaskfor itwritingan
email to sonifer@sonifer.es
14. WARNING:In caseofmisuse, thereisarisk
ofpossible injury.
Specific:
•Theironmustnot be leftunattended while
it is connectedtothesupply mains.

VP7100
13
•Removetheplugfromthesocket before
fillingtheappliancewithwater.
•Thefillinghole should notbe openduring
operation
•Theappliancemustbe used andplaced on
astable surface.
•Whenplaced onitsstand,makesurethat
thesurfaceonwhichthestandisplacedis
stable.
•Theironshould notbe used if ithasbeen
dropped, if therearevisible signsof
damage or if it is leakingwater.
•Keep theironanditscordoutofreachof
childrenless than8yearsofage whenitis
energized or coolingdown.
•ATTENTION.Hot surface.
Thesurfacecanbecomehot during
operation
•Makesurethatthemainsvoltage isthe
sameasthatindicated onthetype plateon
theappliance.
•Always turnthetemperature-controldialto
‘min’beforeputtingthepluginthewall
socketor removingtheplugfromthe
socket.

VP7100
14
•Touchinghotmetalparts,hotwateror
steamcancauseburns.Takecarewhen
touchinghotpartsofthesteamgenerator
andiron.
GENERALINFORMATION
Thiscompletesteamstation consistsofaniron withaseparatesteamgenerator. The
iron isequippedwithasteambutton togive ashotofsteam,andatemperature-
control dial toset the temperature tothe required level.
1Steam lockbutton
2Temperature selector dial
3Safetyfill cap
4ON/OFF button(iron)
5ON/OFF button(boiler)
6Boiler indicator light
7Steam regulator button
8Surgeofsteam button
PREPARING THEAPPLIANCEFORUSE
Itisrecommendedthatyou fill the water reservoirwithamixture of50%tapwater and
50%distilledwater. Thisisparticularlydesirableinareaswithhardwater, sincethiswill
prevent the formation ofexcessive limescale.
Makesure the water reservoirisalwaysfilled,even ifyou donotplantouse the steam
function.
1.Makesure the applianceisnot plugged in.
2.Unscrewthe capoftheboiler
3.Fill the water withthe amount ofwater needed.
4.Replacethe capofthe boiler.

VP7100
15
USE
•Never ironover zips, rivetsinjeans, etc.These will damagethe soleplate. Iron around
anysuchobjects.
•The steamgenerator’sholder fortheiron will becomehot.Donottouchit whilstyou
are ironing.
• Never point the soleplateat persons during use,steam isveryhot.
•Checkwhether ironing-instruction labelsare attachedtoclothing.Alwaysobserve any
such
instructions.
• Donot remove capfrom the bodyofthe generator at anytime.
DRY IRONING
1.Fill the water reservoir(0.8l Max.).
2.Put the ironon the steam generator’s holder.
3.Put the plug inthe wall socket.
4.Turn on the ON/OFF switchandturn the iron’s temperature-controldial(No.2)to
adjust the temperature tothe required setting.The iron startsheating.
5.Adjust the temperatureinaccordancewiththe directions given intable1.
6.When theindicatorlighton the iron turns off,the temperature isreached.You now
canstart ironing.
STEAM IRONING
** When notusingthe steamfunction for sometimeduringthe ironingprocess, the
existingsteaminthe pipe connectingthe boilerwill condense. When usingagainthe
steam function isnormalleave small drops ofwater.
Topreventwater dropletsfallingon thegarmentyouareironing,placetheiron on an
old tissue and press the steam until the steam output returns tonormal.
1.Fill the water reservoir(0.8l Max.).
2.Put the ironon the steam generator’s holder.
3.Put the plug inthe wall socket.
4.Setthe on/off switchsteamgenerator to‘I’. Thesteamgenerator startstopumpthe
water and heat it.The indicator light “steam ready” illuminates when steam isready.
6.Meanwhileadjustthetemperature byturningthe iron’s temperature-controldialto
the requiredsetting.Adjustthe temperature inaccordancewiththe directions given in
table1.

VP7100
16
LabelType offabricMaterialTemp.
The fabricmaynot be ironed.
Synthetic
Acryl
Modacrylic
Polypropylene
Polyurethane
Synthetic Acetate
Triacetate
Synthetic
Metal
Cupro
Polyamide-(nylon)
Polyester
Modal
Viscose
SilkSilk
WoolWool
Steam or dry
CottonCotton Steam or dry
Linen Linen
Table1
7.The temperature indicator lighton the iron isilluminatedwhilstthe iron isheating
up, andisextinguishedoncethe iron hasreachedthe settemperature.You cannow
start ironing.
8.Whilstyouareironingyoucangive ashotofsteambypressingtheiron’s steam
control button.
9.When pausing during ironing,return the iron tothe holder on the steamgenerator.
10.Whenyou have finishedironingreturn the iron tothe holder onthe steam
generator, switchthe steam generator off and remove the plug from the wall socket.
11.Allowthe appliancetocool.

VP7100
17
REFILLING THEWATER RESERVOIR
1. Turn off the iron.
2. Switchit off and wait 5minutes.
3. Keep squeezing the steam trigger until no more steam or airisexpelled.Unscrew
the boiler cap, taking carebecause there maystill be asmall residue ofboiler
pressure from within.
4. The vapour steam inthisapplianceisreallystrong,so donot point topeople,
animalsaranyother delicated objects.
5. Ifsomewater fallswhen filling the tank,cleanit withasoft and drycloth.
6. The unit will takesomeminutes toreachoperating temperature and boiler pressure.
The end ofthe warm-up period isindicated bythe generator station pilotlight
being illuminated.
TURNING OFF AND STORING APPLIANCE
1.Switchoff the steam generator.
2.Remove the plug fromthe plug socket.
3.Let the appliancecool downcompletely.
4.Cleanthe housing anddrainthe appliance. (see‘Maintenanceand cleaning’).
5.Store the ironinadry,frost-free location where children can’t reachit.
•Storetheironvertically(upright), this will prevent damagetothesoleplate.
MAINTENANCE
•Never move the steamgenerator whilstit isswitchedon or isstill hot.Switchoff
the appliance, and wait until it hascooled downbefore you move it.
•Never immerse the appliance, the power cordorthe pluginwater or other
liquids. Ifthishappensdonotuse the applianceanymore; dispose ofthe
appliance.
•Never use corrosive or scouring cleaning agents.
•Never scrape overthe soleplatewithmetal objects.
•After aperiodoftime, thewater mayleave somealkaline depositsthatmustbe
periodicallyremoved bydoing the following:
-Fill the boiler withawater solution (75%)and whitepure vinegar(25%).
-Leave the boilerlid opened,plugthe appliancetothe mains andpress the
power switchtill the water begins toboil.
-Leave the solution for afewminutes. Emptythe boiler andcleanit withwater 2
or 3times.
-When decalcification startsdonot throughsteam withthe iron.
•Cleanthe appliancethoroughlyafter use.
•Makesure the applianceisnotpluggedintothe plugsocketwhen you are
going tocleanit.

VP7100
18
CLEANING
1.Remove the plugfromthe wall socketandallowthe appliancetocooldown
completelybefore cleaning it.
2.Alwaysdrainall the water from the reservoirafter eachuse.
3.Cleanthe iron’shousing withasoft dampcloth.
Disposalof old electricalappliances.
The Europeandirective2002/96/EConWasteElectricalandElectronic
Equipment(WEEE),requires thatold household electricalappliances must
notbe disposedofinthe normalunsortedmunicipalwastestream.Old
appliances mustbe collectedseparatelyinorder tooptimizethe recovery
andrecyclingofthe materialstheycontain, andreducethe impacton humanhealth
andthe environment.Thecrossedout“wheeledbin”symbolon theproductreminds
you ofyourobligation,thatwhen you dispose ofthe appliance, it mustbe separately
collected.Consumers should contacttheirlocalauthorityorretailer forinformation
concerning the correct disposal oftheirold appliance.
DECLARATIONOFCONFORMITY:
This devicecomplies with therequirements of theLow VoltageDirective
2006/95/EC andtherequirements of theEMC directive2004/108/EC.

VP7100
19
FRANÇAIS
CONSIGNESDE SECURITE
Lisezattentivementetrespectezces
instructions.Conservezcemode d’emploipour
pouvoirle consulterultérieurement.
Général:
1. Cetappareil peut êtreutilisépar des
enfants8ansouplusetdespersonnes
présentantunhandicapphysique, sensoriel,
mentaloumoteurvoirenedisposant pasdes
connaissancesetde l'expériencenécessairesen
casde surveillanceoud'instructionssurl'usage
de cetappareil entoutesécuritéetde
compréhensiondesrisquesimpliqués.Les
enfantsnedoiventpasjoueravecl'appareil. Le
nettoyage etlamaintenancenedoiventpastrès
effectués pardes enfantssanssurveillance.
2. Lesenfantsdoivent êtresurveillésafinde
s'assurerqu'ils nejouent pas aveccet appareil.
3. Gardezl’appareil etle câbleàlaportée des
enfants de moins de 8ans.

VP7100
20
4. ATTENTION:Par mesurede sécuritévis-à-
visdesenfants,nelaissezpaslesemballages
(sac enplastique, carton,polystyrène) aleur
portée.
5. Sile cordond’alimentationest
endommagé, adressez-vousàun service
techniqueagréé.
6. Nedébranchezjamaisentirant ducordon.
7. Nejamaisle fairefonctionnersile cordon
oulafichesontao mesousivousremarquez
quel´appareil nefonctionnepas correctement.
8. Nepasmanipulerl´appareil, lesmains
mouillées.
9. Nejamaisplacerl´appareil prèsdansl´eau
ouautreliquide.
10. Avant de nettoyerl´appareil, vérifiezs´ilest
biendébranché.
11. L´appareil doitêtreinstallé suivant les
normesnationalespourlesinstallations
électriques.
12. Cetappareil n’estaptequepourune
utilisationdomestique.
13. Dansle casoùvousavezbesoind'une
copie dumanuel d'instructions,vouspouvez
Table of contents
Languages:
Other Orbegozo Iron manuals

Orbegozo
Orbegozo SV 1260 User manual

Orbegozo
Orbegozo SV 1010 User manual

Orbegozo
Orbegozo SV 3000 User manual

Orbegozo
Orbegozo SV 2670 User manual

Orbegozo
Orbegozo SV 2020 User manual

Orbegozo
Orbegozo VP 9500 User manual

Orbegozo
Orbegozo VP 8550 User manual

Orbegozo
Orbegozo SV 2205 User manual

Orbegozo
Orbegozo SVT 1000 User manual

Orbegozo
Orbegozo SV 1600 User manual