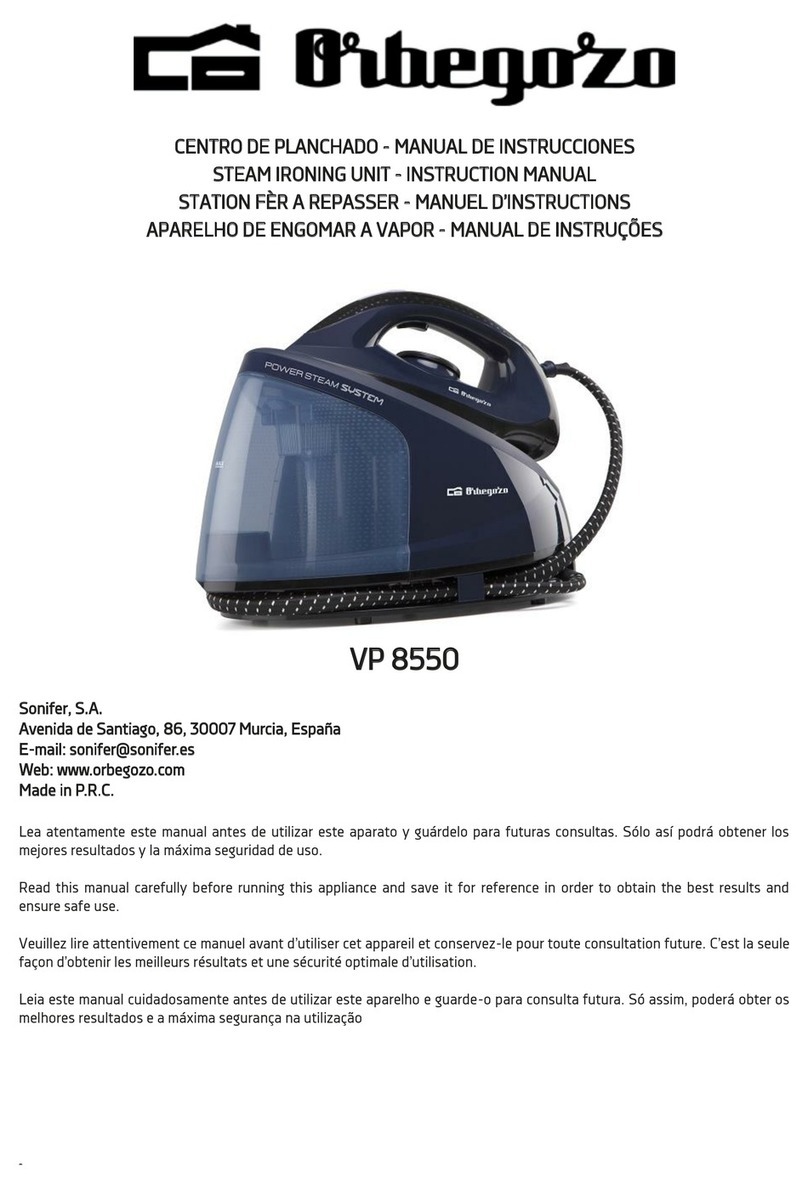
Orbegozo VP 8600 User manual

-
CENTRO DE PLANCHADO - MANUAL DE INSTRUCCIONES
STEAM IRONING UNIT - INSTRUCTION MANUAL
STATION FÈR A REPASSER - MANUEL D’INSTRUCTIONS
APARELHO DE ENGOMAR A VAPOR - MANUAL DE INSTRUÇÕES
VP 8600
Sonifer, S.A.
Avenida de Santiago, 86
30007 Murcia
España
E-mail: sonifer@sonifer.es
Web: www.orbegozo.com
Made in P.R.C.
Lea atentamente este manual antes de utilizar este aparato y guárdelo para futuras consultas. Sólo así podrá obtener los
mejores resultados y la máxima seguridad de uso.
Read this manual carefully before running this appliance and save it for reference in order to obtain the best results and
ensure safe use.
Veuillez lire attentivement ce manuel avant d’utiliser cet appareil et conservez-le pour toute consultation future. C’est la
seule façon d’obtenir les meilleurs résultats et une sécurité optimale d’utilisation.
Leia este manual cuidadosamente antes de utilizar este aparelho e guarde-o para consulta futura. Só assim, poderá
obter os melhores resultados e a máxima segurança na utilização

VP 8600
2
ESPAÑOL
INSTRUCCIONES DE SEGURIDAD
Lea atentamente y siga estas instrucciones. Guarde este
manual para futuras consultas.
Generales:
1.Este aparato pueden utilizarlo niños con edad de 8
años y superior y personas con capacidades físicas,
sensoriales o mentales reducidas o falta de experiencia
y conocimiento, si se les ha dado la supervisión o
formación apropiadas respecto al uso del aparato de
una manera segura y comprenden los peligros que
implica. Los niños no deben jugar con el aparato. La
limpieza y el mantenimiento a realizar por el usuario no
deben realizarlo los niños sin supervisión.
2.Se deberá supervisar a los niños para asegurarse de
que no juegan con este aparato.
3.Mantenga el aparato y su cable fuera del alcance de los
niños menores de 8 años.
4.PRECAUCIÓN: Para la seguridad de sus niños no deje
material de embalaje (bolsas de plástico, cartón,
polietileno etc.) a su alcance.

VP 8600
3
5.Si el cable de alimentación está dañado, debe ser
sustituido por el fabricante, el servicio técnico o
cualquier otro profesional cualificado.
6.No desconecte nunca tirando del cable.
7.No lo ponga en funcionamiento si el cable o el enchufe
están dañados o si observa que el aparato no funciona
correctamente.
8.No manipule el aparato con las manos mojadas.
9.No sumergir el aparato en agua o cualquier otro
líquido.
10. Antes de su limpieza observe que el aparato está
desconectado.
11. El aparato debe instalarse de acuerdo con la
reglamentación nacional para instalaciones eléctricas.
12. Este aparato es sólo para uso doméstico.
13. En caso de necesitar una copia del manual de
instrucciones, puede encontrarla en
www.orbegozo.com.
14. ADVERTENCIA: En caso de mala utilización, existe
riesgo de posibles heridas.
Específicas:
La plancha no debe quedarse sin vigilancia mientras
esté conectada a la alimentación.

VP 8600
4
La clavija de toma de corriente del cable de
alimentación debe retirarse de la toma de corriente
antes de rellenar el depósito de agua.
La plancha se debe usar y dejar en una superficie
estable.
Cuando se coloque la plancha en su soporte,
asegurarse de que la superficie en la que el soporte
está situado es estable
La plancha no está prevista para utilizarse si se ha
caído, si hay signos visibles de daño o si tiene pérdidas
de líquido.
Mantener la plancha y su cable fuera del alcance de los
niños menores de 8 años cuando está conectada o está
enfriándose.
ATENCIÓN. Superficie caliente.
La superficie puede calentarse durante el
funcionamiento, calentamiento y enfriamiento.
Asegúrese de que la tensión eléctrica es la misma que
la indicada en la placa de características del dispositivo.
Gire siempre el selector de temperatura a la posición
“min” antes de enchufar o desenchufar el centro de
planchado.
Evite tocar las piezas de metal, el agua caliente o el
vapor ya que pueden producir quemaduras. Tenga

VP 8600
5
cuidado al tocar las piezas calientes del generador de
vapor y la plancha.
Nunca llene el tanque de agua con agua caliente,
esencia, vinagre, almidón, descalcificador, suavizante u
otro reactivo químico.

VP 8600
6
CONOCE TU CENTRO DE PLANCHADO
Descripción
1) Botón de bloqueo
2) Cable de alimentación con enchufe
3) Ruleta de control de temperatura
4) Botón de vapor
5) Piloto de funcionamiento del termostato
6) Suela

VP 8600
7
7) Asa
8) Depósito de agua
9) Adorno del tanque de agua
10) Panel de control
11) Filtro anti cal de resina
12) Rejilla de entrada de agua
13) Botón de encendido con luz indicadora
14) Luz indicadora de cambio de filtro anti cal de resina
15) Mando de selección de menú
16) Modo ECO con luz indicadora
17) Modo MAX con luz indicadora
18) Modo de auto limpieza con luz indicadora
INSTRUCCIONES DE USO
Cuando utilice la plancha por primera vez, planche primero un paño liso.
El aparato utiliza agua corriente del grifo.
Si el agua es muy dura (dureza superior a 27 grados franceses), sugerimos utilizar agua destilada o
desmineralizada.
Antes de usar el equipo, busque la entrada de agua (12) y primero llene el tanque (8) con una cantidad
adecuada, sin exceder el nivel de agua MÁX.
Conecte el aparato a la fuente de alimentación.
Presione el botón de encendido (13), la plancha comenzará a calentarse y el piloto de funcionamiento
del termostato (5) empezará a parpadear. Transcurridos aproximadamente 30 segundos el piloto dejará
de parpadear y la plancha estará lista para el uso.
Seleccione la temperatura deseada girando la ruleta de control de temperatura (3). La parte coloreada de
azul indica el sector de planchado a vapor.
NOTA: Es normal que por un momento salga un poco de vapor por la suela de la plancha al soltar el
botón de vapor (4).
¡PRECAUCIÓN! No corte la energía inmediatamente si todavía hay vapor de la suela. Debe esperar
hasta que no salga vapor de la suela y luego cortar la energía. De lo contrario, la próxima vez que
encienda la unidad, saldrá vapor o remanentes de agua.
Este aparato también puede generar vapor en posición vertical y, por lo tanto, se puede utilizar para
planchar telas fácilmente, por ejemplo cortinas.

VP 8600
8
Después de que el tiempo de trabajo acumulativo de la bomba sea de 40 horas, se encenderá la luz
indicadora (14) del reemplazo del filtro antical de resina y será necesario reemplazarlo. Después del
reemplazo, presione el botón de reinicio (14) y la luz se apagará.
PLANCHADO EN SECO
Presione el botón de encendido con la luz indicadora (13) y luego gire la ruleta de control de
temperatura (3) hasta una posición cualquiera de la zona sin colorear. Espere hasta que el piloto de
funcionamiento del termostotato (5) deje de parpadear y que indica que se ha alcanzado la temperatura
deseada.
AUTOLIMPIEZA
1. Recordatorio de autolimpieza.
Cuando el tiempo de uso del vapor alcanza las 7 horas, la luz de autolimpieza parpadeará. Debe seguir el
siguiente proceso para activar el modo autolimpieza. No obstante puede activar dicho modo en
cualquier momento que desee, no es necesario que se active el aviso.
IMPORTANTE: Debe realizar la autolimpieza con la plancha fría y en un lugar que pueda ser mojado ya
que la plancha expulsará gran cantidad de agua durante el proceso.
2. Modo de autolimpieza
Presione el botón MODE durante 5 segundos para ingresar al modo de autolimpiezal. El piloto SELF
CLEAN comenzará a parpadear ocurrirán los siguientes procesos automáticamente. No debe tocar
ningún botón ni interrumpir el proceso.
(1) La plancha comenzará a calentarse hasta que el piloto de funcionamiento del termostato deje de
parpadear.
(2) Se activará la bomba durante 45 segundos PRECAUCIÓN: Es posible que durante este proceso se
genere gran cantidad de agua caliente..
(3) Se apagará la bomba y la luz indicador a de funcionamiento del termostato volverá a parpadear. Una
vez llegue a su posición fija, la plancha volverá a su posición de apagado y el proceso de autolimpieza
habrá concluido. Deje enfriar la suela y limpie los restos de cal que puedan quedar en la misma.

VP 8600
9
SUGERENCIAS
-Dividir la colada según las temperaturas de planchado correctas. Empiece por planchar aquellas prendas
que requieran una temperatura más baja. Para obtener detalles más completos, consulte la tabla al final
de este manual.
- Telas como terciopelo y lana, y accesorios como guantes, carteras, etc, recuperarán su aspecto y
texturas ideales con solo pasar la plancha cerca de la superficie de la tela y presionar el botón de vapor.
- Las huellas dejadas en las alfombras por los muebles se pueden eliminar aplicando vapor en las partes
donde se une el pelo y cepillando ligeramente.
-Si la alfombra está hecha de material sintético, no seleccione una temperatura alta.
Cómo conseguir un acabado de planchado
profesional
Una plancha normal genera solo una pequeña cantidad de vapor. En este caso, es necesario vaporizar los
productos constantemente para eliminar las arrugas en la tela que se está planchando.
Un sistema de planchado profesional funciona de manera bastante diferente. La tela se humedece
primero con el vapor y luego, en una segunda fase, se plancha en seco de la forma habitual. Esto
significa que se eliminan los pliegues más pequeños y sus prendas se planchan a la perfección.
En la primera fase (humectación del tejido con vapor), sujete la plancha unos 20 cm por encima del
tejido y presione el botón de vapor (4). Pasar la plancha sobre la prenda con un movimiento circular para
que el potente chorro de vapor humedezca el tejido. Las prendas ligeramente arrugadas requieren solo
unos momentos de vaporización. Si bien las telas muy pesadas o las prendas con pliegues
particularmente difíciles deben estar más húmedas, se debe aplicar vapor durante unos segundos más.
Durante la segunda fase (planchado en seco), controle que el mando del termostato esté en la posición
correcta para el tipo de tejido; planchar en seco la prenda. La placa de planchado especial evitará que las
telas brillen. Con esta técnica de planchado, y siguiendo las sugerencias del cuadro a continuación, le
resultará fácil dar a sus prendas un acabado de planchado realmente profesional.
VP 8600
10
Guía para un planchado perfecto
Tipo de
tela
Posición
del mando
del
termostato
Instrucciones de planchado
Acetato
Acrílico
Nylon
Planchado en seco.
Siga las instrucciones de la etiqueta de la prenda.
Este tipo de tejido requiere generalmente un
planchado muy ligero.
Pollester
Rayón
Planchado en seco
Planchar del revés. Al planchar tejidos mixtos.
Seleccione la temperatura mínima recomendada.
Seda
Planchado en seco.
Planchar del revés.
Lana
Algodón ligero
Ropa ligera
Planchado a vapor.
Planchar del revés. Coloque un paño fino sobre la tela
para evitar un acabado brillante.
Algodón
Lino fino
Tejidos
almidonados
Planchado a vapor.
Humedezca la tela
antes de planchar. Se pueden
planchar telas más pesadas y telas alquitranadas en la
parte delantera. Los colores más oscuros y las
prendas bordadas se deben planchar al revés.
Lino
Planchado a vapor.
Use mucho vapor y planche las telas oscuras del revés
para evitar un acabado brillante. Planche las solapas y
los puños del lado derecho para un mejor acabado.

VP 8600
11
Eliminación del electrodoméstico viejo.
En base a la Norma europea 2012/19/UE de Residuos de aparatos Eléctricos y Electrónicos
(RAEE), los electrodomésticos viejos no pueden ser arrojados en los contenedores
municipales habituales; tienen que ser recogidos selectivamente para optimizar la
recuperación y reciclado de los componentes y materiales que los constituyen, y reducir el
impacto en la salud humana y el medioambiente. El símbolo del cubo de basura tachado se marca sobre
todos los productos para recordar al consumidor la obligación de separarlos para la recogida selectiva. El
consumidor debe contactar con la autoridad local o con el vendedor para informarse en relación a la
correcta eliminación de su electrodoméstico viejo.
DECLARACIÓN DE CONFORMIDAD:
Este dispositivo cumple con los requisitos de la Directiva de Baja Tensión 2014/35/EU y los
requisitos de la directiva de Compatibilidad Electromagnética 2014/30/EU.

VP 8600
12
ENGLISH
SAFETY INSTRUCTIONS
Read and follow these instructions carefully. Keep this
manual for future reference.
General:
1. This appliance can be used by children aged from 8
years and above and persons with reduced physical,
sensory or mental capabilities or lack of experience and
knowledge if they have been given supervision or
instruction concerning use of the appliance in a safe way
and understand the hazards involved. Children must
never play with the appliance. Cleaning and user
maintenance must never be carried out by children
without supervision.
2. Children should be supervised to ensure that they do
not play with the appliance.
3. Keep the appliance and the cable cord out of the
reach of children less than 8 years old.
4. WARNING: In order to ensure your children‘s safety,
please keep all packaging (plastic bags, boxes,
polystyrene etc.) out of their reach.
5. If the supply cord is damaged it must be repaired by
the Authorized Service Agent.
6. Never pull on the cord when unplugging.

VP 8600
13
7. Do not use the unit with a damaged cord or plug, or
if it is not working properly.
8. Do not handle the appliance with wet hands.
9. Never immerse the appliance in water or any other
liquid.
10. Make sure the appliance has been unplugged before
cleaning.
11. This appliance must be installed following the
national regulations for electrical installations.
12. This appliance is for household use only.
13. In case that you need a copy of the instruction
manual, you can find it in www.orbegozo.com.
14. WARNING: In case of misuse, there is a risk of
possible injury.
Specific:
The iron must not be left unattended while it is
connected to the supply mains.
Remove the plug from the socket before filling the
appliance with water.
The appliance must be used and placed on a stable
surface.
When placed on its stand, make sure that the surface
on which the stand is placed is stable.

VP 8600
14
The iron should not be used if it has been dropped, if
there are visible signs of damage or if it is leaking
water.
Keep the iron and its cord out of reach of children
less than 8 years of age when it is energized or
cooling down.
ATTENTION. Hot surface.
The surface can become hot during operation
Make sure that the mains voltage is the same as that
indicated on the type plate on the appliance.
Always turn the temperature-control dial to ‘min’
before putting the plug in the wall socket or
removing the plug from the socket.
Touching hot metal parts, hot water or steam can
cause burns. Take care when touching hot parts of
the steam generator and iron.
Never fill the water tank with hot water, essence,
vinegar, starch, descaler, fabric softener, or other
chemical reagent.

VP 8600
15
KNOW YOUR IRONING CENTER
Description
1) Lock button
2) Power cord with plug
3) Temperature control roulette
4) Steam button
5) Thermostat operating light
6) Sole

VP 8600
16
7) Handle
8) Water tank
9) Water tank ornament
10) Control panel
11) Resin anti lime filter
12) Water inlet grille
13) Power button with indicator light
14) Resin anti-lime filter change indicator light
15) Menu selection knob
16) ECO mode with indicator light
17) MAX mode with indicator light
18) Self-cleaning mode with indicator light
INSTRUCTIONS FOR USE
When using the iron for the first time, iron a smooth cloth first.
The appliance uses tap water.
If the water is very hard (hardness greater than 27 French degrees), we suggest using distilled or
demineralized water.
Before using the equipment, find the water inlet (12) and first fill the tank (8) with a suitable quantity,
without exceeding the MAX water level.
Connect the appliance to the power supply.
Press the power button (13), the iron will start to heat up and the thermostat operating light (5) will start
to flash. After approximately 30 seconds the light will stop flashing and the iron will be ready for use.
Select the desired temperature by turning the temperature control dial (3). The part colored in blue
indicates the steam ironing sector.
NOTE: It is normal for a little steam to come out of the iron soleplate for a moment when you release the
steam button (4).
CAUTION! Do not cut off the power immediately if there is still steam from the soleplate. You need to
wait until no steam comes out of the soleplate and then cut off the power. Otherwise, the next time you
turn on the unit, steam or residual water will come out.
This appliance can also generate steam in an upright position and can therefore be used to easily iron
fabrics, for example curtains.

VP 8600
17
After the cumulative run time of the pump is 40 hours, the indicator light (14) for the replacement of the
resin anti-scale filter will come on and it will need to be replaced. After replacement, press the reset
button (14) and the light will turn off.
DRY IRONING
Press the power button with the indicator light (13) and then turn the temperature control dial (3) to any
position in the uncoloured area. Wait until the thermostat operating light (5) stops flashing and indicates
that the desired temperature has been reached.
SELF-CLEANING
1. Self-cleaning reminder.
When the steam usage time reaches 7 hours, the self-cleaning light will blink. You must follow the
process below to activate the self-cleaning mode. However you can activate this mode at any time you
want, it is not necessary to activate the warning.
IMPORTANT: You must perform the self-cleaning with the cold iron and in a place that can be wet since
the iron will expel a large amount of water during the process.
2. Self-cleaning mode
Press the MODE button for 5 seconds to enter self-cleaning mode. The SELF CLEAN light will begin to
flash and the following processes will occur automatically. You should not touch any buttons or interrupt
the process.
(1) The iron will start to heat up until the thermostat operation light stops flashing.
(2) The pump will run for 45 seconds CAUTION: Large amounts of hot water may be generated during
this process.
(3) The pump will turn off and the thermostat operation indicator light will flash again. Once it reaches its
fixed position, the iron will return to its off position and the self-cleaning process is complete. Allow the
soleplate to cool down and clean any limescale that may remain on it.
SUGGESTIONS
-Divide the laundry according to the correct ironing temperatures. Start by ironing those items that
require a lower temperature. For more complete details, see the table at the end of this manual.

VP 8600
18
- Fabrics such as velvet and wool, and accessories such as gloves, handbags, etc., will regain their ideal
appearance and textures just by running the iron close to the surface of the fabric and pressing the
steam button.
- Traces left on carpets by furniture can be removed by applying steam to the areas where the pile meets
and brushing lightly.
-If the mat is made of synthetic material, do not select a high temperature.
How to get a professional ironing finish
A normal iron generates only a small amount of steam. In this case, it is necessary to constantly steam
the products to eliminate wrinkles in the fabric being ironed.
A professional ironing system works quite differently. The fabric is first moistened with steam and then,
in a second phase, dry ironed in the usual way. This means that the smallest pleats are eliminated and
your clothes are ironed to perfection.
In the first phase (moistening the fabric with steam), hold the iron about 20 cm above the fabric and
press the steam button (4). Pass the iron over the garment in a circular motion so that the powerful jet of
steam moistens the fabric. Slightly wrinkled items require only a few moments of steaming. Although
very heavy fabrics or items with particularly difficult pleats should be more humid, steam should be
applied for a few more seconds.
During the second phase (dry ironing), check that the thermostat knob is in the correct position for the
type of fabric; dry iron the garment. The special ironing plate will prevent the fabrics from shining. Using
this ironing technique, and following the suggestions in the chart below, it is easy to give your garments
a truly professional ironing finish.

VP 8600
19
Guide to a perfect ironing
Kind of
fabric
Thermostat
knob
position
Ironing instructions
Acetate
Acrylic
Nylon
Dry ironing.
Follow the instructions on the garment label.
This type of fabric general
ly requires very light
ironing.
Pollester
Rayon
Dry iron
Iron insi
de out. When ironing mixed fabrics. Select
the minimum recommended temperature.
Silk
Dry ironing.
Iron inside out.
Wool
Light cotton
Light clothes
Steam ironing.
Iron inside out. Place a thin cloth over the fabric to
avoid a shiny finish.
Cotton
Fine linen
Starchy fabrics
Steam ironing.
Dampen the fabric before ironing. Heavier fabrics
and tarry fabrics can be ironed on the front. Darker
colors and embroidered garments should be ironed
on reverse.
Linen
Steam ironing.
Use lots of steam and iron dark fabrics inside out to
avoid a shiny finish. Iron the lapels and cuffs on the
right side for a better finish.

VP 8600
20
Disposal of old electrical appliances.
The European directive 2012/19/UE on Waste Electrical and Electronic Equipment (WEEE),
requires that old household electrical appliances must not be disposed of in the normal
unsorted municipal waste stream. Old appliances must be collected separately in order to
optimize the recovery and recycling of the materials they contain, and reduce the impact on
human health and the environment. The crossed out “wheeled bin” symbol on the product reminds you
of your obligation, that when you dispose of the appliance, it must be separately collected. Consumers
should contact their local authority or retailer for information concerning the correct disposal of their old
appliance.
DECLARATION OF CONFORMITY:
This device complies with the requirements of the Low Voltage Directive 2014/35/EU and the
requirements of the EMC directive 2014/30/EU.
Table of contents
Languages:
Other Orbegozo Iron manuals

Orbegozo
Orbegozo SV 2205 User manual

Orbegozo
Orbegozo SV 1010 User manual

Orbegozo
Orbegozo SV 1260 User manual

Orbegozo
Orbegozo SV 3000 User manual

Orbegozo
Orbegozo SV 1250 User manual

Orbegozo
Orbegozo SV 1600 User manual

Orbegozo
Orbegozo SV 2670 User manual

Orbegozo
Orbegozo SV 2020 User manual

Orbegozo
Orbegozo SVT 1000 User manual

Orbegozo
Orbegozo SV 1020 User manual