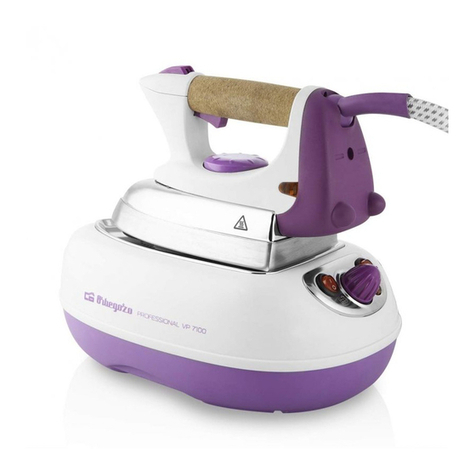
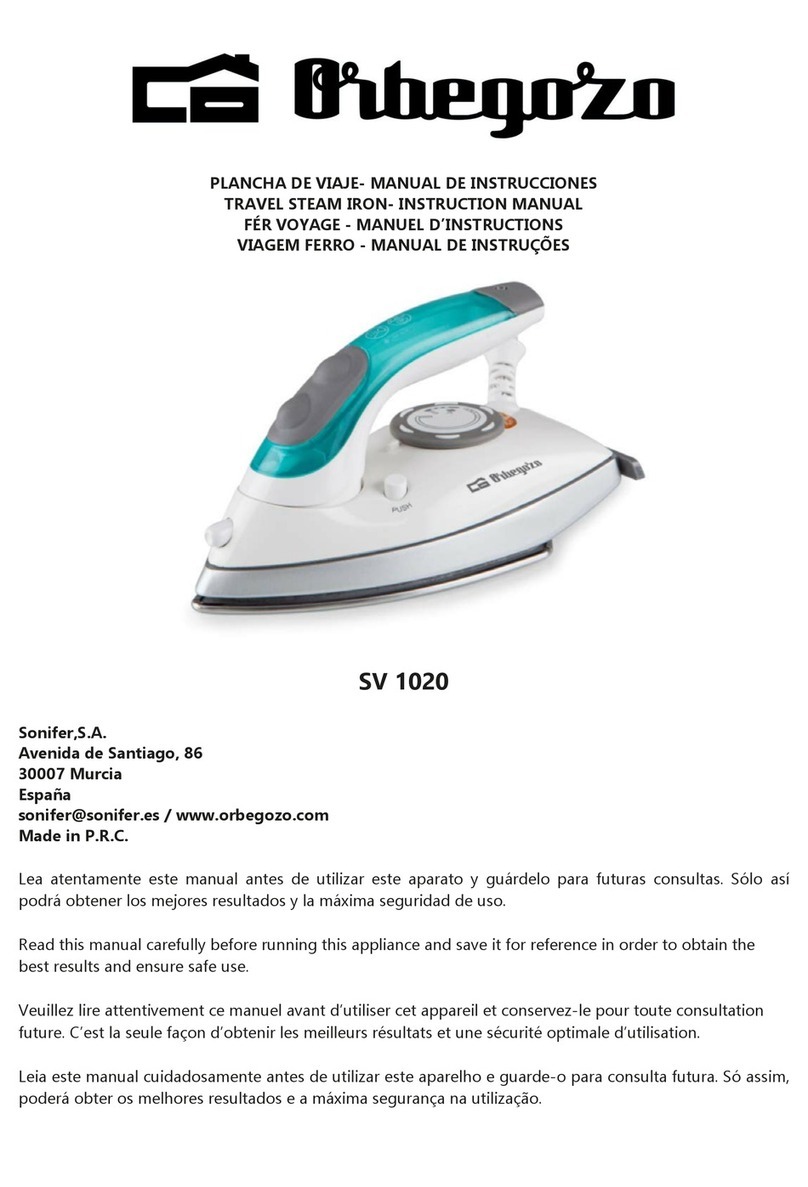
Orbegozo VP 9500 User manual

-
CENTRO DE PLANCHADO - MANUALDE INSTRUCCIONES
STEAM IRONING UNIT-INSTRUCTIONMANUAL
STATIONFÈRAREPASSER - MANUELD’INSTRUCTIONS
APARELHO DE ENGOMARAVAPOR- MANUALDE INSTRUÇÕES
VP9500
Sonifer, S.A.
Avenida de Santiago,86
30007 Murcia
España
E-mail: sonifer@sonifer.es
Leaatentamenteestemanual antesdeutilizar esteaparatoyguárdelopara futuras
consultas.Sóloasí podráobtenerlosmejoresresultadosyla máxima seguridaddeuso.
Readthis manual carefullybeforerunningthis applianceand saveitforreferencein
ordertoobtain thebestresultsand ensuresafeuse.
Veuillezlireattentivement cemanuelavantd’utilisercetappareil etconservez-lepour
touteconsultationfuture.C’estla seulefaçond’obtenir lesmeilleurs résultatsetune
sécuritéoptimaled’utilisation.
Leia estemanual cuidadosamenteantesdeutilizar esteaparelhoeguarde-o para
consultafutura.Sóassim, poderá obterosmelhoresresultadoseamáxima segurança
nautilização

VP9500
2
ESPAÑOL
INSTRUCCIONESDESEGURIDAD
Lea atentamente ysigaestasinstrucciones.Guarde
este manualparafuturasconsultas.
Generales:
1.Este aparatopuedenutilizarloniñosconedadde
8añosysuperiorypersonasconcapacidades
físicas,sensorialesomentalesreducidasofalta
deexperienciayconocimiento,si seleshadado
lasupervisiónoformaciónapropiadasrespecto al
usodelaparato deunamaneraseguray
comprendenlospeligrosqueimplica. Losniños
nodebenjugarconelaparato. La limpiezayel
mantenimientoarealizarporelusuarionodeben
realizarlolosniñossin supervisión.
2.Sedeberásupervisaralosniñosparaasegurarse
dequenojuegan con esteaparato.
3.Mantengaelaparato ysucablefueradelalcance
delosniñosmenoresde8 años.
4.PRECAUCIÓN:Paralaseguridaddesusniñosno
deje materialdeembalaje(bolsasdeplástico,
cartón, polietilenoetc.)asualcance.

VP9500
3
5.Sielcabledealimentaciónestá dañado,debeser
sustituidoporelfabricante,elserviciotécnicoo
cualquierotroprofesionalcualificado.
6.No desconectenuncatirandodelcable.
7.No lopongaenfuncionamiento si elcableoel
enchufe estándañadososi observaqueel
aparato nofuncionacorrectamente.
8.No manipuleelaparato con lasmanosmojadas.
9.No sumergir elaparato enaguaocualquierotro
líquido.
10. Antesdesulimpieza observequeelaparato
está desconectado.
11. Elaparato debeinstalarsedeacuerdoconla
reglamentaciónnacionalparainstalaciones
eléctricas.
12. Este aparato essóloparausodoméstico.
13. Encasodenecesitarunacopiadelmanualde
instrucciones,puedesolicitarlaporcorreo
electrónicoatravésde sonifer@sonifer.es.
Específicas:
1.La planchanodebequedarsesinvigilancia
mientrasesté conectada.
2.La clavija detomadecorriente delcablede
alimentacióndeberetirarsedelatomade
corriente antesderellenareldepósito deagua.
3.La planchasedebeusarydejarenunasuperficie
estable.

VP9500
4
4.Elorificioderellenadonodebeestarabierto
durante elfuncionamiento
5.Cuandosecoloquelaplanchaensusoporte,
asegurarsedequelasuperficieenlaqueel
soporte está situadoesestable
6.La planchanoestá prevista parautilizarsesi seha
caído,si haysignosvisiblesdedañoositiene
pérdidasdelíquido.
7.Mantenerlaplanchaysucablefueradelalcance
delosniñosmenoresde8añoscuandoestá
conectadaoestá enfriándose.
8.ATENCIÓN. Superficiecaliente.
La superficiepuedecalentarsedurante el
funcionamiento, calentamiento y enfriamiento.
9.Asegúresedequelatensióneléctricaeslamisma
quelaindicadaenlaplacadecaracterísticasdel
dispositivo.
10. Giresiempreelselectordetemperaturaala
posición“min”antesdeenchufarodesenchufar
elcentrodeplanchado.
11. Evite tocarlaspiezasdemetal,elaguacaliente
oelvaporyaquepuedenproducir quemaduras.
Tengacuidadoaltocarlaspiezascalientesdel
generadordevapory laplancha.

VP9500
5
DESCRIPCIÓN DE LASPARTES
1.Interruptorcalderínencendido/apagadoO/1
2.Depósitoaguaextraíble
3.Cable de alimentacióneléctrica
4.Cablevaporplancha/calderín
5.Ruedade ajuste vapor
6.Indicadorluminosonaranja vaporlisto
7.Indicadorluminosoverde nivelagua/presenciadedepósitodeagua
8.Indicadordeltermostatode temperatura.
9.Indicadorluminosode temperaturade plancha.
10.Botónvaporconopciónbloqueovaporcontinuo
11.Termostatoajuste temperatura plancha
12.Interruptorplanchaencendida/apagadaO/1
13.Mangode corcho
14.Tapade llenadodepósitodeagua
15.Filtrodeagua
PREPARACIÓNANTESDE CADA USO
1. Apoyeelaparatosobre unasuperficieestable,planay resistente al calor.
2. Extraigaeldepósitode aguautilizandola empuñadura.
3. Llene eldepósitode aguadestiladasin superar elnivelmáximo.
4. Inserte eldepósitocorrectamente ensusitio.
NOTA:Sinodeseallenar eldepósitohastaelnivelmáximo,asegúresedequeselleneal
menoshastaelnivelmínimo.Encasocontrarioelaparatonodesprenderá vapor.

VP9500
6
FUNCIONAMIENTOY DETALLE DEL PANEL DE MANDOS
1. Conecte elcablede alimentaciónala tomadecorriente eléctrica.
2. Pulse ambosinterruptoresrojos(A-D) que se encuentranala derechay alaizquierdadel
panelde mandos.
3. Si quiereplanchar utilizandosolamente la funciónplancha, enciendaúnicamente el
interruptorde la izquierda(A)
4. Elindicadorluminosoverde(C) se iluminará almismo tiempoal encenderelinterruptor
delcalderín (A); la planchase calentará enun minutoy medio.
5. Si elindicadorverdepermanece apagadosignificaquehayquellenareldepósito(por
faltade agua), oque nose hacolocadocorrectamente.
6. Elindicadorluminosonaranja (B)permanecerá apagadohastaquepasendosminutos
(conelnivelMáx.deaguaeneldepósito)indicandoqueelaparatoestálistopara el
suministrode vapor.
•Durante losprimerosusosse podrá comprobar un pequeñoescapedehumo ydeolores
nonocivos;este fenómenoes normal ynotendrá consecuenciasenelusodelaparato,
desapareciendoenpocotiempo.
•Después deun minutoy,normalmente,durante eluso,la bombaeléctrica delaparato
enviará elaguaal calderín.Estopuede provocarun ruido(gorgoteo) que es normal.
7. Regulela emisióndelchorrodevapormediante la ruedagiratoria (E).Elsuministrode
vaporaumentará girándolaenelsentidodelasagujas delrelojydisminuirá girándola en
elsentidocontrario.
8. Para emitir vaporpulse elbotónquese encuentra delante delmangodecorchodela
plancha;siquitaeldedocesará elsuministrodevapor. Sideseaelegir la opción"vapor
continuo" pulse elinterruptorde bloqueosituadoenelcentrodelbotónde vapor.
Etiqueta
Tipodetejido
Material
Temp.
El tejidonosepuede planchar.
Sintético
Acrílico
Modacrílico
Polipropileno
Poliuretano
Sintético Acetato
Triacetato

VP9500
7
Sintético
Metal
Cupro
Poliamida
(nailon)
Poliéster
Modal
Viscosa
Seda Seda
Lana Lana
Vaporoseco
Algodón Algodón
Vaporoseco
Lino Lino
Regulareltermostatode laplancha:
-Empieceplanchandolostejidosqueseplanchanabaja temperatura (Mín.)ytermine
conlosquese planchanatemperatura más elevada(Máx.).
-Paraplanchar prendas contejidosdedistintasfibras,regulelatemperatura eligiendo
la fibra másdelicada.
-Para planchar prendas delana, regulela temperatura enla opciónlanayplanchela
prendadelrevéspara evitarque aparezcanbrillos.
Regularlarueda de cantidad de vapor:
-Para planchar tejidosgruesosaumente la cantidaddevaporgirandola ruedaenel
sentidode las agujasdelreloj.
-Para planchar abaja temperatura reguleal mínimo la ruedadecantidaddevapor
girandoencontrarioal de las agujas delreloj.
Paraplanchar en seco:
-Nopulseelbotónvaporsituadodelantedelmangodecorcho.
Llenado del depósitode agua
Sielniveldelaguaeneldepósitoestáporbajodel"MÍN.".
1. Extraigaeldepósitodeaguayrelléneloconaguadestilada(capacidadmáxima0,8
litros).

VP9500
8
2. Asegúresedevolveracolocar eldepósitocorrectamente
3. Espereaqueelindicadorluminosonaranja seenciendadenuevoindicandoqueel
vaporestápreparado.
Función vaporcontinuo
Pulseelbotónvaporconfuncióndebloqueovaporcontinuopara obtenerun suministro
continuodevapor.
Atención:
Utilicelaopciónvaporcontinuoconprecaución,yaquela potenciadesuministrodevapor
puede causar quemaduras.
Mantenimientodel aparato
Antesderealizar elmantenimientodelaparatoasegúresedequeesté desconectadodela
tomadecorrientey de quela planchayla basede apoyoesténfrías.
•Para limpiar laplanchaoelcalderínnoutiliceproductosabrasivos.
•Nunca pongala planchaoelcalderínbajoelchorrode aguadelgrifo.
•Eviteapoyarla planchasobreunabasedeapoyometálica osobrecualquierotrasuperficie
puessepodría dañar (la basedeapoyodeplanchaestádotadadetaponesdegoma
antideslizantesy resistentesatemperaturas elevadas).
Limpiezade laplancha
Para la limpiezade la suela de la planchase recomienda:
-Utilizar un pañohúmedooun detergente noabrasivo para quitar cualquierresiduode
la planchaodelsoporte base.
-Noutilizar nunca objetosafiladosoásperosparaquitar losresiduosde laplancha.
-Nousar vinagre,sustanciasabrasivasodesincrustantespara limpiar la plancha.
-Noapoyarla planchasobre unasuperficie áspera.
Limpiezadelcalderín
Cuidado:
•Use solamente aguadestilada.
•Noutiliceproductosanticalcáreospara enjuagar elcalderínpuestoquepueden
dañarlo.
1. Controlequeelaparatoesté frío,queseencuentreal menosdoshorasdesenchufadoy
que eldepósitodeaguaextraíble esté vacío.
2. Sitúe elaparatoal borde dellavaboy apoyela planchasobreunasuperficie plana.

VP9500
9
3. Inclineelaparatosobreun ladoyconla llaveAllendesatornillela protecciónde descarga
de plásticodelcalderínquese encuentra enelcentrode la base.
4. Utilicelamismallaveparadesatornillar la tuercahexagonal situadaenlaprotecciónde
descargareciénquitada.
5. Manteniendoelaparatoenposicióninclinada, utiliceunajarra parallenar elcalderíncon
aproximadamente150 cl de aguatibia e igual cantidadde vinagre(150cl).
6. Dela vueltaalaparatoagitándoloenérgicamente.
7. Vacíe elcalderíncompletamente enellavabooenuncubo.
8. Enjuague dosotresvecesconaguacorriente (aproximadamente 250 cl)
9. Importante:antesdevolveracerrar elcalderínajustandola tuerca asegúresedequeno
quede aguaenelcalderín.
10. Volveraponerlaprotecciónde descargade plásticodelcalderínenposiciónde cerrado.
Limpiezadel filtrode agua
Cadamesmantengaelfiltroaremojoenaguaconun 10% de sal durante doshoras.
Guardar el aparato
1. Pulsenlosdosinterruptoresluminososrojosencendido/apagadopara apagar el
calderíny laplanchaydesenchufe elaparato.
2. Apoyela planchasobre labase de apoyo.
3. Dejeenfriarla planchaylabasedeapoyoaproximadamente30minutosymástarde
guarde elaparatoenlugar seguro.
Eliminación del electrodomésticoviejo.
Enbaseala Normaeuropea2002/96/CEdeResiduosdeaparatosEléctricosy
Electrónicos(RAEE), loselectrodomésticosviejosnopuedenserarrojadosenlos
contenedoresmunicipaleshabituales;tienenqueserrecogidosselectivamente
para optimizar la recuperaciónyrecicladodeloscomponentesy materialesque
losconstituyen,yreducirelimpactoenlasalud humanayelmedioambiente.El
símbolodelcubodebasuratachadosemarca sobretodoslosproductospara recordar
al consumidorla obligacióndesepararlospara la recogidaselectiva.El consumidor
debecontactar conla autoridadlocal oconelvendedorpara informarseenrelacióna
la correctaeliminaciónde suelectrodomésticoviejo.
DECLARACIÓNDE CONFORMIDAD:
Estedispositivocumpleconlos requisitos de laDirectivade BajaTensión 2006/95/CEylos
requisitos de ladirectivadeCompatibilidad Electromagnética2004/108/CE.
VP9500
10
ENGLISH
SAFETYINSTRUCTIONS
Readand followtheseinstructionscarefully.Keep
this manualforfuturereference.
General:
1. This appliancecanbeusedby childrenaged
from8years and aboveandpersonswithreduced
physical,sensoryormentalcapabilitiesorlackof
experienceandknowledgeiftheyhavebeengiven
supervisionorinstructionconcerning useof the
applianceinasafe wayand understand thehazards
involved.Childrenmustneverplaywiththe
appliance. Cleaning and usermaintenancemust
neverbecarriedoutby childrenwithout
supervision.
2. Childrenshouldbesupervisedto ensurethat
theydonot play withtheappliance.
3. Keeptheapplianceandthecablecordoutof
thereach ofchildren less than 8years old.
4. WARNING:Inorderto ensureyourchildren‘s
safety, pleasekeepall packaging (plasticbags,
boxes, polystyreneetc.) outoftheir reach.
5. If thesupplycordis damageditmustbe
repaired by theAuthorizedServiceAgent.
6. Neverpull on thecord whenunplugging.

VP9500
11
7. Donot usetheunitwithadamagedcordor
plug, orifitis not workingproperly.
8. Donothandletheappliancewith wet hands.
9. Neverimmersetheapplianceinwaterorany
otherliquid.
10. Make suretheappliancehasbeenunplugged
beforecleaning.
11. This appliancemustbeinstalledfollowing the
nationalregulationsforelectricalinstallations.
12. This applianceis forhousehold useonly.
13. Incasethat youneedacopyof theinstruction
manual,youcanaskforitwriting anemail to
sonifer@sonifer.es
Specific:
1. Theiron mustnot beleft unattended whileitis
connected tothesupplymains.
2. Removetheplug fromthesocket beforefilling
theappliancewith water.
3. Thefilling holeshouldnotbeopenduring
operation
4. Theappliancemustbeusedandplacedona
stablesurface.
5. Whenplacedonitsstand,make surethatthe
surfaceon which thestandis placedis stable.
6. Theironshouldnot beusedifithasbeen
dropped,iftherearevisiblesignsofdamageorifit
is leaking water.

VP9500
12
7. Keeptheironand itscordoutof reachof
childrenless than8years of agewhenitis
energizedorcooling down.
8. ATTENTION. Hot surface.
Thesurfacecan becomehot duringoperation
9. Make surethatthemainsvoltageis thesame
asthatindicated onthetypeplate on theappliance.
10. Alwaysturnthetemperature-controldialto
‘min’ beforeputtingthepluginthewall socket or
removing theplug fromthesocket.
11. Touchinghot metalparts,hot waterorsteam
cancauseburns.Take carewhentouching hot parts
of thesteamgeneratorand iron.
ABOUTTHE APPLIANCE

VP9500
13
1.Boilerswitchon/off O/1
2.Removable watertank
3.Powersupplycable
4.Cable steamiron/boiler
5.Steamcontrolknob
6.Steamready indicatorlight orange
7.Greenlight forthewaterlevel/waterreservoir presence
8.Indicatorthermostat temperature setting plate
9.Irontemperature light.
10.Steambuttonlock optionwithcontinuoussteam
11.Thermostat setting temperature ironplate
12.Ironswitchon/off O/1
13.Corkhandle
14.Flapfilling watertank
15.Waterfilter
PREPARATION FOR USE
1. Place theunitonastable,flat and heat-resistantsurface.
2.Remove thewatertankfromitshandle.
3.Fill thewatertankwithdistilledwaterwithout exceeding themaximumlevel.
4.Assembledthewatertank.
NOTE:Ifyoudo notwanttofillthetankup tothe maxlevel, be suretofillituptoatleastto
the minlevel.Otherwisethe unitwill notdeliver anysteam
OPERATIONANDCONTROLPANELDETAIL
1. Connectthe powercordtothe electricaloutlet
2. Pressbothredswitches(AD)placedtotheright and totheleftofthecontrolpanel
3. Ifyouwanttoironwiththesolefunctioniron,just turnontheswitch(A)totheleft
4. Thegreenindicatorlight(C) will illuminateatthesametimetheboilerpowerswitch(A),
the ironis hot withinaminute and ahalf
5. Ifthegreenlightremainsoff it meansyouhavetofill thetank(low water), orthathas not
beenreplacedproperly.
6. The orange light (B), immediately afterthe ignitionis switchedoff, will turnoninless than
twominutes(Maxlevelofwaterinthetank) toindicate thatthedeviceisreadytorelease
steam.
•Atthetimeofthefirstlighting theremaybeaslightemanationofsmokeandsmell
thatis notharmful, and this phenomenonis normal, itwill notaffecttheuseoftheunit
and will disappear inashort time.
•Afteraboutaminute,and regularlyduring use,theelectric pumpofthedevicesends
the waterintothe boiler.This causesanoise (bubbling)that is normal
7. Adjusttheemissionofsteamthrough theknob(E).Theprovisionincreasesclockwiseand
decreasesbyturning counterclockwise
8. To emitsteampressthebuttoninfrontofthecork handle,and if youreleaseyourfinger
dispensing stops, if youwanttochoosethe"continuoussteam"press thelock buttonlocated
at thecenterofthesteambutton.

VP9500
14
Label
Typeoffabric
Material
Temp.
The fabric may not be ironed.
Synthetic
Acryl
Modacrylic
Polypropylene
Polyurethane
Synthetic Acetate
Triacetate
Synthetic
Metal
Cupro
Polyamide -(nylon)
Polyester
Modal
Viscose
Silk Silk
Wool Wool
Steamordry
Cotton Cotton
Steamordry
Linen Linen
Setthe thermostatofthe iron:
-Beginironing thefabrics thatareironedatlowtemperature(Min)and end withthosethatare
ironedathighertemperatures(Max).
-Toironclotheswithfabric ofvariousfibersadjustthetemperatureofironingonthemost
delicate fiber.

VP9500
15
-Tostretchwoolgarments,adjustthetemperatureofwooland ironthegarmentinsideoutto
avoidthe shinyeffect.
Adjustthe knob ofthe amountofsteam:
-Toironafabric withacertainthickness,increase the amountofsteamby turning it clockwise.
-Forironatlowtemperature,adjusttheknobtothe minimumamountofsteam
by turning it counterclockwise
For dry ironing:
-Donotpress the steambuttonplacedinfrontofthecork handle.
Fillingthe water tank
The watertanklevelis below the"MIN"
1. Removethe removablewatertankand fill (maximumcapacity0.8liters).
2. Makesurethat the tankis repositionedcorrectly
3. Wait until theorange lightcomesonagainonsteamready
Advise:
Forfabricsthatarenotlinen orcotton,holdthe ironafewinchesawaysoasnottoburnthe
tissue
Continuous steam function
Pressthesteambuttonwithcontinuoussteamlocking optiontogetacontinuoussupplyof
steam:
Warning:
Usethe continuoussteamwithcaution given thatthe outputpowerofthe steamcan cause
burns.
Maintenanceofthe appliance
Before carrying out anymaintenance,make sure theappliance is unplugged
and the soleplate oftheironand the ironrest support are cold.
•Do notusedetergentordescaling agentstocleanthesoleplateoftheiron
ortheboiler
•Neverput theironorthe boilerunderthetap.
•Donotplacetheirononametal ironrestorbesidessurfaceasthis may
damage(theironrestis providedwithnon-slipfeet and is designedto
withstand high temperatures).
Cleaningthe plateofthe iron
Cleaning the aluminumplate is highlyrecommended:
-Useadampclothornon-abrasivecleanertoremoveanydepositontheplate oronthemedia
base.
-Neveruse sharpobjectsorrough toremove thedeposit onthe plate.
-Neverusevinegar, abrasive cleaners orscouring tocleanthe iron.
-Donotplacethe irononarough floor.

VP9500
16
Cleaningthe boilerWarning:
•Use distilledwater.
•Donotuse descaling agentstorinsethe boilerasthis maydamage it.
1. Check thattheapplianceiscold,theplug has beendisconnectedformore
than2 hours and thattheremovable watertankisempty.
2. Placetheapplianceontheedgeofthesinkand placetheirononaflat
surface.
3.Tiltthedeviceononesideand withtheappropriateallenkey screwcap
plastic boilerdrainatthecenterofthe base
4.Usethesameallenkeytoscrewthehexagonalring placedinsidethe
discharge guardjust removed.
5. Whileholding theunitinaninclinedposition,useajug and fill theboiler
withabout 150cl ofwarmwaterand anequal amount ofvinegar(150cl).
6. Turnthe device completelyby shaking itvigorously.
7. Completelyempty the boilerinthesinkorinabucket.
8. Rinse twoorthreetimeswithwater(about250 cl)
9. Important: Beforeyouclosetheboilerwiththeringand theallenkey,
ensure thatnowaterremainsinthe boiler.
10.Replacethe protectionofexhaust boilerinplasticinthe closedposition.
Cleaningthe water filter
Eachmonthwe holdthe filtertosoakinwaterwith10% salt fortwohours.
Storingthe appliance
1. Pressbothswitchesbrightredon/off toturnoff theboilerand iron,then
remove the plug.
2. Placethe ironontheironrest support.
3. Let theiron(and therest)coolforabout30 minutes, thenstoreitincomplete
safety.
Disposalofoldelectrical appliances.
TheEuropeandirective2002/96/EC onWaste Electrical and Electronic
Equipment (WEEE), requiresthat oldhouseholdelectrical appliancesmust not be
disposedofinthenormal unsortedmunicipal wastestream.Oldappliancesmust
becollectedseparatelyinordertooptimizetherecoveryand recycling ofthe
materials theycontain,and reducetheimpactonhumanhealthand the
environment.Thecrossedout“wheeledbin”symbolontheproductremindsyouofyour
obligation,that whenyoudispose oftheappliance,itmustbeseparatelycollected. Consumers
shouldcontacttheir local authorityorretailerforinformationconcerning thecorrectdisposal
oftheiroldappliance.
DECLARATIONOF CONFORMITY:
Thisdevicecomplieswiththe requirementsofthe LowVoltageDirective2006/95/ECand the
requirementsofthe EMC directive2004/108/EC.

VP9500
17
FRANÇAIS
CONSIGNESDESECURITE
Lisez attentivementet respectez cesinstructions.
Conservez cemoded’emploipourpouvoir le
consulterultérieurement.
Général:
1. Cet appareil peutêtreutilisépardesenfants8
ansoupluset despersonnesprésentantun
handicapphysique,sensoriel,mentaloumoteur
voirenedisposantpasdesconnaissanceset de
l'expériencenécessairesencasdesurveillanceou
d'instructionssurl'usagedecet appareil entoute
sécurité etdecompréhensiondesrisques
impliqués.Lesenfantsnedoiventpasjoueravec
l'appareil.Le nettoyageet lamaintenancene
doiventpastrèseffectuéspardesenfantssans
surveillance.
2. Lesenfantsdoiventêtresurveillésafinde
s'assurerqu'ilsnejouentpasavec cetappareil.
3. Gardez l’appareil et lecâbleàlaportéedes
enfantsdemoinsde8 ans.
4. ATTENTION:Parmesuredesécurité vis-à-vis
desenfants,nelaissez paslesemballages(sacen
plastique,carton, polystyrène) aleurportée.

VP9500
18
5. Silecordond’alimentationestendommagé,
adressez-vousàunservicetechniqueagréé.
6. Ne débranchezjamais en tirantducordon.
7. Ne jamais lefairefonctionnersi lecordonoula
fichesontaomesousi vousremarquez que
l´appareil nefonctionnepascorrectement.
8. Ne pasmanipulerl´appareil,lesmains
mouillées.
9. Ne jamais placerl´appareil prèsdansl´eauou
autreliquide.
10. Avantdenettoyerl´appareil,vérifiez s´ilest
bien débranché.
11. L´appareil doitêtreinstallésuivantlesnormes
nationalespourlesinstallationsélectriques.
12. Cet appareil n’estaptequepouruneutilisation
domestique.
13. Danslecasoùvousavez besoind'unecopiedu
manueld'instructions, vouspouvez demanderpar
écritured'un e-mail à sonifer@sonifer.es.
Spécifique:
1.Ne paslaisserleferàrepassersanssurveillance
quand il estbranchéau courantélectrique.
2.Débranchezlaprisedelaficheavantderemplir
l’appareil d’eau.
3.L'orificederemplissagenedoitpasêtreouvert
pendantlefonctionnement.
4.L’appareil doitêtreutilisésurunesurfacestable.

VP9500
19
5.Quand il seraplacésurlesupport,veillez àle
posersurunesurfacestable.
6.Ne pasutiliserleferàrepassers’il esttombé,s’il
présente designesvisiblesdedétériorationouen
casdefuite d’eau.
7.Tenir leferetsoncordonhors deportéedes
enfantsdemoinsde8anslorsqu’il estbranché
ou lorsqu’il refroidit.
8.ATTENTION. Surfacechaude.
La surfacepeutdevenir trèschaudpendantle
fonctionnement
9.Réglez toujours leboutondelatempératuresur
«min»avantdebrancheroudébrancher
l’appareil.
10. Faitestoujourstrèsattentionlorsquevous
repassez àproximité d’enfants.Ne laissez jamais
votrefersanssurveillances’il estallumé,même
lorsqu’il estposésuruneplancheàrepasser.
11. Toucherlespartiesmétalliqueschaudes,l'eau
oulavapeurchaudepeutprovoquerdes
brûlures.Faitesattentionlorsquevoustouchez
despartieschaudesdugénérateurdevapeuret
du fer.

VP9500
20
POUR MIEUXCONNAÎTREL’APPAREIL
1.Interrupteurmarche/arrêt de lachaudièreO/1
2.Réservoir d’eauamovible
3.Câble d’alimentationélectrique
4.Cordonvapeurfer/chaudière
5.Régulateurdevapeur
6.Voyantorange quand vapeurprête
7.Voyantvert niveaud’eau/présenceréservoir d’eau
8.Thermostat Indicateurtempérature plaque de réglage
9.Fervoyant de température.
10.Boutonvapeuravecoptionblocagevapeurcontinue
11.Thermostat pourréglage de la température du fer
12.Interrupteurmarche /arrêt du ferO/1
13.Mancheenliège
14.Zone de remplissagedu réservoir d’eau
15.Filtre àeau
PRÉPARATIONAVANTCHAQUE UTILISATION
1. Posezl’appareil surune surface stable,planeet résistante àla chaleur.
2. Retirezle réservoir d’eauenutilisant lapoignée
3. Rempliravec de l'eaudistillée sansdépasserleniveaumaximum.
4. Introduisezleréservoir correctement danssonemplacement.
Table of contents
Languages:
Other Orbegozo Iron manuals

Orbegozo
Orbegozo SV 1260 User manual

Orbegozo
Orbegozo SV 3000 User manual

Orbegozo
Orbegozo SV 1600 User manual

Orbegozo
Orbegozo VP 8500 User manual

Orbegozo
Orbegozo SV 2680 User manual

Orbegozo
Orbegozo SV 2205 User manual

Orbegozo
Orbegozo SV 1010 User manual

Orbegozo
Orbegozo SVT 1000 User manual

Orbegozo
Orbegozo VP 8550 User manual

Orbegozo
Orbegozo SV 1020 User manual