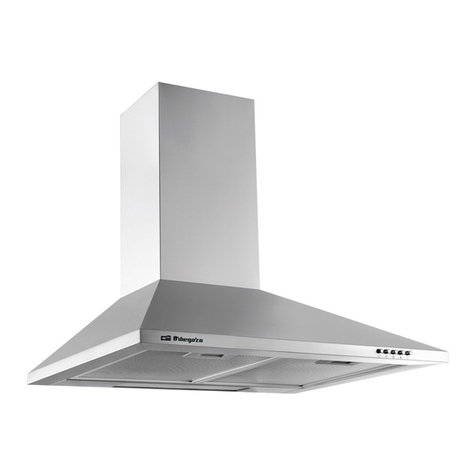
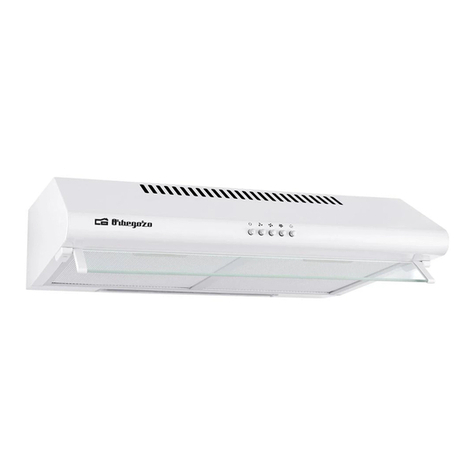
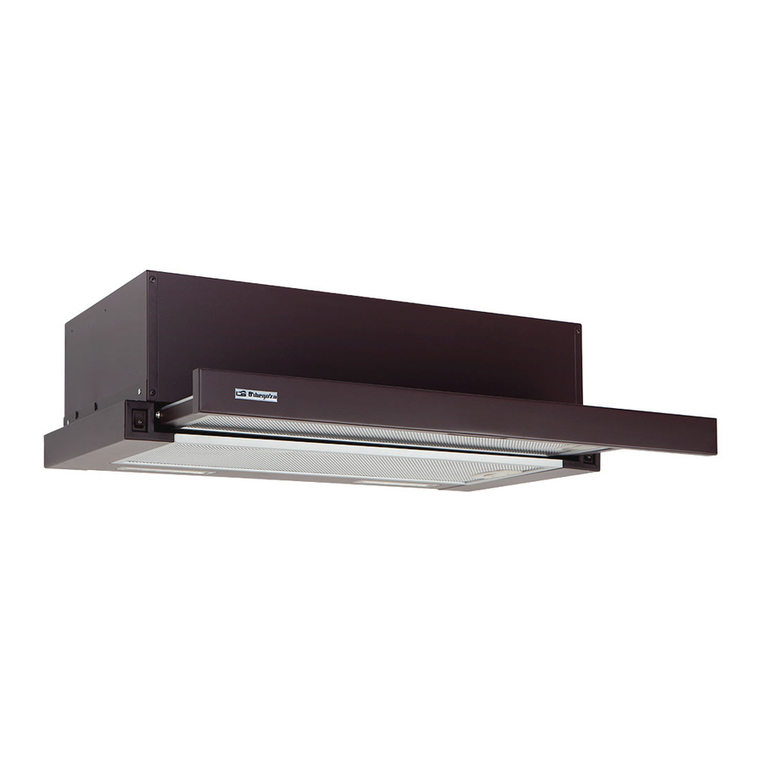
Orbegozo CA 08160 IN User manual

CAMPANA EXTRACTORA CASSETTE- MANUALDE INSTRUCCIONES
COOKER HOOD -INSTRUCTION MANUAL
HOTTE DE CUISINE- MANUELD’INSTRUCTIONS
EXAUSTOR- MANUALDE INSTRUÇÕES
CA 08160/90 IN
Sonifer,S.A.
Avenidade Santiago, 86
30007Murcia
España
E-mail: sonifer@sonifer.es
Made inP.R.C.
Leaatentamenteestemanualantes deutilizaresteaparatoyguárdeloparafuturasconsultas.Sólo
asípodráobtenerlosmejores resultados y lamáxima seguridad deuso.
Read this manualcarefully before runningthis appliance andsaveitforreference inorderto
obtainthe bestresultsandensure safe use.
Veuillezlire attentivementce manuel avantd’utilisercetappareil etconservez-le pourtoute
consultation future.C’estlaseule façon d’obtenirles meilleurs résultats etunesécurité optimale
d’utilisation.
Leiaestemanualcuidadosamenteantes deutilizaresteaparelho eguarde-oparaconsultafutura.
Sóassim,poderáobteros melhoresresultados eamáxima segurançanautilização.

CA08160/90 IN
2
ESPAÑOL
PRECAUCIONESDE SEGURIDAD
A)Leaatentamentelasiguienteinformación acercadelainstalación, laseguridad yel mantenimiento.
Tengaestefolletoinformativo amano parafuturasconsultas.
B) Estacampanaextractorahasidodiseñadacomomodelodeevacuación (escape externo)ofiltraje
(reciclajeinterno deaire).
1.Esteaparatopuedenutilizarloniños conedadde 8años
y superior ypersonas concapacidades físicas,
sensorialesomentales reducidas ofaltade experienciay
conocimiento,siseleshadadolasupervisióno
formaciónapropiadas respectoalusodel aparatode
unamanerasegura ycomprendenlos peligros que
implica.Losniñosnodebenjugarconelaparato.La
limpiezay el mantenimientoarealizarpor el usuario no
debenrealizarlolosniños sinsupervisión.
2.Sedeberá supervisar alos niños paraasegurarsede que
nojueganconesteaparato.
3.Mantengael aparatoysucable fuera del alcancede los
niños menores de 8años.
4.PRECAUCIÓN:Paralaseguridadde sus niñosnodeje
materialde embalaje (bolsas de plástico,cartón,
polietilenoetc.)asualcance.
5.Siel cable de alimentaciónestádañado,debe ser
sustituidoporel fabricante,el serviciotécnico o
cualquierotroprofesionalcualificado.
6.No desconectenuncatirandodel cable.

CA08160/90 IN
3
7.No lopongaenfuncionamientosiel cable oel enchufe
estándañados osiobservaqueel aparatonofunciona
correctamente.
8.No manipule el aparatoconlasmanos mojadas.
9.No sumergirel aparatoenaguaocualquierotrolíquido.
10. Antes de sulimpiezaobservequeel aparatoestá
desconectado.
11. El aparatodebe instalarsede acuerdoconla
reglamentaciónnacionalpara instalaciones eléctricas.
12. Esteaparatoes sólopara usodoméstico.
13. Encasode necesitar unacopiadel manualde
instrucciones,puede solicitarlapor correoelectrónico a
través de sonifer@sonifer.es.
14. ADVERTENCIA:Encasode malautilización,existeriesgo
de posibles heridas.
•Tengacuidadocuandolacampanaextractora de humos
estéfuncionandosimultáneamenteconunallamaoun
hornodecalcinaciónquedependandel airedel
ambienteysealimenteconenergíaquenoseaeléctrica,
yaquelacampanaextractoraeliminael airedel
ambientequelallamaoel hornode calcinación
necesitanparalacombustión.
•Existeriesgode incendioencasode que lalimpiezano
seefectúeconformealas instrucciones.
•No flamearbajolacampanaextractora.

CA08160/90 IN
4
•ATENCIÓN:Laspartesaccesiblespuedencalentarse
cuandoseutilizaconaparatos de cocción.
•El aireevacuadonodebe serenviadoporconductosque
seutilicenpara evacuarloshumosde aparatos
alimentadospor gasuotrocombustible.
•Ladistanciamínimaentreloselementosde cocciónyla
parteinferiorde lacampanadebe sercomomínimode
65cmsilacampanaestáinstaladasobreunelementode
cocciónagas.Silasinstruccionesdeinstalaciónde
elementode cocciónagasindicanunadistancia
superior,sedebentenerencuenta.Ladistanciade 65cm
nopuede reducirse.
•Losreglamentosrespectoalaevacuacióndel airehan
deserrespetados
•Lapresiónnegativa enel ambientenodebe sobrepasar
los 4Pa(4*10-5bar).
•Proporcioneunaventilaciónadecuadaenel ambiente
para nocorrerriesgosalusar lacampanaextractorade
humos.
•Cumplaconlasleyeslocalesaplicablespara la
evacuacióndeaireexterno.El aparatosólosepuede
utilizar contensiónyfrecuencianominales.
•No compruebe el estadode losfiltrosmientrasla
campanaextractoraestéenfuncionamiento.
•No toquelasbombillas después de usarel aparato.
•Estáprohibidococinar allamabajolacampana
extractora.

CA08160/90 IN
5
•Evitelasllamasabiertas,yaquesonperjudicialespara
los filtrosy constituyenunriesgode incendio.
•Compruebe constantementelafritura delacomidapara
evitar queel aceitesobrecalentadoseconviertaenun
riesgode incendio.
PRECAUCION
Lasbombillasdeestacampanasehan diseñadocomo iluminaciónsuplementariaalcocinar.Noson
adecuadas paralailuminacióndelhogar.
PARTESSUMINISTRADAS
Descripción Dibujo Cantidad
Campana
1
Tornillos
(4mm x 18mm)
8
Valvula
2
Reductor
1
INSTALACIÓN
Sitiene unasalidadeairealexterior,sucampanapuedeserconectadacomolafiguradeabajoconun tubo
deextracción.
1. Antes delainstalación, asegúrese deque lacampanaestádesenchufadadelacorriente.
2. Lacampanase debe colocaraunadistanciade65-75cm sobre lasuperficiedecocinaparaun mejor
funcionamiento.

CA08160/90 IN
6
3. Realiceun agujero en labase del armario, de490x265mm parael modeloCA 08160INyde
715x265mm parael modeloCA 08190IN.
4. Quiteel filtro dealuminioyquitelos dos tornillosdel panel frontal.
5. Use un destornillador parafijarcon los tornillos alarmario.
6. Vuelvaamontarel panelfrontal con los dos tornillos ypongael filtro.
FILTRODECARBÓN (NOSUMINISTRADO)
1. Quiteel filtro dealuminio.
2. Coloque el filtro decarbón activadoen un ladodel motor ygire en el sentidocontrarioalasagujasdel
reloj.Repitalamismaoperación en el otro lado.
AVISO:
-Asegúrese que el filtro estácorrectamentecolocado. Deotromodo, se podríaaflojardañarel motor de
lacampana.
-Cuandoel filtro decarbónestécolocadolapotenciadesucción se reducirá.
-Estefiltro no puedeserlavadooreutilizado. Se debe cambiarcada3o6meses dependiendodeluso.
UTILIZACIÓN
1. Coloque el interruptor (1)en laposición Iparaencender laluzdelacampana,en laposición 0se
apagará.

CA08160/90 IN
7
2. Coloque el interruptor (2)en laposición I,II or III,paraseleccionarlavelocidad deaspiración (baja,
mediaoalta).Enlaposición 0se apagará.
LIMPIEZAYMANTENIMIENTO
Desmontajeylimpiezadelos filtros dealuminio
-Sigaestaguíacorrectamenteparalimpiarlos filtros.
-Pulse el botón debloqueodel filtro ytire haciaabajo.
-Sumerjaelfiltro enagua,añadadetergenteydéjelo2-3minutos.Después límpielos con un cepillo, no
ejerzamuchapresión, el filtro es delicadoyse podríadañarfácilmente.
-También puedelavarlos filtros en el lavavajillasa60ºC.
-Elfiltro estáhecho dealuminiopor loque se aconsejano usarlimpiadores agresivos que puedan
corroerlo.
-Asegúrese deque lacampanaestádesconectadacuandolalimpie.
Limpiezaregular
-Limpielos filtros dealuminiomensualmente. Conelloprevendráelriesgodeincendio. Comoelfiltro
recogegrasa,humoypolvo, afectaalaeficienciadelacampana.Sinose limpianlosfiltros lagrasa
puedeobstruirlos.
Limpiezadelacampana
-Paraproteger elcuerpodelacampanadelacorrosión, debe limpiarelexterior delacampanacon
aguacalienteydetergenteno abrasivocada2meses. Paraellohumedezcaun trapocon esaaguay
limpielacampana.
-Lleve cuidadodeno mojarel motor yotraspartes interiores, estopodríaestropearlacampana.
Cambiodelabombilla
1. Apague ydesenchufelacampana.
2. Espere aque labombillase hayaenfriadoantes decambiarla.
3. Utiliceel mismotipo debombilla,LED 2W.
4. El cambiodebombilladeberíaser realizadopor un técnicoespecializado.
CA08160/90 IN
8
SOLUCIÓNDEPROBLEMAS
PROBLEMA CAUSA SOLUCIÓN
Lasluces se enciendenpero el
ventilador no funciona El ventilador estáatascado Apague lacampanayllévelaal
serviciotécnicoparaque sea
reparadapor un profesional
El motor estádañado
Nofuncionannilasluces niel
ventilador LabombillaLED sehafundido Cambielabombillapor una
exactamenteigual.
Eliminacióndelelectrodomésticoviejo.
Enbase alaNormaeuropea2002/96/CEdeResiduos deaparatosEléctricos yElectrónicos (RAEE),
los electrodomésticos viejos no puedenser arrojados en loscontenedoresmunicipales habituales;
tienen que ser recogidos selectivamenteparaoptimizarlarecuperación yrecicladodelos
componentes ymateriales que losconstituyen, yreducirelimpactoen lasaludhumanayel
medioambiente. Elsímbolodelcubo debasuratachadose marcasobre todos los productos pararecordar
al consumidor laobligación desepararlos paralarecogidaselectiva.
Elconsumidor debe contactarcon laautoridadlocalocon elvendedor parainformarse en relación ala
correctaeliminación desu electrodomésticoviejo.
DECLARACIÓNDECONFORMIDAD:Este dispositivocumpleconlos requisitos delaDirectivadeBaja
Tensión2014/35/EUylos requisitos deladirectivadeCompatibilidadElectromagnética2014/30/EU.

CA08160/90 IN
9
ENGLISH
SAFETYPRECAUTION
A)Carefullyread the following important information regarding installationsafetyand maintenance. Keep
thisinformation bookletaccessiblefor further consultations.
B) The appliancehasbeendesigned asaexhausting version(external exhaust)or asafilter version(internal
airrecycle)cooker hood.
1.This appliancecanbeused by childrenaged from 8
years andaboveandpersonswithreduced physical,
sensory ormentalcapabilities or lackofexperienceand
knowledge if theyhavebeengivensupervisionor
instructionconcerninguseoftheapplianceinasafe way
andunderstandthehazards involved. Childrenmust
neverplaywiththeappliance. Cleaninganduser
maintenancemustneverbecarried outby children
withoutsupervision.
2.Childrenshould be supervised toensurethatthey do
not playwiththeappliance.
3.Keep theapplianceandthecable cordoutofthereach
ofchildrenless than8years old.
4.WARNING:Inordertoensureyourchildren‘s safety,
pleasekeep all packaging(plasticbags,boxes,
polystyreneetc.)outoftheirreach.
5.If thesupplycordis damaged it mustberepaired bythe
Authorized ServiceAgent.
6.Neverpull onthecordwhenunplugging.
7.Do notusetheunitwithadamaged cordor plug, or ifit
is notworking properly.
8.Do nothandletheappliancewithwethands.

CA08160/90 IN
10
9.Neverimmersetheappliancein wateror anyother
liquid.
10. Makesuretheappliancehas beenunplugged before
cleaning.
11. This appliancemust beinstalled followingthenational
regulations forelectricalinstallations.
12. This applianceis for household useonly.
13. Incasethatyouneed acopy oftheinstructionmanual,
youcanaskfor itwritinganemail to sonifer@sonifer.es
14. WARNING:Incaseofmisuse, thereis ariskofpossible
injury.
•Takecarewhenthecookerhoodis operating
simultaneously withanopenfireplaceor burnerthat
dependontheairintheenvironmentand aresupplied
by otherthanelectricalenergy,asthecookerhood
removestheairfromtheenvironmentwhichaburneror
fireplaceneed for combustion.
•Riskoffireifthecleaningisnotcarried outaccording to
instructions.
•Do notflambéunderthehood.
•CAUTION:Accessible partsmaybecomehotwhenused
withcookingappliances.
•Exhaustairshould notbesent byconductorsusedto
evacuatefumesfromequipmentpowered bygasor
otherfuel.

CA08160/90 IN
11
•Theminimumdistancebetweenelementsofcooking
andthebottomofthehoodmustbe atleast65cmif the
hoodisinstalled onagascookingelement.If installation
instructionsgascookingelement indicateagreater
distanceshould be takenintoaccount.65cmdistance
cannotbe reduced.
•Theregulationsregarding airevacuationmustbe
respected.
•Thenegativepressureintheenvironment mustnot
exceed 4Pa(4*10-5bar).
•Provide adequateventilationintheenvironment for a
safe operationofthecookerhood.
•Followthelocallaws applicable for externalair
evacuation.Applianceshallonlybe used withrated
voltage andfrequency.
•Do notcheckthestatus ofthefilterswhile thecooker
hoodis operating.
•Do nottouchthelight bulbs afterapplianceuse.
•Flamecooking is prohibited underneath thecooker
hood.
•Constantly check foodfrying toavoid thatthe
overheated oilmay becomeafirehazard.
WARNING
Thelampsof thiscooker hoodaredesignedas supplementaryilluminationwhencooking. Theyare
notsuitableforhousehold illumination

CA08160/90 IN
12
SUPPLIEDPARTIES
Description Picture Quantity
Cooker hood
1
Screws
(4mm x 18mm)
8
Valve
2
Reducer
1
INSTALLATION
Ifyou have anairoutlettothe outside,your hoodcanbe connectedasthe figure belowwithapull-out
tube.
1. Before installation, makesure the Hood isunplugged from the mains.
2. The hood should be placed at adistanceof65-75cm on the kitchen surfacefor better performance.
3. Drill aholeinthe base ofthe cabinet,490*265mmfor themodelCA08160 INand715*265mm for the
model CA 08190IN.
4. Remove the aluminum filter and remove the twofront panel screws.
5. Use ascrewdriver tosecure the screwstothe cabinet.
6. Replacethe front panelwiththe twoscrewsandreplacethe filter.

CA08160/90 IN
13
CARBONFILTER(NOTSUPPLIED)
1. Remove the aluminum filter.
2. Placethe activatedcarbon filter on one sideofthe engine andturn counterclockwise. Repeatthe same
operation on the other side.
NOTICE:
-Makesurethatthe filter iscorrectlypositioned.Otherwise, it mayloosen todamagethe motor ofthe
hood.
-When the carbon filter isinplace, suction power will be reduced.
-Thisfilter cannot be washed or reused.It shouldbe changed every3to6months depending on usage.
UTILIZATION
1. Set the switch(1)toposition Itoturn on the hood light,inposition 0it will turn off.
2. Setthe switch(2)toposition I,II or IIItoselectthesuction speed(low,mediumor high).Inposition0it
will turn off.
CLEANING ANDMAINTENANCE
Disassemblyand cleaning ofaluminum filters
-Followthisguidecorrectlytocleanthe filters.
-Press the filter lockbutton and pull down.

CA08160/90 IN
14
-Dipthe filter intowater, add detergentandleave it for 2-3minutes.After cleaningwithabrush,donot
applytoo muchpressure,the filter isdelicateand could easilybe damaged.
-You canalso wash the filters inthe dishwasher at 60ºC.
-The filter ismadeofaluminum so it isadvisablenot touse aggressive cleaners that cancorrodeit.
-Makesure the hood isswitched off when cleaning.
Regularcleaning
-Cleanthe aluminumfilters monthly.Thiswill preventthe riskoffire.Asthe filters collectsgrease, smoke
and dust,it affectsthe efficiencyofthe hood.Ifthefilters are not cleaned the grease canclog them.
Cleaning the hood
-Toprotectthe hoodbodyfromcorrosion, youshould cleanthe outsideofthe hoodwithhotwater and
non-abrasive detergent every2months. Todothis,moisten aclothwiththat water and cleanthe hood.
-Takecare not towet theengine and other interior parts, thiscould damagethe hood.
Changing the bulb.
1. Turn off and unplug the hood.
2. Wait until the bulbhascooled before changing it.
3. Use the sametype ofbulb, LED 2W.
4. The bulbreplacement should be performed byaqualified technician.
TROUBLESHOOTING
PROBLEM CAUSE SOLUTION
The lightscomeon butthe fan
does not work. The fanisjammed Turn offthe Hoodandhave it
serviced byaprofessional
Engine isdamaged
Nolightsor fanwork. The LED bulbhasblown Changethe bulbfor oneexactly
the same
Disposalof old electricalappliances.
The Europeandirective 2002/96/ECon WasteElectricalandElectronicEquipment(WEEE),requires
thatold householdelectricalappliances mustnotbe disposedofinthenormalunsortedmunicipal
wastestream.Oldappliances mustbe collectedseparatelyinorder tooptimizethe recoveryand
recyclingofthematerialstheycontain, andreducethe impactonhumanhealthandthe environment.The
crossedout“wheeledbin”symbolon the product remindsyou ofyour obligation, thatwhen you dispose of
the appliance, it must be separatelycollected.
Consumersshould contacttheirlocalauthorityorretailer for informationconcerningthe correctdisposalof
theirold appliance.
DECLARATIONOFCONFORMITY: This devicecomplies with therequirements of theLow Voltage
Directive2014/35/EUandtherequirements of theEMC directive2014/30/EU.

CA08160/90 IN
15
FRANÇAIS
AVERTISSEMENTSDE SÉCURITÉ
A)Lisezattentivement ces informations concernant l’installation, lasécuritéet l’entretien. Tenezcette
brochure informative àportée demainpour d’éventuelles consultations.
B) Cettehotteaspiranteaétéconçue commemodèled’évacuation (échappement externe)ou filtrage
(recyclageinterne del’air).
1.Cet appareil peut êtreutilisépar des enfants8ansou
plus etdes personnes présentantunhandicapphysique,
sensoriel,mentaloumoteurvoirenedisposantpas des
connaissances et de l'expériencenécessaires encasde
surveillanceoud'instructionssurl'usagede cet appareil
entoutesécuritéet de compréhensiondes risques
impliqués.Les enfantsnedoivent pas joueravec
l'appareil. Lenettoyage et lamaintenancenedoivent
pas très effectuéspar des enfantssans surveillance.
2.Les enfants doivent êtresurveillés afinde s'assurerqu'ils
nejouent pasaveccetappareil.
3.Gardez l’appareil et le câble àlaportée des enfantsde
moinsde 8ans.
4.ATTENTION:Par mesuredesécuritévis-à-vis des
enfants,nelaissezpas les emballages (sacenplastique,
carton,polystyrène) aleurportée.
5.Sile cordond’alimentationest endommagé, adressez-
vousàunservicetechnique agréé.
6.Nedébranchezjamaisentirant ducordon.
7.Nejamais le fairefonctionnersile cordonoulafiche
sont aomesousivous remarquezquel´appareil ne
fonctionnepas correctement.

CA08160/90 IN
16
8.Nepasmanipulerl´appareil, les mains mouillées.
9.Nejamais placerl´appareil près dans l´eauouautre
liquide.
10. Avant de nettoyerl´appareil, vérifiezs´il est bien
débranché.
11. L´appareil doit êtreinstallé suivant lesnormesnationaux
pourles installations électriques.
12. Cet appareil n’estaptequepouruneutilisation
domestique.
13. Encasquivous avezbesoind'unecopiedumanuel
d'instructions,vous pouvezle demanderàl'adressee-
mail sonifer@sonifer.es
14. AVERTISSEMENT:Encasde mauvaiseutilisationde
l'appareil, ilyaunrisquedeblessure.
•Faitesattentionquandlahotteaspirantefonctionne
simultanémentavecuneflammeouverteouunfourde
cuissonquidépendentde l’airambiant et quandelle est
alimentée avecde l’énergie autrequeélectrique,
puisquelahotteaspiranteéliminel’airambiantdontla
flammeoule fourde cuissonont besoin pourla
combustion.
•Risqued'incendie silenettoyage n'est pas effectuéselon
les instructions.
•Nepas flambersous le capot.
•ATTENTION:Lespartiesaccessiblespeuventchauffer
lorsqu'elles sontutilisées avecdes appareils de cuisson.

CA08160/90 IN
17
•L'airvicié nedoitpasêtreenvoyépar desconducteurs
utiliséspourévacuerlesfuméesprovenant d'appareils
fonctionnant augazouautrecombustible.
•Ladistanceminimale entrelesélémentsde cuissonetle
fondde lahottedoitêtred'aumoins65 cmlorsque le
capotestinstallé surun élément de cuissonaugaz.Si
lesinstructionsd'installationélément de cuissonàgaz
indiquentuneplusgrandedistancedoitêtrepriseen
compte. Distancede 65cmnepeut pas êtreréduite.
•Les règlements concernantl'évacuationde l'airdoivent
êtrerespectées.
•Lapressionnégativedansl’airambiantnedoit pas
dépasser4Pa(4*10-5bar).
•Fournirunebonneventilationdanslapiècepournepas
courirde risques enutilisantlahotteaspirante.
•Respectez les dispositions légales locales applicables
pourl’évacuationde l’airexterne. L’appareil peut
seulement êtreutiliséavecunetensionetunefréquence
nominales.
•Nevérifiezpasl’étatdesfiltresdurant le fonctionnement
delahotte.
•Netouchezpasaux ampoulesaprèsavoirutilisé
l’appareil.
•Il est défendu de cuisineràfeuvif souslahotte.
•Éviterlesflammesouvertes,puisqu’ellessontnuisibles
pourles filtres et constituentunrisqued’incendie.
•Vérifiezconstamment lafritureafind´éviterquel’huile

CA08160/90 IN
18
surchauffée nereprésenteunrisqued’incendie.
ATTENTION
Leslampesdelahotte sont conçuescommeunéclairagesupplémentairelorsdelacuisson.Ilsne
sont pas adaptés pour l'éclairagedes ménages
PARTIESFOURNIES
Description Photo Quantité
Hotte
1
Vis
(4mm x 18mm)
8
Soupape
2
Réducteur
1
INSTALLATION
Si vous avezune sortied'airàl'extérieur, votre hottepeut être connectée commelafigure ci-dessous avec
un tube extractible.
1.Avant l'installation, assurez-vous que lecapot est débranché dusecteur.
2.Lecapot doit être placéàune distancede65-75cm sur lasurfacedelacuisine pour une meilleure
performance.
3.Percezun trou dans labase del'armoire, 490* 265mm pour lemodèleCA 08160INet 715 * 265 mm
pour lemodèleCA 08190IN.

CA08160/90 IN
19
4.Retirezlefiltre en aluminium et retirezles deux visdupanneauavant.
5.Utilisezun tournevispour fixer les visàl'armoire.
6.Replacezlepanneauavant avecles deux viset remplacezlefiltre.
FILTRE DECARBONE(NON FOURNI)
1.Retirer lefiltre en aluminium.
2.Placezlefiltre àcharbon actifsur un côtédumoteur et tournez-ledans lesens inverse des aiguilles d'une
montre. Répétezlamêmeopération del'autre côté.
REMARQUER:
-Assurez-vous que lefiltre est correctement positionné. Sinon, il peut se desserrer pour endommager le
moteur delahotte.
-Lorsque lefiltre àcharbon est en place, lapuissanced'aspiration seraréduite.
-Ce filtre ne peut pasêtrelavé ni réutilisé. Il doit être changétous les 3à6moisselon l'usage.
UTILISATION
1.Mettre l'interrupteur (1)en position Ipour allumer leluminaire ducapot,en position 0il s'éteint.
2.Mettre l'interrupteur (2)en position I,II ou IIIpour sélectionner lavitesse d'aspiration (faible, moyenne ou
élevée).Enposition 0,il s'éteint.
NETTOYAGEET ENTRETIEN
Démontageet nettoyagedes filtres en aluminium

CA08160/90 IN
20
-Suivezceguidecorrectement pour nettoyer les filtres.
-Appuyezsur lebouton deverrouillagedufiltre et tirezvers lebas.
-Trempezlefiltre dans l'eau, ajoutezledétergentet laissez-lependant2-3minutes. Après avoirnettoyé
avecune brosse, n'appliquezpastropdepression,lefiltre est délicat et pourrait facilement être
endommagé.
-Vous pouvezégalement laver les filtres dans lelave-vaisselleà60ºC.
-Lefiltre est en aluminium,il est conseillédene pasutiliser denettoyantsagressifsqui peuvent lecorroder.
-Assurez-vous que lecapot est éteint lors dunettoyage.
Nettoyagerégulier
-Nettoyer les filtres en aluminium tous les mois. Celaéviterales risques d'incendie. Commeles filtres
recueillelagraisse, lafumée et lapoussière, elleaffectel'efficacitédelahotte. Si les filtres ne sont pas
nettoyés, lagraisse peut les boucher.
Nettoyageducapot
-Pour protéger lecorps ducapot delacorrosion,nettoyezl'extérieur ducapot avecdel'eauchaudeet du
détergent non abrasiftous les 2mois. Pour cefaire, humidifier un chiffon aveccetteeauet nettoyerle
capot.
-Veillezàne pasmouillerlemoteur et les autres pièces intérieures, ceci pourrait endommager lecapot.
Changement del'ampoule.
1.Éteignezet débranchezlecapot.
2.Attendezque l'ampouleait refroidi avant delachanger.
3.Utilisezlemêmetype d'ampoule, LED2W.
4.Leremplacement des ampoules doit être effectué parun technicien qualifié.
DÉPANNAGE
PROBLÈME CAUSE SOLUTION
Les lumières s’allumentmaisle
ventilateur ne fonctionnepas. Leventilateur est bloqué. Éteignezlecapotetfaites-le
réparer parunprofessionnel.
Moteur endommagé.
Pasdelumières ni deventilateur. L’ampouleLEDasoufflé. Changer l’ampoulepour une
exactement lamême.
This manual suits for next models
1
Table of contents
Languages:
Other Orbegozo Ventilation Hood manuals

Orbegozo
Orbegozo DS 75 BL.N Series User manual

Orbegozo
Orbegozo CA 07260 A IN User manual

Orbegozo
Orbegozo DS 56160 B IN User manual

Orbegozo
Orbegozo DS 63190 IN User manual

Orbegozo
Orbegozo DS 48160 B IN User manual

Orbegozo
Orbegozo TL 06260 A IN User manual

Orbegozo
Orbegozo DS 59160 IN User manual

Orbegozo
Orbegozo ST 07160 D BL User manual

Orbegozo
Orbegozo DS 76190 BL User manual

Orbegozo
Orbegozo DS 62190 User manual