7. Włącz zasilanie i przetestuj czujnik.
LUX - regulacja natężenia światła
Ustawienie to określa przy jakim natężeniu światła urządzenie przestaje wykrywać ruch, pozostając w trybie oczekiwania. Zabezpiecza to przed niepożądanym włączaniem oświetlenia podczas dnia.
Porę świecenia ustawia się pokrętłem “LUX”, które należy przekręcić do oporu zgodnie z ruchem wskazówek zegara i poczekać do zmierzchu. Gdy zacznie się ściemniać należy ustawić porę świecenia
przekręcając pokrętło “LUX” do momentu włączenia się światła.
TIME - regulacja czasu świecenia
Pokrętło umożliwia określenie czasu przez jaki urządzenie będzie działało po aktywacji czujnika. Czas świecenia liczy się od momentu wykrycia ruchu do momentu wyłączenia.
1. Pokrętło TIME przekręć w kierunku przeciwnym do ruchu wskazówek zegara na minimum (10s), a pokrętło LUX w kierunku zgodnym z ruchem wskazówek zegara na maksimum.
2. Włącz zasilanie. Czujnik i połączone z nim oświetlenie na początku nie odnajdą sygnału.
3. Po ok. 30 sekundach czujnik może zacząć pracę.
4. Jeśli czujnik wychwyci sygnał, oświetlenie się włączy. Jeśli sygnał ustanie, odbiornik powinien przestać pracować w ciągu 10 s ± 3 s a oświetlenie wyłączyć się.
5. Przekręć pokrętło LUX w kierunku przeciwnym do ruchu wskazówek zegara, na minimum (3). Jeśli natężenie światła otoczenia jest większe niż 3 LUX, czujnik przestanie działać i oświetlenie również.
6. Jeśli natężenie światła otoczenia jest mniejsze niż 3 LUX (ciemność), czujnik zacznie pracować.
7. W przypadku braku sygnału, czujnik powinien przestać pracować w ciągu 10 s ± 3 s.
UWAGA: Podczas przeprowadzania testu czujnika w dzień pokrętło LUX należy ustawić na pozycje MAX w przeciwnym razie czujnik nie będzie działał prawidłowo.
NIEKTÓRE PROBLEMY I SPOSOBY ICH ROZWIĄZANIA
1. Obciążenie nie działa:
a. Sprawdź podłączenie zasilania i odbiornika.
b. Sprawdź odbiornik.
c. Sprawdź ustawienia czujnika i ustawienia natężenia oświetlenia otoczenia.
2. Słaba czułość:
a. Sprawdź czy przed czujnikiem nie znajdują się urządzenia, które mogą zakłócić odbierane sygnały.
b. Sprawdź temperaturę otoczenia.
c. Sprawdź czy wykrywany obiekt znajduje się w polu detekcji
d. Sprawdź wysokość instalacji.
3. Czujnik nie może automatycznie wyłączyć obciążenia:
a. W polu detekcji występują ciągłe sygnały ruchu.
b. Sprawdź czy opóźnienie czasowego nie jest ustawione na najdłuższą wartość.
c. Sprawdź czy zasilanie jest zgodne z instrukcją.
BEZPIECZEŃSTWO I KONSERWACJA
Konserwację wykonywać należy przy odłączonym zasilaniu.
Czyścić wyłącznie delikatnymi i suchymi tkaninami.
Nie używać chemicznych środków czyszczących.
Nie zakrywać wyrobu.
Zapewnić swobodny dostęp powietrza.
Operating and installation instructions
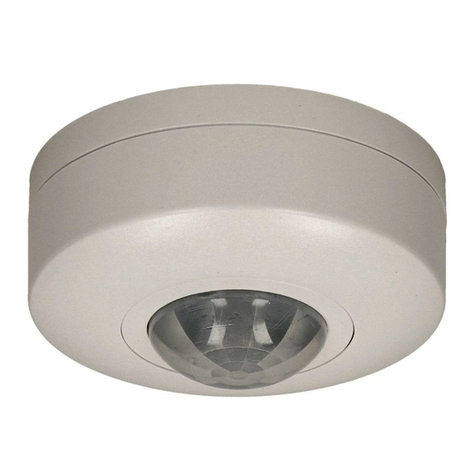
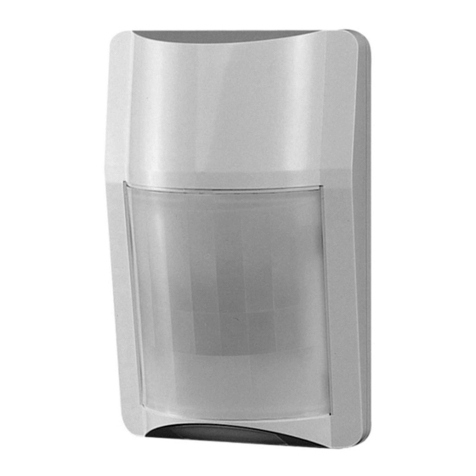
The sensor is used to automatically control lighting or other electrical devices when motion is detected. The receiver (lighting) is switched on by means of PIR (passive infrared) motion sensor. It allows
to switch the light on by motion of a heat generating object detected in sensor’s operation field. The light is switched on as long as the sensor detects any motion in its operation field. If no movement
occurs within the time set for the device, light or other controlled electrical appliances will be automatically switched off. The sensor is placed in a ball joint so that it can be directed to the desired
motion detection area.
While choosing a place of installation, consider the following criteria:
- the sensor should be mounted in a suitable place at a height of 2.2-4 m
- it is not recommended to install the device near radiators, fans or other objects where rapid temperature changes may occur;
- it is not recommended to install in places where sunlight may fall directly on the motion detector;
- It is not recommended to install the device near objects that can move in the wind: curtains, tall plants etc.
- make sure all power cords have a suitable current protection in case of overload, such as proper fuses or other power disconnecting devices,
- if the temperature difference between a moving object and the surrounding area is low (e.g. in summer), the sensor can respond later and its motion detection range will be reduced,
- do not install near strong sources of electromagnetic interference,
- optical system pollution results in decrease of the range and the motion detection sensitivity.
1. Disconnect the power with a fuse or central power switch.
2. Use a proper device to check if there are any live wires left.
3. Remove the top cover by turning it counterclockwise as shown.
4. Connect the power supply and all electrical wires according to the wiring diagram.
5. Fix the base to the ceiling with screws.
6. Attach the top cover of the sensor.
7. Turn on the power and test the sensor.
LUX - luminous intensity adjustment
This setting determines at what level of light the device stops detecting movement while in standby mode. This prevents unwanted lighting during the day. The lighting time is set with the "LUX"
knob, which must be turned clockwise to the stop and waited until dusk. When the light begins to dim, set the lighting times by turning the "LUX" knob until the light comes on.
TIME - lighting time adjustment
The knob allows you to determine the time for which the device will operate when the sensor is activated. The time of light is counted from the moment the motion is detected until it is switched off.
1. Turn the TIME knob counterclockwise for minimum (10s) and the LUX knob clockwise for maximum.
2. Turn on the power. The sensor and the lighting connected to it will not find a signal at first.
3. After approx. 30 seconds the sensor can start working.
4. If the sensor detects a signal, the lighting switches on. If the signal stops, the receiver should stop working within 10 s ± 3 s and the lighting switches off.
5. Turn the LUX knob counterclockwise to minimum (3). If the ambient light intensity is greater than 3 LUX, the sensor will stop working and the lighting will also stop.
6. If the ambient light intensity is less than 3 LUX (darkness), the sensor will start working.
7. In the absence of a signal, the sensor should stop working within 10 s ± 3 s.
Note: when testing in daylight, please turn LUX knob to (MAX ) position, otherwise the sensor could not work properly!
SOME PROBLEMS AND SOLUTIONS
1. The load does not work:
a. Please check the power and receiver connections.
b. Please check the receiver.
c. Please check if the settings of working light correspond to ambient light.
2. Poor sensitivity:
a. Please check if there are any objects in front of the sensor that could negatively impact its operation,
b. Please check the ambient temperature,
c. Please check if the moving object is in the detection field,
d. Please check if the installation height is correct.
3. The sensor cannot automatically switch off the load:
a. Please check if there is continual signal in the detection field,
b. Please check if the time delay is set to the maximum position,
c. Please check that the power supply complies with the instructions.


