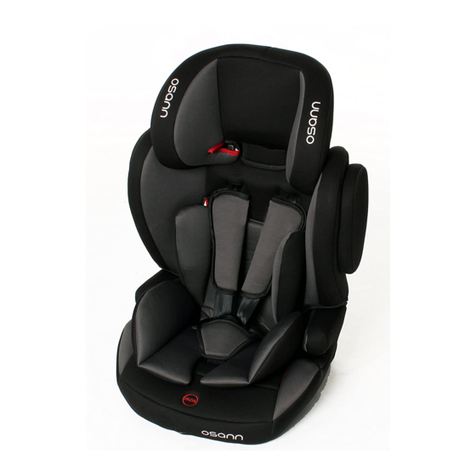
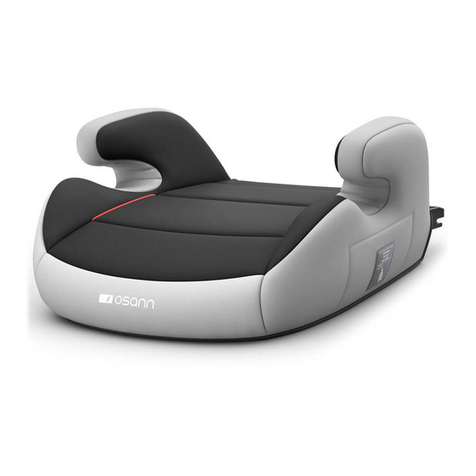
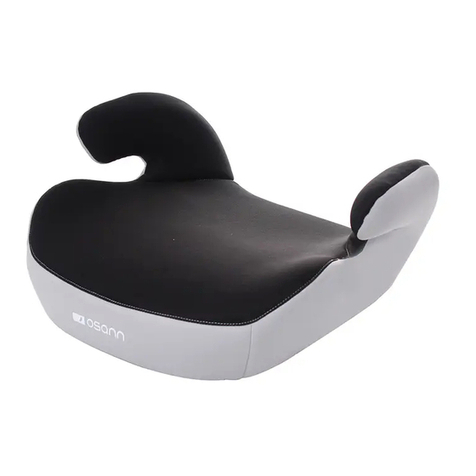
osann Musca Isofix User manual

Musca Isofi x
ECE R129/03, 100–150 cm
EN FR IT
ES CZ PL
DE
NL
SK

- 2 -
DE
Vielen Dank, dass Sie sich für unseren Kinderautositz entschieden haben.
Wenn Sie Hilfe zu diesem Produkt benötigen, wenden Sie sich bitte an unseren
Kundendienst.
ANWENDUNG
• Dieses Produkt ist geeignet für Kinder mit einer Körpergröße von 100 bis 150 cm.
• Einbau vorwärtsgerichtet von 100 bis 150 cm Körpergröße erfolgt mit-
hilfe der Isofi x-Konnektoren. Das Kind wird mit dem 3-Punkt-Gurt
des Autos angeschnallt. Alternativ kann der Kinderautositz in der
Größenklasse 100–150 cm auch nur mit dem 3-Punkt-Gurt montiert wer-
den. Eine Verbindung mit den Isofi x-Konnektoren ist nicht zwingend not-
wendig, aber empfohlen.
HINWEIS
Dies ist eine optimierte i-Size Kindersitzerhöhung. Es ist nach der Regelung
Nr. 129 für die Verwendung in erster Linie auf „i-Size-Sitzplätzen“ zugelassen,
die von den Fahrzeugherstellern in der Gebrauchsanweisung des Fahrzeugs
angegeben sind.
Im Zweifelsfall kann der Hersteller des verbesserten Kinderrückhaltesystems
oder der Einzelhändler befragt werden.
WICHTIG - VERWENDEN SIE DEN KINDERAUTOSITZ NICHT IN FAHRTRICH-
TUNG, BEVOR DAS ALTER DES KINDES 3 JAHRE NICHT ÜBERSCHRITTEN HAT.
Größen-
klasse Einbau-
richtung Installation Typ Sicherung
des Kindes
100–150
cm
Vorwärts-
gerichtet
Isofi x-Konnektoren
& 3-Punkt-Gurt
des Autos
i-Size
Booster
seat
3-Punkt-Gurt
des Autos
100–150
cm
Vorwärts-
gerichtet
3-Punkt-Gurt des
Autos
i-Size
Booster
seat
3-Punkt-Gurt
des Autos
Die folgende Tabelle enthält Informationen über die Befestigungsvorrichtungen
und -methoden:
1 & 2):
Bei Nutzung mit Isofi x: Nur, wenn Iso-
fi x-Konnektoren vorhanden sind und
der Sitzplatz im Pkw-Handbuch als
i-Size kompatibel anerkannt ist.

- 3 - DE
WARNUNG
• Bitte lesen Sie diese Anleitung vor der Verwendung sorgfältig durch, um
die Sicherheit Ihres Kindes zu gewährleisten. Bewahren Sie die Anleitung
auf. Die Nichtbeachtung der Anweisungen in diesem Handbuch kann zu
schweren Verletzungen Ihres Kindes führen.
• Für den Isofi x-Einbau: Achten Sie darauf, das Handbuch des Autoherstel-
lers zu lesen.
• Verwenden Sie keine anderen tragenden Berührungspunkte als diejenigen,
die in der Anleitung beschrieben und in dem Kinderrückhaltesystem ge-
kennzeichnet sind.
• Verwenden Sie diesen Kinderautositz nicht zu Hause. Er wurde ausschließlich
für den Gebrauch in einem Auto konzipiert.
• Lassen Sie Ihr Kind zu keiner Zeit unbeaufsichtigt in dem Sitz.
• Der Kindersitz muss ausgetauscht werden, wenn er bei einem Unfall starken
Belastungen ausgesetzt war.
• Aus Sicherheitsgründen muss der Kinderautositz auch dann im Fahrzeug
befestigt sein, wenn sich kein Kind im Kinderautositz befi ndet.
• Stellen Sie immer sicher, dass alle Gurte, die den Kinderautositz am Fahr-
zeug halten, festsitzen und alle Gurte, die das Kind zurückhalten, an den
Körper des Kindes angepasst sind. Stellen Sie zudem sicher, dass die Gurte
nicht verdreht sind.
• Gepäckstücke oder andere Gegenstände, die im Falle eines Zusammenstoßes
Verletzungen verursachen können, müssen ordnungsgemäß gesichert werden.
• Steife Gegenstände und Kunststoffteile eines Kinderrückhaltesystems müs-
sen so platziert und installiert sein, dass sie nicht von einem beweglichen
Sitz oder einer Fahrzeugtür eingeklemmt werden können.
• Es ist wichtig, dass tiefsitzende Gurte das Becken des Kindes fest fi xieren.
Um das Sturzrisiko zu vermeiden, sollte Ihr Kind immer angeschnallt sein.
• Es ist gefährlich, ohne Zustimmung der zuständigen Instanz Änderungen
oder Ergänzungen am Produkt vorzunehmen. Die Nichtbeachtung der In-
stallationsanweisungen des Herstellers des Kinderrückhaltesystems birgt
ebenfalls Gefahren für die Sicherheit Ihres Kindes.
• Dieser Kindersitz wurde für Kinder mit einer maximalen Körpergröße von
150 cm konzipiert. Überlasten Sie niemals den Kindersitz, indem Sie mehr
als ein Kind oder zusätzliche Lasten darin transportieren.
• Die Kinderrückhalteeinrichtung darf nicht ohne den Sitzbezug verwendet
werden.
• Der Sitzbezug darf nicht durch einen anderen als den vom Hersteller emp-
fohlenen ersetzt werden, da dieser Sitzbezug ein fester Bestandteil der
Rückhalteleistung ist.
- 4 -
DE
SITZTEILE
Vorderansicht
Rückansicht
Kopfstütze
Diagonalgurtführung
für Größenklasse
100–150 cm
Beckengurt-
führung für
Größenklasse
100–150 cm
Rückenlehne
Sitzschale
Kopfstützen-
einstellung
Isofi x-
Konnektor-
erweiterung
Isofi x-
Konnektor

- 5 - DE
REINIGUNG
Um eine lange Nutzungsdauer Ihres Kinderautositzes zu gewährleisten, verwen-
den Sie keine Lösungsmittel, Scheuermittel oder aggressive Reinigungsmittel
zur Reinigung des Kinderautositzes. Überprüfen Sie nach jedem Waschgang die
Beständigkeit des Stoffes und der Nähte. Beim Waschen des Stoffs sind die
Anweisungen auf dem Etikett (siehe unten) sorgfältig zu befolgen.
INSTANDHALTUNG
Überprüfen Sie regelmäßig den Zustand des Produkts auf mögliche Schäden.
Im Schadensfall darf der Kinderautositz nicht mehr verwendet werden und ist
außerhalb der Reichweite von Kindern aufzubewahren.
Bei Fragen und Problemen wenden Sie sich bitte an den
Osann Kundendienst unter +49 (0)7731 970077.
NICHT
bleichen
Trommeltrocknen bei
niedriger Temperatur
Waschen bei 30 °C,
Schonwaschgang
NICHT
bügeln
NICHT
chemisch reinigen
e
o
s
m
U

- 6 -
DE
Zusammenbau Rückenlehne & Sitzschale (variantenabhängig)
• Der Kinderautositz wird im unmontierten Zustand geliefert.
• Bitte nehmen Sie die Rückenlehne und haken diese in einem fl achen Winkel
in die Sitzschale ein.
• Halten Sie die Sitzschale fest und drücken Sie die Rückenlehne nach oben,
bis diese vollständig eingehakt ist.
• Eine Nutzung des Kinderautositzes ohne Rückenlehne ist nicht erlaubt.
Einstellung der Kopfstütze
• Ziehen Sie den Hebel zur Einstellung der Kopfstütze auf der Rückseite des
Kinderautositzes nach oben und stellen Sie die Höhe der Kopfstütze ein.
• Fädeln Sie den Diagonalgurt des 3-Punkt-Gurts des Pkws durch die Diago-
nalgurtführung an der Kopfstütze.
• Achten Sie darauf, dass der Diagonalgurt des 3-Punkt-Gurts des Pkws
knapp über den Schultern Ihres Kindes aus der Diagonalgurtführung an der
Kopfstütze herauskommt.
• Lassen Sie den Hebel los und stellen Sie sicher, dass die Kopfstütze ein-
gerastet ist.

- 7 - DE
Isofi x-Konnektoren
• Drücken Sie beide seitlichen Isofi x-Konnektorknöpfe, um die Isofi x-Kon-
nektoren in der Länge auszufahren.
• Führen Sie die Isofi x-Konnektoren zu den Isofi x-Halterungen am Pkw-Auto-
sitz und lassen Sie diese einrasten.
• Schieben Sie den Kinderautositz fest an die Rückenlehne des Autositzes.
Achten Sie darauf, dass beide Isofi x-Anzeigen auf Grün sind.

- 8 -
DE
EINBAU DES KINDERAUTOSITZES
Größenklasse 100–150 cm, vorwärtsgerichtet
1. Drücken Sie beide seitlichen Isofi x-Konnektorknöpfe, um die Isofi x-Kon-
nektoren in der Länge auszufahren.
2. Führen Sie die Isofi x-Konnektoren zu den Isofi x-Halterungen am Autositz
und lassen Sie diese einrasten.
3 . Schieben Sie den Kinderautositz fest an die Rückenlehne des Autositzes.
Achten Sie darauf, dass beide Isofi x-Anzeigen auf Grün umschalten.
4. Fädeln Sie den Diagonalgurt des 3-Punkt-Gurtes des Pkws durch die Dia-
gonalgurtführung an der Kopstütze des Kinderautositzes.
5. Fädeln Sie den Beckengurt des 3-Punkt-Gurtes des Pkws durch die erste
Beckengurtführung (unterhalb der Armlehne) im Sitzbereich des Kinder-
autositzes.
6. Setzen Sie Ihr Kind in den Kinderautositz.
7. Stellen Sie die Höhe der Kopfstütze so ein, dass der Kopf des Kindes voll-
ständig in der Kopfstütze liegt und der Diagonalgurt durch die Gurtfüh-
rung auf Höhe der Schultern des Kindes herauskommt.
8. Schließen Sie die Gurtschnalle des 3-Punkt-Gurts, bis ein Klicken zu hö-
ren ist.
9. Achten Sie darauf, dass sowohl der Diagonalgurt als auch der Becken-
gurt durch die zweite Beckengurtführung (unterhalb der Armlehne) am
Kinderautositz verläuft, welche zum Gurtschloss des Autos gerichtet ist.
10. Ziehen Sie am Diagonalgurt, um diesen straff zu ziehen. Achten Sie darauf,
dass die Gurte nicht verdreht sind.
Einbau ohne Isofi x:
Alternativ kann der Kinderautositz in der Größenklasse 100–150 cm auch
nur mit dem 3-Punkt-Gurt montiert werden. Eine Verbindung mit den Iso-
fi x-Konnektoren ist nicht zwingend notwendig, aber empfohlen.

- 9 -- 9 - EN
Thank you for choosing our child car seat. If you need help with this product,
please contact our customer service.
HOW TO USE
• This product is suitable for children between 100 and 150cm in height.
• Forward-facing installation for children between 100 to 150 cm in height
made possible thanks to the Isofi x connectors. The child is strapped in
with the car’s 3-point seat belt. Alternatively, the child car seat in the
100-150 cm size class can also be fi tted using the 3-point seat belt only.
Connection with the Isofi x connectors is not mandatory, but it is recom-
mended.
NOTE
This is an optimised i-Size children’s booster seat. It is approved under Regu-
lation No. 129 for use primarily on “i-Size vehicle seats” as specifi ed by vehicle
manufacturers in the vehicle manual.
If in doubt, the manufacturer of the enhanced child restraint system or the
retailer should be consulted.
IMPORTANT - DO NOT USE THE CHILD CAR SEAT IN THE DIRECTION OF TRAV-
EL UNTIL THE CHILD HAS REACHED THE AGE OF 3.
Height
range Installation
direction Installation Type Child safety
device
100–150
cm
Forward-
facing
Isofi x connectors
& 3-point car seat
belt
i-Size
booster
seat
3-point car
seat belt
100–150
cm
Forward-
facing
3-point car seat
belt
i-Size
booster
seat
3-point car
seat belt
The following table provides information about the fastening devices and
methods:
1 & 2): When used with Isofi x: This
only applies if Isofi x connectors are
available and the seat is recognised
as i-Size-compatible in the vehicle
manual.

- 10 -- 10 -
EN
WARNING
• Please read through these instructions carefully before use in order to
guarantee the safety of your child. Retain the instructions. Non-compli-
ance with the instructions in this manual may result in serious injuries to
your child.
• For Isofi x installation: Be sure to read the car manufacturer’s manual.
• Do not use load-bearing contact points other than those described in the
instructions and indicated on the child restraint system.
• Do not use this child car seat at home. It has been designed exclusively for
use in a car.
• Do not leave your child unsupervised in the seat at any time.
• The child seat must be replaced if it has been subject to severe mechanical
stress in an accident.
• For safety reasons, the child car seat must be secured in the vehicle even
when there is no child sitting in the child car seat.
• Always make sure that all straps that attach the child car seat to the ve-
hicle are secure and that all belts that restrain the child are adjusted to fi t
the child’s body. Ensure that the belts are not twisted.
• Items of luggage and other objects that could cause injury in the event of a
collision must be properly secured.
• The rigid elements and plastic parts of a child restraint system must be
positioned and installed so that they cannot become jammed by a movable
seat or a vehicle door.
• It is important that belts that sit low hold the child’s pelvis fi rmly in place.
Your child should always be fastened in to stop them falling out.
• It is dangerous to make changes or additions to the product without ap-
proval from the responsible authority. Non-compliance with the installa-
tion instructions provided by the manufacturer of the child restraint sys-
tem may also present risks to the safety of your child.
• This child seat is designed for children with a maximum height of 150 cm.
Never overload the child seat by transporting more than one child or ad-
ditional loads in it.
• The child restraint system must not be used without the seat cover.
• The seat cover must not be replaced by a cover other than that recom-
mended by the manufacturer, as this seat cover is an important compo-
nent of the restraint system.

- 11 -- 11 - EN
SEAT PARTS
Front view
Rear view
Headrest
Diagonal belt guide
for height range
100–150 cm
Lap belt
guide for
height range
100–150 cm
Backrest
Seat shell
Headrest
adjustment
Isofi x
connector
extension
Isofi x
connec-
tor

- 12 -- 12 -
EN
CLEANING
To guarantee long-term use of your child car seat, do not use any solvents,
abrasive cleaners or aggressive cleaning agents to clean the car seat. Check
the stability of the fabric and the seams after each wash. When washing the
fabric, carefully follow the instructions on the label (see below).
MAINTENANCE
Check the condition of the product for possible damage at regular intervals. In
the event of damage, the child car seat must no longer be used and must be
kept out of the reach of children.
In case of any issues, please contact
Osann customer service on +49 (0)7731 970077.
DO NOT
bleach
Tumble dry at low
temperature
Wash at 30°C,
gentle wash cycle
DO NOT
iron
DO NOT
dry clean
e
o
s
m
U

- 13 -- 13 - EN
Assembling the backrest & seat shell (variant-dependent)
• The child car seat is delivered unassembled.
• Please take the backrest and hook it into the seat shell at a shallow angle.
• Hold the seat shell fi rmly and push the backrest upwards until it is fully
engaged.
• Use of the child car seat without a backrest is not permitted.
Adjusting the headrest
• Pull up the headrest adjustment lever on the back of the child car seat and
adjust the height of the headrest.
• Thread the diagonal belt of the car’s 3-point seat belt through the diagonal
belt guide on the headrest.
• Make sure that the diagonal strap of the car’s 3-point seat belt comes
out of the diagonal strap guide on the headrest just above your child’s
shoulders.
• Release the lever and ensure that the headrest is engaged.

- 14 -- 14 -
EN
Isofi x connectors
• Press the two lateral Isofi x connector buttons in order to extend the length
of the Isofi x connectors.
• Guide the Isofi x connectors onto the Isofi x anchor points on the seat of the
vehicle and ensure that they lock into position.
• Push the child car seat in until it rests securely against the backrest of the
seat of the vehicle. Ensure that both Isofi x indicators are showing green.

- 15 -- 15 - EN
INSTALLATION OF THE CHILD CAR SEAT
Height range 100–150 cm, forward-facing
1. Press the two lateral Isofi x connector buttons in order to extend the
length of the Isofi x connectors.
2. Guide the Isofi x connectors to the Isofi x anchor points on the car seat
and snap them into place.
3 . Push the child car seat in until it rests securely against the backrest of the
car seat. Ensure that both Isofi x indicators are switched to green.
4. Thread the diagonal belt of the 3-point car seat belt through the diagonal
belt guide on the headrest of the child car seat.
5. Thread the lap belt of the car's 3-point belt through the fi rst lap belt guide
(below the armrest) in the seat area of the child car seat.
6. Put your child in the child car seat.
7. Adjust the height of the headrest so that the child’s head is fully in the
headrest and the diagonal belt comes out through the belt guide at the
level of the child’s shoulders.
8. Fasten the belt buckle of the 3-point seat belt until you hear a click.
9. Make sure that both the diagonal belt and the lap belt run through the
second lap belt guide (below the armrest) on the child car seat, which
faces the car’s seat belt buckle.
10. Pull on the diagonal strap to tighten it. Make sure that the straps are not
twisted.
Installation without Isofi x:
Alternatively, the child car seat in the 100-150 cm size class can also be
fi tted with the 3-point seat belt only. Attaching the seat with the Isofi x con-
nectors is not absolutely essential but is recommended.

- 16 -
FR
Merci d’avoir choisi notre siège auto pour enfant. Si vous avez besoin d’aide
avec ce produit, veuillez contacter notre service clientèle.
UTILISATION
• Ce produit convient aux enfants d’une taille de 100 à 150 cm.
• Installation en position face à la route de 100 à 150 cm de hauteur se fait
à l’aide des connecteurs Isofi x. L’enfant est attaché avec la ceinture à 3
points de la voiture. Alternativement, le siège-auto pour enfants dans la
catégorie de taille 100 à 150 cm peut être monté uniquement avec la cein-
ture à 3 points. Une fi xation avec les connecteurs Isofi x n’est pas obliga-
toire, mais recommandée.
REMARQUE
Il s’agit d’un rehausseur pour enfant i-Size optimisé. Il est homologué confor-
mément au règlement n° 129 pour une utilisation principalement avec des
«siègesi-Size», tel qu’il est indiqué par les constructeurs automobiles dans le
manuel d’utilisation du véhicule.
En cas de doute, consultez le fabricant ou le revendeur du dispositif de rete-
nue pour enfants amélioré.
IMPORTANT - N’UTILISEZ PAS LE SIÈGE AUTO POUR ENFANT DANS LA PO-
SITION FACE À LA ROUTE SI L’ENFANT N’A PAS ENCORE ATTEINT L’ÂGE DE
3 ANS RÉVOLUS.
Classe
de taille Sens de
montage Installation Type Système
d’attache de
l’enfant
100–
150cm Face
à la route
Connecteurs
Isofi x et ceinture 3
points de la voiture
i-Size
Booster
seat
Ceinture à
trois points
de la voiture
100–
150cm Face
à la route Ceinture 3 points
de la voiture
i-Size
Booster
seat
Ceinture à
trois points
de la voiture
Le tableau suivant contient des informations sur les dispositifs et les méthodes
de fi xation:
1 & 2): En cas d’utilisation avec Iso-
fi x: Uniquement si des connecteurs
Isofi x sont présents et si le siège est
reconnu comme compatible i-Size
dans le manuel de la voiture.

- 17 - FR
AVERTISSEMENT
• Veuillez lire attentivement ces instructions avant utilisation afi n d’assurer
la sécurité de votre enfant. Conservez les instructions. Le non-respect des
instructions de ce manuel peut entraîner des blessures graves pour votre
enfant.
• Pour l’installation Isofi x: Veillez à lire le manuel du constructeur automobile.
• N’utilisez aucun autre point de contact porteur que ceux indiqués dans les
instructions et marqués dans le dispositif de retenue pour enfants.
• N’utilisez pas ce siège auto pour enfant à la maison. Il a été exclusivement
conçu pour être utilisé dans une voiture.
• Ne laissez jamais votre enfant sur le siège auto sans surveillance.
• Le siège auto pour enfant doit être remplacé s’il a été soumis à de fortes
contraintes lors d’un accident.
• Pour des raisons de sécurité, le siège auto pour enfant doit être fi xé dans
le véhicule même si aucun enfant n’y est installé.
• Assurez-vous toujours que toutes les sangles qui maintiennent le siège
auto pour enfant dans le véhicule sont bien serrées et que toutes les
sangles qui retiennent l’enfant sont ajustées au corps de l’enfant. Veillez
également à ce que les sangles ne soient pas tordues.
• Les bagages ou autres objets susceptibles de causer des blessures en cas de
collision doivent être correctement fi xés.
• Les objets rigides et les éléments en plastique d’un dispositif de retenue
pour enfant doivent être placés et installés de manière à ne pas pouvoir être
coincés par un siège en mouvement ou une porte de véhicule.
• Il est important que les sangles du bas maintiennent fermement le bassin
de l’enfant. Votre enfant doit toujours être attaché afi n d’éviter tout risque
de chute.
• Il est dangereux d’apporter des modifi cations ou des ajouts au produit
sans l’approbation de l’autorité compétente. Le non-respect des instruc-
tions d’installation du fabricant du dispositif de retenue pour enfant pré-
sente également des risques pour la sécurité de votre enfant.
• Ce siège pour enfant a été conçu pour des enfants d’une taille maximale de
150 cm. Ne surchargez jamais le siège pour enfant en y transportant plus
d’un enfant ou des charges supplémentaires.
• Le dispositif de retenue pour enfant ne doit pas être utilisé sans la housse
de siège.
• La housse du siège ne doit pas être remplacée par une autre que celle
recommandée par le fabricant, car cette housse fait partie intégrante des
performances du dispositif de retenue.

- 18 -
FR
ÉLÉMENTS DU SIÈGE
Vue frontale
Vue arrière
Appuie-tête
Guide de sangle
diagonale pour la
classe de
taille 100 – 150cm
Guide de
sangle
abdominale
pour la classe
de taille 100 –
150cm
Dossier
Coque du
siège
Réglage de
l’appuie-tête
Extension de
connecteur
Isofi x
Connecteur
Isofi x

- 19 - FR
NETTOYAGE
Pour assurer une longue durée de vie à votre siège auto pour enfant, n’utilisez
pas de solvants, de produits de nettoyage abrasifs ou agressifs pour son net-
toyage. Après chaque nettoyage, vérifi ez la résistance du tissu et des coutures.
Lors du lavage du tissu, suivez attentivement les instructions fi gurant sur l’éti-
quette (voir ci-dessous).
ENTRETIEN
Vérifi ez régulièrement l’état du produit pour déceler d’éventuels dommages. En
cas de dommage, le siège auto pour enfant ne peut plus être utilisé et doit être
placé hors de portée des enfants.
Si vous avez des questions ou des problèmes, veuillez vous adresser au
Service client Osann au +49 (0)7731 970077.
NE PAS
utiliser d’eau de javel
Sèche-linge à basse
température
Laver à 30°C,
programme délicat NE PAS
repasser
NE PAS
nettoyer à sec
e
o
s
m
U

- 20 -
FR
Assemblage coque du dossier et du siège (selon la variante)
• Le siège auto pour enfant est livré non monté.
• Veuillez prendre le dossier et l’accrocher à la coque du siège à un angle
plat.
• Tenez fermement la coque du siège et poussez le dossier vers le haut
jusqu’à ce qu’il soit complètement accroché.
• L’utilisation du siège auto pour enfant sans dossier n’est pas autorisée.
Réglage de l’appuie-tête
• Tirez vers le haut le levier pour régler l’appuie-tête à l’arrière du siège auto
et réglez la hauteur de l’appuie-tête.
• Enfi lez la sangle diagonale de la ceinture à trois points de la voiture à tra-
vers le guide de sangle diagonale sur l’appuie-tête.
• Assurez-vous que la sangle diagonale de la ceinture à trois points de la
voiture sort du guide de sangle diagonale sur l’appuie-tête juste au-des-
sus des épaules de votre enfant.
• Relâchez le levier et assurez-vous que l’appuie-tête est bien fi xé.
Table of contents
Languages:
Other osann Car Seat manuals

osann
osann Eno 360 User manual

osann
osann MIA User manual

osann
osann JUNIOR ISOFIX User manual

osann
osann Flux Isofi x eXT User manual

osann
osann Eno360 SL User manual

osann
osann Neo360 SL User manual

osann
osann Huddle User manual

osann
osann ONE360 User manual

osann
osann LUX Isofix User manual

osann
osann Oreo360 User manual

osann
osann SWIFT360 User manual

osann
osann SWIFT360 User manual

osann
osann Four360 User manual

osann
osann ONE360 User manual

osann
osann FLUX ISOFIX User manual

osann
osann Flux User manual

osann
osann JUNIOR User manual

osann
osann PLUTO User manual

osann
osann JUNIOR ISOFIX User manual

osann
osann Four360 User manual