manuals.online logo
Brands
  1. Home
  2. •
  3. Brands
  4. •
  5. OVE
  6. •
  7. Bathroom Fixture
  8. •
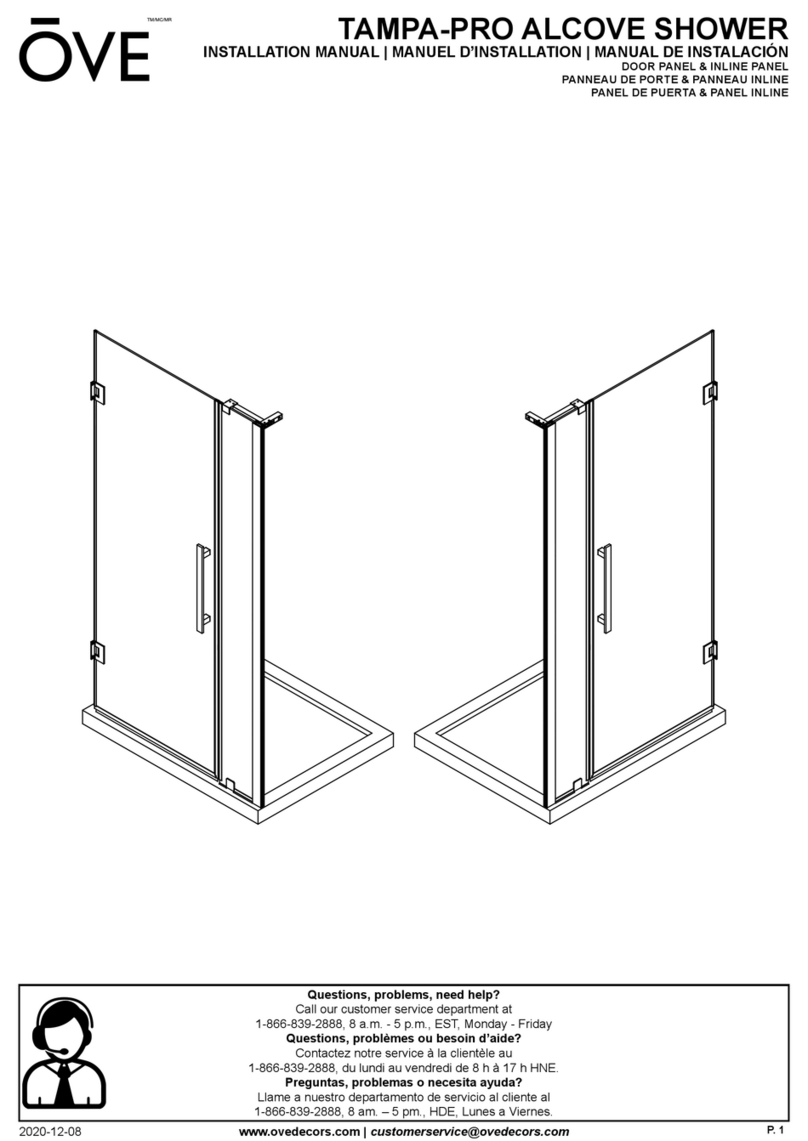
  9. OVE TAMPA-PRO TP0200401 User manual

OVE TAMPA-PRO TP0200401 User manual

Other OVE Bathroom Fixture manuals

OVE SWIFT WALL PANEL 34 User manual

OVE

OVE SWIFT WALL PANEL 34 User manual

OVE HARVARD 48 MR User manual

OVE

OVE HARVARD 48 MR User manual

OVE INFINITY User manual

OVE

OVE INFINITY User manual

OVE SAROS User manual

OVE

OVE SAROS User manual

OVE ANNIE 36 TD User manual

OVE

OVE ANNIE 36 TD User manual

OVE NIKO 48 3492202 User manual

OVE

OVE NIKO 48 3492202 User manual

OVE HARBOR 60 User manual

OVE

OVE HARBOR 60 User manual

OVE ESTERO 60 User manual

OVE

OVE ESTERO 60 User manual

OVE ELLUM 60 User manual

OVE

OVE ELLUM 60 User manual

OVE MILANO 48 User manual

OVE

OVE MILANO 48 User manual

OVE TAMPA User manual

OVE

OVE TAMPA User manual

OVE TAMPA TA13004H0 User manual

OVE

OVE TAMPA TA13004H0 User manual

OVE NIKO 36 3492203 User manual

OVE

OVE NIKO 36 3492203 User manual

OVE PASADENA BUTTRESS PA05B0100 User manual

OVE

OVE PASADENA BUTTRESS PA05B0100 User manual

OVE TAMPA-PRO TP0130 G Series User manual

OVE

OVE TAMPA-PRO TP0130 G Series User manual

OVE PASADENA PA06521J0 User manual

OVE

OVE PASADENA PA06521J0 User manual

OVE ANTIGUA 48 User manual

OVE

OVE ANTIGUA 48 User manual

OVE KELSEY User manual

OVE

OVE KELSEY User manual

OVE LARISSA 48 User manual

OVE

OVE LARISSA 48 User manual

OVE PASADENA User manual

OVE

OVE PASADENA User manual

OVE ZOLA User manual

OVE

OVE ZOLA User manual

OVE KELSEY User manual

OVE

OVE KELSEY User manual

OVE NIKO 60 User manual

OVE

OVE NIKO 60 User manual

OVE BUCKINGHAM 36 User manual

OVE

OVE BUCKINGHAM 36 User manual

Popular Bathroom Fixture manuals by other brands

Kohler Mira Sport Max J03G Installation and user guide

Kohler

Kohler Mira Sport Max J03G Installation and user guide

Moen 186117 Series installation guide

Moen

Moen 186117 Series installation guide

Hans Grohe Raindance Showerpipe 27235000 Instructions for use/assembly instructions

Hans Grohe

Hans Grohe Raindance Showerpipe 27235000 Instructions for use/assembly instructions

Signature Hardware ROUND SWIVEL BODY SPRAY 948942 Install

Signature Hardware

Signature Hardware ROUND SWIVEL BODY SPRAY 948942 Install

fine fixtures AC3TH installation manual

fine fixtures

fine fixtures AC3TH installation manual

LIXIL HP50 Series quick start guide

LIXIL

LIXIL HP50 Series quick start guide

KOLO ATOL PLUS installation manual

KOLO

KOLO ATOL PLUS installation manual

Hans Grohe PuraVida 15073000 Instructions for use/assembly instructions

Hans Grohe

Hans Grohe PuraVida 15073000 Instructions for use/assembly instructions

Toto TS111B8 Installation and owner's manual

Toto

Toto TS111B8 Installation and owner's manual

Kohler K-1158-H2 Homeowner's guide

Kohler

Kohler K-1158-H2 Homeowner's guide

Coram Showers OFFSET QUADRANT manual

Coram Showers

Coram Showers OFFSET QUADRANT manual

baliv DU-2010 manual

baliv

baliv DU-2010 manual

odass OD-1710 instruction manual

odass

odass OD-1710 instruction manual

Oxygenics Evolution Easy installation instructions

Oxygenics

Oxygenics Evolution Easy installation instructions

Bradley Express SS Series installation instructions

Bradley

Bradley Express SS Series installation instructions

Helvex TH-974 installation guide

Helvex

Helvex TH-974 installation guide

DURAVIT C.1 C15240 0090 Instructions for mounting and use

DURAVIT

DURAVIT C.1 C15240 0090 Instructions for mounting and use

Sunshower PURE SOLO manual

Sunshower

Sunshower PURE SOLO manual

manuals.online logo
manuals.online logoBrands
  • About & Mission
  • Contact us
  • Privacy Policy
  • Terms and Conditions

Copyright 2025 Manuals.Online. All Rights Reserved.

P. 1
TAMPA-PRO ALCOVE SHOWER
INSTALLATION MANUAL | MANUEL D’INSTALLATION | MANUAL DE INSTALACIÓN
DOOR PANEL
PANNEAU DE PORTE
PANEL DE PUERTA
www.ovedecors.com | [email protected]
Questions, problems, need help?
Call our customer service department at
1-866-839-2888, 8 a.m. - 5 p.m., EST, Monday - Friday
Questions, problèmes ou besoin d’aide?
Contactez notre service à la clientèle au
1-866-839-2888, du lundi au vendredi de 8 h à 17 h HNE.
Preguntas, problemas o necesita ayuda?
Llame a nuestro departamento de servicio al cliente al
1-866-839-2888, 8 am. – 5 pm., HDE, Lunes a Viernes.
2022-04-26
P. 2
SHOWER DIMENSIONS
DIMENSIONS DE LA DOUCHE
DIMENSIONES DE LA DUCHA
Measurements
Mesures
Medidas
Rule of Measure
Règle de la mesure
Regla de medida
W
Shower width
Largeur de la douche
Ancho de la ducha
Distance from the leftmost edge of the shower to the rightmost edge
Distance de l’extremité gauche de la douche à l’extremité droite
Distancia desde el extremo izquierdo de la ducha hasta el extremo derecho
D
Shower Enclosure Depth
Profondeur de la douche vitrée
Profundidad de ducha de vidrio
Depth of the shower, from the front edge of the shower to the back edge, including the shower base if applicable
Profondeur de la douche, de l’extremité avant à l’extremité arrière, incluant la base de la douche s’il y a lieu
Profundidad de la ducha, de la parte delantera a la trasera, incluida la base de la ducha si corresponde
H
Shower total height
Hauteur totale de la douche
Altura total de la ducha
From the oor up to the top of the shower, including the shower base if applicable
Du plancher jusqu’au haut de la douche, incluant la base s’il y a lieu
Desde el piso hasta la parte superior de la ducha, incluida la base si corresponde
H2
Shower height
Hauteur de la douche
Altura de la ducha
From the oor up to the top of the shower, excluding the shower base if applicable
Du plancher jusqu’au haut de la douche, excluant la base s’il y a lieu
Desde el piso hasta la parte superior de la ducha, excluyendo la base si corresponde
A
Shower Overall Depth
Profondeur de la douche totale
Profundidad total de la ducha
For a shower without a base: Depth of the shower from the front edge of the shower to the studs
If the shower comes with a base: Depth of the shower from the front edge of the base to the studs
Pour une douche sans base: Profondeur de la douche de l’extremité avant jusqu’aux montants muraux
Pour une douche avec base: Profondeur de la douche de l’extremité avant de la base jusqu’aux montants muraux
Para una ducha sin base: Profundidad de la ducha desde el frente hasta los montantes de la pared
Para una ducha con base: Profundidad de la ducha desde el extremo frontal de la base hasta los montantes de la pared
B
Finished Shower Depth
Profondeur de la douche
Profundidad de ducha
For a shower without a base: Depth of the shower from the front edge of the shower to the nished wall
If the shower comes with a base: Depth of the shower from the front edge of the base to the nished wall
Pour une douche sans base: Profondeur de la douche de l’extremité avant jusqu’au mur ni
Pour une douche avec base: Profondeur de la douche de l’extremité avant de la base jusqu’au mur ni
Para una ducha sin base: Profundidad de la ducha desde el frente hasta la pared terminada
Para una ducha con base: Profundidad de la ducha desde el frente de la base hasta la pared terminada
C
Shower Overall Width
Largeur totale de la douche
Ancho total de ducha
For a shower with or without a base in Alcove: Stud to stud distance between the two side walls
For a shower without a base in Corner: Distance from the stud on the wall side to the other edge of the base
For a shower with a base in Corner: Distance from the stud on the wall side to the other edge of the shower
Pour une douche avec ou sans base en Alcôve: Distance montant à montant
Pour une douche sans base en Coin: Distance entre le montant mural et l’autre bord de la base
Pour une douche avec une base en Coin: Distance entre le montant mural et l’autre bord de la douche
Para una ducha con o sin base Alcove: distancia de vertical a vertical
Para una ducha sin base angular: Distancia entre el montante de pared y el otro borde de la base
Para una ducha con base de esquina: Distancia entre el montante de pared y el otro borde de la ducha
E
Finished Shower Width
Largeur de la douche
Ancho de ducha
For a shower with or without a base in Alcove: Distance from nished wall to nished wall
For a shower without a base in Corner: Distance from the nished side wall to the other edge of the base
For a shower with a base in Corner: Distance from the nished side wall to the other edge of the shower
Pour une douche avec ou sans base en Alcôve: Distance du mur ni au mur ni
Pour une douche sans base en coin: Distance entre le mur ni et l’autre bord de la base
Pour une douche avec une base en coin: Distance entre la le mur ni et l’autre bord de la douche
Para una ducha con o sin base Alcove: Distancia desde la pared terminada hasta la pared terminada
Para una ducha sin zócalo: Distancia entre la pared acabada y el otro borde del zócalo
Para una ducha con zócalo de esquina: Distancia entre la pared terminada y el otro borde de la ducha
O
Door opening
Ouverture de la porte
Abertura de la puerta
Width of the door opening
Largeur d’ouverture de la porte
Ancho de apertura de puerta
P
Distance between handle holes
Distance entre les trous de poignée
Distancia entre los oricios de la manija
Distance from center to center of the handle screw holes
Distance de centre a centre des trous de la poignée de porte
Distancia de centro a centro de los oricios de la manija de la puerta
Y
Front Wall Track Installation Distance
Distance d’Installation du rail avant
Distancia de instalación del riel delantero
Distance from the back nished wall to the center of the front wall track
Distance du mur ni du fond au milieu du rail avant
Distancia desde la pared terminada desde la parte posterior hasta la mitad del riel frontal
X
Side Wall Track Installation Distance
Distance d’Installation du Rail de côté
Distancia de instalación del riel lateral
Distance from the side nished wall to the center of the side panel wall track
Distance du mur latéral ni au centre du rail du paneau latéral
Distancia desde la pared lateral terminada hasta el centro del riel del panel lateral
DP
Door Panel
Panneau de Porte
Panel de Puerta
Total width of the glass (Does not include proles or seals)
Largeur du panneau de vitre (N’inclut pas les prolés ou le joints d’étanchéité)
Ancho del panel de vidrio (No incluye perles ni juntas)
IP
Inline Panel (if applicable)
Panneau Inline (si applicable)
Panel Inline (si aplicable)
Total width of the glass (Does not include proles or seals)
Largeur du panneau de vitre (N’inclut pas les prolés ou le joints d’étanchéité)
Ancho del panel de vidrio (No incluye perles ni juntas)
SP
Side Panel (if applicable)
Panneau Latéral (si applicable)
Panel Lateral (si aplicable)
Total width of the glass (Does not include proles or seals)
Largeur du panneau de vitre (N’inclut pas les prolés ou le joints d’étanchéité)
Ancho del panel de vidrio (No incluye perles ni juntas)
WARNING!
Refer to the ANNEX at the end of the INSTALLATION MANUAL to nd the exact dimensions matching to your specic Shower Conguration.
AVERTISSEMENT!
Référez-vous à l’ANNEXE à la n du MANUEL D’INSTALLATION pour trouver les dimensions exactes correspondant à votre conguration de douche spécique.
¡ADVERTENCIA!
Référez-vous à l’ANNEXE à la n du MANUEL D’INSTALLATION pour trouver les dimensions exactes correspondant à votre conguration de douche spécique.
P. 3
SHOWER DIMENSIONS
DIMENSIONS DE LA DOUCHE
DIMENSIONES DE LA DUCHA
DIM H
DIM O
DIM DP
DIM H2
DIM P
DIM D
DIM W
Measures: inch [millimeter]
Mesures: pouce [millimètre]
Medidas: pulgadas [milímetros]
P. 4
INSTALLATION STRUCTURE OVERVIEW
VUE D’ENSEMBLE DE LA STRUCTURE D’INSTALLATION
VISIÓN GENERAL DE LA ESTRUCTURA DE INSTALACIÓN
1. Before you start the installation of your product consult the illustration 1 below showing a side-view of the completed installation.
2. Illustration 2 shows the recommended wall structure and measurements for the product installation.
NOTE: Customer must follow and comply with the local and national building and plumbing codes. All illustrations in this manual are for reference
only and do not take precedent on any code or regulation. This product should be installed by a professional.
1. Avant de commencer l’installation de votre produit, consultez l’illustration 1 ci-dessous montrant une vue latérale de l’installation terminée.
2. L’illustration 2 montre la structure de paroi recommandée et les mesures pour l’installation du produit.
REMARQUE: Le client doit suivre et se conformer scrupuleusement aux codes locaux et nationaux de construction et de plomberie. Toutes les
illustrations de ce manuel ne sont faites que pour référence et ne prennent aucun précédent sur aucun code ou règlement. Ce produit doit être
installé par un professionnel.
1. Antes de iniciar la instalación del producto, ver Figura 1 muestra una vista lateral de la instalación se haya completado.
2. La gura 2 muestra la estructura de la pared recomendado y medidas para la instalación del producto.
NOTA: El cliente debe seguir y cumplir con los códigos de construcción locales y nacionales y fontanería. Todas las ilustraciones de este manual
son indicativos y se comprometen ningún precedente para cualquier código o reglamento. Este producto debe ser instalado por un profesional.
Drywall
Placoplâtre
Paneles de yeso
Stud
Montant
Soportes
Shower base
Base de douche
Plato de ducha
Cement
Ciment
Cemento
Drain
Drain
Desagüe Waste pipe
Tuyau d’évacuation
Tubería de desagüe
Stud
Montant
Soportes
Finished Wall or Tiles
Mur ni ou Tuiles
Pared o azulejos
FAQ
Q: What thickness of cement must I apply?
A: Between 25 mm and 38 mm (1 in and 1.5 in).
Q: Is the base installed on the studs or on the drywall?
A: On the studs.
FAQ
Q: Quelle épaisseur de ciment dois-je appliquer ?
R: Entre 25 mm et 38 mm (1 po et 1.5 po).
Q: La base est-elle installée sur les montants ou sur les murs de
placoplâtre?
R: Sur les montants muraux.
FAQ
P: ¿Qué espesor de cemento debo aplicar?
R: Entre 25 mm y 38 mm (1 pu y 1.5 pu).
P: ¿Está instalada la base en los soportes o en el panel de yeso?
R: En los soportes.
1
2
DIM B
DIM A
DIM E
DIM C
≈1/2” [13]
≈3/8” [10]
Finished wall Thickness
Épaisseur du mur ni
Espesor de pared terminado
Stud
Montant
Soportes
Drywall
Placoplâtre
Paneles de yeso
Finished Wall or Tiles
Mur ni ou Tuiles
Pared o azulejos
P. 5
PACKAGE CONTENT
CONTENU DE L’EMBALLAGE
CONTENIDO DEL PAQUETE
C
A
B
F
E
D
H
G
P. 6
PACKAGE CONTENT
CONTENU DE L’EMBALLAGE
CONTENIDO DEL PAQUETE
B
2x
C
1x
D
1x
E
1x
A
1x
F
1x
H
1x
G
1x
P. 7
PART LIST
LISTE DES PIÈCES
LISTA DE PIEZAS
PART #
# DE PIÈCE
PARTE #
DESCRIPTION
DESCRIPTION
DESCRIPCIÓN
QUANTITY
QUANTITÉ
CANTIDAD
CODE
CODE
CÓDIO
A
Door panel vertical seal strip
Bande d’étanchéité vertical de la porte
Tira de sello vertical de la puerta
1 99SRU3808-WM
B
Shower door hinge
Charnières de la porte de douche
Bisagras para la puerta de la ducha
2
Oil Rubbed Bronze: 99SHI3810-WM
Chrome: 99SHI3807-WM
Satin Nickel: 99SHI3809-WM
Black: 99SHI3808-WM
C
Door panel
Porte de douche
Puerta de la ducha
1Tampa-Pro Door Panel 23in (DPA23): 15B01ATP230872TCRWM
Tampa-Pro Door Panel 29in (DPA29): 15B01BTP290872TCRWM
D
Door handle
Poignée de porte
Manija de la puerta
1
Oil Rubbed Bronze: 99SHA3662-WM
Chrome: 99SHA1075-WM
Satin Nickel: 99SHA1076-WM
Black: 99SHA1077-WM
E
Door bottom seal strip
Bande d’étanchéité du bas de la porte
Tira de sello inferior de la puerta
1 99SRU3801-WM
F
Magnetic strip
Bande magnétique
Banda magnética
199SRU3802-WM
G
Magnetic track
Piste magnétique
Pista magnética
1
Oil Rubbed Bronze: 99STR3888-WM
Chrome: 99STR3887-WM
Satin Nickel: 99STR3894-WM
Black: 99STR3888-WM
H
Wall track (with G)
Glissière (avec G)
Riel de la pared (con G)
1
Oil Rubbed Bronze: 99STR3896-WM
Chrome: 99STR3895-WM
Satin Nickel: 99STR3897-WM
Black: 99STR3896-WM
***
Complete hardware kit
Quincaillerie complete
Todo el hardware
1
Oil Rubbed Bronze: 99SHW6112-WM
Chrome: 99SHW6109-WM
Satin Nickel: 99SHW6111-WM
Black: 99SHW6110-WM
P. 8
BBAA DD
SUPPLIED HARDWARE LIST
QUINCAILLERIE FOURNIE
CONTENIDO DE HARDWARE
TOOLS REQUIRED (not supplied)
OUTILS REQUIS (non fournis)
HERRAMIENTAS NECESARIAS (no incluido)
Pencil
Crayon
Lápiz
Screwdriver
Tournevis
Destornillador
Drill and drill bits
Perceuse et forets
Taladro con brocas
ø1/8” (3mm) & ø5/16” (8mm)
Level
Niveau
Nivel
Measuring Tape
Ruban à mesurer
Cinta medidora
Silicone
Silicone
Silicona
Rubber mallet
Maillet en caoutchouc
Mazo de goma
Cutter
Exacto
Cuchilla
Safety glasses
Lunettes de Sécurité
Anteojos de seguridad
Ratchet
Clé à rochet
Llave de trinquete
5mm Bit socket
Cap
Capuchon
Capuchón
4x
Wall Anchor
Ancrage mural
Tarugo
ø8x30mm
11+3
Screw
Vis
Tornillo
ST5x45mm
8+2
Allen key
Clé Allen
Llave Allen
2.5mm & 4mm
Screw
Vis
Tornillo
ST5x30mm
3+1
CC
FF GG
Screw
Vis
Tornillo
ST4x12mm
3+1
Cap
Capuchon
Capuchón
3x
Fitting
Raccord
Accesorio
3x
EE
Wood shims
Cales en bois
Cuñas de madera
P. 9
A
REVERSIBILITY
RÉVERSIBILITÉ
REVERSIBILIDAD
This instruction is drawn up for a door opening from right to left (see illustration A).
For an installation for a door opening from left to right (see illustration B), use the same instructions, but switch
around the panels: mirror e󰀨ect.
Utilisez ces instructions pour une ouverture de la porte de droite à gauche (illustration A).
Pour une installation de gauche à droite (illustration B), suivez ces mêmes instructions mais permuter l’emplacement
des panneaux: e󰀨et miroir.
Estas instrucciones fueron elaboradas para una abertura de puerta de derecha a izquierda (ilustración A).
Para una abertura de izquierda a derecha (ilustración B), siga estas mismas instrucciones, pero cambie el lugar
para la ubicación del riel: efecto espejo.
B
P. 10
CAUTION
Please carefully read the following important safety information before handling or installing this shower. There is a risk of serious injury while
handling this product. To minimize these risks, please note:
• Always wear safety glasses and gloves while handling.
• Always read and follow all the steps in the installation instructions.
• Inspect all contents and glass for damage before installation.
• Extreme caution should be taken while handling the glass during installation as the tempered glass may shatter if in contact with a hard
surface.
• Handle the tempered glass with caution! Improperly handling the glass can cause it to break suddenly in small pieces (never in pointed
fragments).
• Always take all precautions not to touch the tempered glass with any tools during the installation, or after installed.
• Do not cut or modify the tempered glass as it will shatter if cut.
• Carefully remove product from packaging and keep packaging until installation is complete.
• Inspect all parts for damage; if there is damage to the unit prior to installation, please contact customer service at the number provided in
this guide.
• Install the shower on a oor that is level and able to accommodate the weight of the unit and an occupant.
• Consult local building codes and compliance standards prior to installation and ensure conformity.
• After installation, and from time to time, check the glass for t and nish to ensure that nothing has come loose since installation.
• Keep this installation manual for future reference.
SAFETY INFORMATION
INFORMATION SUR LA SÉCURITÉ
INFORMACIÓN DE SEGURIDAD
AVERTISSEMENT
Veuillez lire attentivement les importantes consignes de sécurité suivantes avant la manutention et l’installation de cette douche. La manipulation
de ce produit présente un risque de blessure grave. Pour minimiser ces risques, veuillez prendre note de ce qui suit:
• Toujours porter des lunettes et des gants de sécurité pendant la manutention.
• Toujours lire et suivre toutes les étapes indiquées dans les instructions d’installation.
• Avant l’installation, inspecter tout le contenu et le verre pour détecter toute forme de dommages.
• Pendant l’installation, faire très attention lorsque vous manipulez les pièces en verre, car le verre trempé peut se fracasser s’il entre en
contact avec une surface dure.
• Manipulez le verre trempé avec précaution sinon il pourrait se briser en petits morceaux (jamais en fragments pointus).
• Prendre toujours toutes les précautions nécessaires pour que, pendant l’installation ou après, les outils que vous utilisez n’entrent pas en
contact avec le verre trempé.
• Ne pas couper ni modier le verre trempé, car il pourrait se briser en éclat s’il est coupé.
• Sortir le produit de son emballage avec soin et le conserver jusqu’à ce que l’installation soit complétée.
• Inspectez toutes les pièces. S’il y a des dommages sur le produit avant l’installation, veuillez communiquer avec le service à la clientèle au
numéro indiqué dans ce guide.
• Installez la douche sur un plancher au niveau et capable de supporter le produit et son utilisateur.
• Veuillez consulter le code du batiment et les normes de conformité avant l’installation du produit.
• Après l’installation, et périodiquement, vérier l’assemblage et la nition des pièces en verre, pour vous assurer qu’aucun élément ne s’est
desserré depuis l’installation.
• Conserver le présent manuel d’instruction pour consultation future.
PRECAUCIÓN
Lea cuidadosamente la siguiente información importante antes de manipular e instalar la ducha. Hay riesgo de lesiones graves mientras se
manipula el producto. Para minimizar estos riesgos, sírvase notar:
• Utilice siempre anteojos de seguridad y guantes durante la manipulación.
• Lea y siga siempre todos los pasos en las instrucciones de instalación.
• Inspeccione todo el contenido y el vidrio por daños antes de la instalación.
• Hay que prestar atención especial mientras se manipula el vidrio durante la instalación ya que el vidrio templado se puede despedazar al
contacto con una supercie dura.
• Manipule el vidrio templado con precaución! Una manipulación inadecuada del vidrio puede ocasionar que se rompa.
• Observe siempre todas las precauciones para no tocar el vidrio templado con ninguna herramienta durante ni después de la instalación.
• No corte el vidrio templado puesto que se despedazará si se corta.
• Retire con cuidado los productos de envase y embalaje mantendrá hasta que la instalación se haya completado.
• Inspeccione todas las piezas en busca de daños, si hay daños en la unidad antes de la instalación, póngase en contacto con el servicio al
cliente al teléfono que gura en esta guía.
• Instale la ducha en un piso que esté nivelado y pueda contener el peso de la unidad y de un ocupante.
• Consulte los códigos de construcción locales y normas requeridas antes de la instalación y asegúrese de cumplirlos.
• Después de la instalación, y de tiempo en tiempo, verique el ajuste el acabado del vidrio para asegurarse de que nada se ha aojado con
el tiempo.
• Guarde este manual de instalación para consulta en el futuro.