manuals.online logo
Brands
  1. Home
  2. •
  3. Brands
  4. •
  5. Overland Storage
  6. •
  7. Storage
  8. •
  9. Overland Storage REO Series User manual

Overland Storage REO Series User manual

Part Number 10400111-103 06/2007 ©2007 Overland Storage, Inc. WPage 1 of 4
REO Series
Remove and Replace
Disk
Important Reminders
IMPORTANT: Be sure to follow Electrostatic Discharge
(ESD) and safety procedures when working on this and
other Overland
WARNING: Improper installation might result in
damage to this part or the appliance, which will
void the current warranty.
CAUTION: When installing a replacement part, always
be sure the replacements have acclimated to room
temperature (test by touching) before beginning the
remove and replace procedure.
CAUTION: To avoid loss of data, on the REO 4000,
9000, 9100 (and in rare cases the 4500) each
new disk must occupy the same slot as the disk
it is replacing.
Overview & Managed Hot Swap Preparation
About REO Disks
CAUTION: If all drives are replaced at once, all data is
lost and the RAID needs to be rebuilt. See your REO
Setup Guide for rebuild help.
REO appliances are equipped with Serial ATA disks
mounted in disk carriers that are accessible through the
front of the enclosure. By using the applicable features in
the REO GUI, you can remove and replace a disk without
powering down the appliance. This is known as
performing a managed hot swap of a disk.
Managed Hot Swap Preparation
1. Make sure that none of the initiators (servers) have
active connections with the appliance.
2. In the REO GUI, locate the disk identification and
removal page associated with the REO software version
in use.
•Version 2.5.0 or later: Internal Disk Management
page.
•Version 2.4.0 or earlier: Physical Volume
Management page.
3. Using the appropriate GUI page, locate the applicable
disk and click the “Remove” button next to it.
NOTE: If you are using REO software version 2.2 or later,
the applicable disk might be listed in the FREE DRIVE
POOL section of the page and might not have a
corresponding Remove button.
a. On the Internal Management or Physical
Volume page, note the disk location.
b. Click the Remove button (if applicable).
c. Click OK when the confirmation message appears.
The managed hot swap preparation is now complete.
TM
REO 9100 Disk Carrier REO 9100 Disk
REO 4500 Disk Carrier REO 4500 Disk
Part Number 10400111-103 06/2007 ©2007 Overland Storage, Inc. WPage 2 of 4
REO 1000 and 1500
Figure 1. REO 1000: No “Replace in Same Slot Number” Requirement
Figure 2. REO 1500: No “Replace in Same Slot Number” Requirement
IMPORTANT: The REO 1000 and 1500 do NOT require new disks to be placed back in the same slot number as the old.
Remove Disk
1. (1500 only) Unlock the carrier.
Use a screwdriver to turn the lock on the disk carrier
lever counter-clockwise to the angled “unlocked”
position (Figure 3).
Figure 3. Lock and Unlock Positions
2. Remove the disk.
a. On the front of the disk carrier, press the lever
release button to the right (Figure 4).
b. Use the lever to pull the carrier and disk
out of the slot (Figure 4).
Figure 4. Remove Carrier
3. Remove the old disk from the carrier
a. Remove the four screws that hold the disk in the
carrier (Figure 5) and set the screws aside.
Figure 5. Remove Screws
b. Remove the disk and set it aside.
Replace Disk
1. Attach the new disk to the carrier.
Insert the new disk in the carrier and secure it using
the previously removed screws.
2. Insert and latch the carrier.
a. Making sure the carrier lever is in it’s fully open/
extended position, place the carrier into the SAME
SLOT NUMBER from which it was removed.
b. Slide the carrier to the back of the slot, and as it
reaches the back press the lever in until it clicks
(locks). Pressing the lever in draws the carrier fully
into the slot and locks it in place.
3. (1500 only) Lock the carrier (Figure 3).
Setup Disks
On the Internal Disk Management (version 2.5.0 or
later) or Physical Volume Management (version
2.4.0 or earlier) page, click the applicable Add,
Rebuild, or Create button, depending on what version
of software you are using and in what configuration.
For help, see your REO Setup Guide.
Return Removed Parts to Overland
Place the removed part in the replacement part’s box, then
follow directions included on the box for returning parts to
Overland Storage.
00 01 03 04
1234
Unlocked Locked
b. Pull Disk Carrier Out
a. Release Button
.
Part Number 10400111-103 06/2007 ©2007 Overland Storage, Inc. WPage 3 of 4
REO 4000 and 4500
Figure 6. REO 4000: MUST Place Disks Back in Same Slot Number
Figure 7. REO 4500: No “Replace in Same Slot Number” Requirement
CAUTION: In the REO 4000, note the slot number of the disk being removed. To avoid data loss, the new disk must be placed
back in this same slot number. The REO 4500 (and 4500x) does not require new disks to be placed back in the same slot
number as the old except in extremely rare cases (when multiple 4500/4500x chassis are being replaced).
REO 4000 Remove Disk Carrier
1. Remove the faceplate.
2. Remove the carrier.
a. Unlock the disk carrier by compressing the
slide lock (Figure 8).
Figure 8. REO 4000 Disk Carrier
b. Swing the front panel outward and remove
the carrier.
REO 4500 Remove Disk Carrier
1. Unlock and release the carrier lever (Figure 9).
a. Turn the carrier lock screw 45 degrees left.
b. Push the lever release button to the right.
Figure 9. REO 4500 Disk Carrier
2. Use the lever to pull the carrier out of the slot.
Remove Disk from Carrier.
a. Remove the screws that hold the disk in the carrier
(Figure 10) and set the screws aside.
Figure 10. Remove Screws
b. Remove the disk and set it aside.
Replace Disk (4000/4500)
IMPORTANT: While the REO 4000 carrier has four screws,
the 4500 disk carrier has five screws. On the REO 4500
you MUST first screw in the center screw (on the side that
has three screws) then screw in the other four.
1. Attach the new disk to the carrier (Figure 11).
Figure 11. REO 4500: Attach Center Screw FIRST
Place the new disk in the carrier and secure it using
the previously removed screws.
2. Insert the carrier into the slot.
3. Push firmly on both sides of the carrier to ensure that
the latch and connector are fully seated.
4. (4000 only) Reattach the faceplate.
Setup Disks
On the Internal Disk Management (version 2.5.0 or
later) or Physical Volume Management (version
2.4.0 or earlier) page, click the applicable Add,
Rebuild, or Create button, depending on what version
of software you are using and in what configuration.
For help, see your REO Setup Guide.
Return Removed Parts to Overland
Follow directions included on the box for returning parts
to Overland Storage.
00 01
02 03 04
05 06 07
12
1234
5678
9
10
11
Slide Lock
Push
Unlock
Right
4500 Only: Attach Center Screw FIRST
Part Number 10400111-103 06/2007 ©2007 Overland Storage, Inc. WPage 4 of 4
REO 9000 and 9100
Figure 12. REO 9000 & 9100: MUST Place Disks Back in Same Slot Number
CAUTION: Note the slot number of the disk. In the REO 9000 and 9100, to avoid data loss, the new disk must be placed back in
the same slot number as the old.
Remove Disk
NOTE: While the REO 9000 has a faceplate in front of the disks
that must be lowered to access the disk carriers/disks, the REO
9100 does not have a faceplate.
1. Remove the faceplate (9000 only-see note above).
Loosen the two thumb-screws on the front panel
faceplate, and remove the faceplate covering the disks/
disk slots.
2. Remove the carrier.
a. On the front of the disk carrier, press the lever
release button to the right (Figure 13).
b. Use the lever to pull the carrier and disk
out of the slot.
Figure 13. REO 9100 Disk Carrier (9000 is Similar)
3. Remove the disk from the carrier.
Remove the four screws that hold the disk in the carrier
and set the screws aside (Figure 14).
Figure 14. Remove Screws
c. Remove the disk and set it aside.
Replace Disk
1. Attach the new disk to the carrier.
Insert the new disk in the carrier and secure it using
the previously removed screws.
2. Insert and latch the carrier.
a. Making sure the carrier lever is in it’s fully open/
extended position, place the carrier into the SAME
SLOT NUMBER from which it was removed.
b. Slide the carrier to the back of the slot.
c. As the carrier reaches the back of the slot, press the
lever in until it clicks (locks). Pressing the lever in
draws the carrier fully into the slot and locks the
carrier in place.
3. Reattach the faceplate (9000 only).
Setup Disks
On the Internal Disk Management (version 2.5.0 or
later) or Physical Volume Management (version
2.4.0 or earlier) page, click the applicable Add,
Rebuild, or Create button, depending on what version
of software you are using and in what configuration.
For help, see your REO Setup Guide.
Return Removed Parts to Overland
Place the removed part in the replacement part’s box, then
follow directions included on the box for returning parts to
Overland Storage.
b. Pull Disk Carrier Out
a. Release Lever
Additional Help
You can get additional technical support on the Internet at http://support.overlandstorage.com,
or call 1-877-654-3429 (toll-free U.S. & Canada), +44 (0) 118-9898050 (Europe), or
001-858-571-5555 x5 (International).

Other manuals for REO Series

2

This manual suits for next models

4

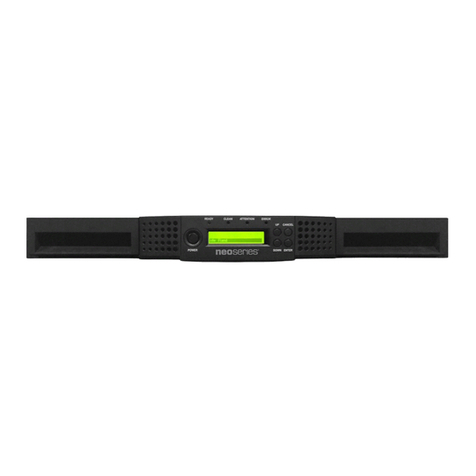
Other Overland Storage Storage manuals
Overland Storage SnapServer XSD 40 User manual

Overland Storage

Overland Storage SnapServer XSD 40 User manual

Overland Storage SnapServerXSR 40 User manual

Overland Storage

Overland Storage SnapServerXSR 40 User manual

Overland Storage NEO 400S User manual

Overland Storage

Overland Storage NEO 400S User manual

Overland Storage NEO S-Series User manual

Overland Storage

Overland Storage NEO S-Series User manual

Overland Storage ARCvault 48 User manual

Overland Storage

Overland Storage ARCvault 48 User manual

Overland Storage Snap Server 210 User manual

Overland Storage

Overland Storage Snap Server 210 User manual

Overland Storage NEO 8000 User manual

Overland Storage

Overland Storage NEO 8000 User manual

Overland Storage ARCvault 12 User manual

Overland Storage

Overland Storage ARCvault 12 User manual

Overland Storage NEO 8000E User manual

Overland Storage

Overland Storage NEO 8000E User manual

Overland Storage SnapScale X2 Node User manual

Overland Storage

Overland Storage SnapScale X2 Node User manual

Overland Storage Tandberg Data RDX QuikStor User manual

Overland Storage

Overland Storage Tandberg Data RDX QuikStor User manual

Overland Storage REO 9000 User manual

Overland Storage

Overland Storage REO 9000 User manual

Overland Storage Neo Series Library User manual

Overland Storage

Overland Storage Neo Series Library User manual

Overland Storage SnapServer DX1 User manual

Overland Storage

Overland Storage SnapServer DX1 User manual

Overland Storage ARCvault Series User manual
Overland Storage

Overland Storage ARCvault Series User manual

Overland Storage SnapServer XSD 40 User manual

Overland Storage

Overland Storage SnapServer XSD 40 User manual

Overland Storage ULTAMUS Manual

Overland Storage

Overland Storage ULTAMUS Manual

Overland Storage ARCvault Series User manual

Overland Storage

Overland Storage ARCvault Series User manual

Overland Storage Neo Series 2000 User manual

Overland Storage

Overland Storage Neo Series 2000 User manual

Overland Storage NEO 2000e User manual

Overland Storage

Overland Storage NEO 2000e User manual

Overland Storage REO 4500x User manual

Overland Storage

Overland Storage REO 4500x User manual

Overland Storage LoaderXpress Guide

Overland Storage

Overland Storage LoaderXpress Guide

Overland Storage LTO-4 User manual

Overland Storage

Overland Storage LTO-4 User manual
Overland Storage NEO 8000E User manual

Overland Storage

Overland Storage NEO 8000E User manual

Popular Storage manuals by other brands

IBM N Series Hardware guide

IBM

IBM N Series Hardware guide

Seagate ST8000AS0022 product manual

Seagate

Seagate ST8000AS0022 product manual

Rackable Systems OmniStor 4000S Series user guide

Rackable Systems

Rackable Systems OmniStor 4000S Series user guide

Fujitsu Eternus DX80 S2 User's guide & installation instructions

Fujitsu

Fujitsu Eternus DX80 S2 User's guide & installation instructions

Clickfree HD225 Fact sheet

Clickfree

Clickfree HD225 Fact sheet

Compaq SW TL881 DLT Mini-Lib/1 manual

Compaq

Compaq SW TL881 DLT Mini-Lib/1 manual

ADIC VLS DLT Installation and operating guide

ADIC

ADIC VLS DLT Installation and operating guide

NETGEAR RND2210-100NAS - Readynas Duo 2TB Desktop... Hardware manual

NETGEAR

NETGEAR RND2210-100NAS - Readynas Duo 2TB Desktop... Hardware manual

Sun Microsystems Sun StorEdge 5310 Release notes

Sun Microsystems

Sun Microsystems Sun StorEdge 5310 Release notes

Seagate DB35.4 - Series 250 GB Hard Drive Product overview

Seagate

Seagate DB35.4 - Series 250 GB Hard Drive Product overview

HANTZ ANS-9012 installation guide

HANTZ

HANTZ ANS-9012 installation guide

Sans Digital TOWERRAID TR5UT+(B) Quick installation guide

Sans Digital

Sans Digital TOWERRAID TR5UT+(B) Quick installation guide

Sony MSHX16G - Memory Stick PRO-HG Duo HX 16 GB operating instructions

Sony

Sony MSHX16G - Memory Stick PRO-HG Duo HX 16 GB operating instructions

HP ET353AA Quickspecs

HP

HP ET353AA Quickspecs

Western Digital WD VelociRaptor WD1500BLFS Specification sheet

Western Digital

Western Digital WD VelociRaptor WD1500BLFS Specification sheet

Freecom SDLT-320i Specifications

Freecom

Freecom SDLT-320i Specifications

CRU Data Express DX175 user manual

CRU

CRU Data Express DX175 user manual

Tektronix 4921 instruction manual

Tektronix

Tektronix 4921 instruction manual

manuals.online logo
manuals.online logoBrands
  • About & Mission
  • Contact us
  • Privacy Policy
  • Terms and Conditions

Copyright 2025 Manuals.Online. All Rights Reserved.