manuals.online logo
Brands
  1. Home
  2. •
  3. Brands
  4. •
  5. Panasonic
  6. •
  7. Meat Grinder
  8. •
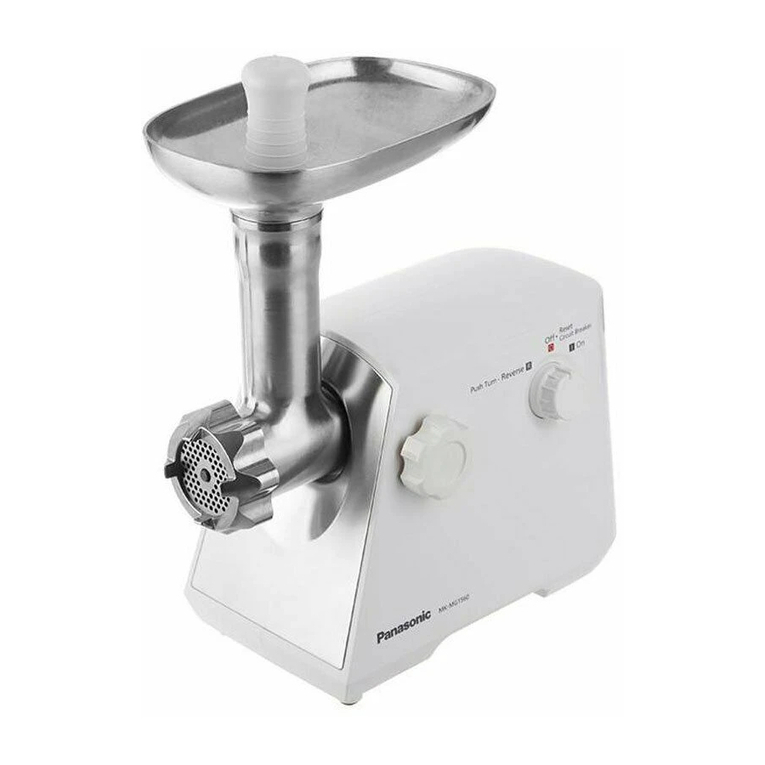
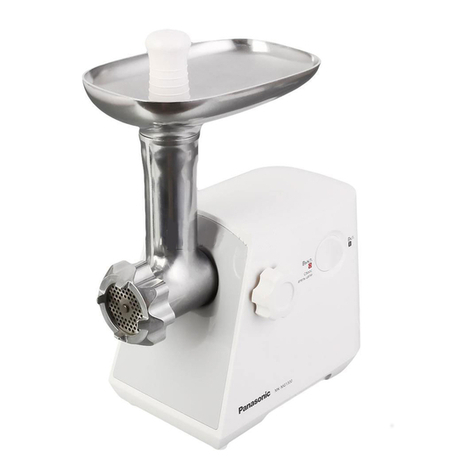
  9. Panasonic MK-ZG1500 User manual

Panasonic MK-ZG1500 User manual

Panasonic
Operating Instructions
J - i i - u u l t CjLuIj u
'be?** ♦♦
Meat Grinder (Household Use
^(_Soli. oJUIoj! £ j >
Model No. M K-ZG1 00
Thank you for purchasing the Panasonic product.
• This product is intended for household use only.
• Please read these instructions carefully to use the this product
correctly and safely.
• Before using this product please give your special attention
to "Safety Precautions" (Page 2~4 .
• Please keep this Operating Instructions for future use.
Contents
Safety Precautions
..................
2
Parts Names
.............................
How to Use
...............................
6
How to Clean.............................10
Specifications
............................
11
^ J a * ^ vi'ti ^ alp*
Ltijl 0.1--I AjaLui j •
I j Ia \ W~u.il j Lajal •
.iu ljij
\Л)1 о,г Aj Lolzk (jjl j) a^liLcl jl ^3 UU •
.(Nf-U a^LA)
' -\y-^ ^LuaIj liial •
CjL^. I
.........
\d.
........
\9
.........
.........
Y\
..............
.^Ljjxcljb ц ^ ^
Jala JLa*3ju^U flc-Uuaji •
JLajuLuI «Jifcl (_уь j-1^. j A3^j v*~ A/nU^ll оЛЬ ЗИ •
"qLaVI иЛЬЬ1ь)и oUjjI f-lbc-) L^.jj ££1а11 ^ <Jj3
JLuLLui^G (Jax-Jdll CuLtijlxjLi JalVWVl
jb jb u d l
XX
.............................
(JUVI йОзЬЬ.)
\0
................................
cl>YU’l j
ХЧ
...............................
J U ^ V I ^
V*
....
.......
V_^u£ijull 4 &
^
..........................................
CjLL-э)
All manuals and user guides at all-guides.com
all-guides.com
Safety Precautions Please make sure to follow these instructions.
In order to prevent accidents or injuries to the user, other people, and damage to property,
please follow the instructions below.
■The following charts indicate the degree of damage caused by wrong operation.
^WARNING Indicates serious
injury or death. ^CAUTION Indicates risk of injury
or property damage.
MThe symbols are classified and explained as follows.
This symbol indicates prohibition. This symbol indicates requirement that
must be followed.
Aw a r n in g
0
Do not damage the power cord or power plug
It may cause an electric shock, or fire caused
by a short circuit.
Do not use the appliance if the power cord or
power plug is damaged or the power plug
is loosely connected to the outlet.
It may cause an electric shock, or fire caused
by a short circuit.
* If the supply cord is damaged, it must be replaced by the manufacturer,
its service agent or similarly qualified person in order to avoid a hazard. may be different
from illustration.
• Do not plug or unplug the power plug with wet hands.
(It may cause an electric shock.)
• Do not exceed voltage on the outlet and do not use alternate current
other than listed on the appliance.
(It may cause an electric shock or fire.)
* Make sure the voltage supplied to the appliance is the same as your local supply.
• Plugging other devices into the same outlet may cause an electric over heating.
O0 Insert the power plug firmly.
I Otherwise it may cause an electric shock and fire caused by the heat that may be generated
\ around the power plug.
© Clean the power plug regularly.
(A soiled power plug may cause insufficient insulation due to the moisture, and may cause a fire.)
All manuals and user guides at all-guides.com
Aw a r n in g
О Do not immerse the appliance in water or splash it with water.
(It may cause an electric shock, or fire caused by a short circuit.)
• Do not disassemble, repair or modify the appliance.
(It may cause a fire, electric shock or injury.)
•►Please contact to the service center for the repair.
• Do not insert any objects in the vent or the gap.
(It may cause an electric shock or malfunction.)
• Especially metal objects such as pins or wires.
• Do not feed food with hands. Use the food pusher.
(It may cause severe injury.)
• Do not disassemble the appliance or place anything (especially finger, spoon, fork, etc.
in the appliance during operation.
(It may cause severe injury.)
• Never remove or attach the hopper plate, head or cap when the motor is operating.
(It may cause an injury.)
O® This appliance is not intended for use by persons (including children with reduced
physical, sensory or mental capabilities, or lack of experience and knowledge, unless
they have been given supervision or instruction concerning use of the appliance by a
person responsible for their safety. Children should be supervised to ensure that they
do not play with the appliance.
(it may cause a burn, injury or electric shock.)
• When abnormal or breaking down occurs, discontinue using the appliance immediately
and unplug.
(It may cause smoking, fire or electric shock.)
e.g. for abnormal or breaking down
• The power plug and the power cord become abnormally hot.
• The power cord is damaged or power failure.
• The main body is deformed or abnormally hot.
♦ Please unplug the appliance immediately and contact to the service center
for the check or the repair.
• Pay special attention to hands or fingers of children as they are so small and can be
involved into the head or holes of the cutting plate.
(It may cause severe injury.)
• Care shall be taken when handling the sharp cutting blade.
(It may cause an injury.) 3
English
All manuals and user guides at all-guides.com
Safety Precautions Please make sure to follow these Instructions.
Ac a u tio n
© Do not leave the appliance unattended when it is in use.
(It may cause a fire or burn.)
• When leaving itself, turn the power off.
© Do not use the appliance on following places.
• The place where is uneven surface, on non-heat-resistant carpet or table cloth etc.
(It may cause a fire.)
• The place where it may be splashed with water or near a heat source.
(It may cause an electric shock or leak.)
O® Make sure to hold the power plug when unplugging the power plug.
Never pull the power cord.
(Otherwise it may cause an electric shock, or fire caused by a short circuit.)
® Unplug the power plug when the appliance is not in use.
(Otherwise it may cause an electric shock, or fire caused by an electric leakage.)
• Switch off the appliance and disconnect from supply before changing
accessories or approaching parts that move in use.
(It may cause an injury.)
® When carrying the appliance, be sure to hold the motor housing with both hands;
do not hold only the hopper plate.
(It may cause an injury.)
Important Information
®Do not grind hard foods such as bones and nuts.
(They may cause jamming.)
®Do not grind ginger and other ingredients with hard fiber.
(They will not be ground.)
®To avoid jamming, do not force to operate the appliance with excessive pressure.
If the appliance jammed due to hard ingredients lodged onto the feed screw or the cutting blade,
switch off immediately and clean the appliance. When the circuit breaker activates, switch off.
(See P.7 "Caution on Jamming".)
® Do not operate more than 15 minutes at one time.
(It may cause a malfunction.)
• Make sure to clean the appliance after every use.
(It may cause a malfunction.)
®Do not fix the cutting blade and the cutting plate when using the Kubbe attachments and
sausage attachment.
4
panatex.com.ua
All manuals and user guides at all-guides.com
Parts Names
Off
оReset
Circuit Breaker
Push Turn - Reverse □ D On
M
□ Wash ail detachable parts before using the appliance
for the first time and dry well. (P.10
(a) Switch ©Head ■ —
.............................
.
....
\
©Cutting plate (coarse)
©Locking knob © Feed screw ®Kubbe attachment A
©M otor housing ©Cutting blade ©Kubbe attachment В
©Opening © -© A ttachm ents ©Sausage attachment
©Food pusher ©Cutting plate (fine) © C ap
©Hopper plate ©C utting plate (medium) У
Cutting surface
Cutting surface should be faced to Cutting plate when being set,
otheavise meat will not be ground.
English
All manuals and user guides at all-guides.com
How to Use
To Grind Meat
Unplug when assembling the unit. Before plugging in, ensure the switch is off.
(Attaching
1 Place the head onto the opening of the motor housing.
Holding the head with one hand and tighten the locking knob clockwise.
Place the feed screw into the head, long end first, by turning the feed
screw slightly until it is set into the slot of the head,
о If the feed screw is set properly, it does not turn.
Place the cutting blade onto the feed screw shaft with the blade facing
the front as illustrated.
о Cutting surface should be faced to the cutting plate when being set,
otherwise meat will not be ground.
4
Place the desired cutting plate over the cutting blade, fitting protrusion
in the slots.
• If the cutting plate is not set properly, meat may leak out around
protrusion of motor housing. When meat leak out, clean around the
protrusion of motor housing.
Wipe with a well-wrung cloth.
Protrusion
Screw the cap into the head firmly.
Place the hopper plate on the head and fix it into position.
Set the unit on a firm surface.
•The air vents at the bottom and the side of the motor housing
should be kept free and not blocked.
6
All manuals and user guides at all-guides.com
all-guides.com
(Grinding Meat
6
Cut all foods into pieces so that they fit easily into the hopper opening.
Plug in, then switch on.
Place foods on the hopper plate and feed foods into the hopper opening
®Use the food pusher.
After use, switch off and unplug.
Note:
•The grinder head may wobble slightly during use, but it is normal.
Do not over tighten the locking knob to stop this movement.
It may cause damage.
Circuit Breaker Protection
When the circuit breaker automatically stops motor due to overloading, follow the below steps.
4 Switch off to reset the circuit breaker.
2 Unplug and detach the parts by reversing steps on “To Grind Meat” from 3- to remove
ingredients in the head.
0 Attach the parts again and continue grinding meat.
Caution on Jamming
When meat does not come out from the cutting plate due to the jam of bones or other hard ingredient,
follow the below steps to release it.
4 Switch off and wait until the motor has stopped completely.
2 Hold on to the motor housing then push in and turn the switch to “Reverse" for a few seconds.
(Do not turn it more than seconds.)
Then turn the switch back to “Off”.
3 Unplug and detach the parts by reversing steps on “To Grind Meat” from 3- to remove
ingredients in the head.
Attach the parts again and continue grinding meat.
7
English
All manuals and user guides at all-guides.com
How to Use
To Use the Sausage Attachment
Meat should be ground and seasoned before making sausage links. (See P.6 “To Grind Meat”.)
Attach the coarse cutting plate to the grinder. For finer textured sausages, use the fine cutting plate.
Detach by reversing steps on “To Grind Meat” from 3- to remove the cutting plate and the cutting blade.
1
Place the Kubbe attachment В and the sausage attachment onto the
feed screw shaft together, fitting protrusions in the slots.
Screw the cap into the head firmly.
Place the hopper plate on the head and fix it into position.
Set the unit on a firm surface.
• The air vents at the bottom and the side of the motor housing
should be kept free and not blocked.
Cut casing into 60 or 90 cm lengths.
Put and gather all of casing over the sausage attachment except the
last 10-1 cm as shown in the illustration.
Plug in, then switch on.
4
• Never push the food mixture into the grinder with your fingers.
Always use the food pusher.
After use, switch off and unplug.
Place seasoned meat into the hopper plate and press it through grinder
with food pusher. Stuff casing naturally with little resistance as the
sausage comes out of the spout. If the meat is forced into the casing
too tightly, the sausage is likely to break immediately. If necessary,
prick tiny holes at the end of the casings to let air escape. To make a
link, pinch at desired length and press the sausage meat back a little.
Then twist 3-4 times. Pinch the next sausage and twist the sausage
in the opposite direction 3-4 times to secure the link.
When the casing is filled, tie securely at the end with a string.
8
All manuals and user guides at all-guides.com
To Make Kubbe
— Recipe —
(Stuffing
100 g
1 1/2 tablespoons
1 1/2 tablespoons
1/3 teaspoon
1/2 teaspoon
1 1/2 tablespoons
mutton
olive oil
onion (cut finely)
all spice
salt
flour
Grind mutton once or twice.
Fry onion until brown and add minced mutton,
all spice, salt and flour.
Grind the mixture three times.
(Outer cover
4 0 g
1 0-200g
1 teaspoon
1
a pinch
dash
lean meat
flour
all spice
nutmeg
powdered red pepper
pepper
Grind meat three times and mix all ingredients
together in a bowl.
• More meat and less flour for outer cover
creates better consistency and taste.
Detach by reversing steps on ‘To Grind Meat” from 3- to remove the cutting
cutting blade.
Place the Kubbe attachments A and В onto the feed screw shaft
together, fitting protrusions in the slots.
Screw the cap into the head firmly.
Following the same steps on “To Grind Meat” as in -6, make the
cylindrical cuter cover.
Form kubbe as illustrated below and deep fry.
C ~ 3
plate and the
9
English
All manuals and user guides at all-guides.com
How to Clean
Before detaching parts, make sure that the motor has stopped completely, then disconnect the plug
from the outlet.
И В Ш
• Do not use benzine, thinner, alcohol, bleach, polishing powder or metal brush otherwise the surface
will be damaged.
• Do not use a dishwasher.
(Detaching
Detach by reversing steps from 1 - of P.6 (Attaching).
■ When it is hard to remove the cap, place a screwdriver between
the protrusions and unscrew.
I When it is hard to remove the cutting plate, place a screwdriver between
the cutting plate and the head as illustrated and lift up.
Cleaning
Remove meat and other foods.
Cap / Head
Wash with diluted dish soap (neutral
and a soft sponge, and dry well.
о Leaving the parts wet after cleaning
may cause corrosion.
Motor housing
Wipe with a well-wrung cloth.
3 5 s 4 - Feed screw / Cutting blade
Cutting plates
Hopper plate
Wash with diluted dish soap (neutral and a soft sponge,
and dry well.
• Leaving the parts wet after cleaning may cause corrosion.
<For the feed screw, cutting blade and cutting plates>
Rubbing a little salad oil after washing and drying will help
prevent them from rusting and keep them lubricated.
Food pusher
Kubbe attachment A
Kubbe attachment В
Sausage attachment
Wash with diluted dish soap (neutral and a soft sponge,
and dry well.
10
All manuals and user guides at all-guides.com
Specifications
-
----------
_MK-ZG1 00
Power supply 220 — 240 V ^ 0 — 60 Hz
Power consumption 240 - 260 W
Dimensions (HXWXD) (approx.) 39.1 X 16.4 X 32.7 cm
Weight (approx.) 3.8 kg
Attachments Cutting plates, Kubbe attachments, Sausage attachment
Note
You can identify the date of manufacturing by production number which is marked on back side of the unit.
Production number X XX xxx
— Second and third digits : month (in number) 01--January, 02--February, ...12--December
'
-----------
First digit: year (last digit of the year in number) 1-2011,2-2012,3-2013
This operating instructions shall be kept as they contain important information.
In case of failure or damage
Do not operate any appliance with a damaged cord or plug or after the appliance malfunctions, or is dropped or
damaged in any manner. Return appliance to the nearest authorized service facility for examination, repair or
electrical or mechanical adjustment.
11
English

panatex.com.ua
All manuals and user guides at all-guides.com
all-guides.com
All manuals and user guides at all-guides.com

Other manuals for MK-ZG1500

1

Other Panasonic Meat Grinder manuals

Panasonic MK-ZJ3500KTN User manual

Panasonic

Panasonic MK-ZJ3500KTN User manual

Panasonic MK-G1350PWTX User manual

Panasonic

Panasonic MK-G1350PWTX User manual

Panasonic MK-MG1560WTN User manual

Panasonic

Panasonic MK-MG1560WTN User manual

Panasonic MK-G1550PWTX User manual

Panasonic

Panasonic MK-G1550PWTX User manual

Panasonic MK-GM1700 User manual

Panasonic

Panasonic MK-GM1700 User manual

Panasonic MK-G38PR User manual

Panasonic

Panasonic MK-G38PR User manual

Panasonic MK-G1300P User manual

Panasonic

Panasonic MK-G1300P User manual

Panasonic MK-GJ1700 User manual

Panasonic

Panasonic MK-GJ1700 User manual

Panasonic MK-ZJ3500 User manual

Panasonic

Panasonic MK-ZJ3500 User manual

Panasonic MK-MG1360WTN User manual

Panasonic

Panasonic MK-MG1360WTN User manual

Panasonic MK-G1300P User manual

Panasonic

Panasonic MK-G1300P User manual

Panasonic MK-MG1300WTN User manual

Panasonic

Panasonic MK-MG1300WTN User manual

Panasonic MK-G1300P User manual

Panasonic

Panasonic MK-G1300P User manual

Panasonic MK-G1800PWTQ User manual

Panasonic

Panasonic MK-G1800PWTQ User manual

Panasonic MK-ZG1500BTN User manual

Panasonic

Panasonic MK-ZG1500BTN User manual

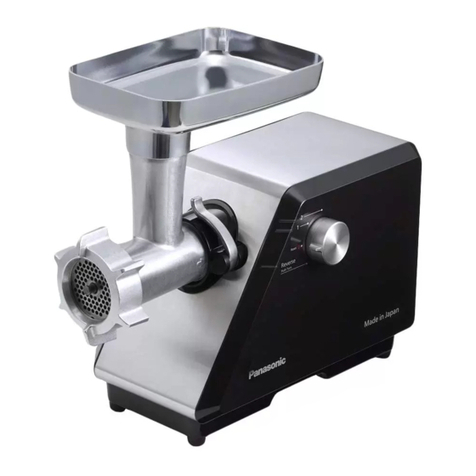
Panasonic MK-ZG1500 User manual

Panasonic

Panasonic MK-ZG1500 User manual

Panasonic MK-MG1000WTN User manual

Panasonic

Panasonic MK-MG1000WTN User manual

Popular Meat Grinder manuals by other brands

Axis AX-MG12 user manual

Axis

Axis AX-MG12 user manual

BIRO 722 Operations manual & parts list

BIRO

BIRO 722 Operations manual & parts list

Gorenje MG2500TJW instruction manual

Gorenje

Gorenje MG2500TJW instruction manual

Bifinett KH 3462 operating instructions

Bifinett

Bifinett KH 3462 operating instructions

Buffalo Tools IW12BX Assembly & operating instructions

Buffalo Tools

Buffalo Tools IW12BX Assembly & operating instructions

Philips HR2726 user manual

Philips

Philips HR2726 user manual

ARDESTO MGL-1730R instruction manual

ARDESTO

ARDESTO MGL-1730R instruction manual

Vitek VT-3611 W Manual instruction

Vitek

Vitek VT-3611 W Manual instruction

Binatone MGR?3040 instruction manual

Binatone

Binatone MGR?3040 instruction manual

REBER 8710 N User reference

REBER

REBER 8710 N User reference

Buffalo Tools MEGPRO Assembly & operating instructions

Buffalo Tools

Buffalo Tools MEGPRO Assembly & operating instructions

Scarlett SC-4249 instruction manual

Scarlett

Scarlett SC-4249 instruction manual

Philips HR2730 user manual

Philips

Philips HR2730 user manual

Moulinex hv4 user manual

Moulinex

Moulinex hv4 user manual

Kenwood AX950 user manual

Kenwood

Kenwood AX950 user manual

Maverick MM-6386 owner's manual

Maverick

Maverick MM-6386 owner's manual

Harbor Freight Tools 46749 Assembly and operating instructions

Harbor Freight Tools

Harbor Freight Tools 46749 Assembly and operating instructions

Omcan MG-CN-0012-E instruction manual

Omcan

Omcan MG-CN-0012-E instruction manual

manuals.online logo
manuals.online logoBrands
  • About & Mission
  • Contact us
  • Privacy Policy
  • Terms and Conditions

Copyright 2025 Manuals.Online. All Rights Reserved.