manuals.online logo
Brands
  1. Home
  2. •
  3. Brands
  4. •
  5. Panlux
  6. •
  7. Accessories
  8. •
  9. Panlux SL-T/M User manual

Panlux SL-T/M User manual

BOX_SL-T_Z_M_131118Technical data can be changed without previous noticement.All rights reserved.
Technické údaje se mohou změnit bez předchozího upozornění.Všechna práva vyhrazena.
Instalace | Installation
PŘI MECHANICKÉM POŠKOZENÍ NEBO NEODBORNÉ MANIPULACI
NEMŮŽE BÝT UZNÁNA ZÁRUKA.
CZE
TLAČÍTKO (IP44)
1) Tlačítko
2) Pomocí šroubováku otevřete kryt tlačítka
3) Pro upevnění základny použijte přibalené šroubky či samolepící
pásku
4) Nastavení melodií (8 melodií)
5) Nastavení kódování (64 kódů)
6) Vložte baterii A23 12V podle vyznačených pólu (AlMn baterie
součástí balení)
7) Nasaďte kryt tlačítka
NASTAVENÍ KÓDOVÁNÍ
Pro správné fungování soustavy musí být zvolený kód nastavený
na tlačítku i na reproduktoru.
PRI MECHANICKOM POŠKODENÍ ALEBO NEODBORNEJ
MANIPULÁCII NEMÔŽE BYŤ UZNANÁ ZÁRUKA.
SVK
TLAČIDLO (IP44)
1) Tlačidlo
2) Pomocou skrutkovača otvorte kryt tlačidla
3) Pre upevnenie základni použite pribalené skrutky alebo
samolepiacu pásku
4) Nastavenie melódií (8 melódií)
5) Nastavenie kódovania (64 kódov)
6) Vložte batériu A23 12V podľa vyznačených pólov (AlMn
batéria súčasťou balenia)
7) Nasaďte kryt tlačidla
NASTAVENIA KÓDOVANIA
Pro správné fungování soustavy musí být zvolený kód
nastavený na tlačítku i na reproduktoru.
IF THE PRODUCT IS MECHANICALLY DAMAGED OR
CONNECTED UNPROFESSIONALLY, GUARANTEE CANNOT
BE ALLOWED.
ENG
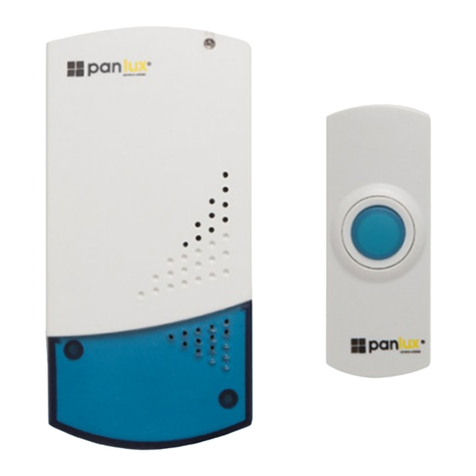
TRANSMITTER (IP44)
1) Push button
2) Use at screwdriver to remove transmitter cover
3) To x the base plate use two screws or self-adhesive sellotape.
4) Sound selection switches (8 melodies)
5) Code setting (64 codes)
6) Put battery A23 12V in correct polarity (AlMn battery included)
7) Put transmitter cover on.
CODE SETTING
Chosen code has to be set on the transmitter and receiver for right
function of the product.
BEI EINER MECHANISCHEN BESCHÄDIGUNG ODER
LAIENHAFTEN MANIPULATION KANN MAN KEINE GARANTIE
ERKENNEN.
GER
SENDER (IP44)
1) Klingertaster
2) Önen Sie das Gehäuse mit einem kleinen schmalen
Schraubendreher
3) Befestigen Sie das Gehäuse mit 2 Schrauben oder
dopellseitigem Klebeband
4) Auswahl der Töne (8 Klingeltöne)
5) Kode-Einstellung (64 Kode)
6) Legen Sie polungsrichtig A23 12V Batterie ein (AlMn Batterie
im Lieferumfang enthalten)
7) Schließen Sie das Gehäuse
KODE-EINSTELLUNG
Sie müssen den gewählten Kode sowohl am Sender als auch am
Empfänger für einen richtigen Betrieb einstellen. SI EL PRODUCTO ESTA AVERIADO MECHANICAMENTE
O CONECTADO MALAMENTE, LA GARANTÍA NO ESTARÁ
ACEPTADA.
ESP
EL PULSADOR (IP44)
1) El pulsador
2) Quite los tornillos con el destornillador
3) Use tornillos incluidos o la cinta adherente y sujete la base
4) Selección de melodía (8 melodias)
5) Ajustado de códigos (64 códigos)
6) Inserte la batería A23 12V según las marcas (AlMn baterías estan
incluidas)
7) Pone la cubierta del pulsador
AJUSTADO DE CÓDIGOS
Para el funcionamiento adecuado del sistema se debe establecer
el código seleccionado y un botón en el reproductor.
34
6
5
1
2
7
SL-T/M
IP44
Technical data can be changed without previous noticement.All rights reserved.
Technické údaje se mohou změnit bez předchozího upozornění.Všechna práva vyhrazena.
SL-T/M
Při mechanickém poškození nebo neodborné manipulaci nemůže být uznána záruka.
Pri mechanickom poškodení alebo pri neodbornej manipulácii nemôže byť uznaná záruka.
PŘED POUŽITÍM VÝROBKU SI PROSÍM PŘEČTĚTE NÁVOD A POSTUPUJTE PODLE
BEZPEČNOSTNÍCH
PRED POUŽITÍM VÝROBKU SI PROSÍM PREČÍTAJTE NÁVOD A POSTUPUJTE PODĽA
BEZPEČNOSTNÝCH INŠTRUKCIÍ.
Děkujeme, že jste si vybrali výrobek rmy PANLUX s.r.o.
Upozornění
Před použitím výrobek zkontrolujte, je-li jakákoliv část poškozena, nepoužívejte
jej. Před každou manipulací se ujistěte, že je elektrický přívod odpojený.
V případě poruchy zařízení neopravujte ani nerozebírejte.
Nedodržení jakékoliv instrukce uvedené v návodu může způsobit újmu na zdraví i majetku.
Upozornenie
Pred použitím výrobok skontrolujte, ak je ktorákoľvek časť poškodená, nepoužívajte ho.
Pred každou manipuláciou sa uistite, že je elektrický prívod odpojený. V prípade poruchy
zariadenie neopravujte ani nerozoberajte.
Nedodržanie akejkoľvek inštrukcie uvedenej v návode môže spôsobiť ujmu na zdraví a
majetku.
NÁVOD NA POUŽITÍCZE |
NÁVOD NA POUŽITIESVK |
If the product is mechanically damaged or connected unprofessionally, guarantee
cannot be allowed.
BEFORE USING OR INSTALLING THE DOORBELL, KINDLY READ THE INSTRUCTIONS AND
FOLLOW SAFETY RULES.
Thank you for choosing the item of company PANLUX s.r.o.
Notice
Before using, check the product and make sure there is no damage, otherwise do not use
it. Before any manipulation assure that mains electrical supply is disconnected. In case of
damage do not repair or disassemble the product.
Infringement of any instruction mentioned in instruction manual can cause harm to
health or property.
INSTRUCTIONSENG |
Ďakujeme, že ste si vybrali výrobok rmy PANLUX SK s.r.o.
Bei einer mechanischen Beschädigung oder einer unsachgemäßen Handhabung
kann keine Gewährleistung anerkannt werden.
Si el producto esta averiado mechanicamente o conectado malamente, la garantía
no estará aceptada.
VOR EINER BENUTZUNG DES ARTIKELS, BITTE LESEN SIE DIE GEBRAUCHSANWEISUNG
UND BERÜCKSICHTIGEN SIE SICHERHEITSWEISUNGEN.
Wir bedanken uns, dass Sie sich ein Produkt der Firma PANLUX s.r.o. ausgesucht
haben.
ANTES DE UTILIZACIÓN LEA LAS INSTRUCCIONESY SIGUE DE MEDIDAS DE PRECAUTIÓN.
Gracias, que Usted se ha comprado el producto de companía PANLUX s.r.o.
Hinweise
Vor der Benutzung das Produkt sowie Zubehör überprüfen. Wenn einer der Teile
beschädigt ist, darf das Produkt nicht verwendet werden. Vergewissern Sie sich vor jeder
Handhabung, dass die Stromzufuhr abgeschaltet ist. Bei einem Defekt ist das Produkt
weder zu reparieren noch auseinander zu nehmen.
Die Nichteinhaltung einer der in der Gebrauchsanweisung angeführten Einweisungen
kann eine Gesundheits- und Vermögensbeeinträchtigung verursachen.
GEBRAUCHSANWEISUNGGER |
INSTRUCCIONESESP |
Aviso
Antes de la montaje se asegure, que la lámpara no esta averida. En el caso de avería,
no la use, repare ni desmonte. Antes de cualquier manipulación disconecte el corriente
eléctrico.
Falta de cualquier instruccion puede causar quebranto de la salud o propriedad.
INSTALACE
Umístění tlačítka zvonku:
Tlačítko by mělo být umístěné na viditelném místě chráněné před deštěm a nadměrným
teplem. Tlačítko je možné připevnit pomocí přiložených šroubků nebo samolepící pásky.
Umístění reproduktoru:
Zvolte si vhodnou zásuvku pro instalaci reproduktoru. Každá překážka mezi
reproduktorem a tlačítkem zhoršuje dosah zvonku.Zvolte si vhodnou zásuvku pro instalaci
reproduktoru. Každá překážka mezi reproduktorem a tlačítkem zhoršuje dosah zvonku.
INŠTALÁCIA
Umiestnenie tlačidla zvončeka:
Tlačidlo by malo byť umiestnené na viditeľnom mieste chránené pred dažďom a nadmer-
ným teplom. Tlačidlo je možné pripevniť pomocou priložených skrutiek alebo samole-
piacej pásky.
Umiestnenie reproduktora:
Zvoľte si vhodnú zásuvku pre inštaláciu Reproduktora. Každá prekážka medzi reproduk-
torom a tlačidlom zhoršuje dosah zvončeka.
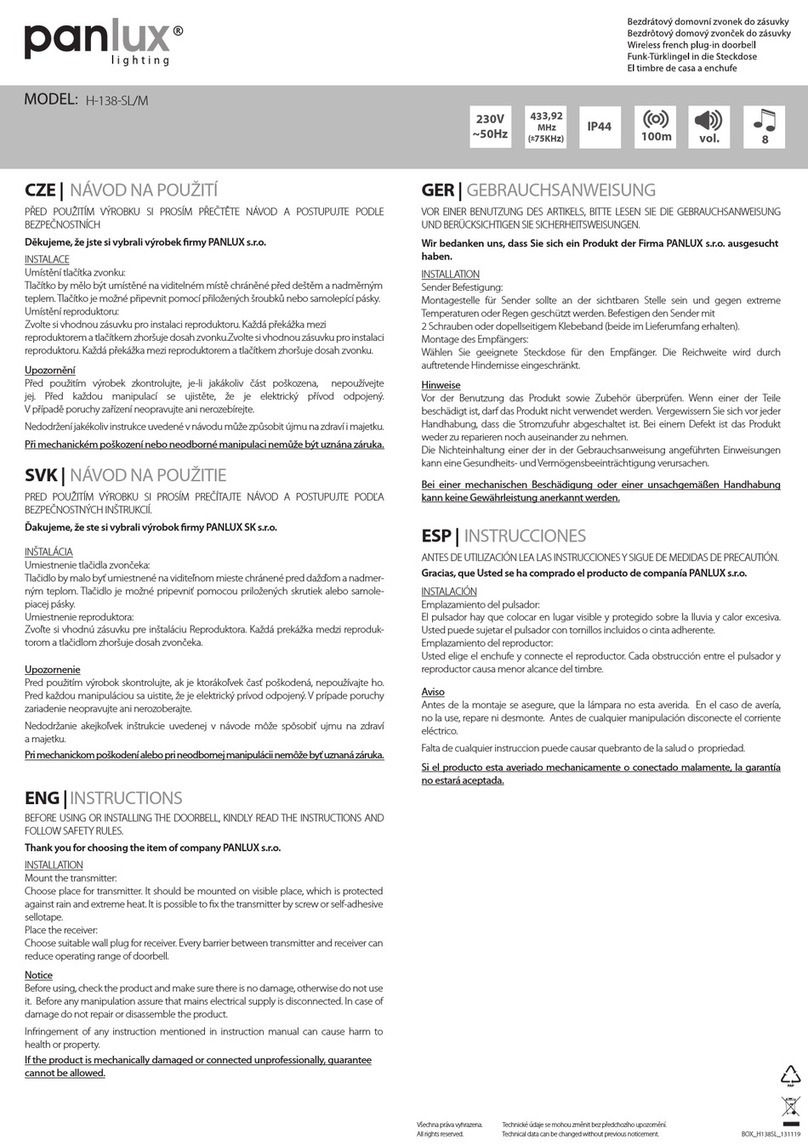
INSTALLATION
Mount the transmitter:
Choose place for transmitter. It should be mounted on visible place, which is protected
against rain and extreme heat. It is possible to x the transmitter by screw or self-adhesive
sellotape.
Place the receiver:
Choose suitable wall plug for receiver. Every barrier between transmitter and receiver can
reduce operating range of doorbell.
INSTALLATION
Sender Befestigung:
Montagestelle für Sender sollte an der sichtbaren Stelle sein und gegen extreme
Temperaturen oder Regen geschützt werden. Befestigen den Sender mit
2 Schrauben oder dopellseitigem Klebeband (beide im Lieferumfang erhalten).
Montage des Empfängers:
Wählen Sie geeignete Steckdose für den Empfänger. Die Reichweite wird durch
auftretende Hindernisse eingeschränkt.
INSTALACIÓN
Emplazamiento del pulsador:
El pulsador hay que colocar en lugar visible y protegido sobre la lluvia y calor excesiva.
Usted puede sujetar el pulsador con tornillos incluidos o cinta adherente.
Emplazamiento del reproductor:
Usted elige el enchufe y connecte el reproductor. Cada obstrucción entre el pulsador y
reproductor causa menor alcance del timbre.
IP44
BOX_SL-T_Z_M_131118

Other Panlux Accessories manuals

Panlux H-148/M User manual

Panlux

Panlux H-148/M User manual

Panlux SL2700 User manual

Panlux

Panlux SL2700 User manual

Panlux BH-348/M User manual

Panlux

Panlux BH-348/M User manual

Panlux SL2502 Series User manual

Panlux

Panlux SL2502 Series User manual

Panlux SL2400 Series User manual

Panlux

Panlux SL2400 Series User manual

Panlux SL2503/B User manual

Panlux

Panlux SL2503/B User manual

Panlux H-228/M User manual

Panlux

Panlux H-228/M User manual

Panlux SL2150 Series User manual

Panlux

Panlux SL2150 Series User manual

Panlux SENZOR SL2300 User manual

Panlux

Panlux SENZOR SL2300 User manual

Panlux SL8001 Series User manual

Panlux

Panlux SL8001 Series User manual

Panlux PN71000019 User manual

Panlux

Panlux PN71000019 User manual

Panlux H-138-SL/M User manual

Panlux

Panlux H-138-SL/M User manual

Panlux H-138/M User manual

Panlux

Panlux H-138/M User manual

Panlux SL2500/B User manual

Panlux

Panlux SL2500/B User manual

Panlux PN71000020 User manual

Panlux

Panlux PN71000020 User manual

Panlux SL2504/B User manual

Panlux

Panlux SL2504/B User manual

Panlux H-108/M User manual

Panlux

Panlux H-108/M User manual

Popular Accessories manuals by other brands

Panasonic WJ-PB85R08 instructions

Panasonic

Panasonic WJ-PB85R08 instructions

Creative Play t121 Installation instructions and specification

Creative Play

Creative Play t121 Installation instructions and specification

Leuze electronic PRK 55 Ex manual

Leuze electronic

Leuze electronic PRK 55 Ex manual

CircuitWerkes MicTel Operating and technical manual

CircuitWerkes

CircuitWerkes MicTel Operating and technical manual

ICS Schneider Messtechnik PT130 operating manual

ICS Schneider Messtechnik

ICS Schneider Messtechnik PT130 operating manual

Homelite 16001A instruction sheet

Homelite

Homelite 16001A instruction sheet

Nailor UNI2-VAV Assembly

Nailor

Nailor UNI2-VAV Assembly

Automation Technology MCS 1280 Series user manual

Automation Technology

Automation Technology MCS 1280 Series user manual

DH Instruments RPM T-BOX instruction sheet

DH Instruments

DH Instruments RPM T-BOX instruction sheet

Balboa 59060 Installation Instructions and Maintenance Manual

Balboa

Balboa 59060 Installation Instructions and Maintenance Manual

SICK Inspector I10 quick start guide

SICK

SICK Inspector I10 quick start guide

nvent TE162024050 instruction manual

nvent

nvent TE162024050 instruction manual

Emos P5508N quick start guide

Emos

Emos P5508N quick start guide

MICRO-EPSILON wireSENSOR WPS-MK46 Assembly instructions

MICRO-EPSILON

MICRO-EPSILON wireSENSOR WPS-MK46 Assembly instructions

Trilux LMS DIM PICO 1 Mounting and operating instructions

Trilux

Trilux LMS DIM PICO 1 Mounting and operating instructions

Wenglor P1HJ1 Series operating instructions

Wenglor

Wenglor P1HJ1 Series operating instructions

Scott MOTORSPORTS GOGGLE user manual

Scott

Scott MOTORSPORTS GOGGLE user manual

BEA Smart Focus manual

BEA

BEA Smart Focus manual

manuals.online logo
manuals.online logoBrands
  • About & Mission
  • Contact us
  • Privacy Policy
  • Terms and Conditions

Copyright 2025 Manuals.Online. All Rights Reserved.