manuals.online logo
Brands
  1. Home
  2. •
  3. Brands
  4. •
  5. Phonocar
  6. •
  7. Car Video System
  8. •
  9. Phonocar VM086 User manual

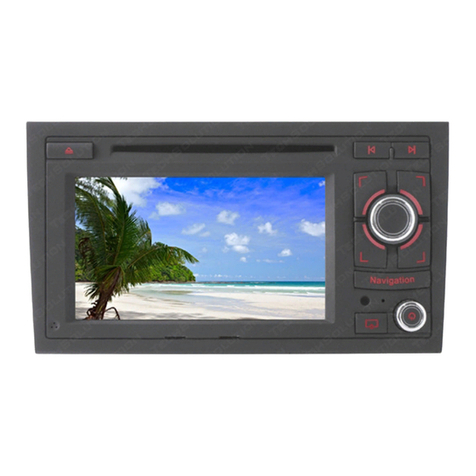
Phonocar VM086 User manual

MANUALE ISTRUZIONI • INSTRUCTIONS MANUAL • NOTICE DE MONTAGE ET D’EMPLOI
GEBRAUCHSANWEISUNGEN • MANUAL DE INSTRUCCIONES
CONNESSIONI • CONNECTIONS
CONNEXIONS • KABEL-VERBINDUNGEN
CONEXIONES
FORD
C-MAX >’07 • S-MAX - FOCUS ‘05>’11 • FUSION ‘06>
FIESTA ‘06>’08 • GALAXY ‘07> - MONDEO ‘08> • KUGA >’12
FUNZIONI • FUNCTIONS • FONCTIONS • FUNKTIONEN • FUNCIONES
Via F.lli Cervi, 167/C • 42124 Reggio Emilia (Italy) • Tel. ++39 0522 941621 www.phonocar.com • e-mail:info@phonocar.it
1
2
3
4
5
6
8
9
10
12131416 15
11
7
1. Torna al menù principale
2.Radio
3. On - Off - Volume
4. Bluetooth
5. Illuminazione
6. Porta USB per aggiornamenti
7. Navigazione
8. ON-OFF audio navigazione
9. Stazione/Traccia
successiva-precedente/Seek+/Seek-
10. DVD
11. Espulsione disco
12. Reset
13. Slot SD Card media
14. Feritoia inserimento disco
15. Slot SD Card navigazione
16. Microfono
1. Vuelve al menú principal
2.Radio
3. Volumen / ON-OFF
4. Bluetooth
5. Brillo
6. Puerto USB para actualizaciones
7. Navegación
8. ON-OFF audio de navegación
9. Emisora/Canción
siguiente-precedente / Seek+/Seek-
10. DVD
11. Expulsión disco
12. Reset
13. Ranura SD Card media
14. Ranura introducción disco
15. Ranura SD Card navegación
16. Micrófono
1. Zurück zum Hauptmenü
2.Radio
3. On - Off - Volume
4. Bluetooth
5. Helligkeit
6. USB-Anschluss für Updates
7. Navigations
8. ON-OFF Audionavigationssystem
9. Sender/Stück
danach-davor / Seek+ / Seek-
10. DVD
11. CD-Auswurf
12. Reset
13. SD-Öffnung media
14. CD-Öffnung
15. Navigations-SD-Öffnung
16. Mikrofon
1. Back to Main Menu
2.Radio
3. On - Off / Volume
4. Bluetooth
5. Brightness
6. USB input for update
7. Navigation
8. ON-OFF navigation audio
9. Station/Track after-before
Seek+/Seek-
10. DVD
11. Expell-CD
12. Reset
13. SD Card slot media
14. CD-opening
15. SD Card slot navigation
16. Microphone
1. Retourne au menu principal
2.Radio
3. On - Off / Volume
4. Bluetooth
5. Luminosité
6. Port USB pour mises à jour
7. Navigation
8. ON-OFF audio navigation
9. Station/trace suivante-précédente
Seek+/Seek-
10. DVD
11. Ejection disque
12. Reset
13. Slot SD Card media
14. Fente insertion disque
15. Slot SD Card navigation
16. Microphone
VM086-VM087
1CANALE DESTRO / RIGHT CHANNEL 1
CANALE SINISTRO / LEFT CHANNEL 1
USCITA VIDEO 1 / VIDEO OUTPUT 1
USCITA VIDEO 2 / VIDEO OUTPUT 2
USCITA SUB WOOFER / SUB-WOOFER OUTPUT
ANTERIORE DESTRO / FRONT RIGHT
ANTERIORE SINISTRA / FRONT LEFT
POSTERIORE DESTRO / REAR RIGHT
POSTERIORE SINISTRA / REAR LEFT
INGRESSO A/V 1
INPUT A/V 1
AUX IN R 1
AUX IN L 1
AUX VIDEO 1
CAM IN
AUX VIDEO 1
AUX VIDEO 2
SUB WOOFER
FRONT R
FRONT L
REAR R
REAR L
ROSSO / RED
BIANCO / WHITE
GIALLO / YELLOW
GIALLO / YELLOW
GIALLO / YELLOW
GIALLO / YELLOW
VERDE / GREEN
ROSSO / RED
BIANCO / WHITE
ROSSO / RED
BIANCO / WHITE
FUSE
BIANCO / WHITE
ANTENNA / AERIAL
FM/AM
MARRONE / BROWN
NON ATTIVO
NOT AVAILABLE
COMANDI AL VOLANTE / STEERING WHEEL COMMANDS
ODOMETRO / ODOMETER
RETROCAMERA / REAR CAMERA
USCITE SERVIZI / SERVICES OUTPUT
AL CONNETTORE ORIGINALE
ORIGINAL CONNECTOR
FRENO A MANO / HAND-BRAKE
GRIGIO / GREY
AZZURRO / BLUE
GIALLO / YELLOW
iPOD
USB
CAN BUS
INTERFACE
1
GPS
ANTENNA
ICOMANDI AL VOLANTE: ATTENZIONE l’interfaccia è già programmata e non necessita di alcuna ulteriore programmazione. Nel caso in cui durante la fase di
installazione si verificassero inconvenienti tali da far perdere la programmazione, procedere al RESET nel modo seguente:
• Con l’interfaccia accesa premere il tasto PRG fino a quando il led verde si spegne.
• Scollegare il lo MARRONE della centralina • Ruotare la chiave di accensione. Il led effettuerà un lampeggio di colore rosso.
• Premere il comando VOL- sul volante. Il led effettuerà un lampeggio di colore rosso a conferma della memorizzazione e proseguire con la stessa procedura per
i rimanenti (VOL+, SEEK-,SEEK+,SRC). • Premere 5 volte il tasto PRG per confermare l’avvenuta memorizzazione ed il led si illuminerà di verde.
GB STEERING-WHEEL COMANDS: please NOTE that the Interface has already been programmed and does NOT need further programming. In case of problems
during installation, causing the loss of such programming, please effect a RESET as follows:
• With switched-on Interface, press PRG-key, until the Green Led goes off.
• Disconnect the BROWN cable from the central-unit. • Turn the ignition-key. Led ashes Red.
• Press VOL- on the steering-wheel. The Led with ash Red, meaning that memorization has been carried out. Now repeat the procedure for all remaining commands
(VOL+, SEEK-, SEEK+, SRC). • Press 5 times the PRG-key, to conrm memorization. The Led will light Green.
FR
COMMANDES AU VOLANT: ATTENTION l’interface est déjà programmée et ne nécessite pas d’ultérieurs programmation. si pendant l’installation vous avez des
soucis provoquant la perte de la programmation, faire le RESET en suivant la procédure suivante:
• Avec l’interface allumée appuyer la touche PRG jusqu’à l’extinction du led vert.
• Débrancher le fil Marron de la centrale • tourner la clé de démarrage. le led effectuera un clignotement rouge.
• Appuyer la commande VOL- sur le volant. Le led effectuera un clignotement rouge pour confirmer la mémorisation et continuer avec la même procédure pour les re-
stants (VOL+, SEEK-,SEEK+,SRC). • Appuyer 5 fois la touche PRG pour confirmer la réussite de la mémorisation et le led s’illuminera vert.
DLENKRAD-STEUERUNGEN: bitte BEACHTEN, dass die Interface bereits programmiert ist und keine weitere Programmierung benötigt. Sollten, während der
Installation, Probleme entstehen, wodurch die Programmierung womöglich verschwindet, bitte ein RESET wie folgt vornehmen:
• Bei eingeschalteter Interface, PRG-Taste drücken, bis das grüne Led erlischt.
• BRAUNES Kabel von der Zentral-Einheit trennen. • Wagen-Zündschlüssel drehen. Led blinkt Rot.
• VOL- auf dem Lenkrad drücken. Led blinkt Rot und zeigt dadurch an, dass die Einspeicherung erfolgt ist. Diese Prozedur bei allen übrigen Funktionen wiederholen
(VOL+, SEEK-, SEEK+, SRC). • PRG-Taste 5 mal drücken, um die Einspeicherung zu bestätigen. Das grüne Led leuchtet auf.
EMANDOS DE VOLANTE: ATENCIÓN El interfaz ya está programado y no necesita ningúna otra programación.
En el caso de que en la fase de instalación se verique mal funcionamiento hasta el punto de perder la programación, efectuar el RESET en el modo siguiente :
• Con el interfaz encendido presionar la tecla PRG hasta cuando el Led verde se apague.
• Desconectar el cable MARRON de la centralita • Girar la llave de encendido. El Led efectuará un destello de color rojo.
• Presionar el mando VOL- en el volante. El Led efectuará un destello de color rojo para conrmar la memorización, con el mismo procedimiento memorizar los
demás mandos del volante (VOL+, SEEK-, SEEK+, SRC) • Presionar 5 veces la tecla PRG para conrmar la memorización, el Led se iluminará de color verde.
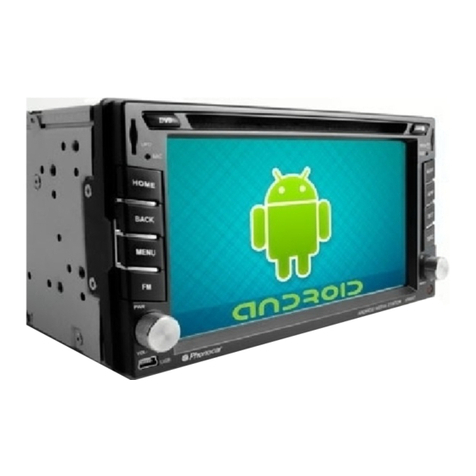
This manual suits for next models

1

Other Phonocar Car Video System manuals

Phonocar VM045 User manual

Phonocar

Phonocar VM045 User manual

Phonocar 05962 User manual

Phonocar

Phonocar 05962 User manual

Phonocar VM012 User manual

Phonocar

Phonocar VM012 User manual

Phonocar VM192 User manual

Phonocar

Phonocar VM192 User manual

Phonocar VM153 User manual

Phonocar

Phonocar VM153 User manual

Phonocar VM 156 User manual

Phonocar

Phonocar VM 156 User manual

Phonocar VM 095 User manual

Phonocar

Phonocar VM 095 User manual

Phonocar VM 155 User manual

Phonocar

Phonocar VM 155 User manual

Phonocar VM 156 User manual

Phonocar

Phonocar VM 156 User manual

Phonocar VM 076 User manual

Phonocar

Phonocar VM 076 User manual

Phonocar VM002 User manual

Phonocar

Phonocar VM002 User manual

Phonocar VM009 User manual

Phonocar

Phonocar VM009 User manual

Phonocar Mirror Link VM 249 User manual

Phonocar

Phonocar Mirror Link VM 249 User manual

Phonocar VM109 User manual

Phonocar

Phonocar VM109 User manual

Phonocar VM 007 User manual

Phonocar

Phonocar VM 007 User manual

Phonocar VM150 User manual

Phonocar

Phonocar VM150 User manual

Phonocar 1/401 User manual

Phonocar

Phonocar 1/401 User manual

Phonocar VM172 Installation guide

Phonocar

Phonocar VM172 Installation guide

Phonocar VM081 User manual

Phonocar

Phonocar VM081 User manual

Phonocar VM090 User manual

Phonocar

Phonocar VM090 User manual

Popular Car Video System manuals by other brands

Chevrolet 2015 City Express owner's manual

Chevrolet

Chevrolet 2015 City Express owner's manual

Advent ADVUNI300 installation guide

Advent

Advent ADVUNI300 installation guide

Nextar MD1008 Manuel d'utilisation

Nextar

Nextar MD1008 Manuel d'utilisation

Kia ADC10J5GG user manual

Kia

Kia ADC10J5GG user manual

Pyle PYLE View Series PLVRL6400 owner's manual

Pyle

Pyle PYLE View Series PLVRL6400 owner's manual

Pioneer CA-HM-UNI-EVO.005 installation manual

Pioneer

Pioneer CA-HM-UNI-EVO.005 installation manual

Eclipse AVN5510 installation manual

Eclipse

Eclipse AVN5510 installation manual

Rockville RVDG7M user manual

Rockville

Rockville RVDG7M user manual

Boss Audio Systems BV11.2 user manual

Boss Audio Systems

Boss Audio Systems BV11.2 user manual

Roadmaster B-783 TC user manual

Roadmaster

Roadmaster B-783 TC user manual

Kia 2013 Rio user manual

Kia

Kia 2013 Rio user manual

Pioneer AVIC-Z1000D11-CHU installation guide

Pioneer

Pioneer AVIC-Z1000D11-CHU installation guide

Philips PAC102 user guide

Philips

Philips PAC102 user guide

Parrot ASTEROID RWi9600 quick start guide

Parrot

Parrot ASTEROID RWi9600 quick start guide

Car-Interface CI-VL2-MTC manual

Car-Interface

Car-Interface CI-VL2-MTC manual

Jensen VM9424 operating instructions

Jensen

Jensen VM9424 operating instructions

r.LiNK RL4-NAC manual

r.LiNK

r.LiNK RL4-NAC manual

LG LAD9700R manual

LG

LG LAD9700R manual

manuals.online logo
manuals.online logoBrands
  • About & Mission
  • Contact us
  • Privacy Policy
  • Terms and Conditions

Copyright 2025 Manuals.Online. All Rights Reserved.