manuals.online logo
Brands
  1. Home
  2. •
  3. Brands
  4. •
  5. PIKO
  6. •
  7. Toy
  8. •
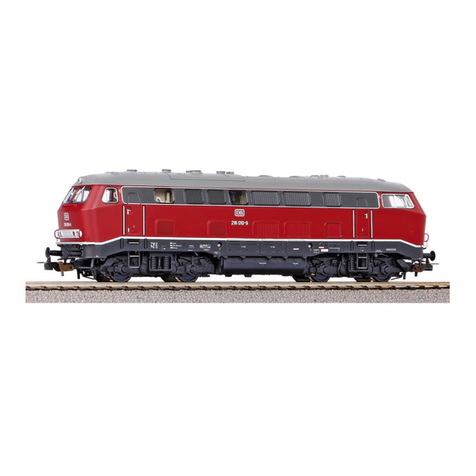
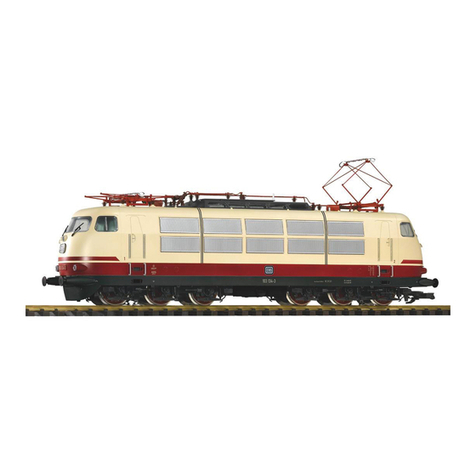
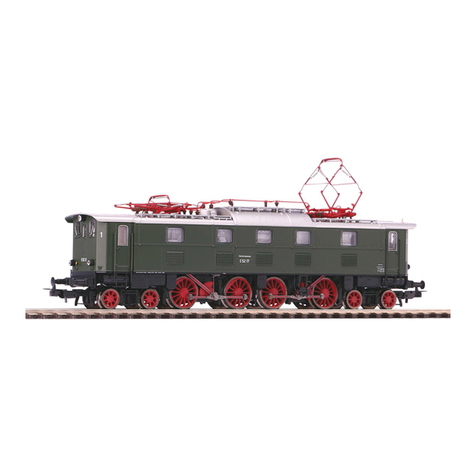
  9. PIKO BR E52 User manual

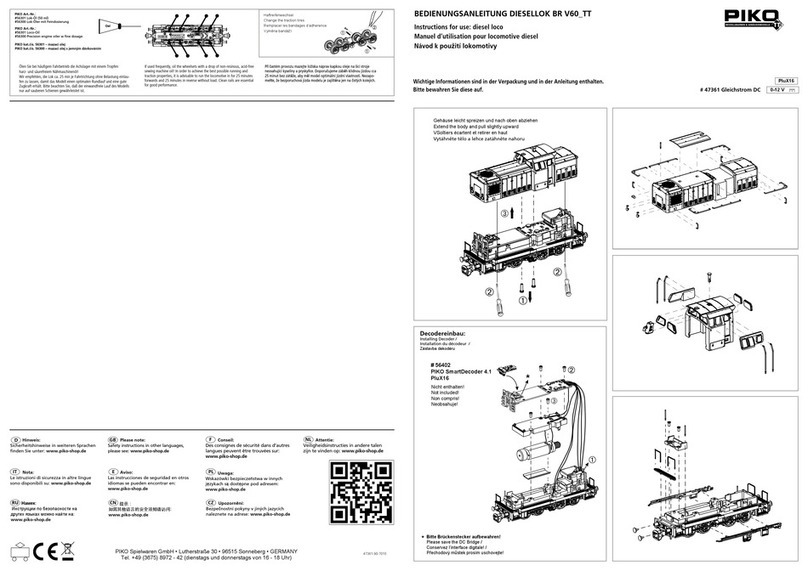
PIKO BR E52 User manual

BEDIENUNGSANLEITUNG
Instructions for use electrical loco
Manuel d’utilisation pour locomotive électrique
Gebruiksaanwijzing locomotief
# 51822 Gleichstrom DC
# 51823 Wechselstrom AC
D GB F NL
USA
ELEKTROLOKOMOTIVE BR E52 
'HF
3OX;
2 3
Inhaltsverzeichnis:
Vorbildinformationen
Sicherheitshinweise
Wichtige Hinweise
Belegung der Schnittstellen
Schaltbare Funktionen
Wartung & Instandhaltung
Ersatzteile
Table of Contents:
Information about the prototype
Safety Notes
Important Notes
Assignment of PluX interface
Controllable Functions
Service and maintenance
Spare parts
Sommaire:
Informations concernant la
locomotive réelle
Remarques importantes sur la sécurité
Information importante
Occupation de l‘interface PluX
Fonctions commutables
Entretien et maintien
Pieces de rechange
Inhoudsopgave:
Informatie over het voorbeeld
Veiligheidsvoorschriften
Belangrijke aanwijzing
Aansluitschema PluX stekker
Schakelbare functies
Onderhoud en service
Onderdelen
Seite:
4
6
8
10
12
18/19
20/21
Page:
4
6
8
10
12
18/19
20/21
Page:
5
7
9
11
13
18/19
20/21
Pagina:
5
7
9
11
13
18/19
20/21
4 5
Vorbildinformation:
1922 bestellte die Deutsche Reichsbahn Gesell-
schaft auf Betreiben ihrer Gruppenverwaltung
Bayern bei Maffei eine für damalige Verhältnisse
hochleistungsfähige Elektrolok für anspruchsvolle
Schnell- und Personenzugdienste. Die Baureihe
erhielt zunächst die bayerische Gattungsbezeichnung
EP 5. Gemeinsam mit der AEG und Siemens (für den
elektrischen Teil) konstruierte Maffei eine beson-
ders schwere Maschine, die zugunsten akzeptabler
Achslasten unterhalb der 20-t-Grenze die Achsfolge
2‘BB2‘ erhielt. Von 1924 bis 1926 in 35 Exemplaren
geliefert, erwiesen sich die wuchtigen Bayern mit
einem Dienstgewicht von 140 t als die schwersten
deutschen Elektroloks – ein bis heute ungebrochener
Rekord. Mit 2200 kW Stundenleistung und einer
Höchstgeschwindigkeit von 90 km/h bewährten
sich die ohne Prototyp (!) gefertigten Maschinen
überraschend gut und wurden 1926 als E 52 01 bis
E 52 35 in das DRG-Nummernschema eingeordnet.
29 Maschinen überdauerten den Zweiten Weltkrieg.
Die grundsolide Konstruktion veranlasste die DB, alle
Loks 1956/57 gründlich aufzuarbeiten. 1969 begann
die Ausmusterung, die erst 1973 endete. 152 034, die
(wie weitere 17 Maschinen) weiter als Heizlok diente,
erinnert inzwischen als Nürnberger Museumslok EP 5
21 534 bis heute an die Güte klassischer bayerischer
Elektrolokomotiven.
Informations sur le modele réel :
La Deutsche Reichbahn a commandé en 1922 a la
société Maffei, une locomotive électrique très
performante afin d’assurer du service voyageurs.
Cette série de locomotives fut nommée de type EP 5.
Les sociétés AEG et Siemens (pour la partie élec-
trique) travaillant avec Maffei, ont construit une
lourde machine de type 2BB2 avec un poids a l’essieu
inferieur a 20 tonnes. 35 exemplaires furent livrés
entre 1924 et 1926, et furent mis en exploitation
en Bavière. Cette locomotive, avec un poids de 140
tonnes fut la plus lourde locomotive électrique
allemande, un record encore inégalé a ce jour.
Aucun prototype de cette série ne fut construit.
La locomotive développe une puissance de 2200 kW
pour une vitesse maximale de 90 Km/h.
Les 35 locomotives furent livrées en 1925 avec les
immatriculations DRG de l’époque (E 52 01 a E 52
35). 29 Locomotives survirèrent a la guerre. Un im-
portant programme de remise a neuf fut engagé en
1956/57 sur tout le parc existant. La radiation débuta
en 1969 jusqu’en 1973. La 152 034 (comme 17 autres
locomotives) ont servis comme locomotives de
chauffe. Une représentative de la série figure au
musée ferroviaire de Nuremberg dans sa décoration
brune d’origine sous l‘immatriculation EP 5 21 534.
Informatie grootbedrijf:
In 1922 bestelde de Deutsche Reichsbahn op initiatief
van de afdeling Beieren een elektrische locomotief
met voor toenmalige begrippen zeer hoge prestaties.
De locomotief was bedoeld voor de zware snel- en
personentrein diensten. Deze loc’s werd in eerste
instantie in de Beierse serieaanduiding EP 5 inge-
deeld. Samen met AEG en Siemens (voor het elek-
trische deel), construeerde Maffei een bijzonder
zware machine, die om de asbelasting onder de
grens van 20 ton te houden, de asindeling 2‘BB2‘
kreeg. Van 1924 tot 1926 werden 35 exempla-
ren afgeleverd. De machtige „Bayern“ leverden,
met een dienstgewicht van 140 ton de zwaarste
Duitse elektrische locomotieven, een tot op heden
ongebroken record. Met 2.200 uur kW vermogen
en een maximumsnelheid van 90 km/h, bewezen
deze zonder prototype (!) gebouwde machines zich
verrassend goed en werden in 1926 als E 52 01-E 52
35 ingedeeld in het nummerschema van de Deutsche
Reichsbahn. 29 machines overleefden de Tweede
Wereldoorlog. De solide basisconstructie bracht de
DB er toe om alle locomotieven in 1956-57 grondig
te renoveren. In 1969 begon de buitendienststelling,
die pas in 1973 werd beëindigd. De 152 034, die
(zoals 17 andere machines) nog als verwarmingsloc
dienst deed, herinnert inmiddels als Neurenbergse
museumlocomotief EP 5 21 534 aan de kwaliteit van
deze klassieke Beierse elektrische locomotieven.
The prototype:
In 1922 the Deutsche Reichsbahn Gesellschaft follo-
wing a request from its Bavaria region ordered a for
those times extremely powerful electric locomotive
for express and passenger train service from the
manufacturer Maffei. The type originally received
the Bavarian designation EP 5. In cooperation with
AEG and Siemens (for the electrical part) Maffei
designed an especially heavy locomotive that had a
2’BB2’ wheel arrangement in order to stay below the
20 t axle load limit. The 35 locomotives that were
delivered between 1924 and 1926 weighed 140 t and
were the heaviest electric locomotives in Germany –
this record hasn’t been broken to this day. With an
hourly rating of 2200 kW and a top speed of 90 km/h
the design that was delivered without the customary
prototype locomotive proved itself surprisingly well.
The locomotives were reclassified as DRG E 52 01 to
E 52 35 in 1926.
29 locomotives survived the second world war. The
solid, proven design motivated the Deutsche Bundes-
bahn to perform a major overhaul for all locomotives
in 1956/57. Decommissioning began in 1969, but it
wasn’t until 1973 that the last locomotive was taken
out of service. 152 034 which served as stationary
heating locomotive (like 17 others) after it was taken
out of service is now an exhibit at the Nuremberg
Railroad Museum. As EP 5 21 534 she serves as a
reminder of the quality of classical Bavarian electric
locomotive design.
6 7
Sicherheitshinweise:
Korrekte Entsorgung dieses Produkts (Elektromüll)
(Anzuwenden in den Ländern der Europäischen Union und ande-
ren europäischen Ländern mit einem separaten Sammelsystem)
Die Kennzeichnung auf dem Produkt bzw. auf der dazugehö-
rigen Literatur gibt an, dass es nach seiner Lebensdauer nicht
zusammen mit dem normalen Haushaltsmüll entsorgt werden
darf. Entsorgen Sie dieses Gerät bitte getrennt von anderen Ab-
fällen, um der Umwelt bzw. der menschlichen Gesundheit nicht
durch unkontrollierte Müllbeseitigung zu schaden. Recyceln Sie
das Gerät, um die nachhaltige Wiederverwertung von stofflichen
Ressourcen zu fördern. Private Nutzer sollten den Händler, bei
dem das Produkt gekauft wurde, oder die zuständigen Behörden
kontaktieren, um in Erfahrung zu bringen, wie sie das Gerät auf
umweltfreundliche Weise recyceln können.
Gewerbliche Nutzer sollten sich an Ihren Lieferanten wenden
und die Bedingungen des Verkaufsvertrages konsultieren.
Dieses Produkt darf nicht zusammen mit anderem Gewerbemüll
entsorgt werden.
Modellartikel - Kein Spielzeug! Bitte bewahren Sie die beiliegen-
den Hinweise und die Bedienungsanleitung auf!
Achtung! Aufgrund vorbildgetreuer, maßstabsgerechter und
funktionsbedingter Gestaltung sind Spitzen und Kanten vorhan-
den. Bei unsachgemäßem Gebrauch besteht Verletzungsgefahr.
Das Modell darf nur mit einem zugelassenen Transformator mit
folgender Kennzeichnung betrieben werden:
Wechselstrom: Max. Fahrspannung: 16 V ~ ,
Umschaltspannung: 24 V ~
Gleichstrom: Max. Fahrspannung: 12 V
Remarque importantes sur la sécurité:
Comment éliminer ce produit
(déchets d’équipements électriques et élektroniques)
(Applicable dans les pays de l’Union Européen et aux autres pays
européens disposant de systémes de collecte sélective)
Ce symbole sur le produit ou sa documentation indique qu’il ne
doit pas être éliminé en fin de vie avec autres déchets ménagers.
L’élimination incontrôlée des déchets
pouvant porter préjudice à l’environnement ou à la santé
humaine, veuillez le séparer des autres types de déchets et le
recycler de façon responsable. Vous favoriserez
ainsi la réutilisation durable des ressources matérielles.
Les particuliers sons invités à contacter le distributeur leur ayant
vendu le produit ou à se renseigner auprès de leur mairie pour
savoir où et comment ils peuvent se débarrasser de ce produit
afin qu’il soit recyclé en respectant l’environnement.
Les entreprises sons invitées à contacter leurs fournisseurs et à
consulter les conditions de leur contrat de vente. Ce produit ne
doit pas être éliminé avec les autres déchets commerciaux.
Ceci est un article de modélisme, ce n’est pas un jouet!
Veuillez conserver les conseils et modes d’emploi joints!
Attention! En raison d’une reproduction fidèle à la réalité,
conforme à l’échelle et fonctionnelle, il y a risque de présence de
petites pièces et d‘arêtes coupantes!
Il y a danger de blessures en cas d‘utilisation non conforme.
Le modèle doit être uniquement actionné avec un
transformateur autorisé portant le logo suivant :
Courant alternatif: Tension maximum: 16 V ~ ,
Tension de commutation: 24 V ~
Courant continu: Tension maximum: 12 V
Safety Notes:
Correct Disposal of This Product (Waste Electrical & Electronic
Equipment) (Applicable in the European Union and other
European countries with separate collection systems)
This marking shown on the product or its literature, indicates
that it should not be disposed with other household wastes at
the end of this working life. To prevent possible harm to the
environment or human health from uncontrolled waste disposal,
please separate this from other types of wastes and recycle
it responsibly to promote the sustainable reuse of material
resources. Household users should contact either the retailer
where they purchased this product, or their local govemment
office, for details of where and how they can take this item for
environmentally safe recycling.
Business users should contact their supplier and check the terms
and conditions of the purchase contract. This product should not
be mixed with other commercial wastes for
disposal.
This is a Model, not a Toy!
Please keep the enclosed manual for future reference!
Attention! Due to the nature of its construction, this product
contains some functional sharp edges! If used incorrectly there is
a possibility of danger.
This model should only be operated using an approved
transformer marked as follows :
Alternating current: max. Load: 16 V ~ ,
Commutation tension: 24 V ~
Direct voltage: max. Driving tension: 12 V
Veiligheidsvoorschriften:
Correcte verwijdering van dit product
(elektrische & elektronische afvalapparatuur)
Dit merkteken op het product of het bijbehorende
informatiemateriaal duidt erop dat het niet met ander
huishoudelijk afval verwijderd moet worden aan het einde van
zijn gebruiksduur. Om mogelijke schade aan het milieu of de
menselijke gezondheid door ongecontroleerde afvalverwijdering
te voorkomen, moet u dit product van andere soorten afval
scheiden en op een verantwoorde manier recyclen, zodat het
duurzame hergebruik van materiaalbronnen wordt bevorderd.
Huishoudelijke gebruikers moeten contact opnemen met de
winkel waar ze dit product hebben gekocht of met de gemeente
waar ze wonen om te vernemen waar en hoe ze
dit product milieuvriendelijk kunnen laten recyclen.
Zakelijke gebruikers moeten contact opnemen met
hun leverancier en de algemene voorwaarden van de
koopovereenkomsten nalezen. Dit product moet niet worden
gemengd met ander befrijfsafval voor verwijdering.
Schaalmodel – géén speelgoed! De bijgesloten aanwijzingen en
de gebruikershandleiding s.v.p. goed bewaren!
Attentie! Vanwege de werkelijkheidsgetrouwe, schaalgetrouwe
en een functiegerichte vormgeving zijn er scherpe kanten
aanwezig! Bij onjuist gebruik bestaat er gevaar voor
verwondingen!
Het model mag uitsluitend wordeen aangestuurd met een
toegelaten transformator, welke is voorzien van het volgende
kenmerk :
Wisselstroom: Max. rijspanning: 16 V ~,
Omschakelspanning: 24 V ~,
Gelijkstroom: Max. rijspanning: 12 V
8 9
If used frequently, oil the wheelsets with a drop of
non-resinous, acid-free sewing machine oil! In order
to achieve the best possible running and traction
properties, it is advisable to run the locomotive in for
25 minutes forwards and 25 minutes in reverse
without load. Clean rails are essential for good
performance.
Ölen Sie bei häufigem Fahrbetrieb die Achslager mit
einem Tropfen harz- und säurefreiem Nähmaschi-
nenöl! Wir empfehlen, die Lok ca. 25 min je Fahrtrich-
tung ohne Belastung einlaufen zu lassen, damit das
Modell einen optimalen Rundlauf und eine gute Zug-
kraft erhält. Bitte beachten Sie, daß der einwandfreie
Lauf des Modells nur auf sauberen Schienen gewähr-
leistet ist.
Si utilisation fréquente, huilez régulièrement avec
une goutte d’huile fine pour machine à coudre.
Nous vous conseillons un rodage complet de 25 min
dans chaque sens pour un roulement optimal.
Il est conseillé de nettoyer régulièrement vos rails
pour un bon fonctionnement.
Wij adviseren u om de loc ca. 25 min. zonder belasting
te laten rijden in beide rijrichtingen, zodat het model
soepel wordt ingereden en een goede trekkracht
opbouwt. Houd er hierbij rekening mee, dat
uitsluitend op schone rails een storingsvrij bedrijf is
gewaarborgd.
Oel
Oel
PIKO Art.-Nr.:
#56301 Loco-Oil
#56300 Precision engine oiler w fine dosage
PIKO Art.-Nr.:
#56301 Lok-Öl (50 ml)
#56300 Lok-Öler mit Feindosierung
PIKO Art.-Nr.:
#56301 Huile locomotive
#56300 Precision engine oiler w fine dosage
PIKO Art.-Nr.:
#56301 Smeerolie loc
#56300 Smeeroliedispenser met kleine dosering
Haftreifenwechsel:
Change the Traction Tyres:
Remplacer les bandages d‘adherence:
Vervangen van de adhesie bandjes:
10 11
-S
-S
-S
-S
-S
-S
-S
-S
-S
-S
-S
-S
-S
-S
-S
-S
-S
-S
-S
-S
-S
-S
-S
-S
-S
-S
-S
-S
-S
-S
-S
-S
-S
-S
-S
-S
Jumper 1: vorne: Ep. II / Ep. III -
Schlußlicht (1x rot / 2x rot)
Jumper 1: voor periode II / periode III -
Sluitlicht (1x rood / 2x rood)
avant: ép. II / ép. III -
Eclairage de fin de convoi
(1x rouge / 2x rouge)
front: Ep.II / Ep. III - train end light
(1x red / 2x red)
Jumper 2: hinten: Ep. II / Ep. III -
Schlußlicht (1x rot / 2x rot)
Jumper 2: achter periode II / periode III -
Sluitlicht (1x rood / 2x rood)
arrière: ép. II / ép. III -
Eclairage de fin de convoi
(1x rouge / 2x rouge)
rear: Ep.II / Ep. III - train end light
(1x red / 2x red)
Jumper 3: Maschinenraumbeleuchtung
Dauer-An mit F0 oder digital schaltbar mit AUX5
Jumper 3: verlichting machinekamer
Constant aan met F0 of digitaal schakelbaar
met AUX5
Eclairage du compartiment des machines
Fonctionnement en continu avec F0 ou
commutable avec AUX5 en mode digital
machine room light permanent on with F0
or digital controllable via AUX5
Funktion der Jumper: Fonction de cavalier:Jumper function: Functie van de jumper:
Belegung der PluX Schnittstelle Occupation de l‘interface PluXAssignment of PluX interface Indeling van de interface
F0f / F0r - weisse Stirnbeleuchtung v+h
AUX1 - Zugschlussbeleuchtung hinten (rot)
AUX2 - Zugschlussbeleuchtung vorne (rot)
AUX3 - Führerstandsbeleuchtung vorne (FS1)
AUX4 - Führerstandsbeleuchtung hinten (FS2)
AUX5 - Maschinenraumbeleuchtung
AUX6 - oberes Spitzenlicht
AUX7 - Spitzenlicht abgedimmt
F0f / F0r - Éclairage avant et arrière blanc
AUX1 - Éclairage de fin de convoi arrière rouge
AUX2 - Éclairage de fin de convoi avant rouge
AUX3 - Éclairage cabine conduite avant (FS1)
AUX4 - Éclairage cabine conduite arrière (FS2)
AUX5 - Éclairage du compartiment des machines
AUX6 - Éclairage arrière supérieur
AUX7 - Éclairage attenué
F0f / F0r - white headlight front and rear
AUX1 - train end light (red)
AUX2 - train end light front (red)
AUX3 - driver cab light front (FS1)
AUX4 - driver cab light rear (FS2)
AUX5 - machine room light
AUX6 - top-headlight on-off
AUX7 - headlights dimmed
F0f / F0r - witte frontverlichting voor + achter
AUX1 - Treinsluitverlichting achter (rood)
AUX2 - Treinsluitverlichting voor (rood)
AUX3 - Verlichting machinistencabine voor (FS1)
AUX4 - Verlichting machinistencabine achter (FS2)
AUX5 - Verlichting machinekamer
AUX6 - top frontsein
AUX7 - Frontverlichting dimmen
12 13
Key Function
F0 Directional lighting on / off
F1 Sound on / off
F2 Pantograph up / down
F3 Driver Cab Door open / close
F4 Driver Cab light FS 1
F5 Driver Cab light FS 1
F6 Machine room light
F7 Driver Cab Window open / close
F8 Shunting mode / Shunting light 1
F9 Handbrake apply / release
F10 Compressor
F11 Fan
F12 Brake apply / release
F13 Compressed air whistle short
F14 Compressed air whistle long
F15 Oil pump
F16 Pressure air release
F17 Emergency brake
F18 Conductors signal
F19 Driver salutation
F20 Top light on / off
F21 Brake sound deactivate
F22 Sanding
F23 Coupling / Uncoupling
F24 Rail Clanks on / off
F25 Curve Squealing on / off
F26 Train lights: Loco pulls
F27 Train lights: Loco pushes
F28 Soundfader
Toets Functie
F0 Licht voor aan/uit
F1 Motorgeluid
F2 Pantograaf op/neer
F3 Deuren machinistenhuis open/dicht
F4 Verlichting macinistenhuis FS 1
F5 Verlichting macinistenhuis FS 2
F6 Verlichting machineruimte
F7 Raam machinistenhuis open/dicht
F8 Rangeergang + Rangeerverlichting 1
F9 Handrem vast/los
F10 Compressor
F11 Motorventilator
F12 Treinrem vast/los
F13 Drukluchtuit kort
F14 Drukluchtuit lang
F15 Oliepomp
F16 Druklucht afblazen
F17 Noodrem
F18 Conducteursuit
F19 Onderlinge begroeting machinisten
F20 Frontlicht aan / uit
F21 Remgeluid deactiveren
F22 Zand strooien
F23 Koppelen
F24 Railstoten aan/uit
F25 Piepen in bochten aan/uit
F26 Treinverlichting: Loc trekt
F27 Treinverlichting: Loc duwt
F28 Soundfader (tunnelmodus)
Taste Funktion
F0 Licht vorn ein/aus
F1 Motorsound
F2 Pantograph auf/ab
F3 Führerstandstüre auf/zu
F4 Führerstandsbeleuchtung FS 1
F5 Führerstandsbeleuchtung FS 2
F6 Maschinenraumbeleuchtung
F7 Führerstandsfenster auf/zu
F8 Rangiergang + Rangierbeleuchtung 1
F9 Handbremse anlegen/lösen
F10 Kompressor
F11 Lüfter
F12 Zugbremse anlegen/lösen
F13 Druckluftpfeife kurz
F14 Druckluftpfeife lang
F15 Ölpumpe
F16 Druckluft ablassen
F17 Notbremse
F18 Schaffnerpff
F19 Lokführergruß (abblenden)
F20 Spitzenlicht an/aus
F21 Bremsgeräusch deaktivieren
F22 Sanden
F23 Kuppeln ab-/ankuppeln
F24 Schienenstöße ein/aus
F25 Kurvenquietschen an/aus
F26 Zugbeleuchtung: Lok zieht
F27 Zugbeleuchtung: Lok schiebt
F28 Soundfader (Tunnelmodus)
Touches Fonctions
F0 Eclairage avant allumé/éteint
F1 Son du moteur
F2 Pantographe levé/baissé
F3 Porte cabine ouverte/fermée
F4 Eclairage cabine FS 1
F5 Eclairage cabine FS 2
F6 Eclairage salle des machines
F7 Fenêtre cabine ouverte/fermée
F8 Vitesse éclairage 1 manoeuvre
F9 Frein à main ouvert/fermé
F10 Compresseur
F11 Ventilateur
F12 Frein loco serré/désserré
F13 Trompe court
F14 Trompe long
F15 Pompe à huile
F16 Vidange réservoir d‘air
F17 Frein d’arrêt d‘urgence
F18 Sifet contrôleur
F19 Conducteur de train salutation
F20 Eclairage supérieure allumé/éteint
F21 Désactiver bruitages de frein
F22 Sabler
F23 Désatteler / Atteler
F24 Bruitage rails allumé / éteint
F25 Sifements virage allumé / éteint
F26 Eclairage train: loco tracte
F27 Eclairage train: loco pousse
F28 Baisse du son (mode tunnel)
14 15
e
Gehäuse leicht spreizen und nach oben abziehen /
Extend the body and pull slightly upward /
Ecarter légèrement la caisse et retirez-la par le haut /
Sprijd lichtjes de kast en verwijder naar boven

16 17
[
[
!
Zurüstbauteile nur für Vitrinenmodelle /
Extensions only for display case models /
Détaillage pour modèle de vitrine /
Deze los meegeleverde onderdelen zijn uitsluitend voor vitrinemodellen!
!
!
wahlweise
alternatively / au choix / naar keuze
Nur in DC Version!
Only in DC version! /
Seulement en DC version /
Uitsluitend in DC versie!
Nur in AC Version!
Only in AC version! /
Seulement en AC version /
Uitsluitend in AC versie!
Nur in AC Version!
Only in AC version! /
Seulement en AC version /
Uitsluitend in AC versie!
18 19
e
f
/6%
/6$
Kabel von Lautsprecher auf Leiterplatte anlöten! /
Solder cables of speakers on mainboard on! /
Souder les câbles du haut parleur au circuit imprimé /
Kabel van de luidspreker op de printplaat solderen!
56374 PIKO Sound-Decoder
56374 PIKO Sound Decoder Kit
56374 PIKO Sound Décodeur
56374 PIKO Loc-Sounddecoder
e
wahlweise
alternatively / au choix /
naar keuze

20 21
2AC/DC 414
17
31
53 87
32 33 34 36 37
90
56030
91 92 92 93 93
423938 41 55 60
18 20 21 24 26 27
106
16
8 12
AC/
DC
AC/DC
AC/DC
AC/DC
AC/DC AC/DC
AC/DC AC/DC AC/DC AC/DC AC/DC
AC/
DC
AC/DC
AC/
DC
AC DC AC DC
ACAC/DC
AC/DC AC/DC AC/DC
AC/DCAC/
DC
AC/DC
AC/DC AC/DC
AC/
DC
AC/
DC
AC/
DC
AC/
DC
AC/DC
AC/
DC
AC/
DC
88
95 96
89 89
AC/
DC
AC/DC AC/
DC
DC AC
94 94
AC DC 56028 AC/DC 56374 AC/DC
22 23
Bezeichnung / Description ET-Nr. / spare part N° PG
Gehäuse / Body 51822-02 17
Stromabnehmer SBS 10 / Pantograph SBS 10 51820-04 15
Isolatoren / Isolators 51820-06 9
Dachleitungen / Roof pipes 51820-08 8
Schalter, Pfeife, Deckel / Switch, Pipe, Cover 51820-10 8
Laufstege / Roof walk 51820-12 10
Dach / Roof 51820-14 8
Fenster (4-tlg.) / Windows (set of 4) 51820-16 8
Leuchtstab mit Lichtabdeckung / Light bar with Licht cover 51820-17 7
Führerstand / Drivers Cab 51820-18 7
Lampen mit Leuchteinsatz / Lamps with light bars 51820-20 7
Scheibenwischer, rechts + links / Wipers, right + left 51820-21 7
Handstangen Tür (4 Stck.) / Handrails (4 pcs.) 51820-24 8
Treppen, Heizungsstecker, Leiter / Steps, Heading plug, Ladder 51820-26 7
Bremsschlauch, Zughaken / Brake pipe, Coupling hook 51820-27 7
Leuchtstäbe Maschinenraum (10-tlg.) / Light bars engine room (set of 10) 51820-31 7
Motorhalter / Motor holder 51820-32 8
Halter Lautsprecher mit Schraube / Holder Loud speaker with screw 51820-33 6
Pufferbohle mit Platte / Buffer beam with plate 51820-34 7
Sandkästen / Sand boxes 51820-36 7
Batteriekasten, rechts + links, Werkzeugkasten / Battery box, right + left, Tool box 51822-37 8
Sifa + Leitungen / Sifa + cables 51820-38 6
Kessel / Boiler 51822-39 8
Steckdose, Tropfbecher (4-tlg.) / Socket, drip cup (set of 4) 51820-41 7
Hauptplatine mit Beleuchtungsplatinen und Kabel / Main board with Light-boards and wires 51820-53 16
Lichtabdeckungen / Light covers 51820-55 6
Puffer / Buffer 51822-60 7
Motor, komplett / Motor, complete 51640-87 16
Kardanwelle + Buchsen / Cardan billow + bushes 51820-88 7
Kupplungsschacht (2 Stck.) / Coupler connector (2 pcs.) 51820-90 7
Bezeichnung / Description ET-Nr. / spare part N° PG
Befestigung Vorläufer / Holder bogie forerunner 51820-91 7
Führung Kuppelstange (4 Stck.) / Guide coupling rod (4 pcs.) 51820-95 7
Schrauben-Set (17-tlg.) / Set of Screws (17 pcs.) 51820-96 7
ET aus unserem Standard-Programm / Spare parts standard range
Haftreifen (10 Stck.) / Friction tyres (set of 10) 56028
Kupplung (2 Stck.) / Coupling, complete (set of 2) 56030
PIKO Sound-Decoder / PIKO Sound Decoder Kit 56374
nur für DC-Version / only for DC version
Vorläufer, komplett / Bogie forerunner, complete 51820-89 12
Radsatz Vorläufer (2 Stck.) / Wheelset bogie forerunner (2 pcs.) 51820-92 10
Getriebe mit Drehgestell vorne, komplett / Gearbox with bogie front, complete 51820-93 14
Getriebe mit Drehgestell hinten, komplett / Gearbox with bogie rear, complete 51820-94 14
nur für AC-Version / only for AC version
Schleifer mit Schraube / Slider with screw 59380-42 10
Vorläufer, komplett / Bogie forerunner, complete 51821-89 12
Radsatz Vorläufer (2 Stck.) / Wheelset bogie forerunner (2 pcs.) 51821-92 10
Getriebe mit Drehgestell vorne, komplett / Gearbox with bogie front, complete 51821-93 14
Getriebe mit Drehgestell hinten, komplett / Gearbox with bogie rear, complete 51821-94 14
*Preisgruppe *price category
PIKO Spielwaren GmbH
Lutherstraße 30 • 96515 Sonneberg • GERMANY 51822-90-7000_V2
Hinweis nur für
DC-Version:
Die Funk-Entstörung
der Anlage ist mit dieser
Lokomotive sichergestellt,
wenn der üblicherweise
im Gleis-Anschlussstück
eingebaute Konden-
sator eine Kapazität von
mindestens 680 Nanofarad
aufweist.
Note only for
DC version:
With this locomotive
interference will not
occur if the condenser
normally fitted in the
track connection section has
a minimum capacity of 680
nano farads.
Conseil que en
CC version:
Cette locomotive est équipée
d’un filtre anti-parasite. Un
condensateur placé
habituellement dans les joints
des rails présente une capacité
minimale de 680 nF.
Aanwijzing DC versie:
De ontstoring van uw
modelspoorbaan is bij het
gebruik van deze locomotief
gegarandeerd, wanneer
de in het railaansluitstuk
ingebouwde condensator
een capaciteit heeft van
minimaal 680 nanofarad.
Achtung:
Sicherheitshinweise in weiteren Sprachen finden Sie unter: www.piko-shop.de
Attention:
Safety instructions in other languages, please see: www.piko-shop.de
0-12 V
0-16 V

This manual suits for next models

4

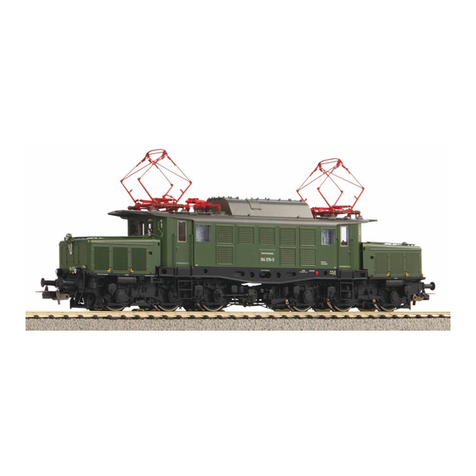
Other PIKO Toy manuals

PIKO 37526 User manual

PIKO

PIKO 37526 User manual

PIKO 35300 User manual

PIKO

PIKO 35300 User manual

PIKO BR 218 User manual

PIKO

PIKO BR 218 User manual

PIKO BR 50 User manual

PIKO

PIKO BR 50 User manual

PIKO BR 95 User manual

PIKO

PIKO BR 95 User manual

PIKO BR V 43 User manual

PIKO

PIKO BR V 43 User manual

PIKO Baureihe V100 DR User manual

PIKO

PIKO Baureihe V100 DR User manual

PIKO BR 247 VECTRON User manual

PIKO

PIKO BR 247 VECTRON User manual

PIKO BR 119 TT User manual

PIKO

PIKO BR 119 TT User manual

PIKO CORADIA BR 440 User manual

PIKO

PIKO CORADIA BR 440 User manual

PIKO 37330 User manual

PIKO

PIKO 37330 User manual

PIKO D.145 User manual

PIKO

PIKO D.145 User manual

PIKO TAURUS TT User manual

PIKO

PIKO TAURUS TT User manual

PIKO SM42 PKP User manual

PIKO

PIKO SM42 PKP User manual

PIKO BR 50 DR IV User manual

PIKO

PIKO BR 50 DR IV User manual

PIKO BR 181.2 User manual

PIKO

PIKO BR 181.2 User manual

PIKO BR 132 User manual

PIKO

PIKO BR 132 User manual

PIKO ET22 PKP User manual

PIKO

PIKO ET22 PKP User manual

PIKO BR 003 User manual

PIKO

PIKO BR 003 User manual

PIKO BR E63 User manual

PIKO

PIKO BR E63 User manual

PIKO BR 187 TT User manual

PIKO

PIKO BR 187 TT User manual

PIKO D.141 User manual

PIKO

PIKO D.141 User manual

PIKO BR 141 User manual

PIKO

PIKO BR 141 User manual

PIKO BR 110 User manual

PIKO

PIKO BR 110 User manual

Popular Toy manuals by other brands

AquaCraft UL-1 Superior user manual

AquaCraft

AquaCraft UL-1 Superior user manual

marklin 78184 user manual

marklin

marklin 78184 user manual

Fisher-Price T5124 manual

Fisher-Price

Fisher-Price T5124 manual

Vollmer 43797 Mounting instruction

Vollmer

Vollmer 43797 Mounting instruction

Eduard Blenheim Mk.IVF exterior quick start guide

Eduard

Eduard Blenheim Mk.IVF exterior quick start guide

Fisher-Price Sparkling Symphony Mirror instructions

Fisher-Price

Fisher-Price Sparkling Symphony Mirror instructions

Hasbro Tiger Electronics Star Wars Episode I Battle Tank Attack... instructions

Hasbro

Hasbro Tiger Electronics Star Wars Episode I Battle Tank Attack... instructions

SYMA S50H user manual

SYMA

SYMA S50H user manual

Hasbro my little Pony So Soft Newborn 62320 manual

Hasbro

Hasbro my little Pony So Soft Newborn 62320 manual

Airigami PAPER AVION SAS SCANDINAVIAN AIRLINES BOEING... manual

Airigami

Airigami PAPER AVION SAS SCANDINAVIAN AIRLINES BOEING... manual

Kyosho Mitsubishi LANCER Evolution VII WRC Body... instruction manual

Kyosho

Kyosho Mitsubishi LANCER Evolution VII WRC Body... instruction manual

Horizon Hobby E-FLITE Turbo Timber Evolution 1.5m instruction manual

Horizon Hobby

Horizon Hobby E-FLITE Turbo Timber Evolution 1.5m instruction manual

Mattel Monster High BJR25 instructions

Mattel

Mattel Monster High BJR25 instructions

Kid Trax Toys MINI Cooper S owner's manual

Kid Trax Toys

Kid Trax Toys MINI Cooper S owner's manual

Mattel Barbie FXT25 instructions

Mattel

Mattel Barbie FXT25 instructions

Eduard Zoom DH-2 interior Assembly instructions

Eduard

Eduard Zoom DH-2 interior Assembly instructions

Hasbro Disney/Pixar TOY STORY AND BOYOND Squad Leader... quick start guide

Hasbro

Hasbro Disney/Pixar TOY STORY AND BOYOND Squad Leader... quick start guide

Viessmann 5061 manual

Viessmann

Viessmann 5061 manual

manuals.online logo
manuals.online logoBrands
  • About & Mission
  • Contact us
  • Privacy Policy
  • Terms and Conditions

Copyright 2025 Manuals.Online. All Rights Reserved.