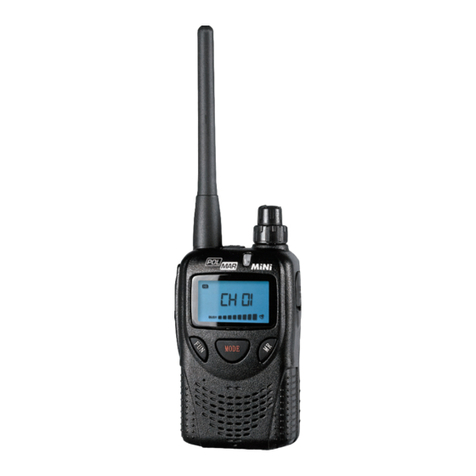
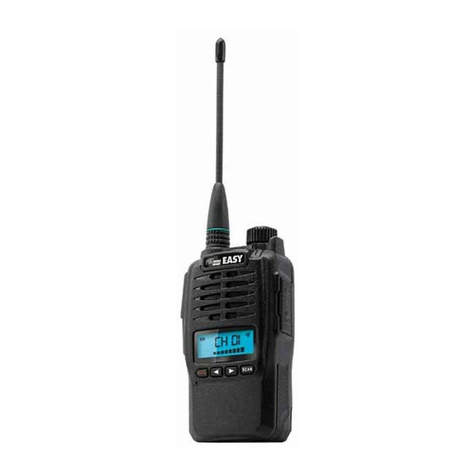
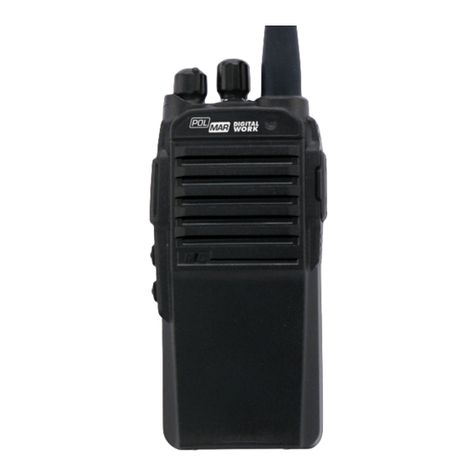
POLMAR Mini PMR446 User manual

WORK III
RICETRASMETTITORE
PMR446
Manuale d’uso
Importato e distribuito da Polmar srl

1
Contenuto della confezione
Disimballare il ricetrasmettitore con cura, in caso di parte mancante
o danneggiata, rivolgetevi immediatamente al rivenditore.
Lista degli accessori: Clip da cintura • Pacco batteria agli ioni di litio
• Caricabatteria • Adattatore • Manuale utente
INDICE
Vista dell’apparato 3
Funzionamento 4
Trasmissione 4
Monitor 4
Chiamata 4
Radio FM 4
Funzionamento canale di emergenza 4
Rilevamento bassa tensione batteria 5
Clonazione via cavo tra due ricetrasmettitori 5
Manutenzione 5
Guida alla soluzione dei problemi 7
Tabella DCS e CTCSS 8
Informazioni Tecniche 9

2
Grazie per avere acquistato questo ricetrasmettitore POLMAR. Sia-
mo certi che questo ricetrasmettitore di facile utilizzo vi garantirà
comunicazioni afdabili e sicure.
PRECAUZIONI
Prima di usare il ricetrasmettitore, leggere attentamente il presen-
te manuale. Conservare il manuale d’istruzione: contiene istruzioni
importanti pertinenti la sicurezza e l’uso.
Per la manutenzione rivolgersi esclusivamente a personale qua-
licato.
Non utilizzare il ricetrasmettitore o ricaricare le batterie in atmo-
sfera esplosiva (presenza di gas, polveri, fumi, ecc.).
Spegnere il ricetrasmettitore mentre si carica carburante o ci si
trova presso una stazione di rifornimento.
Non manomettere o tentare di modicare il ricetrasmettitore.
Non collocare il ricetrasmettitore in aree eccessivamente polvero-
se, umide o su superci instabili.
Se l’apparato deve essere riposto per un lungo periodo, si racco-
mada di togliere il pacco batteria; questo per evitare di trovarlo
scarico al momento dell’uso.
Con l’apparato commutato in trasmissione evitare che l’antenna sia
in prossimità o che venga in contatto della pelle della faccia o sugli
occhi. L’apparato darà il maggior rendimento se mantenuto verticale
con il microfono ad una distanza di 5 - 10 centimetri dalla bocca.
Danno all’udito! Nel caso la ricezione avvenga mediante cufe,
auricolari ecc. limitare il livello del volume. Un ascolto prolungato
a volume spinto danneggia l’udito. Se dopo un certo uso si riscon-
trassero dei schi alle orecchie ridurre il volume o non ricorrere
più all’uso delle cufe.
NON alimentare l’apparato con una tensione alternata. Sussiste il
pericolo di incendio oltre che al sicuro danneggiamento del rice-
trasmettitore
NON azionare il pulsante PTT se non necessario
NON usare il ricetrasmettitore mentre si è alla guida di un veicolo. Al
ne di prevenire incidenti prestare la massima attenzione alla guida
Evitare di riporre il ricetrasmettitore esposto ai raggi solari né di
usarlo con temperature al di sotto dei -20°C o superiori a +55°C.
•
•
•
•
•
•
•
•
•
•
•
•

3
Antenna
Tasto chiamata emergenza
Indicatore Led
Regolazione VOX
Selettore canali
Foro per cinghiello
Tasto PTT
Tasto Monitor/FM+
1.
2.
3.
4.
5.
6.
7.
8.
Tasto FM
Microfono
Tasto rilascio batteria
Batteria
Altoparlante
Protezione MIC/SP
Clip da cintura
9.
10.
11.
12.
13.
14.
15.
VISTA DELL’APPARATO

4
FUNZIONAMENTO
Trasmissione
Premere il tasto “PTT”: la spia rossa si accende e potrete subito
parlare. Per terminare il colloquio, rilasciare il tasto.
Monitor
Premere brevemente il tasto “Radio/Monitor/Reception+” (sotto il
tasto PTT) per attivare l’audio; poi premere nuovamente il tasto per
uscire dalla funzione.
Chiamata
Premere il tasto PTT, poi brevemente il tasto “Radio/Monitor/Recep-
tion+” per attivare la funzione di chiamata.
Per uscire dalla funzione, rilasciare il tasto “Radio/Monitor/ Recep-
tion+”.
Radio FM
Premere il tasto “Radio/Monitor/Reception+” per circa 2 secon-
di: si attiva la funzione Radio. Poi premere brevemente “Radio
Monitor Reception+” o “Call Reception-” per effettuare la scan-
sione automatica del segnale. Il ricetrasmettitore interrompe la
scansione e la ricezione radio quando c’è un segnale sul canale.
Premere di nuovo brevemente “Radio Monitor Reception+” o “Call
Reception-” per ricevere altre radio.
Per uscire dalla modalità radio, premere a lungo “Radio/Moni-
tor/Reception+”. Quando l’altoparlante emette un doppio segnale
audio, signica che l’uscita dalla funzione è stata effettuata.
Tramite software si può anche disabilitare la ricezione della radio FM.
Funzionamento canale di emergenza
L’apparato Work III possiede la funzione “Emergency Call” (Chia-
mata di emergenza). Per attivare questa funzione, premere il tasto
“Call/Reception-” per circa 2 secondi, quindi la spia lampeggia in
rosso avvertendo di trasmettere alla radio che è sintonizzata sulla
stessa frequenza. Per annullare, premere il tasto PTT.
Azionando la funzione chiamata di emergenza, il ricetrasmettitore
rimarrà sul canale 01 sin quando ruoterete il selettore verso il vo-
stro canale desiderato.
La spia verde lampeggia se non avrete ruotato il selettore di canale
dopo aver azionato la chiamata di emergenza.
1.
2.
3.

5
Rilevamento bassa tensione batteria
Il dispositivo funziona regolarmente quando la tensione è superiore
a 6,5V.
Quando la tensione si trova fra 6.3V e 6.5V, il ricetrasmettitore
riceve normalmente, ma emette degli avvisi acustici ogni 20 se-
condi; l’apparato trasmette regolarmente ma durante la trasmis-
sione il led rosso lampeggia.
Con tensione inferiore a 6.1V il ricetrasmettitore si spegne auto-
maticamente.
Clonazione via cavo tra due ricetrasmettitori
Collegare il cavo di clonazione ad ambedue i ricetrasmettitori e
poi accendere entrambi gli apparati.
Sul ricetrasmettitore “master” ruotare il selettore sul canale 8,
poi tenere premuto il tasto “Radio/Monitor/Reception+” per pre-
parare il trasferimento dati (3 secondi dopo) ntanto che un led
con luce arancione lampeggia indicando che la radio “master” è
pronta per la clonazione. Poi rilasciare il tasto.
Quando lampeggia la luce arancione sul ricetrasmettitore “ma-
ster”, premere il tasto PTT: sul ricetrasmettitore lampeggerà la
luce rossa, mentre sul ricetrasmettitore da clonare lampeggerà
una luce gialla, indicando che il ricetrasmettitore “master” è in
fase di clonazione. La clonazione ha avuto buon esito quando
la luce sul ricetrasmettitore “master” lampeggia nuovamente in
arancione.
Se i led di entrambi i ricetrasmettitori lampeggiano in modo ano-
malo nel corso della trasmissione di dati, signica che la clona-
zione non è andata a buon ne. In tal caso, dovreste vericare
che il cavo sia ben collegato, quindi premere di nuovo il tasto PTT
per ripristinare la clonazione quando la spia del ricetrasmettito-
re “master” è di colore arancione. Se occorre clonare più di un
ricetrasmettitore, a clonazione avvenuta spegnere il dispositivo
ricevente, scollegare il cavo di trasmissione. Inne, clonare il suc-
cessivo ricetrasmettitore seguendo il procedimento di cui sopra.
Manutenzione
Il ricetrasmettitore che avete acquistato è un prodotto elettronico di
precisione e deve essere usato con cura.
I seguenti accorgimenti manutentivi possono contribuire a prolun-
gare la durata dell’apparecchio.
1.
2.
3.
1.
2.
3.
4.
6
Non cercare di smontare il ricetrasmettitore: lavori svolti da per-
sone non specializzate possono danneggiare il dispositivo.
Spegnere il ricetrasmettitore quando si nei di un distributore di
benzina.
Non esporre a lungo il ricetrasmettitore al sole o presso qualche
fonte di calore: l’alta temperatura può ridurre la durata dell’elet-
tronica e distorcere le parti di plastica.
Tenere il ricetrasmettitore all’asciutto: pioggia ed umidità corro-
dono i circuiti elettronici.
Spegnere i ricetrasmettitori ed asportare le loro batterie quando
devono stare a lungo inattivi.
1.
2.
3.
4.
5.

7
Guida alla soluzione dei problemi
PROBLEMA SOLUZIONE
Non si accende La batteria potrebbe essere esaurita.
Ricaricare o sostituirla.
La batteria potrebbe non essere stata
installata correttamente.
Rimuoverla e reinstallarla.
•
•
La batteria si esaurisce
subito dopo la ricarica
La vita della batteria è esaurita.
Sostituire il pacchetto batterie con uno
nuovo.
•
Non si riesce ad
ascoltare o a parlare
con gli altri membri del
proprio
gruppo
Assicurarsi di stare utilizzando la
stessa frequenza e lo stesso tono
CTCSS degli altri membri del gruppo.
Gli altri membri del gruppo
potrebbero essere troppo lontani.
Assicurarsi di essere all’interno dl
campo di trasmissione degli altri
ricetrasmettitori.
•
•
Vi sono altre voci
(al di fuori di quelle dei
membri del gruppo)
sullo stesso canale.
Cambiare tono CTCSS.
Assicurarsi di modicare il tono su
tutti i ricetrasmettitori del gruppo.
•

8
83 gruppi DCS
023 051 114 143 174 251 315 371 445 532 631 723
025 054 115 152 205 261 331 411 464 546 632 731
026 065 116 155 223 263 343 412 465 565 654 732
031 071 125 156 226 265 346 413 466 606 662 734
032 072 131 162 243 271 351 423 503 612 664 743
043 073 132 165 244 306 364 431 506 624 703 754
047 074 134 172 245 311 365 432 516 627 712
80 gruppi CTCSS
67.0 85.4 107.2 136.5 165.5 186.2 210.7 254.1
69.3 88.5 110.9 141.3 167.9 189.9 218.1
71.9 91.5 114.8 146.2 171.3 192.8 225.7
74.4 94.8 118.8 151.4 173.8 196.6 229.1
77.0 97.4 123.0 156.7 177.3 199.5 233.6
79.7 100.0 127.3 159.8 179.9 203.5 241.8
82.5 103.5 131.8 162.2 183.5 206.5 250.3
TABELLA DCS E CTCSS

9
INFORMAZIONI TECNICHE
Generalità
Gamma di frequenza 446,00625 - 446,09375 MHz
Numero di canali 8 + 8
Spaziatura canali 12.5 kHz
Temperatura di esercizio da -20°C a +55°C
Modo di emissione Modulazione di Frequenza (FM)
Tensione 7,4 V
Corrente in stand-by 15mAh (risparmio)
Dimensioni 100 (H) × 58 (L) × 36 (P) mm
Peso 205 g
Trasmettitore
Distorsione di frequenza ≤3 ppm
Potenza in uscita ≤500 mW
Corrente assorbita 450 mA
Deviazione max di frequenza ±2,5 kHz
Distorsione frequenza audio <10%
Ricevitore
Sensibilità di riferimento <-122 dBm
Sensibilità squelch <-126 dBm
Potenza audio nominale ≥500 mW
Corrente assorbita ≤380 mA
Distorsione audiofrequenza <10%

11
Unpacking and checking equipment
Carefully unpack the transceiver, if any items are missing or have
been damaged during shipment, le a claim with the carrier im-
mediately.
Accessories List: Belt clip • Li-Ion battery pack • Charger • Adaptor
• User Manual.
CONTENTS
View of transceiver 13
Operation 14
Transmit 14
Monitor 14
Call 14
FM Radio 14
Emergency Channel Operation (Emergency Call Function) 14
Battery low voltage detection 14
Wired Cloning between two transceivers 15
Maintenance 16
Troubleshooting 17
DCS and CTCSS chart 18
Technical Information 19

12
Thank you for choosing POLMAR. We are sure that this easy-to-use
transceiver will guarantee you reliable safe communication.
PRECAUTIONS
Before using the transceiver, read this manual carefully and keep
it for future reference: it contains important instructions for safety
and use.
Servicing must be performed by qualied personnel only.
Do not use the transceiver or recharge the batteries in an explo-
sive atmosphere (presence of gas, dust, fumes etc.).
Switch the transceiver off while refuelling or at a petrol station.
Do not tamper with or attempt to modify the transceiver.
Do not use the transceiver in excessively dusty or damp areas or
place on unstable surfaces.
If the equipment has to be stored for a long period, the battery
pack must be removed to prevent it running at.
With the equipment switched to transmission, avoid positioning
the antenna near to or in contact with your face or eyes.
The equipment will perform best if kept vertical with the micro-
phone at a distance of 5 - 10 centimetres from your mouth.
Damage to hearing! If reception is by means of earphones, head-
sets, etc., the volume level must be kept down. Prolonged use
at high volume will damage your hearing. If, after use, you hear
buzzing noises, turn the volume down or abandon use of the ear-
phones.
DO NOT power the equipment with alternating voltage: risk of re
in addition to certain damage of the transceiver.
DO NOT operate the PTT button if not necessary.
DO NOT use the transceiver while driving a vehicle. In order to
prevent accidents, pay maximum attention while driving.
Avoid leaving the transceiver exposed to sunlight or using it with
temperatures below - 0°C or above +55°C.
•
•
•
•
•
•
•
•
•
•
•
•
•

13
Antenna
Emergency Call
Indicator
VOX
Channel
Ring Hole
PTT
Monitor/FM+
1.
2.
3.
4.
5.
6.
7.
8.
FM-
MIC
Battery snap
Battery
SP
MIC/SP Waterproof Cover
Belt Clip
9.
10.
11.
12.
13.
14.
15.
VIEW OF TRANSCEIVER

14
OPERATION
Transmit
Press the “PTT”key, the red indicator on, then you can talk at once.
Release your hands to end the talking.
Monitor
Press the”Radio/Monitor/Reception+”key shortly to open the acous-
tic noise, and then press the key again to exit.
Call
Press PTT, then “Radio/Monitor/Reception+” key shortly to activate
call function. Release the “Radio/Monitor/Reception+” key to exit.
FM Radio
Press the “Radio/Monitor/Reception+” key for about 2 seconds
to open theRadio function, then press the “Radio/Monitor/Re-
ception + ”or “Call/Reception-” key shortly to scan the signal
automatically. The transceiver will stop scanning and to receive
when there’s a signal on the channel, press the ”Radio/Monitor/
Reception+”orCall/Reception-” key shortly again to receive other
radios.
Keep pressed the “Radio/Monitor/Reception+” to exit the radio mode,
When the speaker sound “di,di” that’s means you already exit.
PC also can be programmed to turn off FM.
Emergency Channel Operation (Emergency Call Function)
Work III set a useful function “Emergency Call”. Press the “Call/Re-
ception-” key for about 2 seconds to activate emergency call func-
tion, then the indicated light ashes red and alert to transmit to the
radio which is set the same frequency.
Press the PTT key to cancel
The transceiver will remain at channel 01 when you operate the
Emergency Call Function, until rotate the channel selector to your
desired channel.
The green indicated light will ash if you didn’t rotate the channel
selector after operating the Emergency Call Function.
Battery low voltage detection
The device works properly when the voltage is higher than 6.5V;
When the voltage is among 6.3V to 6.5V, the transceiver receives nor-
mally but with alerts and “dididi” sound indication every 20 seconds
and launches normally, but the light ashes red while launching.
1.
2.
3.
1.
2.

15
When the voltage is below 6.1V, then the transceiver will power
off by itself.
Wired Cloning between two transceivers
Well connected the transmission lines to the both transceivers,
and then power on the subsidiary transceiver.
Rotate the channel selector on the base transceiver to channel
8, then hold and Press “Radio/Monitor/Reception+” key to power
on, (3 seconds later) until the orange light (red light and yellow
light ash simultaneously) ashes which indicates the base trans-
ceiver is in cloning state, then release the button.
When the orange light on the base transceiver ashes, press the
PTT key, the red light on base transceiver ashes, and the yellow
light on subsidiary transceiver ashes, which indicates the base
transceiver is in cloning state. The mutual clone is successful
when the light on base transceiver ashes orange again.
If indicator lights of both two transceivers ashes abnormally in
the process of data transmit, it means replication fail. In that
case, please check and make sure the transmission line is well
connected. And please press the PTT button again to resume
cloning when the indicator light of the base transceiver shines
orange.
If need to clone with more than one transceiver, please turn off
the subsidiary device after cloning nished and then pull out the
transmission cable. And then clone to next transceiver following
steps above.
Please reboot the transceiver to make it work properly after cloning.
3.
1.
2.
3.
4.
5.
6.

16
Maintenance
Transceiver you purchased is an exactitude design electronic prod-
ucts and pleaseuseitcarefully.
Following maintenance ways may help extend its lifetime.
Please don’try to disassemble the transceiver since non-techni-
cians’ processing may cause damage to the device.
To use stable power supply, please connect the specied USB
cable to the DC jack of the transceiver.
Please turn off the transceiver when you are in gas station.
Please don’t put the transceiver in sun or hot place for long time,
because the high temperature will shorten use life of electronic
parts and cause distortion to plastic parts.
Please keep the transceiver dry, because rain and moisture will
erode the electronic circuits.
Please power off the transceiver and remove its battery pack im-
mediately once it is peculiar.
1.
2.
3.
4.
5.
6.

17
Troubleshooting
PROBLEM SOLUTION
No power The battery may have been
exhausted. Please recharge or
replace the battery pack.
The battery pack may not be installed
correctly. Please check and install it
again.
•
•
Battery lasts in a short
time after charging
The battery pack has been used out
and cannot function any longer.
Please replace it with a new one.
Make sure the battery is fully charged.
•
•
Unable to talk or hear
members in your group
Make sure you are using the same
frequency and CTCSS tone as other
members in your group.
Other group members maybe too far
away from you, make sure you are in
the radio’s operating range.
•
•
The other group
members’ voices are
present on the channel.
Please change the frequency.
Make sure to change CTCSS signal of
all transceivers in your group.
•
•

18
50 groups DCS
023 051 114 143 174 251 315 371 445 532 631 723
025 054 115 152 205 261 331 411 464 546 632 731
026 065 116 155 223 263 343 412 465 565 654 732
031 071 125 156 226 265 346 413 466 606 662 734
032 072 131 162 243 271 351 423 503 612 664 743
043 073 132 165 244 306 364 431 506 624 703 754
047 074 134 172 245 311 365 432 516 627 712
83 groups CTCSS
67.0 85.4 107.2 136.5 165.5 186.2 210.7 254.1
69.3 88.5 110.9 141.3 167.9 189.9 218.1
71.9 91.5 114.8 146.2 171.3 192.8 225.7
74.4 94.8 118.8 151.4 173.8 196.6 229.1
77.0 97.4 123.0 156.7 177.3 199.5 233.6
79.7 100.0 127.3 159.8 179.9 203.5 241.8
82.5 103.5 131.8 162.2 183.5 206.5 250.3
DCS AND CTCSS CHART

19
TECHNICAL INFORMATION
General
Frequency range 446,00625 - 446,09375 MHz
Number of channel 8 + 8
Channel spacing 12.5 kHz
Operatingtemperaturerange da -20°C a +55°C
Modem pattern Frequency Modulation (FM)
Voltage 7,4 V
Standby Current 15mAh (Power Save)
Size 100 (H) × 58 (L) × 36 (P) mm
Weight 205 g
Transmitter
Frequency Distortion ≤3 ppm
Output power ≤500 mW
Emission current 450 mA
Maximum frequency deviation ±2,5 kHz
Audio frequency distortion <10%
Receiver
Reference sensitivity <-122 dBm
Squelch sensitivity <-126 dBm
RatedAudioPower ≥500 mW
Receiving current ≤380 mA
Audio frequency distortion <10%

20
Other manuals for Mini PMR446
1
Table of contents
Languages:
Other POLMAR Transceiver manuals

POLMAR
POLMAR GALAXY User manual

POLMAR
POLMAR Navy-010 User manual

POLMAR
POLMAR Mini PMR446 User manual

POLMAR
POLMAR NAVY-08 User manual

POLMAR
POLMAR DB-5 User manual

POLMAR
POLMAR SMART PMR446 User manual

POLMAR
POLMAR DB-50M User manual

POLMAR
POLMAR DB-32 User manual

POLMAR
POLMAR DB-2 User manual

POLMAR
POLMAR Shark2 User manual
Popular Transceiver manuals by other brands

Kenwood
Kenwood TS-600 operating manual

Yaesu
Yaesu FT-2000D - UPDATE V0150 AND V11.54 Update

Kenwood
Kenwood TM-D700A Service manual

Magnum
Magnum AlphaForce operating manual

Yaesu
Yaesu FTDX-9000MP Operation manual

Delta Electronics
Delta Electronics Multi-Rate CWDM SFP Transceiver LCP-155 CWDM Specification sheet