manuals.online logo
Brands
  1. Home
  2. •
  3. Brands
  4. •
  5. Polycom
  6. •
  7. Handset
  8. •
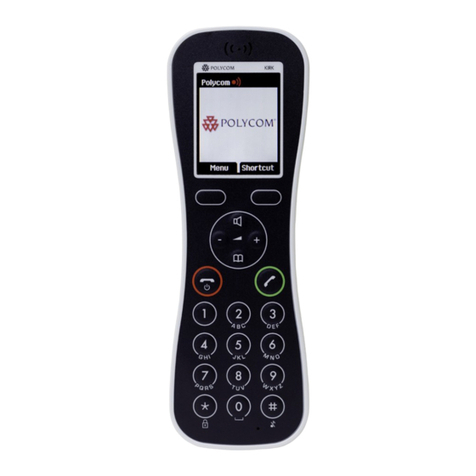
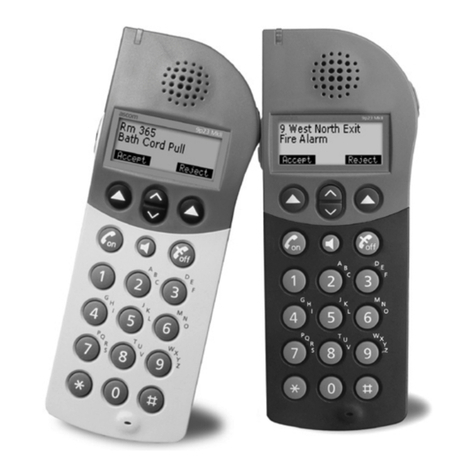
  9. Polycom KIRK 4020 Specification sheet

Polycom KIRK 4020 Specification sheet

Other manuals for KIRK 4020

4

This manual suits for next models

1

Other Polycom Handset manuals

Polycom Polycom Butterfly User manual

Polycom

Polycom Polycom Butterfly User manual

Polycom KIRK 4020 User manual

Polycom

Polycom KIRK 4020 User manual

Polycom SpectraLink 8440 User manual

Polycom

Polycom SpectraLink 8440 User manual

Polycom VVX 500 series User manual

Polycom

Polycom VVX 500 series User manual

Polycom KIRK 4020 User manual

Polycom

Polycom KIRK 4020 User manual

Polycom VVX 300 User manual

Polycom

Polycom VVX 300 User manual

Polycom VVX 300 User manual

Polycom

Polycom VVX 300 User manual

Polycom Diagnostic Handset 1610 User manual

Polycom

Polycom Diagnostic Handset 1610 User manual

Polycom KIRK 5020 User manual

Polycom

Polycom KIRK 5020 User manual

Polycom VVX410 User manual

Polycom

Polycom VVX410 User manual

Polycom KIRK 4020 Guide

Polycom

Polycom KIRK 4020 Guide

Polycom KIRK 4080 User manual

Polycom

Polycom KIRK 4080 User manual

Polycom VVX D60 User manual

Polycom

Polycom VVX D60 User manual

Polycom KIRK 7020 User manual

Polycom

Polycom KIRK 7020 User manual

Polycom SoundPoint IP 32 Series User manual

Polycom

Polycom SoundPoint IP 32 Series User manual

Polycom SoundPoint IP 320 User manual

Polycom

Polycom SoundPoint IP 320 User manual

Polycom KIRK 5020 User manual

Polycom

Polycom KIRK 5020 User manual

Polycom SpectraLink 8450 User manual

Polycom

Polycom SpectraLink 8450 User manual

Polycom STRATA CIX 8002 User manual

Polycom

Polycom STRATA CIX 8002 User manual

Polycom VVX D60 User manual

Polycom

Polycom VVX D60 User manual

Polycom KIRK 2010 User manual

Polycom

Polycom KIRK 2010 User manual

Polycom KIRK KIRK 4040 User manual

Polycom

Polycom KIRK KIRK 4040 User manual

Polycom KIRK 4080 User manual

Polycom

Polycom KIRK 4080 User manual

Polycom VVX-250 Series User guide

Polycom

Polycom VVX-250 Series User guide

Popular Handset manuals by other brands

GE 28101EE1 Quick setup guide

GE

GE 28101EE1 Quick setup guide

Kyocera IRIDIUM KI-G100 user guide

Kyocera

Kyocera IRIDIUM KI-G100 user guide

SW Comms ShoreTel 212k quick guide

SW Comms

SW Comms ShoreTel 212k quick guide

iPECS LIP-9020 user guide

iPECS

iPECS LIP-9020 user guide

ASCOM I62 - user manual

ASCOM

ASCOM I62 - user manual

Philips TD6736/BH051P user manual

Philips

Philips TD6736/BH051P user manual

LG-Ericsson LIP-9010 user guide

LG-Ericsson

LG-Ericsson LIP-9010 user guide

Mitel 112 manual

Mitel

Mitel 112 manual

SBC SBC-381H installation manual

SBC

SBC SBC-381H installation manual

Mitel 5602 user guide

Mitel

Mitel 5602 user guide

Swissvoice ePure HD manual

Swissvoice

Swissvoice ePure HD manual

ASCOM d81 Messenger Safety instructions

ASCOM

ASCOM d81 Messenger Safety instructions

SpectraLink 7522 quick start guide

SpectraLink

SpectraLink 7522 quick start guide

Avaya L100 Series Release notes

Avaya

Avaya L100 Series Release notes

GE 27950EE1 user guide

GE

GE 27950EE1 user guide

Mitel OpenPhone OpenPhone 27 user guide

Mitel

Mitel OpenPhone OpenPhone 27 user guide

GE 1583 user guide

GE

GE 1583 user guide

iiNet Handset Quick installation guide

iiNet

iiNet Handset Quick installation guide

manuals.online logo
manuals.online logoBrands
  • About & Mission
  • Contact us
  • Privacy Policy
  • Terms and Conditions

Copyright 2025 Manuals.Online. All Rights Reserved.

Polycom Kirk 4020 DECT Handset Feature Guide
Press the button for 1 second
When the handset is turned on the
symbol is shown in the lower left corner of
the display, if the handset is subscribed to a
system
Press the button for 4 seconds.
Note: When the handset has been outside
the coverage area, it can take up to 30
seconds before the handset is back on the
system after re-entering the coverage area.
For making or receiving calls the handset has
to be subscribed to a system (shown in
display)
Press the button, the icon in the
display will flash until the connection is
established
Dial the number onto the keypad
Dial the number onto the keypad (long press
on the button will make a pause, if
necessary).
Press the button, the icon will flash
until the connection is established
Press the > (BOOK) to enter the telephone
book
Search for the number either by using the <
or >buttons or by pressing the first letter in
the name by using the digits 1 –9
Press the button, the icon will flash
until the connection is established
To answer a call, press the button
To place a caller on hold, press the Rbutton
To retrieve the call, press R
While on a call press the Rbutton.
Dial the extension of phone number
Wait for answers.
Press to hang-up
While on a call press the Rbutton
Dial the extension of phone number
Wait for ring tone.
Press to hang-up
Press Rbutton then dial *68 and the
extension of phone which call is to be parked,
then hang up
Polycom Kirk 4020 DECT Handset Feature Guide
Press button then dial *88 to retrieve
the parked call
Enables you to pickup an incoming call ringing
at another extension which is a member of the
same pickup group.
To perform call pickup, dial *98 and then
press the button
Enables you to pickup an incoming call ringing
at an extension.
To perform direct call pickup, dial *97 and the
extension of the phone which is ringing, then
press the button.
Press button then dial *72 then enter
the phone number where you want your calls
to ring, wait for confirmation, then hang-up
Press button then dial *73 wait for
confirmation, then hang-up
Press button then dial *90 then enter
the phone number where you want your calls
to ring, wait for confirmation, then hang-up
Press button then dial *91 wait for
confirmation, then hang-up
Press button then dial *92 then enter
the phone number where you want your calls
to ring, wait for confirmation, then hang-up.
Press button then dial *93 wait for
confirmation, then hang-up.
Press button then dial *21, wait for
confirmation, then hang-up
Press button then dial #21 wait for
confirmation, then hang-up
Press button then dial *40, wait for
confirmation, then hang-up
Press button then dial #40 wait for
confirmation, then hang-up
Press button then dial *41, wait for
confirmation, then hang-up
Press button then dial #41 wait for
confirmation, then hang-up
While on a call press the Rbutton
Dial *55 and wait for confirmation
Press to hang-up
The handset registered onto TIPT can be
included in a conference call, only if the
conference originates from a SIP IP phone and
analogue phones.
Polycom Kirk 4020 DECT Handset Feature Guide
Press button then dial *69
The last incoming phone number is redialled
To dial the last number you called, press the
<button and scroll using the <or >button to
select the desired number and then press the
button.
Press button then dial *66
The last outgoing number is redialled
Press button then dial *78, wait for
confirmation, then hang-up
Press button then dial *79 wait for
confirmation, then hang-up
Press button then dial *67
Dial the intended telephone number.
Press button then dial *65
Dial the intended telephone number
Press button then dial *74, followed by
the single digit speed dial code [2-9]
The speed dial number is dialled
Press button then dial *75, followed by
the prefix [ ] and the two digit speed dial
code [00 –99]
The speed dial number is dialled
Press button then dial *62
CLEAR VOICEMAIL MESSAGE WAITING
INDICATOR
Press button then dial *99
Use the two buttons placed at the right side of
the handset for volume control
In the battery menu it is possible to see the
remaining battery capacity. For reading the
correct capacity, the handset has to be removed
from the charger for at least one hour.
Press MENU and use the <or >buttons to
reach the Battery Menu
Press to enter the menu and you can see
the current status of the battery capacity
Press to return to the menu system or
press MENU to quit. The indication on the
display is not necessarily an exact reflection
on the remaining speech time.
To lock the handset keypad to prevent
accidental button presses
Press the MENU button then the button
(display will show KEY LOCKED).
To unlock the handset keypad,
Press the MENU button and then the
button again (display will show idle text).
The handset has a user-defined profile and a
mode where all sounds are disabled (SILENT).
Pressing the MENU button then the button
will enter the profile setup where you can
configure the following various handset
functions: backlight, ring tone, ringer volume,
key click, vibrator, b-answer, start volume, out of
range indicator and auto key lock. To access
these functions use the <or >buttons and then
the button.
The handset also has a silent function. Pressing
the MENU button then the # will toggle the
SILENT mode. The display shows SILENT if the
SILENT mode is chosen.