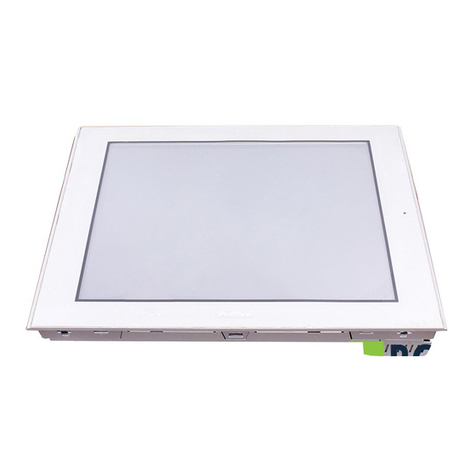
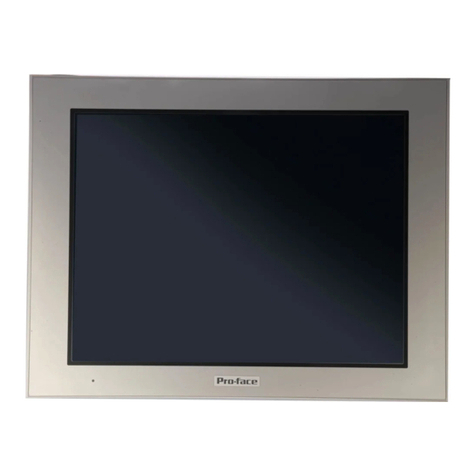
Pro-face FP3650-T41 User manual

1
FP3650-T41 Installation Guide
FP unit (1)
Installation Guide (1) (this manual) Warning/Caution Information (1)
Installation Gasket (1)(attached to the FP unit)
Installation Brackets (4/set, 1set) USB Cable Clamp(2)
This unit has been carefully packed, with special attention to quality. However, should
you find anything damaged or missing, please contact your local FP distributor
immediately.
An FP3650-T41 unit needs the following software for operation. As FP user manual,
provided by PDF media, describes its details, download the manual below and get the
further information. Visit our website below and get both software and reference manual.
(URL:http://www.pro-face.com/otasuke/)
• Software : Mouse Emulation Software
• Manual : FP-3500T/3600T/3650T series User Manual
Caution
Be sure to read the “Warning/Caution Information” on the attached sheet before using
the product.
Package Contents
Required software/Reference manual

2
The FP3650-T41 is UL/c-UL recognized components. (UL File No.171486)
This unit conforms as a product to the following standards:
UL60950-1 Industrial Control Equipment
(Information Technology Equipment - Safety - Part 1: General Requirements)
CAN/CSA C22.2 No.60950-1-03 (c-UL Qualification)
(Information Technology Equipment - Safety - Part 1: General Requirements)
<Cautions>
Be aware of the following items when building the FP into an end-use product:
• The FP must be used as a built-in component of an end-use product.
• This unit should be installed in the front face of a metal panel.
• If this unit is installed so as to cool itself naturally, be sure to install it in a vertical
panel. Also, be sure that the FP unit is mounted at least 100 mm away from any
adjacent structures or equipment. If these requirements are not met, the heat generated
by the FP unit’s internal components may cause the unit to fail to meet UL/c-UL
standard.
• For use in Pollution Degree 2 environment.
.
The FP3650-T41 is a CE marked product that conforms to EMC directives and Low
Voltage directives EN55011 Class A, EN61000-6-2 and EN60950-1 First Edition.
* For detailed CE marking information, please contact your local FP distributor.
UL/c-UL Application Notes
Model Type Listed No.
FP3650-T41 3580405-01
CE Marking Notes

3
1Part Names
CDEFGH
Front View
Rear View
Bottom View
A,B
J
I
A: TFT Color LCD
Acts as a display monitor for your host.
B: Touch Panel
Allows you to switch screens or write data to
the host.
C: Input Terminal Block
Provides the input and ground terminals for a
power cable.
D: Setting Switch
By opening the cover, the Dip switches and
slide switch are seen. Each switch can set a
operation mode.
E:Analog RGB Connector
Connector for analog RGB interface
F: DVI-D Interface Connector
Connector for DVI-D interface
G: Serial Connector
Connector for serial (RS-232C) interface.
Used for sending touch panel data to the
host.
H: USB Connector (Type B)
Connector for USB interface. Used for
sending touch panel data to the host or used
as an upstream port for USB-HUB.
I: Front LED
Used to indicate the condition of the power
supply, a backlight burnout or image signal
input.
J: USB Connector (Type A)
Adownstream port for embedded USB-HUB
in conformity with USB2.0/1.1 standard,
which is used for connecting USB devices.
Connect the upstream port of the USB-HUB
(H:USB connector) to the Host PC for USB
connector use.

4
The Dip Switches and Slide Switch are located in the bottom of the FP unit. Only the
settings when the power supply is turned on is effective to the Dip Switches and the Slide
Switch. After changing the settings of the Dip Switches and the Slide Switch, be sure to
restart your FP unit
SW1
• SW1-2 Dip Switch SW1-2 is used to display or hide the OSD.
To hide the OSD, set the switch to ON. To display the OSD, set the switch to OFF.
The default setting is OFF. (OSD is displayed.)
SW2
2Dimensions
3Dip Switches and Slide Switch
Switch Setting
SW1-1 Reserved (Always OFF)
SW1-2 Display/Hide the OSD
SW1-3 Reserved (Always OFF)
SW1-4 Reserved (Always OFF
SW1-5 Reserved (Always OFF)
SW1-6 Reserved (Always OFF)
SW1-7 Reserved (Always OFF)
SW1-8 Reserved (Always OFF)
Switch Setting
Slide Switch is used to switch the data input/output (command
control) method on the touch panel between USB and RS-232C
(Serial). The default setting is RS-232C.
301[11.85]
317[12.48]
243[9.57]
227[8.94]
58[2.28]
8[0.31]
Top View
Front View Side View
Unit: mm [in]
Dip Switches(SW1)
Slide Switch(SW2)
Bottom View
ON
18
SW1
2
32
U
SB

5
Analog RGB Interface
Display Area (FP3650-T41)
4Interfaces
Input signal type Analog RGB
Input signal
characteristic Image signal : analog RGB
Synchronous signal :TTL level, negative true or positive true
Scanning type : non-interlace
Setting by OSD
(On Screen Display)
•CONTRAST
•H-POSITION
•H-size
•DIMMER(BACKLIGHT)
•ALL RESET (DEFAULT)
•BRIGHTNESS
•V-POSITION
•PHASE
•SHARPNESS
Size H Sync.
(kHz) V Sync.
(Hz) Dot Clock
(MHz)
Screen Resolution
Expansion
(H: Horizontal)
(V: Vertical)
Display
Resolution
640×400 24.827 56.000 21.053 ×1.6 (H)
×1.92 (V) 1024×768
640×400 31.469 70.000 25.175
640×480 31.469 59.992 25.175 ×1.6 1024×768640×480 37.500 75.000 31.500
640×480 35.000 66.667 30.240
720×400*1
*1. When you use this resolution, set “ON” for “720 × 400 Mode” in the OSD (On
Screen Display) “system settings”.
31.469 70.000 28.320 ×1.42 (H)
×1.92 (V) 1024×768
800×600 37.879 60.317 40.000 ×1.28 1024×768
800×600 46.875 75.000 49.500
1024×768 48.363 60.004 65.000 ×1.0 1024×7681024×768 56.476 70.069 75.000
1024×768 60.023 75.029 78.750

6
Pin Assignments and Signal Names for Analog RGB
Connector.................. Mini Dsub 15 pin male
Connector set screw.. Inch type (4-40)
Cable......................... RGB cable manufactured by Pro-face.
FP-CV02-45 <4.5m> (VGA standard)
DVI-D Interface
Display Area (FP3650-T41)
Pin No Signal Name Condition Pin Location
1 Analog R R signal input
2 Analog G G signal input
3 Analog B B signal input
4 Reserved NC (spare for input)
5 Digital grounding Digital signal GND
6 Return R R signal GND
7 Return G G signal GND
8 Return B B signal GND
9 Reserved NC (spare for input)
10 Digital grounding Digital signal GND
11 Reserved NC (spare for input)
12 DDC DATA DDC Data
13 H. SYNC Horizontal synchronous signal input
14 V. SYNC Vertical synchronous signal input
15 DDC CLK DDC Clock
• If a cable other than the specified RGB cable is used, product
performance cannot be guaranteed due to the possibility of noise
interfering with the FP unit’s operation.
Input signal type DVI-D
Setting by OSD
(On Screen Display) •CONTRAST
•DIMMER(BACKLIGHT)
•ALL RESET (DEFAULT)
•BRIGHTNESS
•SHARPNESS
Size H Sync.
(kHz) V Sync.
(Hz) Dot Clock
(MHz)
Screen Resolution
Expansion
(H: Horizontal)
(V: Vertical)
Display
Resolution
640×400 24.827 56.000 21.053 ×1.6 (H)
×1.92 (V) 1024×768
640×400 31.469 70.000 25.175
640×480 31.469 59.992 25.175 ×1.6 1024×768640×480 37.500 75.000 31.500
640×480 35.000 66.667 30.240
720×400*1 31.469 70.000 28.320 ×1.42 (H)
×1.92 (V) 1024×768
800×600 37.879 60.317 40.000 ×1.28 1024×768
800×600 46.875 75.000 49.500
15
11
5
1

7
Pin Assignments and Signal Names for DVI-D
Connector.................. DVI-D 24-pin male
Connector set screw.. Inch type (4-40)
Cable......................... DVI-D cable manufactured by Pro-face.
FP-DV01-50 <5 m>, FP-DV01-100 <10 m>
Serial Interface
1024×768 48.363 60.004 65.000 ×1.0 1024×7681024×768 56.476 70.069 75.000
1024×768 60.023 75.029 78.750
*1. When you use this resolution, set “ON” for “720 × 400 Mode” in the OSD (On
Screen Display) “system settings”.
Pin No Signal Name Pin No Signal Name Pin Location
1 TMDS DATA2- 13 NC
2 TMDS DATA2+ 14 NC
3 TMDS DATA2 SHIELD 15 GND
4 NC 16 Hot Plug Detect
5 NC 17 TMDS DATA0-
6 DDC Clock 18 TMDS DATA0+
7 DDC Data 19 TMDS DATA0 SHIELD
8NC20NC
9 TMDS DATA1- 21 NC
10 TMDS DATA1+ 22 TMDS CLOCK
SHIELD
11 TMDS DATA1 SHIELD 23 TMDS CLOCK+
12 NC 24 TMDS CLOCK-
• If a cable other than the specified DVI-D cable is used, product
performance cannot be guaranteed due to the possibility of noise
interfering with the FP unit’s operation.
• The FP-DV01-100 can be used only when connected to a PS-2000B unit.
When using the FP-DV01-100, be sure to turn the PS-2000B’s internal
dipswitch 4 ON.
(When using the FP-DV01-50, turn this switch OFF.)
RS-232C Serial Interface
Baud rate : 9600 bps
Data length : 8 bits
Parity : None
Stop bit : 1
Flow Control: None
1
9
17
8
16
24
17
24
1
8

8
Pin Assignments and Signal Names for Serial Interface
*1 The CD, DTR, and DSR are connected together inside of the FP.
Connector.................. Dsub 9 pin female
Connector set screw.. Inch type (4-40)
Cable......................... SIO cable for FP manufactured by Pro-face.
FP61V-IS00-O
Concerning Signal Names
Signal names used for the serial interface on FP units are designed to match the pin order
used on most PC serial interfaces, so that a straight cable can be used to connect the two.
Therefore, connect each pin’s signal to the same signal name on the PC side.
For example, pin #2 ‘RD’ should be connected to the ‘RD’ input terminal on the PC’s
connector.
Refer to the FP-3500T/3600T/3650T series User Manual’s section “Cable Diagrams” for
each signal’s direction.
USB Interface (Type-B connector : Up-Stream Port)
Pin Assignments and Signal Names for USB Interface
Cable......................... USB cable manufactured by Pro-face
FP-US00
Pin No. Signal Name Condition Pin Location
1 CD Carrier Detect*1
2 RD Receive Data (FP->Host)
3 SD Send Data (FP<-Host)
4 DTR Data Terminal Ready*1
5 GND Ground
6 DSR Data Set Ready*1
7 RS Request to Send (FP<-Host)
8 CS Clear to Send (FP->Host)
9 NC (Used internally)
Pin No. Signal Name Condition Pin Location
1 USB1-5V +5VIN
2 USBD1(-) USB data(-)
3 USBD1(+) USB data(+)
4 GND Ground
• If a cable other than the specified USB cable is used, product
performance cannot be guaranteed due to the possibility of noise
interfering with the FP unit’s operation.
6
9
1
5
4
3
21

9
(1) According to the Panel Cut size, make instllation holes on the panel.
(2) Check that FP has instllation fastners. Insert the FP from the front.
(3) The following figures show the eight(4) fastener insertion slot locations. Insert each
fastener’s hook into the slot. Tighten the screws in a diagonal pattern, and slowly
increase the torque.
• To avoid an electric shock, when connecting the FP’s power cord terminals to the
power terminal block, confirm that the FP’s power supply is completely turned OFF,
via a breaker, or similar unit.
5Instllation
• Installation gasket must be used even though it is not necessary for
its environment. For installation, refer to the FP-3500T/3600T/
3650T series User Manual.
• Tightening the screws with too much force can damage the FP unit’s
case.
• The necessary torque is 0.5N•m.
6Wiring
227.5
+1
0
FP
Unit: mm [in] 301.5 [11.87 ]
+1
0 +0.04
0
[8.96 ]
+0.04
0
under 4-R3
FP
Panel Panel thickness
1.6[0.06] to 10[0.39]
Bottom
Insertion
Slots
Panel Installation
fastener
Top
FP
Hook

10
• To avoid the dangers of fire, electric hazards and equipment damage, be sure to use
only the specified voltage when operating the FP.
• Since there is no power switch on the FP unit, be sure to attach a breaker-type switch
to its power cord.
Electrical Specification
Environmental Specification
Power Cable Connecting
Connecting the FP Power Cord
(1) Be sure that the FP’s power cord is not plugged in to the power supply.
(2) Remove the Terminal Strip’s clear plastic cover.
Item Specification
Power Supply
Input Voltage AC100 ~ 240V
Rated Voltage AC85V ~ AC265V
Rated Frequency 50 / 60HZ
Allowable Frequency Range 40Hz - 72Hz
Allowable Voltage Drop 1 cycle (Max.)
Current Consumption AC100V 0.9A or less (TYP0.55 A)
AC240V 0.45A or less (TYP0.30 A)
In-Rush Current 60A (Max.)
Voltage Endurance AC1500V 20mA for 1 minute
(between charging and FG terminals)
Insuration Resistance DC500V 10MΩ (Min.)
(between charging and FG terminals)
Item Specification
Surrounding Air
Temperature 0~50ºC (The panel should not incline more than 30º)
Storage Temperature -20 ~ +60ºC
Ambient Humidity 10~90%RH
(No condensation, Wet bulb temperature: 39ºC max.)
Storage Humidity
Air Purity (Dust) 0.1mg/m3(Max.) (No electrically conductive dust is allowed)
Pollution Degree Pollution Degree 2
AC cable Grounding Wire
Power Cord Double insulation wire
1.25~2.0 mm2
[0.0024inch2to 0.0062 inch2]
(16-14AWG)
1.25~2.0 mm2
[0.0024inch2to 0.0062 inch2]
(16-14AWG)
Recomended Ring
terminal*1
*1. In order to prevent a short circuit caused by loose screws, make sure to use a
crimp-type terminal with insulating sleeve.
V2-MS3 compatible
(J.S.T. Mfg. Co.,Ltd).
Over ø3.2 mm[0.13 in.]
V2-P4 compatible
(J.S.T. Mfg. Co.,Ltd).
Over ø4.3 mm[0.17 in.]
Under 6.0 mm
[0.24 in.] Under 7.0 mm
[0.28 in.]

11
(3) Remove the screws from the two (2) terminals (L,N) and FG (Frame Ground)
Terminal, position the Ring Terminals and reattach the screws. (Check each wire to
make sure the connections are correct)
(4) Reattach the Terminal Strip’s clear plastic cover.
USB Cable Clamp Attachment Procedure
Installation to USB cable
(1) Connect the USB cable to the connector.
(2) Tighten the clamp until the cable is secured in place and insert the convex of cable
clamp into the USB fixing hole to fix both as shown in the following figure.
USB Cable Clamp Removal Feature
(1) Push in the cable clamp's stopper with a standard flat-blade screwdriver until the
cable clamp is unlocked, and remove it.
(2) Disconnect the USB cable.
Please pay special attention to the following instructions when connecting the power cord
terminals to the FP unit.
• If the power supply voltage exceeds the FP unit’s specified range, connect a voltage
transformer.
• The torque required to tighten these screws are as follows:
Terminal Block: 0.5 to 0.6N•m.
FG (Frame Ground) Terminal: 0.6 to 0.7 N•m.
7Using the USB Cable Clamp
• If the stopper will not move, press on <A> (shown in the figure) to
free the clamp from the clamp holder.
8Power Supply Cautions
DON’T
CONNECT
FG (Frame Ground) Terminal
USB cable
USB Cable Clamp
Stopper
<A>
USB fixing hole

12
• Between the line and the ground, be sure to use a low noise power supply. If there is
still an excessive amount of noise, connect a noise reducing transformer.
• Input and Output signal lines must be separated from the power control cables for
operational circuits.
• The FP unit’s power supply cord should not be bundled with or kept close to main
circuit lines (high voltage, high current), or input/output signal lines.
• Connect a surge absorber to handle power surges.
• To reduce noise, make the power cord as short as possible.
When attaching a wire to the FP unit’s rear face FG terminal, (on the AC Connector), be
sure to create an exclusive ground.
(Use a grounding resistance of 100Ω, a wire of 2mm2or thicker, or your country’s
applicable standard.)
• All FP Input and Output signal lines must be separated from all operating circuit
(power) cables.
• If this is not possible, use a shielded cable and ground the shield.
OSD Functions
You can operate the FP screen menus via the touch panel, and even if FP is operating,
adjust screen image display to a minute level. The feature is called OSD (On Screen
Display). The items that can be set with OSD and the functions are shown.
9Grounding Caution
10 Input/Output Signal Line Cautions
11 Calibration of OSD Display Position
Example of OSD screen "Ver.*.**" indicates the version of the OSD.

13
Starting the OSD
To start the OSD and enter OSD mode, press the three corners of the touch panel in turn
(upper left, upper right, and lower right) within 5 seconds. In OSD mode, the setting
screen is displayed in the center of the screen. In this mode, the touch panel cannot be
used to export data to external devices unless the settings for the OSD are completed.
Using the OSD
Quitting the OSD
• OSD is not displayed when a SW 1-2 is ON.
Item Function
Color Settings Adjusts the contrast and the brightness.
Screen Settings Adjusts the display position of the screen.
(Analog RGB only)
Custom Display Adjusts Sharpness and the backlight brightness.
System Settings Changes settings such as activating the click sound.
All Reset Resets the current OSD value to the default value.
Input Source Switches Analog RGB and DVI-D.
Auto Adjust Automatically adjusts the display position of the screen.
(Analog RGB only)
Auto Gain Automatically adjusts the contrast and the brightness.
(Analog RGB only)
ESC Cancels the setting and returns to the upper level.
SET Applies the setting and returns to the upper level.
Arrow KEY Changes the selection.
SELECT Selects icons or items.
SAVE Saves the current value and quits the OSD.
EXIT Quits the OSD.
Icons on the screen are used to operate the OSD. After the OSD start-up, the top menu
displays. Touching the icon you want to adjust displays its submenu or setting change
screen. In the setting change screen, icons are used to change the setting. To
apply the setting, press the button. Press the button to save the defined settings.
To quit the OSD, press the or button in the top menu or leave the OSD as it
is for at least 30 seconds.

14
Top Main
• In the OSD, pressing the button applies the set value and enables
the setting. The set value won’t be canceled unless the power is turned
OFF or the value is reset.
If the power is turned OFF without saving the set value, that data will
disappear. The last saved data will be read into the system when the FP
starts. To enable the changed value, be sure to press the button.
• All the setting values, even though in process of the OSD settings, will b
e
retained in condition of letting the OSD leave more than 30 seconds or b
y
pressing the button. The OSD will keep those values and make the
m
effective until power-off or a Reset command input.
Selection of the change item
Applies the setting and then returns to the top menu.
Cancels the setting and then returns to the top menu.
Screen Settings (Analog RGB only)
H.Position
V.Position
H.size
Phase
Contrast
R.Contrast
G.Contrast
B.Contrast
Brightness
Color Settings
Adjustment button
Selection of the change item Adjustment button
Applies the setting and then returns to the top menu.
Cancels the setting and then returns to the top menu.
Custom Display
Sharpness
Dimmer
Auto Adjust Enable
OSD Transparent
Selection of the change item Adjustment button
Applies the setting and then returns to the top menu.
Cancels the setting and then returns to the top menu.

15
720x400 Mode When an input data resolution of 720 x 400 is used in the
VGA text mode, set this parameter to ON. For other
resolutions, set this parameter to OFF.
(Default: OFF)
Enables/disables the screen display Auto OFF function
and sets the time when the Auto OFF function is
enabled.
(Default: OFF <Auto OFF function disabled>)
The Auto OFF function automatically turns off the
display to prevent the screen from burning out when the
touch panel is not used for some period of time. With
this parameter, you can set the time interval to turn off
the screen display (how much time passes before the
screen display is turned off) when the touch panel is not
used. If the touch panel is not touched over the set time,
the backlight will automatically turns off.
Select the time period from 1 min, 3 min, 5 min, 10 min,
and OFF (Auto OFF function disabled).
Enables/disables the Backlight burnout detect function.
(Default: ON)
When a burned-out backlight is detected, the status LED
flashes alternately green and red, or a steady orange.
Touch-operation will be disabled when the backlight
burns out, which prevents the FP from sending input
signals to the PLC.
BL Alarm
• Normally, the FP unit detects a backlight burnout by
monitoring the backlight’s current flow, however, the FP
may fail to detect this condition, depending on the type of
backlight problem.
Auto off Disp
Selection of the change item
System Settings
Enables/disables the click sound. With this parameter,
the sound level can also be adjusted.
(Default value: OFF <Click sound disabled>)
Click Tone
Adjustment button
Applies the setting and then returns to the top menu.
Cancels the setting and then returns to the top menu.

16
.
Applies the setting and then returns to the top menu.
Cancels the setting and then returns to the top menu.
• Be sure to perform the auto gain control when the screen
has both 100% black and 100% white areas displayed.
Saves the setting and quits the OSD.
End of OSD
Saves all the adjusted settings in the EEPROM.
Auto Gain (Analog RGB only)
Icon selection
Icon decision
• Be sure to perform the auto adjust while things except
that black are shown on sides of the display.
Applies the setting and then returns to the top menu.
Cancels the setting and then returns to the top menu.
Input Source
Auto Adjust (Analog RGB only)
Applies the setting and then returns to the top menu.
Cancels the setting and then returns to the top menu.
Resets all the settings and then returns to the top menu.
Cancels the setting and then returns to the top menu.
All Reset
Note
Regardless of the above clause, Digital
Electronics Corporation shall not be held
responsible for any damages or third-party
claims for damages or losses resulting
from the use of this product.
071257D .FP3650-MT01E-BTH 2006.8 JM/A ©2006 Digital Electronics Corp.
Digital Electronics Corporation
8-2-52 Nanko Higashi, Suminoe-ku,
Osaka 559-0031, Japan
URL:http://www.pro-face.com/
Table of contents
Other Pro-face Monitor manuals
Pro-face
Pro-face GP-4000M User manual

Pro-face
Pro-face FP3900-T41 User manual

Pro-face
Pro-face GC4000 Series User manual
Pro-face
Pro-face GP77R Series Instruction manual

Pro-face
Pro-face SP5000 Series User manual
Pro-face
Pro-face PL-X900 Series User manual
Pro-face
Pro-face GP-3600T Series User manual
Pro-face
Pro-face PS-3000B Series User manual

Pro-face
Pro-face FP2650-T41 User manual
Pro-face
Pro-face Xycom SXT1811 Installation instructions
