manuals.online logo
Brands
  1. Home
  2. •
  3. Brands
  4. •
  5. Pro-Form
  6. •
  7. Elliptical Trainer
  8. •
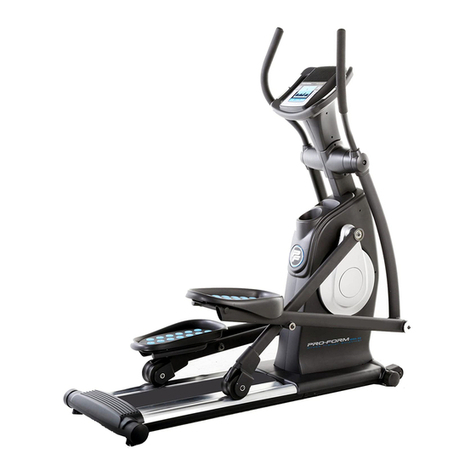
  9. Pro-Form 485 E Elliptical User manual

Pro-Form 485 E Elliptical User manual

Other manuals for 485 E Elliptical

4

This manual suits for next models

2

Other Pro-Form Elliptical Trainer manuals
Pro-Form 850 Elliptical User manual

Pro-Form

Pro-Form 850 Elliptical User manual

Pro-Form PFBE19610.3 User manual

Pro-Form

Pro-Form PFBE19610.3 User manual

Pro-Form 400 Zle Elliptical User manual

Pro-Form

Pro-Form 400 Zle Elliptical User manual

Pro-Form Comfort Stride User manual

Pro-Form

Pro-Form Comfort Stride User manual

Pro-Form 696 Elliptical User guide

Pro-Form

Pro-Form 696 Elliptical User guide

Pro-Form 300 Zle Elliptical Setup guide

Pro-Form

Pro-Form 300 Zle Elliptical Setup guide

Pro-Form 831.283521 User manual

Pro-Form

Pro-Form 831.283521 User manual

Pro-Form 550 Hr Elliptical User manual

Pro-Form

Pro-Form 550 Hr Elliptical User manual

Pro-Form Crossxover User manual

Pro-Form

Pro-Form Crossxover User manual
Pro-Form 6.0 Et Elliptical User manual

Pro-Form

Pro-Form 6.0 Et Elliptical User manual

Pro-Form 790 Hr Elliptical Operating and maintenance manual

Pro-Form

Pro-Form 790 Hr Elliptical Operating and maintenance manual

Pro-Form 831.28543.0 User manual

Pro-Form

Pro-Form 831.28543.0 User manual

Pro-Form 470 Hr Elliptical System manual

Pro-Form

Pro-Form 470 Hr Elliptical System manual

Pro-Form ZE 9 User manual

Pro-Form

Pro-Form ZE 9 User manual

Pro-Form 720 Zle Elliptical User manual

Pro-Form

Pro-Form 720 Zle Elliptical User manual

Pro-Form 696 Elliptical Quick start guide

Pro-Form

Pro-Form 696 Elliptical Quick start guide

Pro-Form 485 E Eng/french User manual

Pro-Form

Pro-Form 485 E Eng/french User manual

Pro-Form 465S User manual

Pro-Form

Pro-Form 465S User manual

Pro-Form 764hr Bike Operating and maintenance manual

Pro-Form

Pro-Form 764hr Bike Operating and maintenance manual

Pro-Form 720 Zle Elliptical Operating and maintenance manual

Pro-Form

Pro-Form 720 Zle Elliptical Operating and maintenance manual

Pro-Form 900 CardioCrossTrainer User manual

Pro-Form

Pro-Form 900 CardioCrossTrainer User manual

Pro-Form PFEL53408.0 User manual

Pro-Form

Pro-Form PFEL53408.0 User manual

Pro-Form XP 115 831.28643.0 User manual

Pro-Form

Pro-Form XP 115 831.28643.0 User manual

Pro-Form PFEL4501 User manual

Pro-Form

Pro-Form PFEL4501 User manual

Popular Elliptical Trainer manuals by other brands

NordicTrack AudioStrider 990 PRO NTEL09811.2 user manual

NordicTrack

NordicTrack AudioStrider 990 PRO NTEL09811.2 user manual

Weslo Momentum 4.0 Elliptical Manuale d'istruzioni

Weslo

Weslo Momentum 4.0 Elliptical Manuale d'istruzioni

Progear Fitness Air elliptical pro 1307 owner's manual

Progear Fitness

Progear Fitness Air elliptical pro 1307 owner's manual

Torque Fitness XPLLP owner's manual

Torque Fitness

Torque Fitness XPLLP owner's manual

Octane Fitness PRO3700C Operation manual

Octane Fitness

Octane Fitness PRO3700C Operation manual

Xterra FS5.8e owner's manual

Xterra

Xterra FS5.8e owner's manual

Bodyguard E-40 user manual

Bodyguard

Bodyguard E-40 user manual

Vision Fitness X6600iNetTV Assembly guide

Vision Fitness

Vision Fitness X6600iNetTV Assembly guide

NordicTrack E 7.2 Elliptical null

NordicTrack

NordicTrack E 7.2 Elliptical null

NordicTrack E4.1 Elliptical null

NordicTrack

NordicTrack E4.1 Elliptical null

NordicTrack E4.1 Elliptical null

NordicTrack

NordicTrack E4.1 Elliptical null

Bonn Germany Concept 2.2 user manual

Bonn Germany

Bonn Germany Concept 2.2 user manual

Precor Resolute RSL 620 Assembly guide

Precor

Precor Resolute RSL 620 Assembly guide

NordicTrack E 9.2 Elliptical HASZNALATI UTASITAS

NordicTrack

NordicTrack E 9.2 Elliptical HASZNALATI UTASITAS

Sears FREE SPIRIT C249 30737 0 owner's manual

Sears

Sears FREE SPIRIT C249 30737 0 owner's manual

True FS-64 Assembly manual

True

True FS-64 Assembly manual

Sport-thieme ST 310 manual

Sport-thieme

Sport-thieme ST 310 manual

VIRTUFIT CTR 1.1 user manual

VIRTUFIT

VIRTUFIT CTR 1.1 user manual

manuals.online logo
manuals.online logoBrands
  • About & Mission
  • Contact us
  • Privacy Policy
  • Terms and Conditions

Copyright 2025 Manuals.Online. All Rights Reserved.

®
CAUTION
Read all precautions and
instructions in this manual
before using this equipment.
Keep this manual for future
reference.
Model No. FEMEL87078
Serial No.
Serial
Number
Decal
Patent Pending
QUESTIONS?
As a manufacturer, we are com-
mitted to providing complete
customer satisfaction. If you have
questions, or if there are missing
or damaged parts, we will guaran-
tee complete satisfaction through
our Customer Service
Department.
lease CALL:
0345-089009
Or WRITE:
ICON Fitness Lifestyle Ltd.
Greenwich House
223 North Street
Sheepscar
West Yorkshire
Leeds LS7 2AA
Visit our website at
www.proform.com
new products, prizes,
fitness tips, and much more!
USER’S MANUAL
The serial number is found in the
location shown below. Write the
serial number in the space above.
2
TABLE OF CONTENTS
IMP RTANT PRECAUTI NS . . . . . . . . . . . . . . . . . . . . . . . . . . . . . . . . . . . . . . . . . . . . . . . . . . . . . . . . . . . . .3
BEF RE Y U BEGIN . . . . . . . . . . . . . . . . . . . . . . . . . . . . . . . . . . . . . . . . . . . . . . . . . . . . . . . . . . . . . . . . . . .4
PART IDENTIFICATI N CHART . . . . . . . . . . . . . . . . . . . . . . . . . . . . . . . . . . . . . . . . . . . . . . . . . . . . . . . . . . .5
ASSEMBLY . . . . . . . . . . . . . . . . . . . . . . . . . . . . . . . . . . . . . . . . . . . . . . . . . . . . . . . . . . . . . . . . . . . . . . . . . . .6
H W T USE THE ELLIPTICAL EXERCISER . . . . . . . . . . . . . . . . . . . . . . . . . . . . . . . . . . . . . . . . . . . . . . . . .9
MAINTENANCE . . . . . . . . . . . . . . . . . . . . . . . . . . . . . . . . . . . . . . . . . . . . . . . . . . . . . . . . . . . . . . . . . . . . . . .11
C NDITI NING GUIDELINES . . . . . . . . . . . . . . . . . . . . . . . . . . . . . . . . . . . . . . . . . . . . . . . . . . . . . . . . . . . .12
PART LIST . . . . . . . . . . . . . . . . . . . . . . . . . . . . . . . . . . . . . . . . . . . . . . . . . . . . . . . . . . . . . . . . . . . . . . . . . . .14
EXPL DED DRAWING . . . . . . . . . . . . . . . . . . . . . . . . . . . . . . . . . . . . . . . . . . . . . . . . . . . . . . . . . . . . . . . . .15
H W T RDER REPLACEMENT PARTS . . . . . . . . . . . . . . . . . . . . . . . . . . . . . . . . . . . . . . . . . . .Back Cover
®
WARNING: Before beginning this or any exercise program, consult your physician. This is espe-
cially important for persons over the age of 35 or persons with pre-existing health problems. Read
all instructions before using. ICON assumes no responsibility for personal injury or property dam-
age sustained by or through the use of this product.
The decal shown at the right has been placed on
the elliptical exerciser. If the decal is missing, or
if it is not legible, please call our Customer
Service Department at
0345-089009
to order a free
replacement decal. Apply the decal in the loca-
tion shown.
1. Read all instructions in this manual before
using the elliptical exerciser.
2. Use the elliptical exerciser only as described
in this manual.
3. It is the responsibility of the owner to
ensure that all users of the elliptical exercis-
er are adequately informed of all precau-
tions.
4. lace the elliptical exerciser on a level sur-
face, with a mat beneath it to protect the
floor or carpet. Keep the elliptical exerciser
indoors, away from moisture and dust.
5. Inspect and tighten all parts regularly.
Replace any worn parts immediately.
6. Keep children under the age of 12 and pets
away from the elliptical exerciser at all
times.
7. The elliptical exerciser should not be used
by persons weighing more than 115 kg.
8. Wear appropriate clothing when using the
elliptical exerciser. Always wear athletic
shoes for foot protection.
9. When mounting and dismounting the ellipti-
cal exerciser, always hold the handlebars or
the T-handle and step onto and off the pedal
that is in the lowest position.
10. Each time you stop exercising on the
elliptical exerciser, allow the pedals to come
to a complete stop before dismounting.
11. Always keep your back straight when using
the elliptical exerciser. Do not arch your
back.
12. If you feel pain or dizziness at any time
while exercising, stop immediately and
begin cooling down.
13. The elliptical exerciser is intended for in-
home use only. Do not use the elliptical
exerciser in a commercial, rental, or institu-
tional setting.
3
IM ORTANT RECAUTIONS
WARNING: To reduce the risk of serious injury, read the following important precautions before
using the ROFORM®485E.
4
BEFORE YOU BEGIN
Congratulations for selecting the PR F RM®485E
low-impact elliptical exerciser. The PR F RM®485E
is an incredibly smooth exerciser that moves your feet
in a natural elliptical path, minimising the impact on
your knees and ankles. And the unique PR F RM®
485E features adjustable resistance, upper-body and
stationary handlebars, and a multi-mode exercise
monitor to help you get the most from your exercise.
Welcome to a whole new world of natural, elliptical-
motion exercise from PR F RM.
For your benefit, read this manual carefully before
you use the ROFORM®485E. If you have questions
after reading the manual, call our Customer Service
Department at
0345-089009.
To help us assist you,
please note the product model number and serial
number before calling. The model number is
PFEMEL87078. The serial number can be found on a
decal attached to the elliptical exerciser (see the front
cover of this manual for the location of the decal).
Before reading further, please look at the drawing
below and familiarise yourself with the parts that are
labelled.
Console
Resistance Knob
FRONT
BACK
LEFT SIDE Pedal Arm
Pedal Disk
Side Shield
Pedal
Book Holder
Upright
Water Bottle Holder
(bottle not included)
T-Handle
Handlebar
5
ART IDENTIFICATION CHART
Use the chart below to identify the small parts used in
assembly. The number in parenthesis below each part
refers to the key number of the part, from the PART
LIST on page 14. The number after the dash indicates
the quantity needed for assembly. Note: Some parts
may have been pre-attached for shipping. If a part
is not in the parts bag, check to see if it has been
pre-attached.
M10 Nylon Locknut (29)—4
Pedal Arm Spacer (41)—2*
Weld Spacer (49)—2 5/8” Axle Cap (57)—2*
3/4” Axle Cap (43)—4*
M6 Black Nylon Locknut (55)—2
Handlebar Spacer (39)—2
Rear Pedal Arm Bushing (11)—4
Pedal Arm Bushing (42)—4
M4 x 19mm Round
Head Screw (16)—6
M4 x 16mm Round
Head Screw (38)—4
M6 x 16mm Button Head Bolt (54)—2
* Extra parts may be included.
6
1. While another person holds the Upright (3) near the
Frame (1) as shown, gently pull the Resistance Cable
(26) and the Sensor Wire (25) out of the top of the
Upright until there is no slack between the Upright
and the Frame.
Slide the Upright (3) onto the welded bolts on the
Frame (1). Be careful to avoid pinching the
Resistance Cable (26) and the Sensor Wire (25).
Tighten an M10 Nylon Locknut (29) onto each welded
bolt.
2. While another person holds the Console (6) near the
Upright (3), connect the console wire to the Sensor
Wire (25).
Feed the slack Sensor Wire (25) back down into the
Upright (3). Attach the Console (6) to the Upright (3)
with four M4 x 16mm Round Head Screws (38). Be
careful to avoid pinching the Sensor Wire.
Press the Resistance Control Knob (50) onto the
Resistance Control (26).
ASSEMBLY
Assembly requires two people. Place all parts of the elliptical exerciser in a cleared area and remove the
packing materials. Do not dispose of the packing materials until assembly is completed.
Assembly requires a phillips screwdriver , two adjustable spanners , and a
rubber mallet .
1
3
1
25
26
29
Welded
Bolts
Console
Wire
3
50
26
25
6
38
2
7
3. Find the Left Pedal (31), which has a ridge on the
right side. Attach the Left Pedal to one of the Pedal
Arms (12) with three M4 x 19mm Round Head
Screws (16) as shown.
Repeat this step to attach the Right Pedal to the other
Pedal Arm (not shown).
4. Identify the Left Handlebar (8) (there is an “L” stick-
er on the Left Handlebar). Apply lubricant to the
axle on the lower end of the Left Handlebar.
Make sure that there are two Pedal Arm Bushings
(42) in each Pedal Arm (12).
Slide a Handlebar Spacer (39) and the Pedal Arm
(12) with the Left Pedal (31) onto the Left Handlebar
(8) as shown. (Note: These parts fit tightly; it may be
helpful to use the rubber mallet.) Next, refer to the
PART IDENTIFICATI N CHART on page 5 and iden-
tify the 3/4” Axle Caps (43). Tap a 3/4” Axle Cap onto
the Left Handlebar.
Repeat this step to attach the other Pedal Arm (12) to
the Right Handlebar (62).
5. Slide a Weld Spacer (49) onto the left axle on the
Upright (3). Make sure that the open side of the Weld
Spacer is facing the Upright.
Apply lubricant to the axle on the left Crank Arm
(59). Slide a edal Arm Spacer (41) onto the left
Crank Arm.
Make sure that there are two Rear Pedal Arm
Bushings (11) in the Pedal Arm (12) attached to the
Left Handlebar (8).
With the help of another person, slide the Left
Handlebar (8) onto the left axle on the Upright (3)
while sliding the left Pedal Arm (12) onto the left
Crank Arm (59). (Note: These parts fit tightly; it may
be helpful to use the rubber mallet. In addition, it may
be helpful to rotate the left Crank Arm (59) to a differ-
ent position.)
Tap a 5/8” Axle Cap (57) onto the left axle on the
Upright (3).
Tap a 3/4” Axle Cap (43) onto the left Crank Arm (59).
Repeat this step to attach the Right Handlebar and
the right Pedal Arm (not shown).
3
31
12
16
8
62
42
43
12
12
4
39
Lubricant
Ridge
31
5
59
41
11
12
49
57 3
43
8
Lubricant
8
7. The Console (6) requires two 1,5V batteries (not
included). Alkaline batteries are recommended.
To install batteries, first locate the battery clip under
the Console (6). Insert two batteries into the battery
clip as shown. Make sure that the batteries are
turned so the negative ends of the batteries
(marked “–”) are touching the springs in the
battery clip.
8. Make sure that all parts are properly tightened before you use the elliptical exerciser. Note: There may
be some hardware left over after assembly is complete. Place a mat under the elliptical exerciser to protect the
floor or carpet from damage.
6
7
6
55
54
10
3
Batteries
Battery
Clip
6. Attach the T-Handle (10) to the Upright (3) with two
M6 x 16mm Button Head Bolts (54) and two M6 Black
Nylon Locknuts (55).
9
HOW TO USE THE ELLI TICAL EXERCISER
HOW TO EXERCISE ON THE ELLI TICAL
EXERCISER
To mount the elliptical exerciser, firmly hold the han-
dlebars or the T-handle and carefully step onto the
pedal that is in the lowest position. Next, step onto the
other pedal. Push the pedals until they begin to move
with a continuous motion. Note: The pedal disks can
turn in either direction; it is recommended that
you turn the pedal disks in the direction shown
below; however, to give variety to your exercise,
you may choose to turn the pedal disks in the
opposite direction.
To dismount the elliptical exerciser, allow the pedals
to come to a complete stop. CAUTION: The elliptical
exerciser does not have a freewheel; the pedals
will continue to move until the flywheel stops.
When the pedals are stationary, step off the highest
pedal first. Then, step off the lowest pedal.
HOW TO ADJUST THE RESISTANCE OF THE
EDALS
As you exercise,
you can adjust
the resistance of
the pedals with
the resistance
knob on the
console. To
increase the
resistance,
turn the knob
clockwise; to
decrease the
resistance, turn the knob counterclockwise.
Pedal
Pedal Disk
Resistance Knob
10
DESCRI TION OF THE CONSOLE
The console is designed to help you get the most
from your workouts. As you exercise, you can watch
your progress around the LED track, while the
display provides continuous exercise feedback.
The six modes of the display are described below.
SPEED—This mode displays your current exercise
speed, in miles per hour.
TIME—This mode displays the length of time you
have exercised. Note: If you stop exercising, the time
mode will pause until you resume.
DIST.—This mode displays the total distance you
have completed, in miles.
LAPS—This mode displays the number of 1/4-mile
laps you have completed around the LED track.
CAL.—This mode displays the approximate number of
Calories you have burned.
SCAN—This mode displays the speed, time, distance,
laps, and calorie modes, for 5 seconds each, in a
repeating cycle.
BATTERY INSTALLATION
Before the console can be operated, two 1,5V batter-
ies must be installed. If you have not installed batter-
ies, see assembly step 7 on page 8.
HOW TO O ERATE THE CONSOLE
If there is a thin sheet of clear plastic on the face of
the console, remove it.
1. To turn on the power, press the “on/reset” button or
simply begin exercising. When the power is turned
on, one LED indicator will light in the LED track,
and the entire display will appear for two seconds.
The console will then be ready for operation.
2. Select one of the six modes:
Scan mode—
When the power
is turned on, the
scan mode will
automatically be
selected. ne
mode indicator
will show that the
scan mode is selected, and a flashing mode indica-
tor will show which mode is currently displayed.
Note: If a different mode is selected, you can
select the scan mode again by repeatedly pressing
the mode button.
Speed, Time,
Distance, Laps, or
Calorie mode—To
select one of
these modes for
continuous dis-
play, press the
mode button repeatedly. The mode indicators will
show which mode is selected. (Make sure that the
scan mode is not selected.)
3. The LED track represents a distance of 1/4 mile. As
you exercise, the indicators around the track will
light one at a time until you have completed 1/4
mile. A new lap will then begin.
4. To reset the display, press the “on/reset” button.
5. To turn off the power, simply wait for about four
minutes. Note: The console has an “auto-off”
feature. If the pedals are not moved and the
console buttons are not pressed for four
minutes, the power will turn off automatically
in order to conserve the batteries.
Mode Indicators
LED Track