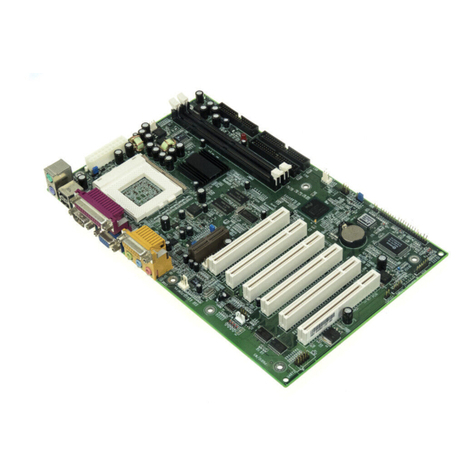
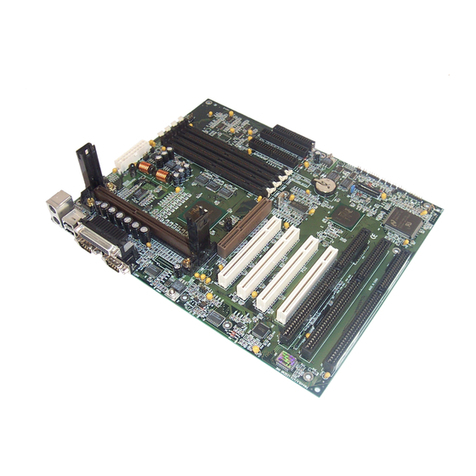
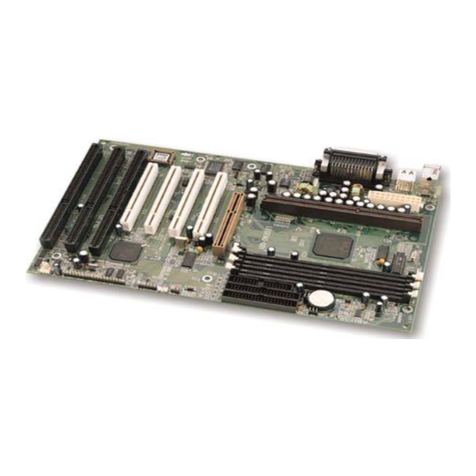
QDI KinetiZ 7E User manual

Notice
The information in this document is subject to change in order to improve reliability, design,
or function without prior notice and does not represent a commitment on the part of this
company. In no event will we be liable for direct, indirect, special, incidental, or consequen-
tial damages arising out of the use or the possibility of such damages.
All trademarks are the property of their respective owners.
If you need any further information, please visit our web-site: “www.qdigrp.com”.
Item Checklist
Completely check your package. If you discover damaged or missing items, contact your
retailer.
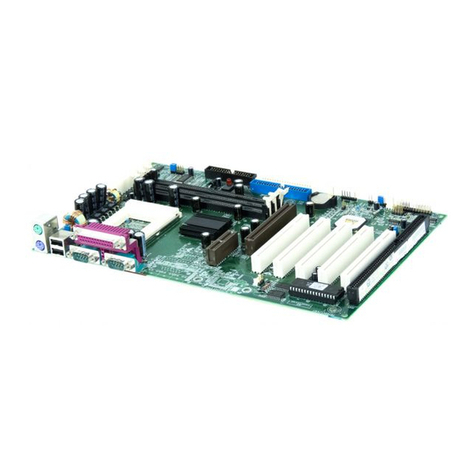
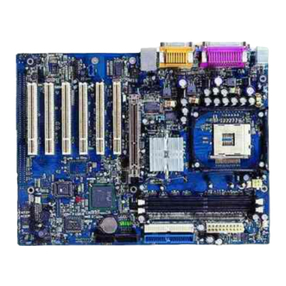
KinetiZ 7E/KinetiZ 7E-A/KinetiZ 7E-C mainboard
QDI Driver CD 2000
I/O shield(optional)
1 IDE ribbon cable
1 floppy ribbon cable
1 10-pin ribbon cable with bracket for USB3 and USB4(optional)
User’s manual

Declaration of conformity
QUANTUMDESIGNS(HK)LTD.
20th Floor, Devon House, TaiKoo Place 979 Kings Road,
Quarry Bay, Hong Kong
declares that the product
Mainboard
KinetiZ 7E/KinetiZ 7E-A/KinetiZ 7E-C
is in conformity with
(reference to the specification under which conformity is declared in
accordance with 89/336 EEC-EMC Directive)
þ EN 55022 Limits and methods of measurements of radio disturbance
characteristics of information technology equipment
þ EN 50081-1 Generic emission standard Part 1:
Residential, commercial and light industry
þ EN 50082-1 Generic immunity standard Part 1:
Residential, commercial and light industry
European Representative:
QDICOMPUTER(UK)LTD QDI COMPUTER ( SCANDINAVIA ) A/S
QDISYSTEMHANDELGMBH QDIEUROPE B. V.
QDICOMPUTER(FRANCE)SARL QDICOMPUTERHANDELSGMBH
LEGEND QDI SPAIN S.L. QDI COMPUTER (SWEDEN) AB
Signature : Place / Date : HONG KONG/2001
Printed Name : Lv Yan Position/ Title : Assistant President

Declaration of conformity
Trade Name: QDI Computer ( U. S . A. ) Inc.
Model Name: KinetiZ 7E/KinetiZ 7E-A/KinetiZ 7E-C
Responsible Party: QDI Computer ( U. S. A.) Inc.
Address: 41456 Christy Street
Fremont, CA 94538
Telephone: (510) 668-4933
Facsimile: (510) 668-4966
Equipment Classification: FCC Class B Subassembly
Type of Product: Mainboard
Manufacturer:Quantum Designs (HK) Inc.
Address: 20/F, Devon House, TaiKoo Place
979 King’s Road, Quarry Bay, HONG
KONG
Supplementary Information:
This device complies with Part 15 of the FCC Rules. Operation is subject to the
following two conditions : (1) this device may not cause harmful interference,
and (2) this device must accept any interference received, including interference
that may cause undesired operation.
Signature : Date : 2001

CONTENTS
I
BootEasy................................................................................................S.1
Facilitédevitesse Initialisation(Francais) .......................................... S.5
1. Introduction................................................................. 1
Overview............................................................................................ 1
KeyFeatures ...................................................................................... 1
Introduction to New Features .............................................................. 4
2. Installation Instructions .............................................. 7
External Connectors ................................................................. 7
PS/2Keyboard&PS/2MouseConnector............................................. 7
USB1&USB2...................................................................................... 7
USB3&USB4...................................................................................... 7
ParallelPortConnectorand SerialPortConnector ................................ 8
UART2 ................................................................................................ 8
Line-injack(or Real outjack), Microphone-injack, Speaker-outjackand
MIDI/Joystickconnector ....................................................................... 8
ATXPowerSupply Connector&Power Switch(POWERSW) .............. 9
HardDiskLEDConnector(HDLED) ..................................................... 9
ResetSwitch(RESET)......................................................................... 9
SpeakerConnector(SPEAKER)........................................................... 9
ACPILEDConnector(ACPI_LED) ......................................................... 9
GREENLEDConnector(GREEN_LED) .................................................. 9
HardwareGreenConnector(SLEEP)................................................. 10
PowerLEDConnector(PWR_LED) ..................................................... 10
Key-lockconnector(KEY_L) .............................................................. 10
Fan Connector(CPUFAN,CHSFAN,FAN3) ....................................... 10
InternalAudioConnectors(AUX,CDLIN,MODEM).................................11
Audio/ModemRiserInterfaceConnector(AMR)...................................11
Wake-UpOnLAN(WOL) ................................................................... 12
Wake-UpOnInternalModem(WOM) .................................................. 12
InfraredHeader (IrDA)....................................................................... 12
ExpansionSlots &I/O Portsdescription ............................................. 13
Jumper Settings ........................................................................... 13
Suspend to RAM Switch( J12) .......................................................... 13
CONTENTS
II
Enable/Disableonboardaudio(JSD) .......................................................14
BIOS-ProtectEasyJumper(JAV).............................................................14
OverclockingJumperSetting(JFSB)......................................................15
EnableUSBKeyDeviceWake-upFunction(JUSB1,JUSB2) ....................15
CPUbusratioselection(J19&JP9) ..........................................................16
CPUCoreVoltageSetting(JP2) .............................................................. 17
OnboardSound(CT5880)Setting(JP8) ...................................................17
ClearCMOS(JCC) .................................................................................. 18
3.BIOS Description ..................................................................19
UtilitySupport .............................................................................. 19
AWDFLASH.EXE ...................................................................................19
AWARD BIOS Description ........................................................... 20
EnteringSetup.......................................................................................20
LoadFail-Safe Defaults .........................................................................20
LoadOptimizedDefaults........................................................................ 20
StandardCMOSFeaturesSetup .......................................................... 20
Frequency/VoltageControl ....................................................................24
AdvanceBIOS FeaturesSetup............................................................ 25
AdvanceChipsetFeatures Setup ........................................................ 27
PowerManagementSetup................................................................... 29
PnP/PCIConfigurationsSetup .............................................................. 31
IntegratedPeripherals.......................................................................... 32
PCHealthStatus....................................................................................34
Set Supervisor/User Password.............................................................35
Boot with BIOS defaults ...................................................................... 35
Appendix A QDI Driver CD 2000 ............................................ 36
Appendix B Boot Logo ......................................................37
RecoveryEasy....................................................................38
Introduction ...........................................................................................38
OperationProcess ................................................................................38
FAQ ...................................................................................................... 43

Caution
1. Be sure to add some Silicone Grease between the Socket A pro-
cessor and FAN to keep them fully contact, meanwhile to meet the
heat sink requirement.
2. because the processor could overheat and damage both the proces-
sor and the motherboard, we recommend that you should have an AMD
authorized fan to prevent overheating.
3. Never run the processor without the heatsink properly and firmly
attached.
4. The AC power status of the system is indicated by the red LED under
the three DIMM sockets. If the LED is on , adding or removing device like
SDRAM memory is porhibited.
Note:
This manual is suitable for KinetiZ 7E/KinetiZ 7E-A/KinetiZ 7E-C mainboard.
Each mainboard is carefully designed for the PC user who wants different
features.
KinetiZ 7E-A mainboard: The model with AC’97 Codec
KinetiZ 7E-Cmainboard: The model with CT5880 PCI Hardware Audio
KinetiZ7Emainboard: The model without Audio.

Manual for KinetiZ 7E/KinetiZ 7E-A/KinetiZ 7E-C
QDI BootEasy
BootEasyis anew memberoflegendQDIEasy series,which isthe latestinnovationcomes
fromlegendQDI.
BootEasySetupMenu
BootEasy technology enormously improves the long BOOT process time of computers.
Reducing the wait time every user has to suffer when starting their computer. BIOS without
BootEasy has to perform many routines every time when the system starts, such as
checking system core of the computer and initializing system peripherals. Now with the
BootEasy, BIOSwill notrunthese repetitiveProcesses anylonger , PCcanboot-up without
any redundant waiting for the displaying of starting OS. BootEasy is quite easy to use ,
choosetherightoptioninCMOSSETUP,( refertoAdvancedBIOSFeatures) itcanbeeasily
booted quickly. BootEasy save all the information when PC first normally boot-up, and it
restores all the parameters for the system and thus let the PC boot freely and rapidly.
Note:
1. Under the following conditions, PC will boot-up in normal way.
(1) PC boot-up for the first times after set option as Enabled.
(2) the system information saved by BIOS was damaged.
(3) PC fail to boot-up continually over three times.
2. Don’t power off or reset system while BootEasy initializing.
3. set “QDI BootEasy Feature” as “Disabled” before you replace system equipment.
set “QDI BootEasy Feature” as “Enabled” after you accomplished replacing.
S.1
BootEasy

Manual for KinetiZ 7E/KinetiZ 7E-A/KinetiZ 7E-C
BootEasyist eineNeuentwicklungvonLegendQDI, dieneue InnovationderQDI
Easy–Technologien.
BootEasy Setup Menu
Mit der BootEasy- Technologie Technik wird der Bootvorgang nur noch vier bis fünf
Sekunden in Anspruch nehmen, bis das Betriebssystem geladen wird. Der Grund
für die lange Warterei liegt in den Routine-Abfragen, die das BIOS bei jedem Start
abarbeitet. So wird beispielsweise jedes Mal die Taktfrequenz des Prozessors
geprüft oder angeschlossene Geräte aktiviert.
DieBootEasy-TechnikprüftdiesePunkte nurbeim erstmaligenStart desRechners
undspeichertdie Ergebnisseineinem FlashROM.Beim nächstenStart ruft das
Systemlediglich dieseInformationenaus demSpeicher abund kannso innerhalb
von wenigen Sekunden den Boot-Prozess abschließen.
BeiÄnderungen am System,beispielsweise nachdem Einbaueinesneuen
Prozessors, muss deshalb zuvor die BootEasy-Funktion deaktiviert werden, beim
nächsten Start werden die neuen Informationen dann erneut abgespeichert.
FallsFehler imFlashROM denBootvorgang behindern,versucht dasSystem drei
Mal den Rechner hochzufahren, bei Misserfolg schaltet
es auf die althergebrachte Art zu booten um, das heißt, es dauert wieder ebenso
lang wie früher. Anschließend kann die BootEasy – Technik wieder aktiviert
werden.
FallsFehler imFlashROM denBootvorgang behindern,versucht dasSystem drei
Mal den Rechner hochzufahren, bei Misserfolg schaltet es auf die althergebrachte
Art zu booten um, das heißt, es dauert wieder ebenso lang wie früher.
Anschließend kann die BootEasy – Technik wieder aktiviert werden.
QDI BootEasy
S.2
BootEasy

Manual for KinetiZ 7E/KinetiZ 7E-A/KinetiZ 7E-C
QDI BootEasy
BootEasyeilnuovosoftwaremembrodellafamiglialegendQDIEasy,qualeinnovazioneda
LEGEND-QDI.
BootEasy Setup Menu
Latecnologia Boot Easyabbrevia glienormi tempidel computer infase diBOOT.
Riduce le attese d’ogni utente che accede al suo computer. Il BIOS senza Boot Easy
deve eseguire molte routines ogni qualvolta il sistema parte, come controllo della sezione
centrale del computer oltre che inizializare le varie periferiche esterne.
Ora con Boot Easy, il BIOS non eseguirà questi processi ripetitivi cosi lunghi , il Pc potrà
partire senza attese ridondanti prima della presentazione del logo del sistema operativo.
Boot Easy e’ facile da usare, basta scegliere la giusta opzione nel BIOS setup,
( riferito al Advanced BIOS Features ) ed il computer potrà velocemente ripartire.
BootEasysalvatutteleinformazionialprimoavvionormale,tuttiiparametrisarannorestituiti
ai BOOT successivi
Nota:
1IlPcpartira’ normalmentese sarannorispettatele seguenticondizioni
(1)Il Pc fa’il primoBOOT con l’opzione Enable
(2)Leinformazioni suiparametri salvatidalBIOSnon eranoDANNEGIATE
(3)Il PC fallisce l’avvio piu’ di tre volte
Nonspegnere o resettail PCdurante l’avviodiBOOT EASY
Disabilitail“QDIBootEasyFeature”primadisostituire leperifericheadessocollegate(HDD,
CD-ROM,ecc.)solodoporiabilitail “QDIBootEasyFeature”.
S.3
BootEasy

Manual for KinetiZ 7E/KinetiZ 7E-A/KinetiZ 7E-C
QDI BootEasy
BootEasyes elnuevo miembrode lafamilia de“Easies”deLegendQDI,queseacabade
incorporaralos últimosmodelos deplacasbase.
Menu de configuración de BootEasy
LatecnologíaBootEasydisminuyeenormementeeltiempodedicadoalprocesode
arranquedel ordenador, reduciendoconsiderablemente eltiempodeesperaque tiene
que sufrir el usuario al arrancar su PC. Las BIOS normales, sin BootEasy,
deben realizar multitud de rutinas repetitivas cada vez que el sistema se arranca, como
verificar el “core” del sistema e inicializar periféricos. Ahora, con BootEasy, su BIOS no
realizará estas tareas repetitivas nunca más, su PC podrá arrancar sin
ninguna necesidad de repetir estas tareas antes de mostrar la pantalla de arranque de
su sistema operativo. BootEasy es muy simple de utilizar, basta con escoger la opción
correctaenCMOS SETUP, (refiérase alapartado Advanced BIOSFeatures) ; Así,
conseguirá arrancar su sistema rápidamente. BootEasy guardará toda la información
durante el primer arranque correcto, y, la próxima vez que arranque, restaurará esta
información para permitir al sistema un arranque rápido y fiable.
Nota:
1. Bajo estas circunstancias, el PC arrancará en modo normal:
(1) La primera vez que arranque su PC después de haber
activado la opción BootEasy en BIOS (“Enabled”).
(2) La información guardada en BIOS es incorrecta.
(3) El arranque de su PC falla por tres veces consecutivas.
2.Noapague su ordenadormientras se iniciaBootEasy.
3.Desactive “QDIBootEasy Feature”seleccionándolo como“Disabled” antesde cambiar
algúncomponente desu PC.Puederestaurarlaopción “QDIBootEasy Feature”como
“Enabled”al terminarla instalaciónde nuevoscomponentes.
S.4
BootEasy

Manual for KinetiZ 7E/KinetiZ 7E-A/KinetiZ 7E-C
KinetiZ 7E/KinetiZ 7E-A/KinetiZ 7E-C
S.5
Installation de la carte mère KinetiZ 7E/7E-A/7E-C
1. Assurez-vous que votre ensemble est complet: carte mère, câbles IDE et FLOPPY,
noticed’utilisationetCD-ROMd’installation.
2. Vérifiez que l’alimentation est débranchée et reliez-vous à la terre par une courroie
à votre poignet. A défaut, maintenez le contact de vos deux mains avec un objet lui-
même relié à la terre, ou une partie en métal de votre système.
3. Fixez la carte mère dans le boîtier grâce aux vis fournies avec celui-ci.
4. Si votre carte mère est munie de cavaliers, placez les en fonction des options que
vous souhaitez utiliser: réglage de la fréquence du processeur si votre carte n’est
pas SpeedEasy, fonction allumage par saisie du mot de passe…(voir le manuel,
rubrique «configuration des cavaliers» pages 13 à 17)
5. Insérez le processeur dans son logement avec son ventilateur que vous
brancherezauconnecteur«CPUFAN».
6. Insérezla/lesbarrette(s)mémoiredans lesslots DIMM.
7. Installez vos éventuelles cartes PCI et AMR dans les slots prévus à cet effet (voir
pagecentrale dumanuel).
8. Branchez vos périphériques IDE et FLOPPY sur les connecteurs prévus à cet effet
grâce aux nappes fournies avec la carte. Vérifiez que le sens de branchement est
correct (liseré rouge du câble sur la broche 1 du connecteur).
9. Reliez les câbles du boîtier aux connecteurs prévus à cet effet (Connecteur
d’alimentation,LEDdemarche/arrêt,disquedur,haut-parleur…voirmanuelpages9
à12). Refermez leboîtier.
10. Branchez les périphériques externes sur les sorties du fond de panier: clavier,
sourisPS/2,périphériquesUSB,moniteur,imprimante…(voirmanuelpages7-8)
11. Lorsque tous les éléments du système sont installés physiquement, rebranchez
l’unitécentrale.
Installation du système.
1. Démarrezvotre systèmeen pressantle bouton«POWER».
2. Pressez la touche «Suppr» pour entrer dans le setup du BIOS.
3. Dans le menu «SpeedEasy CPU Setup», réglez la vitesse de votre processeur
(ATTENTION:ilest recommandéde nepas sélectionnerune fréquencesupérieureà
celle de votre processeur, nous déclinons toute responsabilité pour les dommages
quienrésulteraient)
4. Effectuez les autres réglages du BIOS selon votre configuration (nous vous
conseillons fortement de maintenir les réglages par défaut afin d’éviter toute
manipulationhasardeusepouvant résulterenun dysfonctionnement).Pour plus
d’informations sur les fonctions du BIOS, vous pouvez consulter la version
françaisedu manuelsurle CD-ROM.

Manual for KinetiZ 7E/KinetiZ 7E-A/KinetiZ 7E-C
KinetiZ 7E/KinetiZ 7E-A/KinetiZ 7E-C
S.6
5. Pressez la touche F10 ou choisissez “Save and exit” pour enregistrer vos
paramètreset relancer lamachine.
6. Installezvotre systèmed’exploitation
7. Après installation, assurez-vous qu’il ne subsiste aucun conflit ou périphérique
inconnu dans votre système.
8. Installationdespilotes:
1. Express install
Il est recommandé que les utilisateurs installent ce programme avec les options de base
A. Pilote duchipset
B. Pilote Audiocodec AC97
C. DirectX8.0
2. Accessory
Les logiciels contenus dans ce répertoire sont :
A. QDIManageEasy
3. Browse CD
Vouspouvez voir lecontenu duCD-ROM
Dansle répertoireUtility :
A. AWDFLASH.EXE
B. LF.EXE
Dansle répertoireDocuments :
A. Adobe Acrobat Reader V3.0 – Ar32e301.exe
B. Manuels français *.doc
Installation de QDI ManageEasy v2.0
LancezSetup.exedepuislerépertoireduCD-ROM\QME2pourinstallerQDI ManageEasy
2.0. L’assistant d’installation vous guidera pour le reste de l’installation.
Pourplusd’informations surl’utilisation de QDIManageEasy v2.0, référez-vousà l’aideen
lignedeQDIManageEasyv2.0.
QDIManageEasy
Il est bien connu que garantir la sécurité et la fiabilité du PC est essentiel. Spécialement
de nos jours, gérer et surveiller le matériel est encore plus important car les opérations et
les échanges de données critiques entre ordinateurs et réseaux sont monnaie courante.
Avec le développement de l’ordinateur, le système devient de plus en plus complexe, en
même temps le contrôle du matériel doit être renforcé. Aujourd’hui il est possible de
surveiller et contrôler votre matériel sous Windows 9x ou NT. QDI ManageEasy est un
outil système, comme un pont entre l’OS et le matériel, utilisé pour accéder au statut du
matériel et exécuter des fonctions de contrôle. Ces fonctions vous permettent de
voir plus d’une centaine d’informations basiques sur votre ordinateur et de surveiller

Manual for KinetiZ 7E/KinetiZ 7E-A/KinetiZ 7E-C
KinetiZ 7E/KinetiZ 7E-A/KinetiZ 7E-C
S.7
des données clés sur la santé du PC en temps réel. QDI ManageEasy vous aide
également à contrôler à distance des machines sous réseau local. Avec QDI
ManageEasy, vousaméliorez votre niveaude gestion.
QDIBootEasy
BootEasyest la dernièrenée destechnologies Legend QDI.
Voir figure 1 page S.1 du manuel en anglais.
BootEasypermet auPC dedémarrer plusrapidement lorsqu’onallume, resetou relancele
PC.
Gagnezdu temps,plus facilement.
Ils’agitd’une véritabletechnologie «OnNow» et «Instantlyavailable PC»,conforme aux
spécificationsPC2001.
Sansle BootEasy, leBiosdémarre lentement,maintenant avecleBootEasy,le PCpeut
démarrer en un instant, sans attente redondante pour afficher le démarrage du système
d’exploitation.
BootEasy est facile à utiliser, il suffit de choisir l’option correcte dans le menu «Advanced
BiosFeatures Setup».
BootEasysauvegarde toutesles informationslorsquelePCbootenormalementet
restaurelesparamètres pourle système, permettantainsi au PCde démarrerrapidement.
Note:
1. Le PC démarre de manière classique dans les cas suivants:
- Premierdémarrageaprès activationdel’option
BootEasy
- Informationssauvegardéesendommagées
- Echec au démarrage du PC à 3 reprises
2. N’arrêtez pas ou ne redémarrez pas le système lorsque BootEasy s’initialise
3. Placez«QDIBootEasy Feature»sur «Disabled»avant dechanger uncomposantdu
système
Placez«QDI BottEasy Feature»sur «Enabled»après avoireffectuéle changement.

Manual for KinetiZ 7E/KinetiZ 7E-A/KinetiZ 7E-C
-- This page is intentionally left --

Manual for KinetiZ 7E/KinetiZ 7E-A/KinetiZ 7E-C
Chapter 1
Introduction
Chapter 1
Chapter 1
Introduction
Overview
The green mainboard utilizes the VIA Apollo KT-133A chipset, providing a cost-effective
PC/ATX platform with perfect capability and high performance to support Socket A AMD®
DuronTM/AthlonTM processors. The VIA®VT686B chipset integrates software configurable
AC’97 audio(Optional) and supports Ultra ATA/100 technology, also the mainboard inte-
gratesCreativeCT5880PCIhardwaresound(Optional)toprovidehighquality3Dsurround-
ing sound effect.The VIA®KT-133A chipset provides some new features such as AGP 4X
modeandUltra-Fast200MHz/266MHzFSB. Equippedwiththree memorymodulesockets,
1.5GBPC100/133MHzSDRAMcanbe supported.Italso providesadvancedfeatures such
as wake-up on LAN and wake-up on internal/external modem function. Suspend to RAM,
theoptimalimplementationoftheAdvancedConfigurationandPowerInterface(ACPI)speci-
fication, makes the PC’s power consumption drop to the lowest possible level and enable
quick wakeup. BootEasy, our new technology shorten the long BOOT process time of
computer.
Key Features
Form factor
l ATX form factor of 305mm x225mm
Microprocessor
lSupports AMD Socket A AthlonTM “B” type (FSB is 200MHz)/”C” type (FSB is
266MHz )processorsat700MHz/750MHz/800MHz/850MHz/900MHz/950MHz/
1GHz/1.1GHz/1.2GHz and further processors
lSupportsAMDSocketADuronTM processorsat600MHz/650MHz/700MHz/750MHz/
800MHz/850MHz and further processors
lSupports200MHz/266MHz FSB
lMultiphase power regulators for AMD Socket A AthlonTM/DuronTM Processors
Chipset
l Apollo KT-133A chipset: VT8363A, VT82C686B
System memory
lProvidesthree 3.3V168pinDIMM sockets,supportsPC100/133SDRAM,
VCM SDRAM
lMinimummemorysizeis8MB,maximummemorysizeis1.5GB
On-board IDE
lSupportstwo PCIPIOand BusMasterIDEports
lTwo fast IDE interfaces supporting four IDE devices including IDE hard disks and

Manual for KinetiZ 7E/KinetiZ 7E-A/KinetiZ 7E-C
Introduction
CD-ROM drives
lSupports “UltraDMA/100”Synchronous DMAmode transferring upto100Mbytes/sec
On-chipI/O
lOne floppy port supporting up to two 3.5″or 5.25″floppy drives with 360K/720K
/1.2M/1.44M/2.88Mformat
lTwohighspeed16550fastcompatibleUARTs(COM1/COM2/COM3/COM4selective)
with 16-byte send/receive FIFOs
l One joystick port
lAllI/Oports canbeenabled/disabled intheBIOS setup
On-chip Audio (Available for KinetiZ 7E-A mainboard only)
lBuild in VT82C686B
lDirectSound AC97Audio
l AC97 2.1 Compliant
Creative® CT5880 PCI Hardware Sound (Available for KinetiZ 7E-C mainboard only)
lPCI2.2compliant
l3D audio effects
l32-voice XG wavetable synthesizer
lDirect Sound/Music Hardware Accelerator
lFull-Duplexstereo
lSupports four speakers output based on Speaker-out jack and Line-in jack
AGPSLOT
lSupports4X mode&AGP 2.0compliant
Advanced features
lPCI2.2Specificationcompliant
lProvides Trend ChipAwayVirus® On Guard
lProvides four USB ports, on-board PS/2 mouse and PS/2 keyboard ports
lProvides infrared interface
lSupports software power-down (eg. Windows 98/Windows 2000)
lSupports wake-up on LAN and wake-up on internal/external modem
l Supportssystemmonitoring(monitorsCPU andsystemtemperatures,systemvoltages
and fan speed).
l ProvidingQDI’sinnovationssuchas RecoveryEasy, BIOS-ProtectEasy(toprotect the
systemBIOSfrombeingattackedbyseverevirussuchasCIH),LogoEasy,ManageEasy
and BootEasy(new feature)

Manual for KinetiZ 7E/KinetiZ 7E-A/KinetiZ 7E-C
BIOS
lLicensed advanced AWARD BIOS, supports flash ROM with 2M bit memory size,
plug and play ready
lSupportsIDECD-ROMorSCSIbootup
Green function
lSupportsACPI (AdvancedConfigurationand PowerInterface) andODPM (OS
DirectedPowerManagement)
lSupports ACPI power status: S0, S1, S3(STR), S4, S5(Soft-off)
Expansion slots
l1 ISA slot
l5PCIslots
l1AGP slot
l1AMR slot
Chapter 1

Manual for KinetiZ 7E/KinetiZ 7E-A/KinetiZ 7E-C
Introduction to New Features
BIOS-ProtectEasy
TheBIOSofthemainboardiscontained insidetheFlashROM.Severeviruses suchasCIH
virus are so dangerous that it may overwrite the BIOS of the mainboard. If the BIOS has
been damaged, the system will be unable to boot. We provide the following solution which
protects the system BIOS from being attacked by such viruses.
There are two choices which can implement this function.
1. Set the jumper (JAV) as closed, the BIOS can not be overwritten.
2. Setthejumper(JAV)asopen,meanwhileset“BIOS-ProtectEasy”asEnabledinAWARD
BIOSCMOSSetup.Inthisway,theBIOScannotbeoverwritten,buttheDMIinformation
canbeupdated.
Ultra ATA/100
According to the previous ATA/IDE hard drive data transfer protocol, the signaling way to
send data was in synchronous strobe mode by using the rising edge of the strobe signal.
The Ultra ATA/33 protocol doubles the burst transfer rate from 16.6MB/s to 33.3MB/s, by
using both the rising and falling edges of the strobe signal, and Ultra ATA/66 doubles the
Ultra ATA burst transfer rate once again (from 33.3MB/s to 66.6MB/s) by reducing setup
times and increasing the strobe rate. In the same way, the burst transfer rate of Ultra
ATA/100 is higher than ATA/66 (from 66.6MB/s to 100MB/s)by reducing the pulse width
from 30ns to 20ns and increasing the strobe rate.
Itcanbe addedinto existing systemswithout theneedfor terminationdevices, new cable,
or other hardware changes, industry implementation of ATA/100 will provide an inexpen-
sive, simple, non-proprietary, high-speed method of host to storage access.
The 80-conductor, 40-pin cable standard in ATA/66 has enhanced reliability and bee
carried forward to ATA/100. of course, backwards compatible with ATA/33.
Introduction

Manual for KinetiZ 7E/KinetiZ 7E-A/KinetiZ 7E-C
PC-133 Memory
PC133SDRAMUnbuffered DIMMdefinesthe electricalandmechanicalrequirementsfor
168-pin,3.3 Volt, 133MHz, 64/72-bitwide, Unbuffered SynchronousDRAM DualIn-Line
MemoryModules (SDRAMDIMMs). Relatively, the peakbandwidthof PC-133memoryis
the 33% higher than PC-100 memory. These latest SDRAMs are necessary to meet the
enhanced133MHzbusspeedrequirement.
Suspend to RAM
Suspend to RAM is a cost-effective, optimal implementation of the Advanced Configura-
tion and Power Interface (ACPI) 1.0 specification, which makes a PC’s power consump-
tion drop to the lowest possible level and enables quick wakeup. When the system is in
Suspend-to-RAMstatus,the systemcontextis maintainedin system memory, thesystem
consumes only a small fraction of the power used for full operation. Instead of shutting
down the system to save power when not in use and then having to reboot later, Sus-
pend-to-RAM solution enables the system to quickly wake up, restoring all applications
and features, enabling operation in a few seconds.
Toimplementthis function,the followingrequirments areessential:
1. Power supply requirements: The current of 5VSB line of the power supply should be
morethan0.75A.
2. Set the Jumper J12 with pin1&pin2 closed.
3. TheBIOS option“ACPIfunction”shouldbe enabled,and“ACPI SuspendType”should
beset asS3 inAWARD BIOSCMOS setup.
4. An ACPI-enabled operating system such as Windows 98 or Windows 2000 family is
needed.NavigatetotheCD-ROMdrivefromtheMS-DOSCommandPromptandenter
the following from the Win98 directory on the CD:
D:\SETUP /P J
(This manual assumes that your CD-ROM device driver letter is D:)
Windows 98 will be installed with ACPI enabled.
For Windows 98 SE and Windows 2000, just install them directly.
5. Three ways to enter Suspend-to-RAM status under ACPI-enabled Windows 98:
lClick Start -> Shut down -> Standby to enable the system to enter Suspend-to-
RAMstatus.
lClick Start -> Setup -> Control Panel -> Power Management -> Advanced and
choose Standby item, the system will enter Suspend-to-RAM status when you
press power button.
lFrom Power Management Properties in Control Panel, set the latency time in
System Standby, the system will enter Suspend-to-RAM status when time out.
The same ways used to power up the system can be used to wake up the system from
Suspend-to-RAM status. For example, pushing the power button, through the Wake-on-
LAN,Wake-on-Modemfunction orRTCAlarm.
Chapter 1

Manual for KinetiZ 7E/KinetiZ 7E-A/KinetiZ 7E-C
Creative CT5880 chipset (Available for KinetiZ 7E-C mainboard only)
The CT5880 provides high-quality audio performance and low CPU utilization for you.
Featuring 128-voice wave-table synthesis with very high sample rate converters. In
addition, CT5880 supports localized three-dimensional sound immersion in headphone
andfour-speakerenvironments. The four-speakerbased on speaker-outand line-in jack.
the CT5880 also supports multiple algorithm levels of reverb and chorus effects on the
wave-table sounds as well as spatial sound enhancement on MIDI and wave sounds in
two speakers. Full duplex operation also allows simultaneous audio recording and play-
back.
The mainboard has two solution for on-board audio
Installation of CT5880 driver
Beforeyou install CT5880chipset driver, pleasemake surethatCT5880 chipsetis onboard.
1.If CT5880 chipsetis onboard, theCD2000 willdetected itandthe option“ PCI Sound
Driver” will appear on screen, you click this option to install CT5880 chipset driver .
2. If CT5880 is not onboard, the CD 2000 will detected AC97codec and the option “ Audio
Codec Driver” will appear on screen, you click this option to complete the installation
Soft-sound(AC’97codec)
Hardware-sound(CT5880)
Note : After installation of CT5880dirver, you
can select four speaker output function
Introduction
This manual suits for next models
2
Table of contents
Other QDI Motherboard manuals