BlackMax – User Manual
RE_PROD_0006 Version 3 Page 5 of 19 Issue Date 23/03/2021
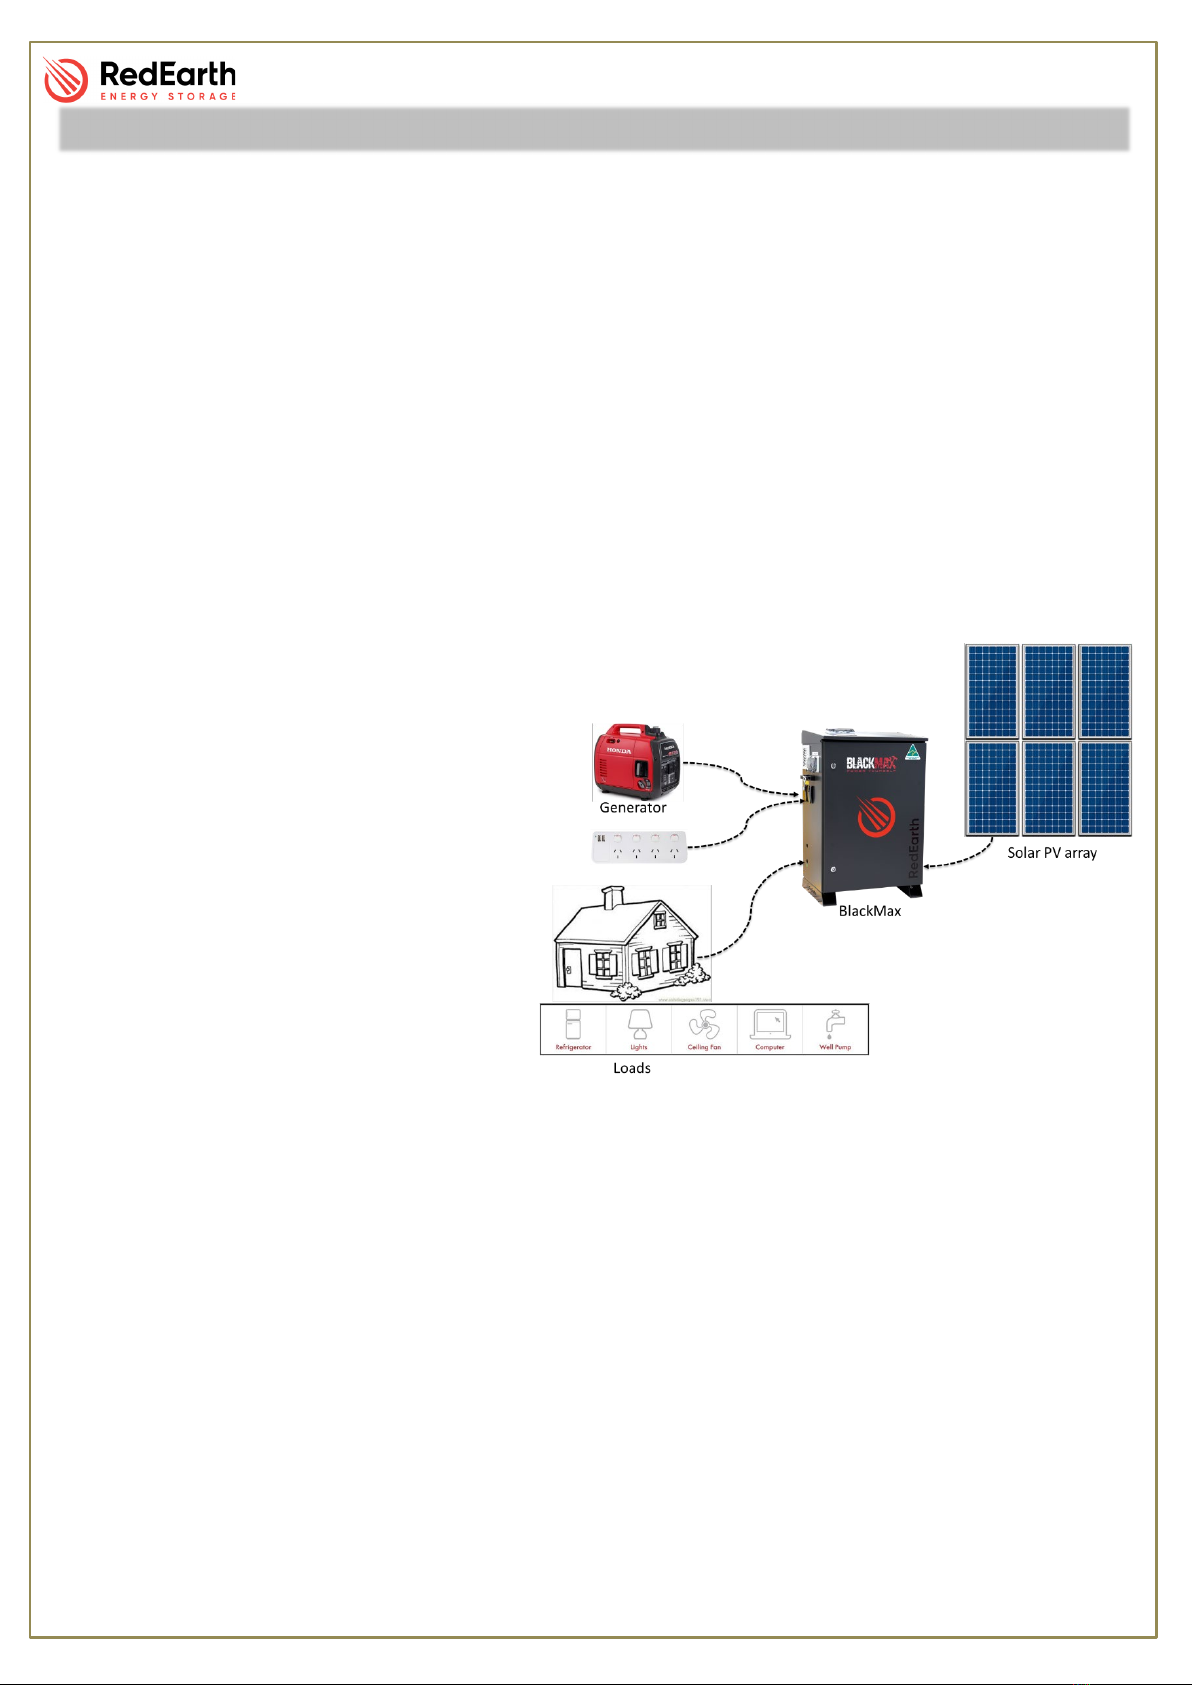
The BlackMax can be divided into four areas. The AC, the DC, the inverter, and the battery area.
With two access points available, use the lid for the batteries and the front door for the switches
and electronic equipment. Below is explained how to access and what to expect in each area.
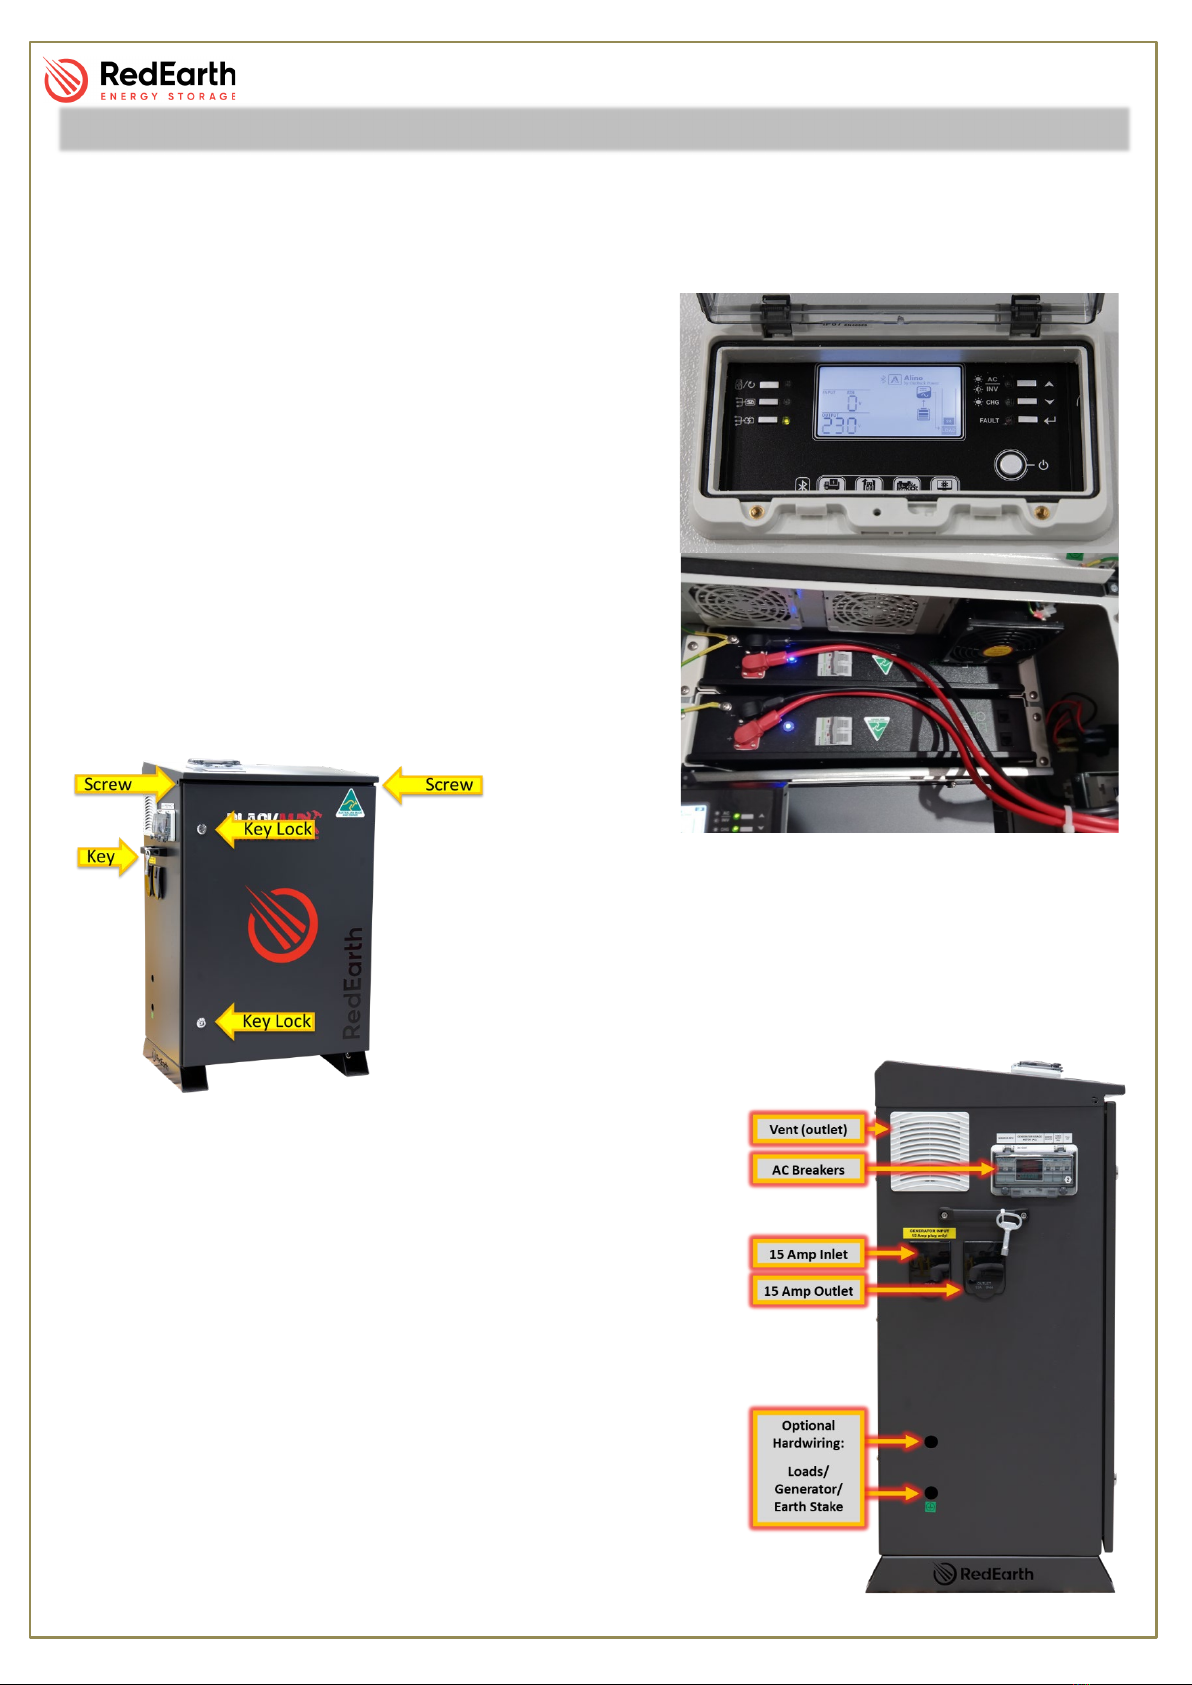
The Top:
A clear weather proof cover on the lid allows viewing of
the display, if interaction is needed, the cover can be
easily lifted by releasing the two screws and the clip tab
from the front and held in a vertical position with the
help of rear hinges.
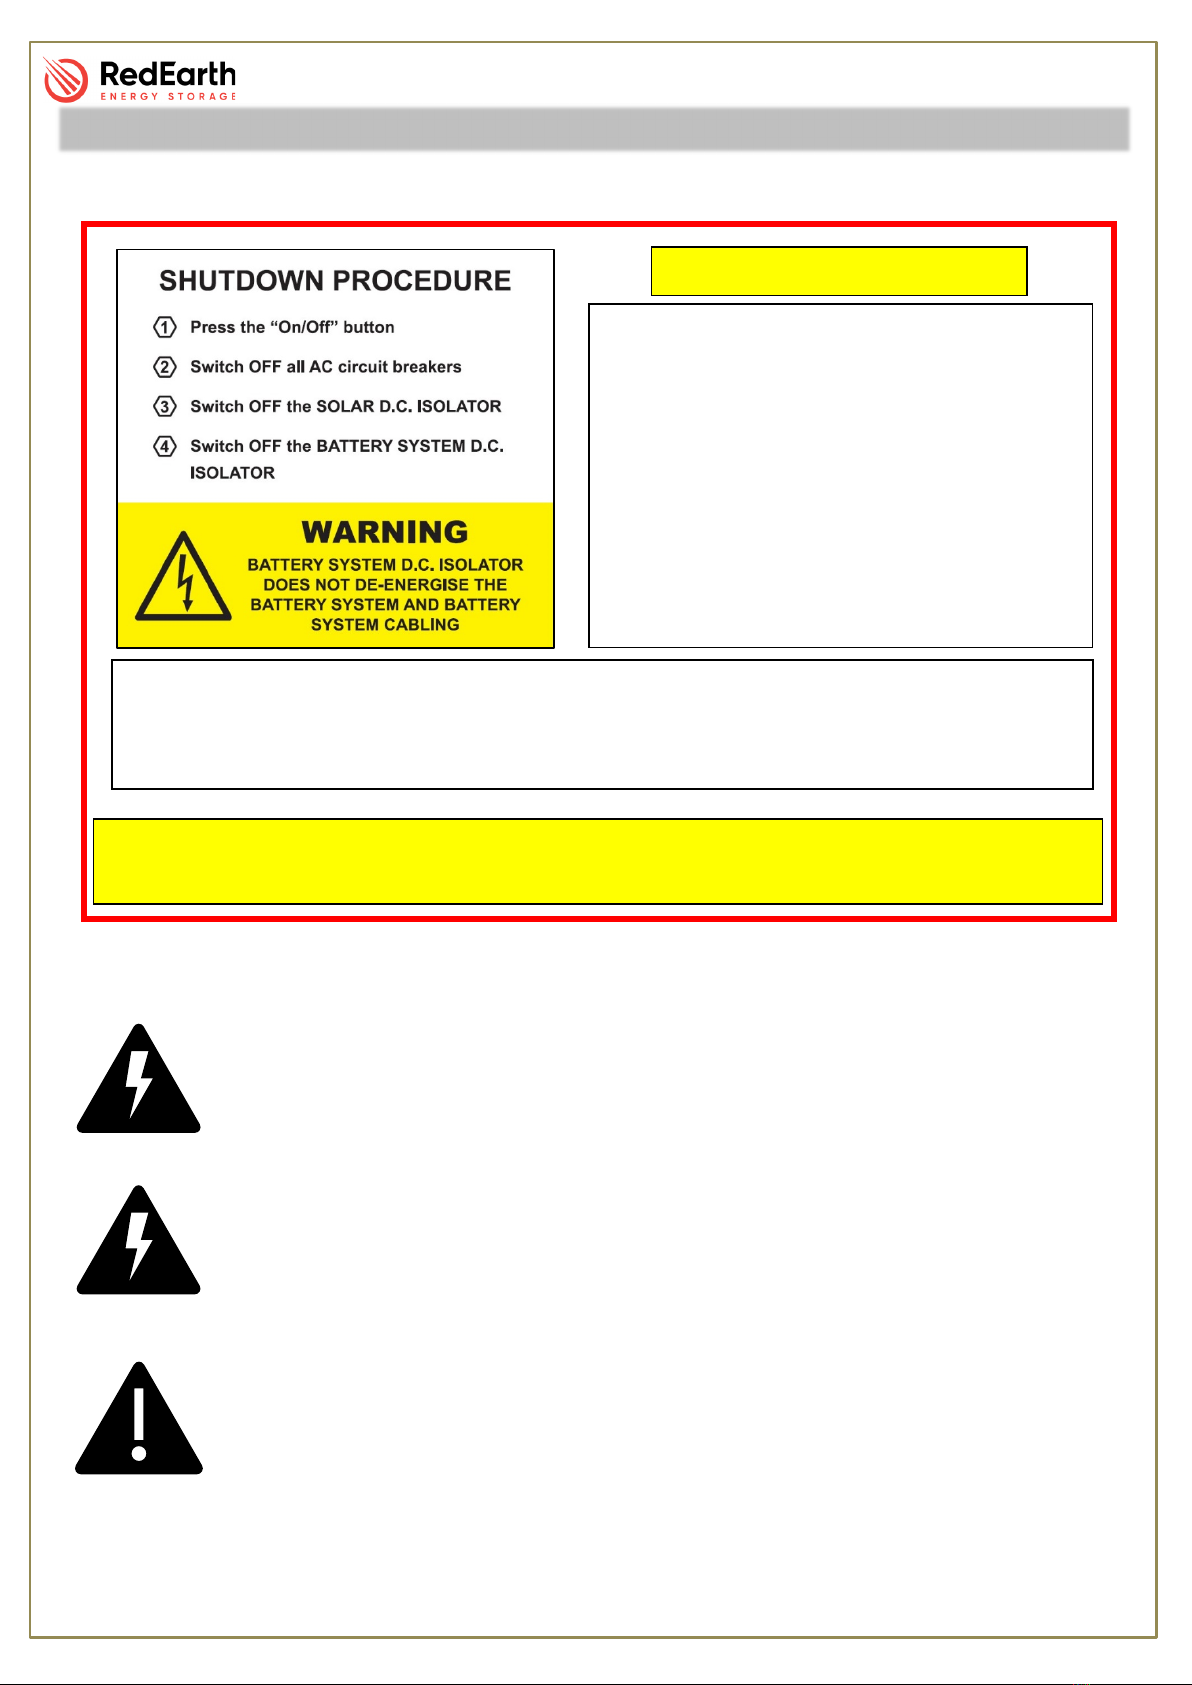
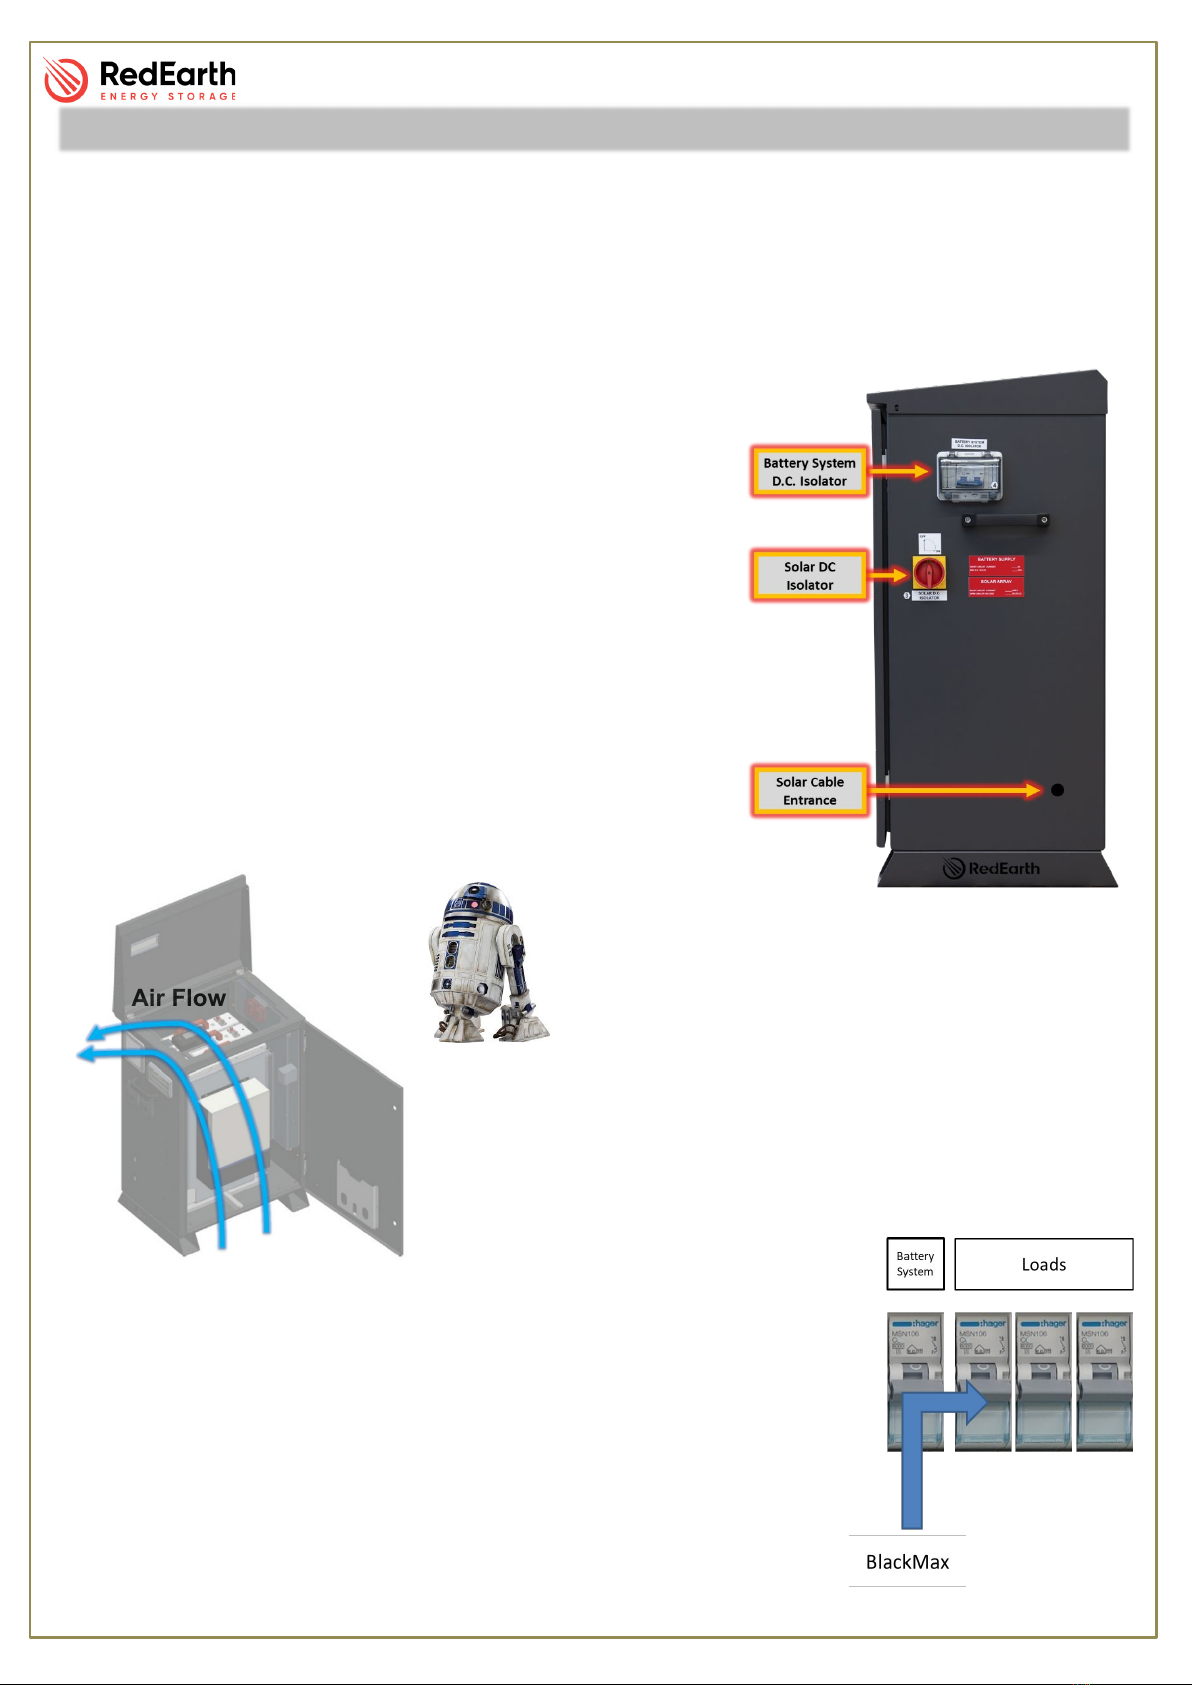
For a full shutdown procedure, access to the batteries
is required. This is also done via the lid as it can pivot
on the rear hinges and sit in a vertical position.
Note: Refer to the Installation Manual for more
information on how to lift the lid.
Once the lid is open, clear and direct access is
available to the batteries
The Door:
The second access is made by the front door. To open it,
the two key locks must be turned clockwise with the help
of the key. These items are shown in the picture to the
right.
The AC Side:
Looking at the AC side of the BlackMax on the left-hand side
(LHS), you will find the items shown in the picture to the right.
•Vent;
•AC Breakers;
•15A INLET power point for the generator (a 15 Amp
lead is required);
•15A OUTLET power point (the 15A lead will not fit);
•Handle
•Openings for hardwired connections.