RedEarth DropBear User manual

DropBear
HOME BATTERY SYSTEM—ON AND OFF-GRID
Single and Three Phase Models

DropBear | Installation Manual Jan 2023
RedEarth Energy Storage
For sales enquiries contact sales@redearth.energy
For technical support: support@redearth.energy
15 Fienta Place, Darra BRISBANE QLD 4076 | 1800 733 637 | www.redearth.energy
2
RedEarth Energy Storage is an Australian-owned and operated manufacturer of energy storage systems
Co-founded by CEO Charlie Walker, CTO Chris Winter, and non-executive director Bruce Ebzery in 2013, RedEarth Energy Storage began as a
start-up doing research and development into battery energy storage systems specifically for the Australian market.
Starting in the off-grid environment with the development of BlackMax, RedEarth has since added on-grid, commercial and industrial, and
residential systems to its suite of products, all designed to be modular and scalable to allow the end-user customer to update their systems
should their needs change.
RedEarth operates with the belief that electricity will be the primary energy source in the future, and that every business and residence can
generate more clean, green electricity than it can consume – meaning they can financially capitalise on their excess solar energy.

DropBear | Installation Manual Jan 2023
RedEarth Energy Storage
For sales enquiries contact sales@redearth.energy
For technical support: support@redearth.energy
15 Fienta Place, Darra BRISBANE QLD 4076 | 1800 733 637 | www.redearth.energy
3
Table of Contents
Table of Contents.................................................................................................................................... 3
Safety ..................................................................................................................................................... 4
Overview ................................................................................................................................................ 5
Dimensions and Clearance/Positioning Information ................................................................................ 6
Components ........................................................................................................................................... 7
3-phase switch gear .......................................................................................................................................... 9
Components supplied ..................................................................................................................................... 11
Installation—8 steps for installation and customer handover ........................................................................... 12
Step 1. Transporting the DropBear ........................................................................................................................................... 12
Step 2. Positioning the DropBear .......................................................................................................................................... 13
Step 3. Solar Installation ....................................................................................................................................................... 13
Step 4. Electrical connections ............................................................................................................................................... 14
Step 5: Turn ON and Shutdown procedure ........................................................................................................................... 18
Step 6: Commissioning .......................................................................................................................................................... 19
Step 7: Monitoring via RedEarth’s EMU App and Select.live ................................................................................................ 21
Step 8: Customer Handover .................................................................................................................................................. 22
Appendix A ........................................................................................................................................... 24
Appendix B ........................................................................................................................................... 28

DropBear | Installation Manual Jan 2023
RedEarth Energy Storage
For sales enquiries contact sales@redearth.energy
For technical support: support@redearth.energy
15 Fienta Place, Darra BRISBANE QLD 4076 | 1800 733 637 | www.redearth.energy
4
Safety
Symbol Explanation
Refer to the operating instructions.
Indicates additional information, emphasized contents or tips that may be helpful.
Caution, risk of electric shock.
Caution, risk of danger.
Do not touch live parts until 10 minutes after disconnection from the power sources.
The wiring diagrams and installation instructions are given as a guide only and compliance to appropriate standards
is the responsibility of the installer. Relevant standards are listed below:
AS/NZS 3000:2018 Wiring rules
AS/NZS 5033:2021 (and 1&2) Installation and safety requirements for photovoltaic (PV) arrays
AS/NZS 4509.2:2012 Stand-alone power systems—Design
AS/NZS 1170.2:2011 Structural design actions—Wind actions
AS/NZS1768:2007 Lightning protection
AS/NZS 3008.1.1:2017 Electrical installations—Selection of cables
AS4777.2:2020 Grid connection of energy systems via inverters
AS/NZS 5139:2019 Electrical installations—Safety of battery systems for use with power conversion
equipment
The DropBear must only be installed by suitably qualified personnel who have read and are familiar with
its operation and hazards.
The battery provided with this system must be charged only by the Selectronics inverter. Do not attempt
to charge the batteries with any other charger device or connect any devices directly to the DC battery
bus unless approved by RedEarth.
In the event of a fire evacuate the area and call emergency services. A dry
agent fire extinguisher should be readily available and used. DO NOT use
water.
Note: MSDS document is provided with the system and can be found at
www.redearth.energy
Do not use a damaged battery. Batteries should only be disposed of at an appropriate recycling centre.
Please contact RedEarth for advice.
A battery can present a risk of electrical shock and high short-circuit current. The following precautions
should be observed when working on batteries:
Disconnect charging source prior to connecting or disconnecting battery terminals.
In our efforts towards constant product enhancement, this document is subject to change at any time.
Please visit http://www.redearth.energy and download the appropriate and latest version manual.

DropBear | Installation Manual Jan 2023
RedEarth Energy Storage
For sales enquiries contact sales@redearth.energy
For technical support: support@redearth.energy
15 Fienta Place, Darra BRISBANE QLD 4076 | 1800 733 637 | www.redearth.energy
5
Overview
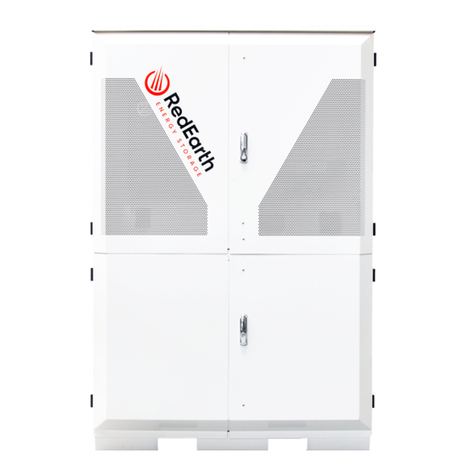
The RedEarth DropBear is an Australian-made ready-to-run energy storage system for On or Off-Grid and single or three-phase
applications.
The system is designed to be easy to install and use. It is assembled and factory tested
prior to shipment and requires only limited programming on-site for standard
configurations.
It uses Selectronics SP Pro battery inverters together with RedEarth’s TROPPO 4841
lithium batteries (LFP). As standard it is combined with Selectronic-certified Fronius
inverters (single or three phase versions depending on the system ordered) making it an
AC-coupled system.
It is supplied with everything needed to connect the PV Solar array and a generator
(either 2-wire auto start or manual start), or the grid for grid-connected systems.
The DropBear is designed to be installed indoors or outside in a shaded and weather protected area and fixed against a wall. A
changeover switch is included in case there is a problem with the system. In this case the loads are run solely off an alternate
power source (e.g., generator or the grid) until the system is operational again.
Remote monitoring is available subject to mobile phone coverage. This uses RedEarth’s EMU app.
DropBear installations require the electrical connection of:
The customers load – there are dedicated terminals inside
the unit to connect to.
Arrays of PV solar panels to the Fronius inverters. In 3-phase
systems the Fronius inverters are outside the system and
need to be connected to the AC MCBs pre-Installed within
the DropBear.
Grid or Generator - there are dedicated power, generator
auto-start and generator trickle charger terminals inside the
unit to connect to.
Remote monitoring uses RedEarth's RedPi edge device as
well as Selectronics SelectLive- The RedEarth supplied RedPi
has a built-in SIM-card (requires mobile coverage), otherwise
connect the internet via LAN cable. Starlink satellite communications can also be used.
For a smooth installation, RedEarth offers installation training as well as tech-support during installation. RedEarth requests that
the Installer contact RedEarth's Tech Support once the system Is turned on during Installation to confirm operation.
Note: Selectronics allows more complex installations to be installed (such as dual phase or high-power grid T-connections) To do
these, the installer should have experience with Selectronics and have received training directly from them. RedEarth primarily
supplies and supports our standard configurations. If they are modified for a particular installation, then the responsibility for
these changes passes to the certified installer.
During factory testing all parameters are pre-set for correct operation between the SP Pro inverter, the Fronius and the battery
bank. However, some parameters may need to be adjusted during installation (e.g., generator size, maintenance run, etc).
Please consult this manual as well as the Selectronics Manual and comprehensive Selectronics website.
DropBear | Installation Manual Jan 2023
RedEarth Energy Storage
For sales enquiries contact sales@redearth.energy
For technical support: support@redearth.energy
15 Fienta Place, Darra BRISBANE QLD 4076 | 1800 733 637 | www.redearth.energy
6
Dimensions and Clearance/Positioning
Information
DropBear Weight
367kg for 1-phase with x2 Fronius PV
inverters and without any Troppo batteries
(42.5kg per battery)
Dimensions:
203.2 cm H x 155.7 cm W x 68.8 cm D
DropBear Minimum Clearance
to allow
access:
2.4 m H x 2.0 m W x 1.3 m D
Positioning information summary:
Minimum Clearance around SunRise where
no windows doors etc are allowed, according
to AS/NZS 5139.

DropBear | Installation Manual Jan 2023
RedEarth Energy Storage
For sales enquiries contact sales@redearth.energy
For technical support: support@redearth.energy
15 Fienta Place, Darra BRISBANE QLD 4076 | 1800 733 637 | www.redearth.energy
7
Components
This is an overview of the DropBear. It has two main sections. The top section contains the inverters and switch gear, and the
isolated bottom section contains the TROPPO batteries. Each section has a key-lockable double door. The image below shows
the 1-phase version of the DropBear.
DropBear 1-phase version with 7.5kW Selectronics inverter and two Fronius PV inverters (Selectronics certified) setup for off-
grid operation. The Fronius inverters are rated at 1 x 8.2kW and 1x 6.0kW to remain under the 15kW maximum specified by
Selectronics for their 7.5kW inverter.

DropBear | Installation Manual Jan 2023
RedEarth Energy Storage
For sales enquiries contact sales@redearth.energy
For technical support: support@redearth.energy
15 Fienta Place, Darra BRISBANE QLD 4076 | 1800 733 637 | www.redearth.energy
8
The two images below show the 1-phase and 3 phase version of the DropBear. In the 3-phase version the Fronius PV inverters
are installed outside the DropBear.
1-phase setup with x2
Fronius PV inverters
3-phase setup (external
Fronius PV inverters)

DropBear | Installation Manual Jan 2023
RedEarth Energy Storage
For sales enquiries contact sales@redearth.energy
For technical support: support@redearth.energy
15 Fienta Place, Darra BRISBANE QLD 4076 | 1800 733 637 | www.redearth.energy
9
The switch gear in the top section is labelled for easy identification as shown below. There is a 1-phase and 3-phase version.
The installer can make a minor change in the switchgear between the on-grid and off-grid versions. In the off-grid versions the
switches are setup for generator input, meaning that the Neutral is also switched. This is not done when connected to the grid in
an on-grid installation. In this case the installer can replace the Generator switches with either a 1 or 3-pole switch or just
choose to use the active poles of the existing generator switches.
1-phase switch gear
3-phase switch gear
Removing the panel with the switch covers in the top section exposes all the cable connection points and switch gear wiring.
Depending on whether you have a single-phase or three-phase version, the configuration will be as shown below.
1-phase wiring:

DropBear | Installation Manual Jan 2023
RedEarth Energy Storage
For sales enquiries contact sales@redearth.energy
For technical support: support@redearth.energy
15 Fienta Place, Darra BRISBANE QLD 4076 | 1800 733 637 | www.redearth.energy
10
3-phase wiring:
The lower enclosure is where the TROPPO batteries are installed. The DropBear can hold up to 14 batteries (4.1kWh x14 =
57.4kWh nominal).
Front and rear rails secure the batteries in place as shown below.
Because of the characteristics of RedEarth’s TROPPO lithium battery, it is possible to install additional batteries in your system at
a later date, please contact RedEarth to purchase extra TROPPO batteries.
The enclosure is pre-wired with battery cables for all 14
batteries via the bus-bar system attached to the top
plate. This makes adding additional batteries a simple
process of plugging in the spare battery cables into the
connectors on top of each battery.

DropBear | Installation Manual Jan 2023
RedEarth Energy Storage
For sales enquiries contact sales@redearth.energy
For technical support: support@redearth.energy
15 Fienta Place, Darra BRISBANE QLD 4076 | 1800 733 637 | www.redearth.energy
11
Components supplied
The DropBear you receive on the pallet includes the following items:
DropBear system - pre-wired as ordered – either single or three
phase, on or off-grid
Selectronic inverter installed – 1 or 3 depending on the
configuration ordered
Fronius inverters as ordered – Primo for 1-phase and Symo for
3-phase
Parts Kit Box
o 2x Wall mount bracket to secure the DropBear to the
wall
o Selection of screws/ Dyna-bolts for fixing the base and
wall brackets
o Sticker Kit for PV & battery
o Glands and plain to screwed adapters for sealing the
cable entries
o MC4 connectors
o Aerial for 4G connection
o 2x Blanking plates for forklift holes
DropBear Installation Manual
DropBear User Manual
Selectronics SP PRO user manual
Fronius inverter manual
Battery SDS
Warranty Information

DropBear | Installation Manual Jan 2023
RedEarth Energy Storage
For sales enquiries contact sales@redearth.energy
For technical support: support@redearth.energy
15 Fienta Place, Darra BRISBANE QLD 4076 | 1800 733 637 | www.redearth.energy
12
Installation—8 steps for installation and customer handover
The DropBear is designed to be easy to Install. It includes prewired
connection points and comprehensive labelling and parts kit to simplify the
installation.
Technical support is available directly from RedEarth during installation if
required.
Selectronics also has detailed information and support available, especially
for more advanced installations.
8 steps to complete your DropBear installation:
1. Transporting – getting the system to site
2. Positioning – the system in its final location
3. Solar Installation
4. Electrical connections to the DropBear
4.1. AC Connection
4.1.1. Load Connection
4.1.2. Grid / Generator connection
4.1.3. Generator Auto-Start and Charger
4.1.4. Generator Requirements
4.2. DC Connections
4.2.1. Battery installation and connection
4.2.2. PV Connections
4.3. Communication Connections
5. Start-up and Shutdown procedure
6. Commissioning
7. Monitoring via RedEarth’s EMU app and Selectlive
8. Customer Handover – including their access to the EMU app
Step 1. Transporting the DropBear
The DropBear system is supplied strapped down to a pallet. It is fully ready
to run, just requiring the batteries to be installed. The system weighs around
367 kg without batteries. The system requires lifting equipment to be
removed from the pallet and placed in position.
The base of the system has spaces for either a forklift or a standard trolley
jack to be used.
If the DropBear is too heavy to manage, the Inverters can be removed and
then replaced once the system is in position.
WARNING: Personal Injury
Use safe lifting techniques and standard safety
equipment when working with this equipment.

DropBear | Installation Manual Jan 2023
RedEarth Energy Storage
For sales enquiries contact sales@redearth.energy
For technical support: support@redearth.energy
15 Fienta Place, Darra BRISBANE QLD 4076 | 1800 733 637 | www.redearth.energy
13
Step 2. Positioning the DropBear
The DropBear is designed to be placed against a wall in a shaded
and weather protected area with the system securely connected
to the wall using the wall brackets included in the parts kit. Air
inlet vents are on the side and base of the system. Do not block
them and ensure they are kept clear at all times.
At the installation location, mark a height of 1925mm from the
floor. As shown in the picture at right, this mark indicates the centre of the two
large holes in the brackets (marked “B”). The two brackets should be positioned
so that are securely fastened to the wall (e.g., wall studs).
The wall bracket has two sets of different size holes “A”s and “B”s. As illustrated
(below), set “A” is for screwing into a wall stud with the screws (supplied) and set
“B” is for a solid concrete/ brick wall to be secured with Dyna-bolts (supplied).
Once wall brackets are firmly attached to the
wall, move the DropBear into place with the
help of a trolley jack (or forklift) lifting it high
enough to clear the bracket and slide in
behind it.
On the base of the DropBear, there is a hole
at the front on each side. These holes are for
securing the base with supplied Dyna-bolts,
then plug these holes with supplied 25mm
plugs to minimise pest ingress.
Masking tape has been positioned in
between the doors and the unit for transportation. These are common rubbing spots, and the purpose of the tape is to avoid
paint chipping during transportation. This can now be removed.
Step 3. Solar Installation
The PV Array should be designed and installed in accordance with AS/NZS 5033 and the latest
CEC Installation guidelines. Caution should be taken in selecting PV panels and wiring method
to ensure Open Circuit Voltage (VOC) and Short Circuit Current (ISC) is not exceeded.
PV array frame must be grounded
Ensure that the array is within the inverter specification and polarity of the array is
correct.
PV modules must have an IEC61730 Class A rating
WARNING: The Solar DC Isolator on the Fronius
inverters must be in the off position before any solar
panels are connected
IMPORTANT: Before positioning the DropBear, be sure
that there is a minimum available area of 2.4 m H x 2.0 m
W x 1.3 m D
This will allow a minimum of 90
⁰
open door angle as well
as lateral ventilation.

DropBear | Installation Manual Jan 2023
RedEarth Energy Storage
For sales enquiries contact sales@redearth.energy
For technical support: support@redearth.energy
15 Fienta Place, Darra BRISBANE QLD 4076 | 1800 733 637 | www.redearth.energy
14
Step 4. Electrical connections
Before any electrical connections are made, check all DropBear internal connections are
secure and have not come loose during transport.
Ensure all breakers and isolators, as well as those supplying power to the unit, are turned
OFF.
With the DropBear in place, rotate the handles on
the top and bottom door counterclockwise to open
the doors. Remove the Control Panel covers by
unscrewing all identified screws shown in the
picture. By doing this, you will have access to all AC
and DC, wire connection terminals and the “Comm’s
Area”.
4.1 AC Connections
All AC cables should be brought through the 25mm
or 32mm holes on the rear panel, sealed with a
gland or plain-to-screwed adaptor (note: that the
supplied glands are designed to be used with 25mm
flexible conduit).
The cables are then connected to the correct
terminals of the MCB as shown below, as well as the Earth and Neutral bars as required.
PV inverters that are pre-installed in the DropBear are pre-wired to their respective AC breakers (1-phase system only).
However, if a PV inverter is installed externally such as in the three-phase model, the AC cables must be attached to the
dedicated PV inverter breakers. There are three 3-phase breakers pre-installed for this purpose, as shown below.
Single phase model – showing load and generator connection point (the Fronius PV inverters already wired in)

DropBear | Installation Manual Jan 2023
RedEarth Energy Storage
For sales enquiries contact sales@redearth.energy
For technical support: support@redearth.energy
15 Fienta Place, Darra BRISBANE QLD 4076 | 1800 733 637 | www.redearth.energy
15
Three phase model – showing load, generator and Fronius PV inverters connection points. (up to three)
4.1.1 Load connection
The Active wires are terminated into the bottom of the Load circuit breaker (1 or 3-phase), as shown in the above picture. Earth
and Neutral must be terminated into the respective busbars.
NOTE:: See SLDs in the back of this manual.
4.1.2 Grid / Generator termination
For a generator both the Active and Neutral wires must terminate into the bottom of the generator circuit breaker. Earth must
be terminated into an empty slot in the Earth Bar.
If the system is grid-connected, then the Neutral wire must connect directly to the Neutral busbar and not be wired into the
MCB.
4.1.3 Generator Auto-Start and Charger
The DropBear contains a trickle charger for the generator battery as
well as a 2-wire AutoStart feature. There are four terminals in the
Comms area to connect these to the generator. These terminals are
shown in the picture at right and can be identified as:
Gen Start: Dry contact
The two terminals on the left must be connected to a cable
to activate the generator 2-wire auto-start.
Positive Terminal (charger)
The third terminal from the left must be connected to the
positive (+12V) terminal of the generator’s battery.
Negative Terminal (charger)
The fourth terminal from the left terminal must be
connected to the negative (0V) terminal of the generator’s
battery.
NOTE: If this is an On-Grid installation, connect the neutral cable to the Neutral Bar

DropBear | Installation Manual Jan 2023
RedEarth Energy Storage
For sales enquiries contact sales@redearth.energy
For technical support: support@redearth.energy
15 Fienta Place, Darra BRISBANE QLD 4076 | 1800 733 637 | www.redearth.energy
16
4.1.4 Generator Requirements
For the SPMC482 (7.5kW), the recommended generator size by Selectronic is 14kVA. For a 3-phase system with 3 x7.5kW
Selectronics Inverters the recommended size Is at lest 42kVA.
Please ensure that your generator meets or exceeds the following specifications:
Generator waveform THD: < 10%.
Generator Vrms range: 180 ~ 264Vac
Generator voltage crest factor (Vpeak/Vrms): < 1.6
Generator peak voltage: <380V
Frequency range: 45Hz ~ 55Hz
Frequency slew rate: <0.3Hz/sec
4.2 DC Connections
4.2.1 Battery Connection
The batteries located are in the lower enclosure, behind the bottom double doors.
These are usually supplied separately for ease of transportation; unbox the batteries, place them on the battery shelf, re-install
the front battery rails and finally attach the battery cables.
NOTE:
Inverter-generators are recommended for use with DropBear because of their better
power quality. If voltage, frequency, or current waveforms of the generator are not of a high
enough quality, then it will be rejected by the inverter.

DropBear | Installation Manual Jan 2023
RedEarth Energy Storage
For sales enquiries contact sales@redearth.energy
For technical support: support@redearth.energy
15 Fienta Place, Darra BRISBANE QLD 4076 | 1800 733 637 | www.redearth.energy
17
4.2.2 PV Connections
For the 1-phase DropBear with Fronius inverters installed inside the system, the PV cables should be brought through the 25mm
holes on the rear of the unit using the supplied glands or plain to screwed adapters.
Terminate the PV cables with the MC4’s connectors provided, confirm polarity, and then plug them and into the pre-terminated
tails as shown below.
For the 3-phase DropBear, where the Fronius inverters are installed externally the PV cables are brought directly to the Fronius
inverter. Only the AC cables (and communication cable) from the Fronius inverters are brought into the DropBear via the
25/32mm glands and connected to any of the 3 MCBs preinstalled into the system.
4.3 Communications
The DropBear has RedEarth’s RedPi edge device installed. It includes a 4G SIM card and provides for easy monitoring of the
system operation using your mobile phone.
The equipment is located on the right side of the switchgear, under the cover with the Selectlive device attached to it.

DropBear | Installation Manual Jan 2023
RedEarth Energy Storage
For sales enquiries contact sales@redearth.energy
For technical support: support@redearth.energy
15 Fienta Place, Darra BRISBANE QLD 4076 | 1800 733 637 | www.redearth.energy
18
For the 4G monitoring to work the included antenna
must be installed in an area where it has sufficient mobile
coverage. The cable of the antenna can pass through one
of the 25mm holes in the rear of the DropBear and be
screwed into the top of the RUT240 modem as shown in
the image above.
Note that if there is no mobile phone coverage, however
there is a hard-wired internet connection available, this
can be used by passing the Cat5/6 cable through one of
the holes in the rear of the DropBear and connecting it to
the LAN terminal in the RUT240 as shown here. Starlink
satellite communication Is also an option.
Note: once a connection is established you can contact
RedEarth to confirm that remote monitoring is
functioning.
Step 5: Turn ON and Shutdown procedure
Once the DropBear is in place and correctly wired up, you may start the system.
To power up the unit follow the steps below:
1. Turn on individual DC battery breakers
on top of each TROPPO battery.
This will pre-charge the capacitors
inside the Selectronics inverters. The
LED on the inverter will flash and
beep. Wait for approximately 10
seconds
2. Turn on the Main Battery Breaker
3. Turn on the PV isolator located under
each Fronius, whether they are
installed inside the DropBear or
externally.
Before step 4, confirm the inverters
are powered up but not inverting
(outputting AC power)
4. Turn on all AC circuit breakers
5. Turn ON the Selectronic by pressing
and holding the “ON” button on the
top left-hand-side of the inverter.
Start with the left-most Selectronics if
more than one is installed. This is the
MASTER inverter.

DropBear | Installation Manual Jan 2023
RedEarth Energy Storage
For sales enquiries contact sales@redearth.energy
For technical support: support@redearth.energy
15 Fienta Place, Darra BRISBANE QLD 4076 | 1800 733 637 | www.redearth.energy
19
Step 6: Commissioning
The DropBear has been commissioned and tested in RedEarth’s factory to
confirm correct operation of the system prior to shipment. This is based on
the system specifications provided when it was ordered, e.g., off-grid or on-
grid operation, as well as the specific sizes and numbers of Fronius inverters
required.
However, some last-minute parameter adjustments may be required (e.g.,
generator size or weekly run-time to exercise the generator). Carefully
follow the procedure below on how to make these alterations without
compromising the existing configuration.
NOTE: This must be done by a qualified person.
NOTE: The program Selectronic SP Link is required to make these parameter
changes and can be downloaded from Selectronics’ web page
(http://www.selectronic.com.au/)
6.1 Step One
With the system powered up, connect a computer to the Selectronic SP Pro
(master) using the USB cable supplied in the Parts kit as shown at right.
6.2 Step Two
Open the program “Selectronic SP Link”. The following page will appear:
6.3 Step Three

DropBear | Installation Manual Jan 2023
RedEarth Energy Storage
For sales enquiries contact sales@redearth.energy
For technical support: support@redearth.energy
15 Fienta Place, Darra BRISBANE QLD 4076 | 1800 733 637 | www.redearth.energy
20
Click on the “Connection” tab and then on “Connect”.
The program will request you to “Save Site” before proceeding. Fill in a site name and then click “Save Site”.
Other manuals for DropBear
2
Table of contents
Other RedEarth Batteries Pack manuals

RedEarth
RedEarth SunRise SRS-3 Series User manual

RedEarth
RedEarth BlackMax User manual

RedEarth
RedEarth BlackMax User manual

RedEarth
RedEarth BlackMax User manual

RedEarth
RedEarth DropBear User manual

RedEarth
RedEarth HoneyBadger User manual

RedEarth
RedEarth SunRise SRS-3 Series User manual

RedEarth
RedEarth TROPPO-4841 User manual