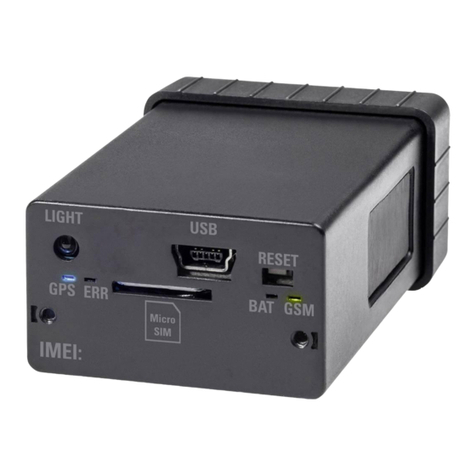
Renkforce GX111 User manual

Operating Instructions
GSM Alarm Device with GPS Tracking „GX111“
Item No. 1168681

2
Table of Contents
Page
1. Introduction..........................................................................................................................................................4
2. Explanation of Symbols .......................................................................................................................................4
3. Intended Use .......................................................................................................................................................5
4. Scope of Delivery.................................................................................................................................................5
5. Safety Information................................................................................................................................................6
6. Notes on Rechargeable Batteries........................................................................................................................7
7. General Information.............................................................................................................................................8
a) General Descriptions.....................................................................................................................................8
b) Operating Mode.............................................................................................................................................9
c) Alarm Mode .................................................................................................................................................10
d) Housing/Operating Elements....................................................................................................................... 11
e) Description of the Connections....................................................................................................................13
f) Notes on Use...............................................................................................................................................13
g) Notes on Connection...................................................................................................................................13
8. Commissioning - First Steps..............................................................................................................................14
a) Assembly and Charging of the Product.......................................................................................................14
b) Changing the PIN Code to „1513“ ...............................................................................................................15
c) Micro SIM Card Insertion.............................................................................................................................15
9. CongurationviaTextMessage.........................................................................................................................16
10. Functional Descriptions .....................................................................................................................................18
a) Determining„STATUS“ ................................................................................................................................18
b) GeneralCongurationCommands..............................................................................................................19
1. Changing the PIN Code („PIN“)...............................................................................................................19
2. Changing the Device Name („NAME“) ....................................................................................................19
3. Setting the Language (Function „LANGUAGE“)......................................................................................20
4.AdministrationofthePhoneBook(Functions„TEL“,„TEL1“,…).............................................................20
c) CongurationoftheSensors.......................................................................................................................22
1. Setting Support („DIAGNOSE“)...............................................................................................................22
2. Shock („SHOCK“)....................................................................................................................................23
3. Position Change („SLOPE“) ....................................................................................................................25
4.BrightnessChange(„LIGHT“)..................................................................................................................26
(
3
Page
5.TemperatureLimits(„TEMP“) ..................................................................................................................27
6. Panic Alarm („S1“) ...................................................................................................................................28
d) Additional Functions ....................................................................................................................................28
11. Location Determination......................................................................................................................................29
a) General GPS Localisation („GPS“)..............................................................................................................29
b) Submission of a Web Link with GPS Position („GPSMAP“)........................................................................30
c) ReadingDate/TimeandSynchronisingclock(„GPSDATE“) .......................................................................30
d) ActivatePositionTracking(„TRACK“) .........................................................................................................31
e) Programming the GPS Zone („GPSZONE“)................................................................................................32
12. EmailDispatchoftheTrackingData..................................................................................................................34
a) CongurationoftheSMTPAccessData(„SMTP“) .....................................................................................35
b) CongurationoftheGPRSAccessData(„GPRS“) .....................................................................................36
c) TransmissionoftheTrackingData(„TRACKDATA“) ...................................................................................37
13. System Functions ..............................................................................................................................................39
a) TimebetweenTwoAlarmMessages(„IDLEALARM“).................................................................................39
b) Online/OfineTimesofGSM(„TIMEOUT“).................................................................................................40
14. ERROR and LED Flashing Sequences .............................................................................................................42
a) „ERR“ LED...................................................................................................................................................42
b) „GSM“ LED..................................................................................................................................................43
c) „AKKU“ LED ................................................................................................................................................43
d) „GPS“ LED...................................................................................................................................................43
15. Reset to Default.................................................................................................................................................44
16. Maintenance and Cleaning................................................................................................................................44
17. Declaration of Conformity (DOC).......................................................................................................................45
18. Disposal.............................................................................................................................................................45
a) General Information.....................................................................................................................................45
b) Batteries and Rechargeable Batteries.........................................................................................................45
19. TechnicalData ...................................................................................................................................................46

4
1. Introduction
DearCustomer,
thank you for purchasing this product.
ThisproductcomplieswiththestatutorynationalandEuropeanrequirements.
Tomaintainthisstatusandtoensuresafeoperation,youastheusermustobservetheseoperatinginstructions!
Theseoperatinginstructionsarepartofthisproduct.Theycontainimportantnotesoncommissioningand
handling.Alsoconsiderthisifyoupassontheproducttoanythirdparty.Therefore,retaintheseoperating
instructionsforreference!
All company names and product names are trademarks of their respective owners. All rights reserved.
If there are any technical questions, please contact:
International: www.conrad.com/contact
United Kingdom: www.conrad-electronic.co.uk/contact
2. Explanation of Symbols
An exclamation mark in a triangle indicates important notes in these operating instructions that must be
strictly observed.
Thearrowsymbolindicatesthatspecialadviceandnotesonoperationareprovidedhere.

5
3. Intended Use
Theproductservestomonitoryourproperty.Itmustnotbeusedtomonitorpersons.
Sensorsforshock,positionchange,brightnessmeasurement,andtemperaturemeasurementarebuilt-in.
The integrated GPS receiver serves precise determination of the position, GeoFence monitoring and tracking of
position data.
All functions can be controlled remotely by text message.
Any use other than that described above can damage the product and may involve additional risks such as short
circuit,re,electricshock,etc.
Nopartofthisproductmustbemodiedorconverted.
Thesafetyinformationmustbeobservedatalltimes!
ThisproductcomplieswiththestatutorynationalandEuropeanrequirements.Allcompanynamesandproductnames
are trademarks of their respective owners. All rights reserved.
4. Scope of Delivery
• GX111withrechargeablebattery
• MiniUSBcable
• Briefinstructions
Themainmanualfortheproductisavailableviadownload.
Up-to-date operating instructions
Todownload the latestoperatinginstructions, visit www.conrad.com/downloads or scan the QR
code on this page. Follow the instructions on the website.
The following accessories are needed for operation. They are not enclosed:
• Micro-SIMcard(eitheraprepaidcardoraconventionalcontractcard)
Important!
SetthePINofthiscardto1513beforeinsertingitintotheGX111.
• Phillipsscrewdriver(sizetomatchM2screws)toopenthecoveraps

6
5. Safety Information
The guarantee/warranty will expire if damage is incurred resulting from non-compliance with these
operating instructions. We do not assume any liability for consequential damage!
Nor do we assume any liability for damage to property or personal injury caused by improper use
or failure to observe the safety information. The warranty/guarantee will expire in such cases!
• Forsafetyand approval reasons,unauthorisedconversionand/or modication ofthedeviceare not
permitted. Never dismantle the product.
• Theproductisnotatoyandmustbekeptoutofreachofchildren.Theproductcontainssmallpartsand
a rechargeable battery. Operate the product in a way that it is out of reach of children.
• Donotusethisproductinhospitalsormedicalfacilities.TheGSMradiosignalsmaycausefunctional
impairmentinlife-maintainingsystems.Thesamemayapplyinotherareas.
• Handletheproductwithcare;impacts,shockorfallevenfromlowheightswilldamageit.
• Theproductonlyservestotriggeralarmsbutdoesnotrelievetheuserfromhisdiligenceobligation.
TheGPSfunctionsonlyservetomonitorproperty.Youarepersonallyresponsibleforcompliancewith
the statutory requirements for further monitoring.
• Ifyoundanydamageattheproduct,stopoperatingitandtakeittoaspecialistworkshop.
It can be assumed that safe operation is no longer possible if:
- the product is visibly damaged
- the product no longer functions
- the product was stored under unfavourable conditions for an extended period of time
- if it was subjected to heavy stress during transport
• Iftheproductisbroughtfromacoldintoawarmroom(e.g.intransport),itispossiblethatcondensation
develops.
Therefore,rstlettheproductreachroomtemperaturebeforeconnectingittothepowersupply.This
may take several hours.
• Donotleavethepackagingmateriallyingaroundcarelesslyasitcanbecomeadangeroustoyforchild-
ren.
• Ifthereareanyquestionsthatarenotansweredinthisoperatingmanual,contactourtechnicalsupport
or another expert.

7
6. Notes on Rechargeable Batteries
• Batteriesdonotbelonginthehandsofchildren.
• Donotleaverechargeablebatterieslyingaroundopenly.Childrenorpetsmayswallowthem.Ifswallowed,consult
a doctor immediately.
• Leakingordamagedrechargeablebatteriesmaycausecausticburnsiftheycomeintocontactwithskin.Therefore
you should use suitable protective gloves for this.
• Liquidsleakingfromrechargeablebatteriesarechemicallyhighlyaggressive.Objectsorsurfacesthatcomeinto
contactwiththemmaytakeseveredamage.Therefore,keeprechargeablebatteriesinasuitablelocation.
• Makesurethatrechargeablebatteriesarenotshort-circuited,dismantledorthrownintore.Thereisadangerof
explosion!
• Alwaysobservecorrect polarity (observeplus/+andminus/-) when connecting therechargeablebatteryto the
GX111.
• Useonlytheenclosedrechargeablebatteriesoraccessoryrechargeablebatteriesofthesamebuildtosupplythe
GX111withpower.
• Ifnotusedforalongerperiod(e.g.incaseofstorage),removetheinsertedrechargeablebatteryfromtheGX111.
Iftherechargeablebatteryistooold,itmayleakandcausedamagetotheproduct,whichleadstothecancellation
ofthewarranty/guarantee!
• Adamagedrechargeablebatterymustnolongerbeused.Disposeofitinanenvironmentallycompatiblemanner.
• Readchapter„Disposal“abouttheenvironmentallyfriendlydisposalofbatteries.

8
7. General Information
Theseoperatinginstructionsdescribethefunctionandoperationatthetimeofprinting(27January2014).Changes
thatserveproductimprovementcanbeperformedbythemanufactureratanytime.Themostrecentoperatinginst-
ructions will be provided on the associated product page on www.conrad.com in a timely manner.
TheGX111hasanupdatefunction.However,anupdateshouldonlybeperformedtosolvewrongbehaviour.Every
updateprocesshasrisks(e.g.cancellationduringtheupdate,etc.).Itmustbeassumedthattheproductmustbesent
to the manufacturer after a defective update process.
Inthefollowing,themostimportantitemsthatyoumustobservewhenusingtheproductarenoted.
Alltextmessageanswerexamplesaretobeunderstoodsymbolically.Actualimplementationmayvary.The
examples should only show the information on the format and writing to be expected.
Priortocommissioningoftheproduct,checkwhetheritisgenerallysuitedfortheintendedapplication!
Ifindoubt,askasuitablespecialist.
a) General Descriptions
Thisproductistobeusedtomonitorthecustomer‘sproperty.Incaseofalarm,itstaskistoinformthecustomerofit
by text message as quickly as possible.
Itmaymonitorshock,positionchanges,brightnessdifferencesandtemperature.Incaseofalarm,theGX111sends
an alarm text message to up to 4 stored phone numbers.
TheGPSreceiverisusedtodetermineandmonitorGPSzones(„GeoFence“),i.e.aplaceorareawheretheproduct
may be present.
Theproductisdesignedformaximumbatterylife.Theregularconditionissleepmode,whereonlythecongured
sensorsareactive.Theywakeupthemoduletosendtextmessagealarmsifathresholdisexceeded.
Apartfromthis,themodulewillwakeupevery24h,e.g.for15minutes(default)andwillcheckforanytextmessages
received.Uponreceiptofatextmessage,the„ONLINE“timeoutisresetandcanbeconsideredfurther.Duringthis
time,e.g.thecurrentpositioncanbedetermined.ForthisitispossibletohavealinktoOpenStreetMap.org(open-
source map provider) sent by text message command.
Furthermore,theproductmayalsorecordandsave(track)thecurrentGPSposition.Thesesaveddatacanberead
by USB.

9
b) Operating Mode
Theproductisoptimisedforthe longest battery life.ThisisachievedbytargeteddeactivationoftheGSM-/GPS-
module („OFFLINE“ mode).
Fortheproducttocontinuetobeavailable,theGSMmodulewillwakeupautomaticallyafteraspecictime(„ONLINE“
mode)andcheckwhetherthereareanynewtextmessages.Thestandardsettingsare15minutesforthe„ONLINE“
modeand1425minutesforthe„OFFLINE“mode(15+1425=1440minutes=24h).The„TIMEOUT“commandcan
be used to change these settings on demand (described farther towards the back of these instructions).
A sensor alarm or push on the external button „S1“ will wake up the module at once.
Eachuseractivity(textmessage,USBdata)willalsoresettheactivetimeout;youwillhave15minutes‘time(by
default) again after each action.

10
c) Alarm Mode
Thereistheimportantalarmmodeinparalleltoandindependentoftheoperatingmode.Thismodedeneswhether
theGX111is„armed“asanalarmdeviceandmaysendtextmessagealarmswhensensorsaretriggeredandoptio-
nally issue an alarm sound.
Theconditionsareasfollows:
ENABLE ALARM #1513
Thealarmmodeisswitchedon.
DISABLE ALARM #1513
Thealarmmodeisswitchedoff.
Alarm mode on:
Thismodeisenteredviathecommand„ENABLEALARM#<PIN>“.Whetherthealarmmodeisactiveornotcanonly
berequestedviathecommand„TESTSTATUS#1513“.Ifthealarmmodeisonandrecognisesanalarmincidentvia
anactivatedalarmsource(shock,position,…),allphonenumbersinthephonebookoftheGX111(nottheSIMcard!)
will receive the corresponding alarm text message and an optional alarm sound can be issued.
Alarm mode off:
Inthismode,GSMcostsariseonlywhenanactionperformedbyyoucausesareactionoftheGX111.TheGX111only
sendsanswertextmessageswhenatextmessagewiththecorrectPINhasbeenreceived.TheGX111doesnotsend
out any alarm text messages on its own.
Thealarmmodeis(deliberately)offbydefault.
Observethathighcostsmayarisefromsendingtextmessages(particularlyabroad),dependingonhowthe
GX111iscongured.

11
d) Housing/Operating Elements
TheGX111hasnofurtherlabelsorLEDsontheoutsidebecauseitistobeasunobtrusiveandmergewith
its environment as well as possible.
Thegureshowsthehousingwithoutthefrontcap.
1 Lightsensor„LIGHT“
2 USB-socket (charging rechargeable battery)
3 Button„RESET“forresetting
4 Button „S1“ (wake up)
5 „GSM“ LED (green)
6 „AKKU“ LED (yellow)
7 Micro-SIMcardholder(setthecard‘sPINto1513!)
8 „ERR“ LED (red)
9 „GPS“ LED (blue)
10 Screw connection
11 Position of the GPS receiver in the housing
Find the description of the operating elements below:
1 Lightsensor„LIGHT“
Thelightsensormeasurestheambiencebrightness.Thealarmvalueissetfrom1(bright)to10(dark).Whenthe
setbrightnessvalueisexceeded,analarmmessageissent.Thismaybeusedtodetect,e.g.,openingofacabinet
orgate(lightingression)(command„LIGHT“).
Asaspecialproduct feature, the lightsensorreactstotheentirevisibleandinvisiblelight spectrum from UV
(ultraviolet,e.g.UV-lamps)toIR(infrared,e.g.IR-remotecontrols).
Therefore,placetheGX111correctlybeforeassumingincorrecttriggering.
12311
9
10
87 6
4
5
10

12
2 USB-socket (charging rechargeable battery)
TherechargeablebatteryoftheGX111ischargedviatheUSBsocketandaninterfaceisprovidedforcontrol/
congurationoftheGX111.Permanentoperation(powersupply)viaUSBispossibleaswell.
ConnectedtothePC,adriverisneededforthe„virtualCOMport“sothattheGX111canbecongured/controlled
viaUSBandarmwareupdateperformed.Therequiredsoftwareandrmwarelesareavailableonlineatwww.
conrad.com,inthedownloadsectionfortheproduct.
TheGX111mustonlybeusedwiththeofciallyprovidedsoftware(downloadareaontheproductwebsite).
3 Button„RESET“forresetting
ThisbuttonisusedtorestarttheGX111.
Incombinationwiththebutton„S1“,theGX111isresettofactorysettings.Formoreinformation,seechapter
„Factory settings“ farther back in these operating instructions.
4 Button „S1“ (wake up)
ThisbuttonwakesuptheGX111sothatitcanbeconguredinthe„ONLINE“modeviatextmessage.USBcon-
gurationisonlypossiblein„ONLINE“modeeither.
Thebuttonforpanicalarmcanbeconguredaswell.Oncethebuttonispushed,atextmessagealarmissent
when the alarm mode is activated (command „S1“).
5 „GSM“ LED
ThisLEDisusedtorecognisetheactivityandstatusoftheGPSmoduleintheGX111.Inthe„ONLINE“mode,this
LEDwillalwaysashorbelit.
AmoredetaileddescriptionofthisLEDisfoundinthechapterondescriptionoftheerrorcodesandLEDashing
sequences.
6 „AKKU“ LED (yellow)
TheinternalrechargeablebatteryischargedandmonitoredviaachargingelectronicsystemintheGX111.For
moreinformation,seethechapterondescriptionoftheerrorcodesandLEDashingsequences.
7 Micro SIM card holder
ThemicroSIMcardholderisusedtoholdanymicroSIMcard.
TheGX111canonlybeactivatedwiththemicroSIMcardinserted.TheSIMcardholderrecognisesinser-
tionofthecardandreleasestheremaininghardwareoftheGX111.
WithouttheinsertedSIMcard,onlychargingoftherechargeablebatteryviaUSBisavailable,butnoother
functions!
ObservethatconsiderablecostsmayarisefrommobilephonedataconsumptionwhenusingtheSMTP
and GPRS functions.

13
8 „ERR“ LED (red)
ThisLEDisusedas„Error“LEDandwillinformofactivitiesorerrorsaccordingtothechapterondescriptionof
theerrorcodesandLEDashingsequences.
9 „GPS“ LED (blue)
ThisLEDindicatesactivitiesoftheGPSmodule.Alsoobservethechapterondescriptionoftheerrorcodesand
LEDashingsequences.
10 Screw connection
Thecovercapisattachedhere.
11 Position of the GPS receiver in the housing
TowarrantbestGPSreception,theGX111musthaveafreeviewoftheGPSsatellitesinthesky.
e) Description of the USB socket
Thisconnectionisusedtochargetherechargeablebatteryofthedevicewithachargingcurrentof100mA.Thisdoes
not require drivers and any commercial USB plug-in mains unit can be used.
A higher charging current (500 mA) requires release from a USB host (e.g. PC with USB-port). Only then will the
charging times described in the technical data be available.
Data communication takes place via a standard USB chip that signs on to the Windows-PC as a virtual COM port.
Thecorrespondingdrivercanbeprocuredeitherfromwww.conrad.comordirectlyfromthemanufacturer‘swebsite:
http://www.ftdichip.com/Drivers/VCP.html
f) Notes on Use
• Thereisnoprescribedusageposition.
• WhenusingtheUSBsocket,observethatthereisenoughroomfortheplug.Lateralforcesontheplugged-inplug
canleverthesocketfromthePCBandthuscauseirreparabledamage,lossofwarranty/guarantee!
• Towarrantthedevicefunction,chooseasiteofusewheretheGMSnetworkreceptionisasgoodaspossibleand
the GPS signal can be received.
• Theproductshouldbetakentoasitewhereobjectshockcanbemeasured(„SHOCK“alarm).
g) Notes on Connection
• Theexternalcablesmustbekeptasshortaspossibleandremaininglinelengthsmustnotbecoiled.Themaximum
line length is 3 m.
• Too-strongtemperatureuctuationsmayleadtotemporaryimpairmentandrequiremanualresetinextremecases.
• Theproductisnotintendedforthe„Safety“areaandalsodoesnotcorrespondtoanySIL/ASILlevel.

14
8. Commissioning - First Steps
Thefollowingisneededforoperationandcongurationofthedevice:
• AconventionalmobilephonethatpermitsinsertionofamicroSIMcardforcongurationoftheGX111.
Ifyourmobilephoneisnotequippedforusewithamicro-SIMcard,youwillneedthecorrespondingadap-
ter.
• AnadditionalmicroSIMcardfortheGX111
• AUSBport(PC,notebookorincludedmainsadapter)withUSBcable
• AsmallPhillipsscrewdriverforM2screwstoremovethecoversoftheGX111
a) Assembly and Charging of the Product
Theproductisdeliveredwiththerechargeablebatteryinserted.However,itisnotconnectedtopreventdeepdischar-
ge.
Therefore,thehousingoftheGX111mustbeopenedandthePCBremovedforrstcommissioning.Thentherechar-
geablebatterycanbeconnectedandtheGX111assembledagain.
Particularly observe the following items during assembly:
Rechargeable battery connection:
ThereisaconnectionfortherechargeablebatteryonthePCBsidewiththeSIMholderrightnexttoit.Theplugis
pushedontotheholderfromthetop.Theplugisprotectedagainstpolarityreversal.
Rear cover (without opening for light sensor)
ThecoverisrmlyscrewedtothehousingandcoversthelargeopeningwiththePCBandtherechargeablebattery.
Thecovermustberemovedtoreplacetherechargeablebattery.ThenthePCBwiththerechargeablebatterycanbe
pulled from the housing.
Whenputtingittogether,observethatthesealonthecoverinsideisplacedcleanlyandhasnodamage.
Therubberwashersalsomustbeusedforscrewingtoensurebestweatherresistance.
Front cover
ThiscovercoversallconnectionsandstatusLEDsandhasonlyatransparentopeningforthelightsensor.Onlythis
coverneedstobeunscrewedforregularaccesstotheproduct(USB,SIM,etc…).
Therequirementstoassemblyofthefrontcoverarethesameasfortheinternalcover.However,observethatthe
transparent opening should be checked for contamination so that the light sensor can work properly.

15
b) Changing the PIN Code to „1513“
EverySIMcardhasaPINcode.BecausethisGSMproductusesitsownPINprocessingforreasonsofsafety,the
SIM card PIN code must be changed to that of the product.
The following steps are required for this:
• ThemicroSIMcardintendedfortheproductmustbeinsertedinamobilephone.Ifyourmobilephoneisnotequip-
pedforusewithamicro-SIMcard,youwillneedthecorrespondingadapter.
• Accordingtotheoperatinginstructionsofthemobilephone,thePINcodemustbechangedto1513.
• ThemicroSIMcardwiththechangedPINcodemustberemovedfromthemobilephone.
• ThemicroSIMcardwiththechangedPINcodecannowbeinsertedintotheGX111(seenextchapter).
We urgently advise against deactivating the SIM card PIN query. In addition to the risk at theft and con-
nectedillegaluse,deactivationofthePINfunctionmeansthatthedeviceisusedinanon-intendedmode.
Theremaybefunctionalerrors!
c) Micro SIM Card Insertion
ThemicroSIMcardwiththePINnumber„1513“mustbeinsertedintheintendedSIMcardholderoftheGX111.
AfterinsertionofthemicroSIMcard,theGX111isswitchedon.
DuringstartingoftheGX111,the„ERR“LEDashesatanintervalofonesecond.Afterashorttime,the„GSM“LED
willashgreen(inintervalsof½second)(networkscanning)andafterafewseconds,the„GSM“LEDshouldchange
itsashingpattern.
Ifthe„GSM“LEDdoesnotchangeitsashingpattern,thereisnoconnectiontotheGSMnetwork.Inthiscase,the
networkqualityandfunctionofthemicroSIMcardatthesiteoftheGX111mustbeinspectedwithaseparatemobile
phone.
Use a mobile phone to check if the SIM card is activated at all. If the mobile phone cannot log into the GSM network
withthesetPIN1513,thereisaproblemwiththeSIMcard.Inthiscase,contacttheprovideroftheSIMcard.
IfanerroroccurswhileconnectiontotheGSMnetworkisestablished,itissignalledwiththe„ERR“LED.Inthiscase,
pushthe„RESET“buttonattheGX111.
IftheGX111usedtobeusedwithanotherSIMcard,thereistheoptionofthePINnumberintheproduct
beingchangedandnownolongermatchingthedefaultsetting„1513“.Inthiscase,theGX111mustbe
resettofactorysettings(seecorrespondingchapterfartherbackintheseoperatinginstructions),thenthe
PIN of the micro SIM card must be set to „1513“ in the mobile phone.
ThemicroSIMcardmayhavebeenlockedinthemeantimeandmustbeunlockedwiththePUK.Inthis
case,useaseparatemobilephoneandunlockthemicroSIMcard.

16
9. Conguration via Text Message
ToreceivethefullfunctionalscopeoftheGX111,itmustrstbecongured.Theentirecongurationisperformedby
simpletextmessagecommandsyousendtotheGX111(thephonenumberofthemicroSIMcardintheGX111)from
your mobile phone.
Thismethodmakesitpossibletoactivate,deactivateorchangethesettingsoftheGX111fromanywhere.
Alternatively,theGX111canbeconguredviatheUSBinterfaceusingPCsoftware(availableviawww.conrad.com).
TheseoperatinginstructionsdonotdealwithcongurationviaPCsoftware.Thisonlydescribeshowthe
productcanbecontrolledviaamobilephone,withoutanyotheraids.
Toprotectagainstunauthorisedaccess,theGX111generallyreactstoauthenticatedmessagesonly.Ina
textmessage,youauthenticateyourselfbyincludingthecorrectSIMPINoftheGX111(nottheoneofthe
mobilephoneonwhichthetextmessagehasbeenwritten!).
Foryourownsafety,theSIMPINnumbermustbechangedunderallcircumstancesaftercommissioning
oftheproduct.Thisisdescribedinthecorrespondingchapter.
IftheGX111isin„OFFLINE“mode(controlcommandsviatextmessagearenotpossible),theGX111can
beputinto„ONLINE“modebypushingthebutton„S1“onitsside.Thestandardsettingsare15minutes
forthe„ONLINE“modeand1425minutesforthe„OFFLINE“mode(15+1425=1440minutes=24h).
Introduction into the command format
ThetextmessagestoprogramtheGX111aresetupaccordingtothefollowingchart:
<ACTION> <FUNCTION> <PARAMETER1> <…> <#PIN>
Examples:
SET TEL1 +49177556644221 #1513 (phonebook)
RESET TEMP #1513 (alarmoff)
TEST TEMP #1513 (query)
ENABLE ALARM #1513 (alarmon)
DISABLE ALARM #1513 (alarmoff)
Important!
EverytextmessagesenttotheGX111mustendwiththePINsetasprotection.Without„#<PIN>“atthe
endofthetextmessage,itisdiscardedandnoansweringtextmessagewillbegenerated!
Thecommandsandparametersmustbeseparatedbyasinglespaceeach.
IftheGX111doesnotreact,itmaybein„OFFLINE“mode.Pushthelateralbutton„S1“towakeitup.

17
„ACTION“
The„ACTION“commandspermitthefollowing:
SET =switchon/activate/congure
RESET =switchoff/deactivate/factorysettings
TEST =test/check/request
ENABLE =activatethealarmsystem(onlyforthefunction„ALARM“)
DISABLE =deactivatethealarmsystem(onlyforthefunction„ALARM“)
Noteonthe„RESET“command:
Ifafunctionistobeswitchedofforresetduetoanerror,thecorresponding„RESET“actionmustbeused
withthecorrespondingfunctionword!Thisactionisuniversallyapplicabletoallfunctions/textmessage
commands and resets the corresponding function to the default settings.
„FUNCTION“
Thisisusedtoselectthefunctionyouwanttochangeorperform:
TEL1 =phonebookentryno.1
NAME =NameoftheGX111
„PARAMETER“
Boththepresenceandthenumberofparametersdependonthefunctionandactionused.Therefore,most„RESET“
actionshave noparameterswhile„SET“actionswithoutparametersareratherrare(whatshouldbesettowhich
value).
A parameter may be the following:
List: Youmaychooseaparameterfromapre-denedlist.
e.g.:DE,EN
Writing:<DE/EN>
Number: An integer without decimal digits.
e.g.:60=time[seconds](SETIDLEALARM60#1513)
More information:
• Capitalisationisnotrelevant;youmayusecapitalandsmalllettersasyouwish.
• Everynewcommandofthesamefunctionwilloverwritetheprevioussettings.
• Aftereveryvalidtextmessagecommand,theGX111willsendatextmessageanswertoconrmprogrammingto
your mobile phone (if the PIN in the text message command was correct).

18
10. Functional Descriptions
ThefollowingexamplesassumethatthePINis„1513“.
Theaction„TEST“ALWAYScontainsansweringwiththecorrectparametersforthefunctionandthusisnot
indicated. Several functions share one answer text message to use the maximum of a text message.
Theaction„RESET“isALWAYSresettingofafunctiontothefactorysettings(allparameters).Deviations
are indicated separately below.
a) Determining „STATUS“
Thecommand„STATUS“returnsasummaryofthemostimportantsettingsandconditionsoftheGX111.
TEST STATUS #1513
ThentheGX111sendsananswertextmessage.
Example(therightcolumnshowsonlyadescription;itisnotcontainedinthetextmessage):
GX11101.XX NameoftheGX111,rmwareversion
GSM: 59% GSM signal strength
GPS: on GPS receiver is on
TEMP:28CCurrentlymeasuredtemperature
Accu: 75% Current charge condition of the rechargeable battery
Slope: 0 degree Measured position angle 0° or no reference angle set
Diagnose: off Diagnosis mode off
Alarm: Disabled Alarm treatment via text message deactivated

19
b) General Conguration Commands
Thissub-chapterdescribesallgeneralcongurationcommands.
1. Changing the PIN Code („PIN“)
TosecuretheGX111fromunauthorisedaccess,thestandardPIN„1513“maybesettoanyothervalue.ThePINcode
can be changed as follows:
SET PIN <new PIN> #<old PIN>
Example: Changing old PIN 1513 to new PIN 1234:
SET PIN 1234 #1513
Foreverynewtextmessagecommand,thenewPINcodenowhastobeappended(tostickwiththeexample:1234),
precededbyacrosshatch(#).IfthewrongPINcodeisenteredorthePINcodeisnotsent,youwillnotreceivean
answering text message. Changing of the PIN code will change both the settings of the product and the PIN code of
themicroSIMcard!ThePINcodealwayshas4digits.
Thereisno„TEST“actionfortestingthisfunction.
IfyoulosethePINcode,theGX111canberesettofactorysettings(seechapter„FactorySettings“).All
settingswillbelostwhenresetting!Thenthedevicemustbesetagain.
ResettingtheGX111tofactorysettingswillnotaffectthemicroSIMcard.ThePINcodeofthemicroSIM
card is not changed.
2. Changing the Device Name („NAME“)
IfseveralGX111areoperatedatthesametime,itisrecommendedtoassignadifferentnametoeachGX111.This
makes it easier to assign alarm messages to the correct device.
Thedevicenamehasamaximumlengthof20characters.
TochangethenameatyourGX111,sendthefollowingtextmessagecommand:
SET NAME <new name> #1513
Example: Renaming to „NEWNAME“:
SET NAME NEWNAME #1513
Youwillreceivethefollowingconrmationtextmessage:
NEWNAMEGX1111.xx
Toresetthedevicenametofactorysettings(noname),usethefollowingcommand:
RESET NAME #1513

20
3. Setting the Language (Function „LANGUAGE“)
TheGX111sendsalarmtextmessagesintheGermanlanguage.IfthetextmessagesaretobesentintheEnglish
language,sendthefollowingtextmessagecommandtotheGX111:
SET LANGUAGE EN #1513
ToreceivethetextmessageinGermanagain,sendthefollowingtextmessagecommandtotheGX111:
SET LANGUAGE DE #1513
4. Administration of the Phone Book (Functions „TEL“, „TEL1“,…)
TheGX111cansaveupto4phonenumbers.Incaseofalarm,anoticationtextmessageissenttoeachofthese
phonenumbers.Thesephonenumberscanalsousethefunction„INCALL“.
Ifthesamenumberisinthelistseveraltimes,itwillreceivethesametextmessageasmanytimes.
TheGX111mayprocessphonenumbersinnationalandinternationalformat.However,theinternational
formatshouldbeusedatalltimes,sinceuseabroadmaycauseproblemsotherwise.
Example:0172/xxxxxxxx(national)becomes+49172xxxxxxxx(international)
Saving Phone Numbers
UsethefollowingcommandtosaveaphonenumberintheGX111:
SET TEL1 +49111… #1513
SET TEL2 +49222… #1513
SET TEL3 +49333… #1513
SET TEL4 +49444… #1513
Thereistheoptionofprogrammingseveralphonenumbersinasinglecommand,e.g.3phonenumbers(TEL1to
TEL3):
SET TEL1 +49111… +49222… + 49333… #1513
Concurrent programming of phone numbers is possible with a list starting from the indicated phone book entry and
ending at the last phone book entry as follows:
SET TEL1 <tel-nr1> <tel-nr2> <tel-nr3> <tel-nr4> #1513
SET TEL2 <tel-nr2> <tel-nr3> <tel-nr4> #1513
SET TEL3 <tel-nr3> <tel-nr4> #1513
SET TEL4 <tel-nr4> #1513
Other manuals for GX111
1
Table of contents
Other Renkforce Security System manuals

Renkforce
Renkforce GX111 Manual

Renkforce
Renkforce 751514 User manual

Renkforce
Renkforce KW-9270 User manual

Renkforce
Renkforce 752168 User manual

Renkforce
Renkforce RF-PM-01 User manual

Renkforce
Renkforce 1369187 User manual

Renkforce
Renkforce 1270198 User manual

Renkforce
Renkforce 1270197 User manual

Renkforce
Renkforce MAC-608 User manual

Renkforce
Renkforce AC-239 User manual