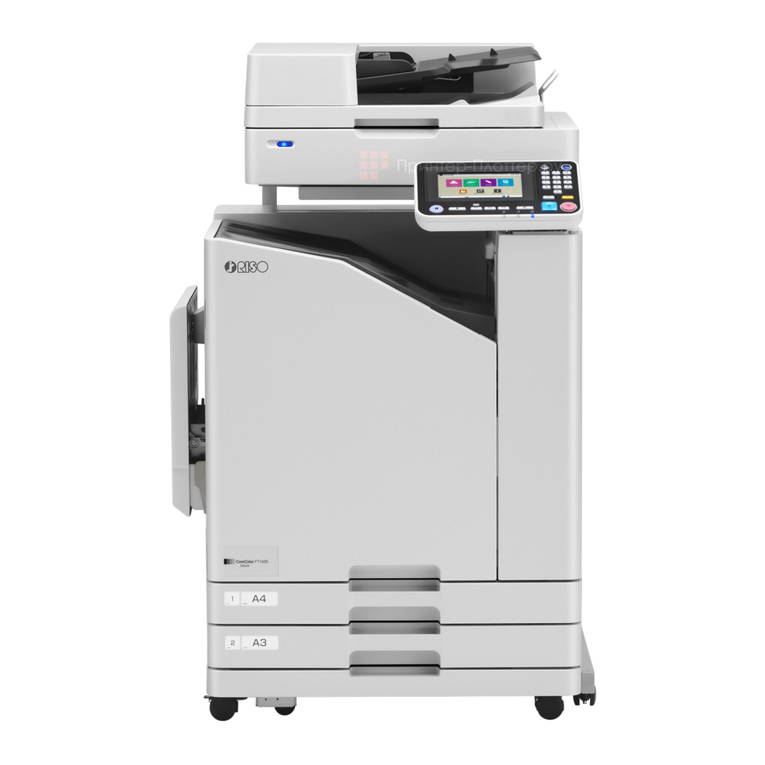
Riso VALEZUS T1200 User manual

This guide describes the action to take
when a paper jam or other problem occurs.
This guide describes the action to take
when a paper jam or other problem occurs.
T1_TRG-EN_02
Troubleshooting GuideTroubleshooting Guide

CAUTION
The "Safety Precautions" are provided in the User's Guide.
Be sure to read through them prior to use.
After reading this guide, keep it in handy for future reference.

About This Guide
Preface
Thank you for purchasing the VALEZUS T1200.
This guide describes the possible causes and solutions for problems that can occur when using this
machine.
Keep this guide handy, such as near the machine, for easy reference.
For troubleshooting of the print controller, see the user's guide for the print controller.
The following manuals are included with this machine.
About This Guide
This guide may not be reproduced in whole or in part without the permission of RISO KAGAKU
CORPORATION.
The contents of this manual may be changed without prior notice due to product improvements.
RISO KAGAKU CORPORATION shall not be liable for any consequence of using this guide or the
machine.
Trademark Credits
Windows is either a registered trademark or a trademark of Microsoft Corporation in the United States and/or
other countries.
PostScript is either a registered trademark or a trademark of Adobe in the United States and/or other
countries.
,
, VALEZUS and FORCEJET are trademarks or registered trademarks of RISO KAGAKU
CORPORATION in the United States and other countries.
Other corporate names and/or trademarks are either registered trademarks or trademarks of each company,
respectively.
User's Guide
This guide describes handling precautions and specifications, as well as the operations and settings of
each function.
Read this guide for a more detailed understanding of the machine.
z
Administrator's Guide
This guide describes the settings of the machine and dedicated equipment to be configured by the
administrator.
z
Troubleshooting Guide (this guide)
This guide describes the actions to take when a paper jam or other problem occurs.
z
(1)
(2)
(3)
1
VALEZUS T1200 Troubleshooting Guide

Symbols, Notations, and Screenshots Used in This
Guide
Indicates cautions that should be noted for safe use of this machine.
Indicates important items that should be noted or are prohibited.
Indicates useful or additional information.
The names of the following are indicated with square brackets [ ]:
Hard keys on the operation panel
Buttons and items displayed on the touch panel screen
Buttons and items displayed on a computer window
Example: Press the [Stop] key.
In this guide, the names of the dedicated equipment are described using a generic term as shown below.
The specific name for each item of equipment is used when its unique features are explained.
Name Used in This Guide Dedicated Equipment
Standard tray High capacity feeder
Double tray feeder (Feed 1, Feed 2)
Stacking tray High capacity stacker
Double tray stacker (Unit 1, Unit 2)
The stacking tray connected to the right side of the machine.
The procedures, screen shots, and illustrations in this guide assume that the high capacity feeder and
high capacity stacker are connected.
The screenshots and illustrations in this guide may vary depending on the usage environment including
connected equipment.
Symbols Used in This Guide
Names of Keys and Buttons
Names of Dedicated Equipment
*
*
Illustrations and Operating Procedures in This Guide
2
VALEZUS T1200 Troubleshooting Guide

Contents
About This Guide 1
Symbols, Notations, and Screenshots Used in This Guide 2
Touch Panel Display 4
[System Info] Screen 4
Status Area 5
Job List Icons 6
MessagesChapter 1 7
Error Messages on the Touch Panel 7
Examples of the Messages 8
Service Call 8
Unit Error 9
Paper Jam 10
Consumable Error 10
Installation Error 10
Warning 12
Information 14
TroubleshootingChapter 2 17
Paper Jams 19
Precautions When Removing Jammed Paper 21
Frequent Paper Jams 22
Paper Feed Path 23
General Troubleshooting for This Machine 25
Troubleshooting for Printing 27
Troubleshooting for the Feed Tray 29
Troubleshooting for the High Capacity Feeder/Double Tray Feeder 30
Troubleshooting for the High Capacity Stacker/Double Tray Stacker 32
Other Problems 33
Simple Questions 35
3
VALEZUS T1200 Troubleshooting Guide

4
[System Info] Screen
You can touch [System Info] on the [Home] screen to check information about the consumables, machine,
user, and license.
The [Consumables] screen displays the status of the ink and paper.
Touch Panel Display The touch panel allows you to perform
operations and check the current status of the
machine. Use the information described in this
section to help with troubleshooting.
VALEZUS T1200 Troubleshooting Guide

5
Status Area
The information described below is displayed in the status bar on the touch panel.
(ON): Using RISO ink
(ON): Using non-RISO ink (Consumables
information is entered.)
(flashing): Using non-RISO ink (Consumables
information is not entered.)
The amount of remaining ink cannot be displayed
when using non-RISO ink. [--] is displayed instead of
the remaining ink indicator.
Printer status
A
The current status of the machine is indicated with a
description such as [Idle], [Printing], [Error], or
[Some Units Unavailable].
FORCEJET™ link icon
B
This icon indicates whether all parts required for
printing are working correctly.
The display will differ depending on the consumable
or configured details.
•
•
•
For more information on setting the ink information,
see "The [Ink Information Input] screen is displayed."
(p.34).
Remaining ink indicator
C
The bar of each ink indicates the amount of
remaining ink. When the bar starts flashing, it is the
time to replace the ink cartridge. Prepare a new ink
cartridge for the color that flashes.
^^
•
VALEZUS T1200 Troubleshooting Guide

6
Job List Icons
The job list on the [Finished] screen displays the following icons according to the job type along with the
document name/job name.
Icon Job Type
Print job
Broken job (Broken data or data with problems)
VALEZUS T1200 Troubleshooting Guide

7
1
Chapter 1 Messages
This chapter describes the reasons why the error LED flashes on the operation panel and messages appear
on the touch panel, and what actions to take.
When the message is displayed, resolve the problem following the instructions in the displayed message.
Operation panel error LED
When an error occurs, the error LED flashes in red.
Error Messages on the Touch Panel
A description of the problem and instructions for resolving the problem are displayed, as shown in the
illustration below.
An alphanumeric error code is displayed at the top of the error message screen.
Be sure to mention this error code when contacting your service representative.
The first letter of the error code indicates the type of problem.
The numbers vary depending on the location of the problem.
•
-
-
VALEZUS T1200 Troubleshooting Guide

8
Examples of the Messages
The following are examples of messages. Follow the instructions in the displayed messages to resolve the
problems.
[Cancel] and [Continue] may be displayed on some message screens. Touch [Cancel] to stop the current
operation. Touch [Continue] to resume the current operation.
<S000-0000>Service Call
These error messages are displayed when inspection or repair is required by a service
representative.
Message Action to Take
A problem has occurred. Press
the Reset key, or turn the power
off and on again with the power
key on the operation panel. If the
problem persists, contact your
dealer.
A problem has occurred.
Press the [Reset] key on the operation panel. If this still does not
solve the problem, press the [Power] key on the operation panel to
restart the machine. If the above two operations for recovery do not
solve the error, contact your dealer or authorized service
representative. Be sure to mention the error code displayed on the
touch panel when contacting your dealer or authorized service
representative.
Not enough space in memory.
Turn the power off and on again
with the power key on the
operation panel.
The machine cannot be used because there is not enough available
space on the internal solid state drive (SSD).
Press the [Power] key on the operation panel to restart the machine.
If this does not solve the problem, contact your dealer or authorized
service representative. Be sure to mention the error code displayed
on the touch panel when contacting your dealer or authorized service
representative.
^^
•
^^
VALEZUS T1200 Troubleshooting Guide

9
1
<U000-0000>Unit Error
These error messages are displayed when repair is required by a service representative.
Message Action to Take
A problem has occurred on the
standard tray. You can use
another tray to continue printing.
A problem has occurred with the standard tray.
Touch [Change Tray] and specify a different paper tray.
A problem has occurred on the Feed
1 (Feed 2). You can continue printing
by using another tray.
A problem has occurred on the
paper tray. You can use the
standard tray (another tray) to
continue printing.
A problem has occurred with the feed tray.
Touch [Change Tray] and specify the standard tray (another tray) as
the paper tray.
A problem has occurred on feed
tray 1 (feed tray 2, feed tray 3). To
solve the problem, remove the
jammed paper. You can use
another tray to continue printing.
A paper jam occurred in the feed tray.
See "Troubleshooting for the Feed Tray" (p.29), and remove the
jammed paper.
To continue printing with another tray, touch [Change Tray] and
specify a different paper tray.
A problem has occurred on feed
tray 1 (feed tray 2, feed tray 3). To
solve the problem, remove the
jammed paper, and press the
Reset key. Printing using another
tray is possible.
A paper jam occurred in the feed tray.
See "Troubleshooting for the Feed Tray" (p.29) to remove the
jammed paper, and press the [Reset] key on the operation panel. If
this still does not solve the problem, press the [Power] key on the
operation panel to restart the machine.
If the above two operations for recovery do not solve the error,
contact your dealer or authorized service representative. Be sure to
mention the error code displayed on the touch panel when contacting
your dealer or authorized service representative. To continue printing
with a different paper tray, press the [Reset] key on the operation
panel, change the settings, and send the data.
A problem has occurred on the
paper output. You can use
another output tray to continue
printing.
A problem occurred when paper was output to the face down tray.
Touch [Change Output Tray] and specify a different output tray.
A problem has occurred on the
paper output to the option. You
can use another output tray to
continue printing.
A problem occurred when paper was output to the stacking tray.
Touch [Change Output Tray] and specify a different output tray.
The external controller has an
error. Check.
An error has occurred with the print controller (ComColor Express
FS2100C) or the print controller is not connected properly. Press the
[Reset] key on the operation panel to turn off the display of the error
message and check the LED indicator of the print controller and the
connections of its cables.
^^
VALEZUS T1200 Troubleshooting Guide

10
<X000-0000>Paper Jam
These error messages are displayed when there is a paper jam.
Message Action to Take
Buttons indicate paper jam
locations. To display how to fix,
touch the button.
Paper is jammed inside the machine, no paper was fed, or multiple
sheets of overlapped paper were fed into the machine.
Touch the button indicating the location of the paper jam to display
how to remove the jammed paper, and follow the instructions. For
more information, see "Paper Jams" (p.19).
<Y000-0000>Consumable Error
These error messages are displayed when it is time to replace consumables or parts that require
periodic replacement.
Message Action to Take
Replace the ink cartridge. Do not
set the removed one to prevent
failure.
Replace the displayed ink cartridge with the new one.
For more information, see "Ink Cartridge Replacement" in the "User's
Guide".
The expiration date of the ink
cartridge has expired. Replace the
ink cartridge.
<Z000-0000>Installation Error
These error messages are displayed when a cover or tray is not completely closed or an ink cartridge
is not properly installed.
Message Action to Take
Set ink cartridges. No ink cartridge has been installed, or a non-RISO ink has been
installed. Install a RISO ink cartridge, or contact your administrator.
Different color ink is set. Replace
the ink cartridge.
The type or color of the installed ink cartridge is not correct. Check
the installation position and the color and type of the installed ink
cartridge, and install the ink cartridge properly.
If the wrong ink cartridge has been installed, remove it, wipe the ink
port clean, attach the cap, and store it horizontally in the proper
orientation.
The ink cartridge is not correct.
Replace the ink cartridge.
^^
^^
^^
VALEZUS T1200 Troubleshooting Guide

11
1
Check the Stripper Unit. The stripper unit of the high capacity feeder is not installed properly.
Reinstall the stripper unit.
Installing the stripper unit
The stacking tray of the High
Capacity Stacker (Double Tray
Stacker) is not set. Set the
stacking tray.
The stacking tray is not set on the high capacity stacker (double tray
stacker).
After setting the stacking tray on the carriage, return this to the high
capacity stacker (double tray stacker).
Lower the stripper lock knob (A) to
unlock the stripper unit.
1
Press the stripper release lever (B)
and remove the stripper unit.
2
Reinstall the stripper unit.3
Make sure that the stripper
unit is fully inserted.
•
Lift the stripper lock knob to lock the
stripper unit.
When the stripper lock knob cannot
be locked, the stripper unit is not fully
inserted.
Make sure that the stripper unit is
fully inserted.
4
VALEZUS T1200 Troubleshooting Guide

12
<W000-0000>Warning
These warning messages are displayed when there is no more paper, the output tray is full, a
peripheral device is not connected, or there is another problem.
Message Action to Take
Set paper. The paper specified for the job is not loaded in the tray available for
auto selection.
Load the corresponding type and size of paper in the tray available
for auto selection.
Otherwise, touch [Change Tray] and change [Paper Selection] to a
setting other than [Auto], or enable [Auto Selection] for a tray loaded
with the specified paper.
Auto tray selection is not
available. Select a paper tray, and
press the Start key.
Auto selection is not performed if it is not enabled for any of the trays,
even when paper tray selection is set to [Auto]. Touch [Paper
Selection] and select the tray, or enable [Auto Selection] for the
required tray.
The paper size may not be
correct. Check the standard tray
paper guide, tray, or paper size
setting.
The size of paper specified for the job is not loaded. Load the
specified size of paper. Otherwise, touch [Change Tray] and enable
[Auto Selection] for a tray loaded with the specified paper.
The Standard Tray (Feed Tray 1,
Feed Tray 2, Feed Tray 3) is not
available. You can use another
tray to continue printing.
A problem has occurred with the standard tray (with feed tray 1, feed
tray 2, or feed tray 3).
Touch [Change Tray] and specify a different paper tray in which an
error has not occurred.
Job name:
This paper size cannot be output
to the specified tray. Change the
output tray or paper size. (The job
was deleted.)
Touch [Close], change the settings, and send the data again. For
more information on the paper sizes that can be used with each tray,
see "Printing Paper" in the "User's Guide".
This paper size cannot be output
to the current output tray. Check
the orientation or settings of the
set paper.
Touch [Close], change the settings, and send the data again.
For more information on the paper sizes that can be used with the
output tray, see "Printing Paper" in the "User's Guide".
This paper size cannot be output
with offset output. Check the
orientation or settings of the set
paper.
Touch [Close], change the settings, and send the data again. For
more information on the paper that can be used with offset output,
see "Printing Paper" in the "User's Guide".
There is no tray to which paper
can be output. Remove paper.
The paper output to each tray exceeds the maximum load capacity.
Remove paper.
Printing on envelopes is
specified. Check whether duplex
printing or other settings that
cannot be used in combination
are configured.
Incompatible settings for the envelope job have been specified.
Cancel the following setting and send the data again.
Duplex printing
In a state where [Thickness] for the type of paper is set to [Envelope],
you are trying to print on paper other than an envelope. Touch
[Change Tray] and change [Thickness] to [Standard].
^^
•
VALEZUS T1200 Troubleshooting Guide

13
1
Message Action to Take
A file containing a large amount
of data is still processing. Press
"Continue" button to allow
processing to finish, or press
"Cancel" button to delete the job.
A job with a large amount of data is being processed.
When a job contains a large amount of data, it is recommended that
you handle it as a waiting job before printing.
Not enough space in SSD. Delete
unnecessary jobs to free up
space in SSD.
The SSD of the machine is full.
Delete completed jobs or unnecessary documents to free up space
on the solid state drive.
This is Non-Riso ink cartridge.
Using Non-Riso ink may result in
serious damage to the printer.
Check your service provider's
warranty/service agreement if
any, as damage caused by Non-
Riso supplies could be excluded
from coverage. Do you wish to
continue using this cartridge?
A non-RISO ink cartridge has been installed.
Contact your administrator to determine whether or not to use this
ink. To continue using the non-RISO ink cartridge, touch [Yes] and
enter the appropriate values in the [Ink Information Input] screen
which appears next. For more information, see "The [Ink Information
Input] screen is displayed." (p.34).
Paper is not appropriately loaded
in the stacking tray of High
Capacity Stacker (Double Tray
Stacker). Check the stacking tray.
The paper guides of the high capacity stacker (double tray stacker)
are not set in their proper positions and the paper is not aligned.
Check the printouts.
To output irregular sized paper, it is necessary to register the paper
size to the machine in advance. Contact your administrator for
details.
Paper is left in the High Capacity
Stacker (Double Tray Stacker).
Print cannot be run. Remove
paper from the stacking tray.
There is paper on the stacking tray of the high capacity stacker
(double tray stacker).
When there is paper on the stacking tray, the paper guides cannot
move to the appropriate positions for the next job. Remove paper.
Mixed size paper is stacked in the
High Capacity Stacker (Double Tray
Stacker). Remove paper from the
stacking tray.
Job Name:
This job cannot be ejected in the
stacking tray of High Capacity
Stacker (Double Tray Stacker).
Check the settings. (The job has
been deleted.)
The printouts do not come out as the job contains inappropriate
settings for the high capacity stacker or double tray stacker (paper
size, mixed size originals, or containing settings that cannot be
performed). Change the output tray, specify the paper size that can
be output, or change the settings so that the sizes are not mixed.
When the power is turned on or when recovering from
the sleep mode, it is necessary to remove the paper on
the stacking tray as otherwise the paper guides will not
be able to move to their appropriate positions in
accordance with the paper size. If you are not removing
the printouts every time a print job is completed, it is
recommended that the time until entering the sleep mode
be set longer with [Power Saving Setting] in the
administrator menu.
For more information on the power saving setting, see
"Power Saving Setting" in the "Administrator's Guide".
•
VALEZUS T1200 Troubleshooting Guide

14
Message Action to Take
The High Capacity Feeder is
overloaded with paper. Check the
feed tray.
Paper that exceeds the maximum number of sheets that can be
loaded has been loaded in the high capacity feeder (double tray
feeder). Remove paper.
For more information on the maximum number of sheets that can be
loaded, see "Printing Paper" in the "User's Guide".
The Feed 1 (Feed 2) is overloaded
with paper. Check the Double Tray
Feeder.
Load paper in High Capacity
Feeder or check the paper guides
and paper size settings.
Load the paper in the high capacity feeder (double tray feeder).
The standard tray paper guides do not match the size of the paper.
Match the standard tray paper guides with the size of the paper.
Otherwise, touch [Change Tray] and check the paper settings.
Load paper in the Feed 1 (Feed 2) of
the Double Tray Feeder or check the
paper guides and paper size
settings.
The Standard Tray (Feed Tray 1,
Feed Tray 2, Feed Tray 3) is not
available. (The job has been
deleted.)
A problem has occurred with the standard tray (with feed tray 1, feed
tray 2, or feed tray 3) in which the slip sheets or cover sheets are
loaded. Touch [Close], check the standard tray (feed tray 1, feed tray
2, or feed tray 3), and send the data again.
IP address of LAN0 and LAN1, or
network segment may be
conflicting. Please check the
network settings of LAN0 and
LAN1.
The same IP address (segment) is set to LAN0 and LAN1 of the
machine. When assigning the IP addresses manually, assign a
different IP address to LAN0 and LAN1.
Check the IP address from [Network Setting (IPv4)] or [Network
Setting (IPv6)] in [Admin Menu].
<I000-0000>Information
These messages are displayed when machine maintenance is required.
Message Action to Take
The drain tank must be replaced
soon. Contact your dealer, and
have a new drain tank ready.
The drain tank needs to be replaced. Contact your dealer or
authorized service representative.
The transfer belt is dirty. Leaving
the belt dirty results in inaccurate
printing. Contact your dealer.
The transfer belt needs to be cleaned. Contact your dealer or
authorized service representative.
•
•
^^
Printing cannot be performed when the drain tank is full.
Call for service immediately when this message is
displayed.
•
The paper size and position cannot be detected when the
transfer belt is dirty, resulting in improper printing.
The cleaning operation needs to be performed by
technical support staff. Call for service immediately when
this message is displayed.
Until the transfer belt is cleaned, the margins around the
edges of the paper are 5 mm (7/32"), regardless of the
printable area setting.
•
VALEZUS T1200 Troubleshooting Guide

15
1
Message Action to Take
Ink cartridge is near expiration. It
is recommended to use or
replace the ink cartridge soon.
For optimal printing quality, use the ink cartridge within approximately
24 months from the date of manufacture (when preserved under
room temperature).
VALEZUS T1200 Troubleshooting Guide

16
VALEZUS T1200 Troubleshooting Guide

17
2
Chapter 2 Troubleshooting
This chapter describes what actions to take when problems occur.
Use the information in this chapter to help with troubleshooting.
Problem See
Paper Jams p.19
General Troubleshooting for This Machine
The machine does not operate at all. / Nothing is displayed on the touch panel when the power
is turned on. p.25
Nothing is displayed on the touch panel, even when the buttons of the operation panel are
touched. p.25
The operation panel freezes while shutting down and won't proceed. p.25
The printing results are light or dark. p.25
Prints have white streaks or appear blurry. p.25
The output results are dirty or have black streaks. p.25
The paper becomes dirty. / Printing is not aligned properly. p.25
A multiple feeding error occurs although multiple sheets of paper were not being fed, or multiple
feeding errors occur frequently. p.26
Troubleshooting for Printing
Cannot print from the print controller. p.27
Cannot print properly on irregular sized paper. p.27
It takes a long time to print. / When printing multiple copies, the printer makes a beep sound
after each copy is printed. p.27
Cannot reprint a job on the [Job Status] screen. p.27
After interrupting a job or turning the machine off and back on, it is unknown how much printing
was completed. p.27
Paper is loaded but the "Set paper." error message is displayed. p.27
The results of color printing are poor. p.27
The paper edges become dirty. p.28
Duplex printing cannot be performed using the paper loaded in the standard tray. p.28
Troubleshooting for the Feed Tray
Paper is jammed in the feed tray. / The tray cannot be pulled out smoothly. p.29
Troubleshooting for the High Capacity Feeder/Double Tray Feeder
Although the paper in the standard tray has run out, the standard tray does not descend to its
lowermost position and stops midway. p.30
The paper feed guides cannot be adjusted and cause the paper to bend, warp, or be
misaligned. p.30
No paper is fed. / The back of a card is damaged. / Multiple sheets of paper are fed. p.30
Troubleshooting for the High Capacity Stacker/Double Tray Stacker
The stacking tray does not descend and it is difficult to remove the printouts. p.32
The stacking tray descends each time a job is printed and it is not possible to continuously print. p.32
VALEZUS T1200 Troubleshooting Guide
Other manuals for VALEZUS T1200
2
Table of contents
Other Riso Printer manuals

Riso
Riso ComColor FT Series User manual

Riso
Riso HC5500 User manual

Riso
Riso HC FINISHER Service manual

Riso
Riso Print Gocco Arts User manual

Riso
Riso GOCCOPRO QS200 User manual

Riso
Riso GOCCOPRO QS200 User manual

Riso
Riso 9050 User manual

Riso
Riso 9450 User manual

Riso
Riso HC5000 Product guide

Riso
Riso ComColor 9150 Original instructions

Riso
Riso MZ870 User manual

Riso
Riso ComColor GL Series User manual

Riso
Riso ComColor 9150 Service manual

Riso
Riso VALEZUS T2100 User manual

Riso
Riso RISOGRAPH RN2000 User manual

Riso
Riso SF Series User manual

Riso
Riso CV1200W User manual

Riso
Riso MZ970 User manual

Riso
Riso HC5000T User manual

Riso
Riso RZ Series User manual