Page
of
2 2
ISSUE NO. : HCT-034
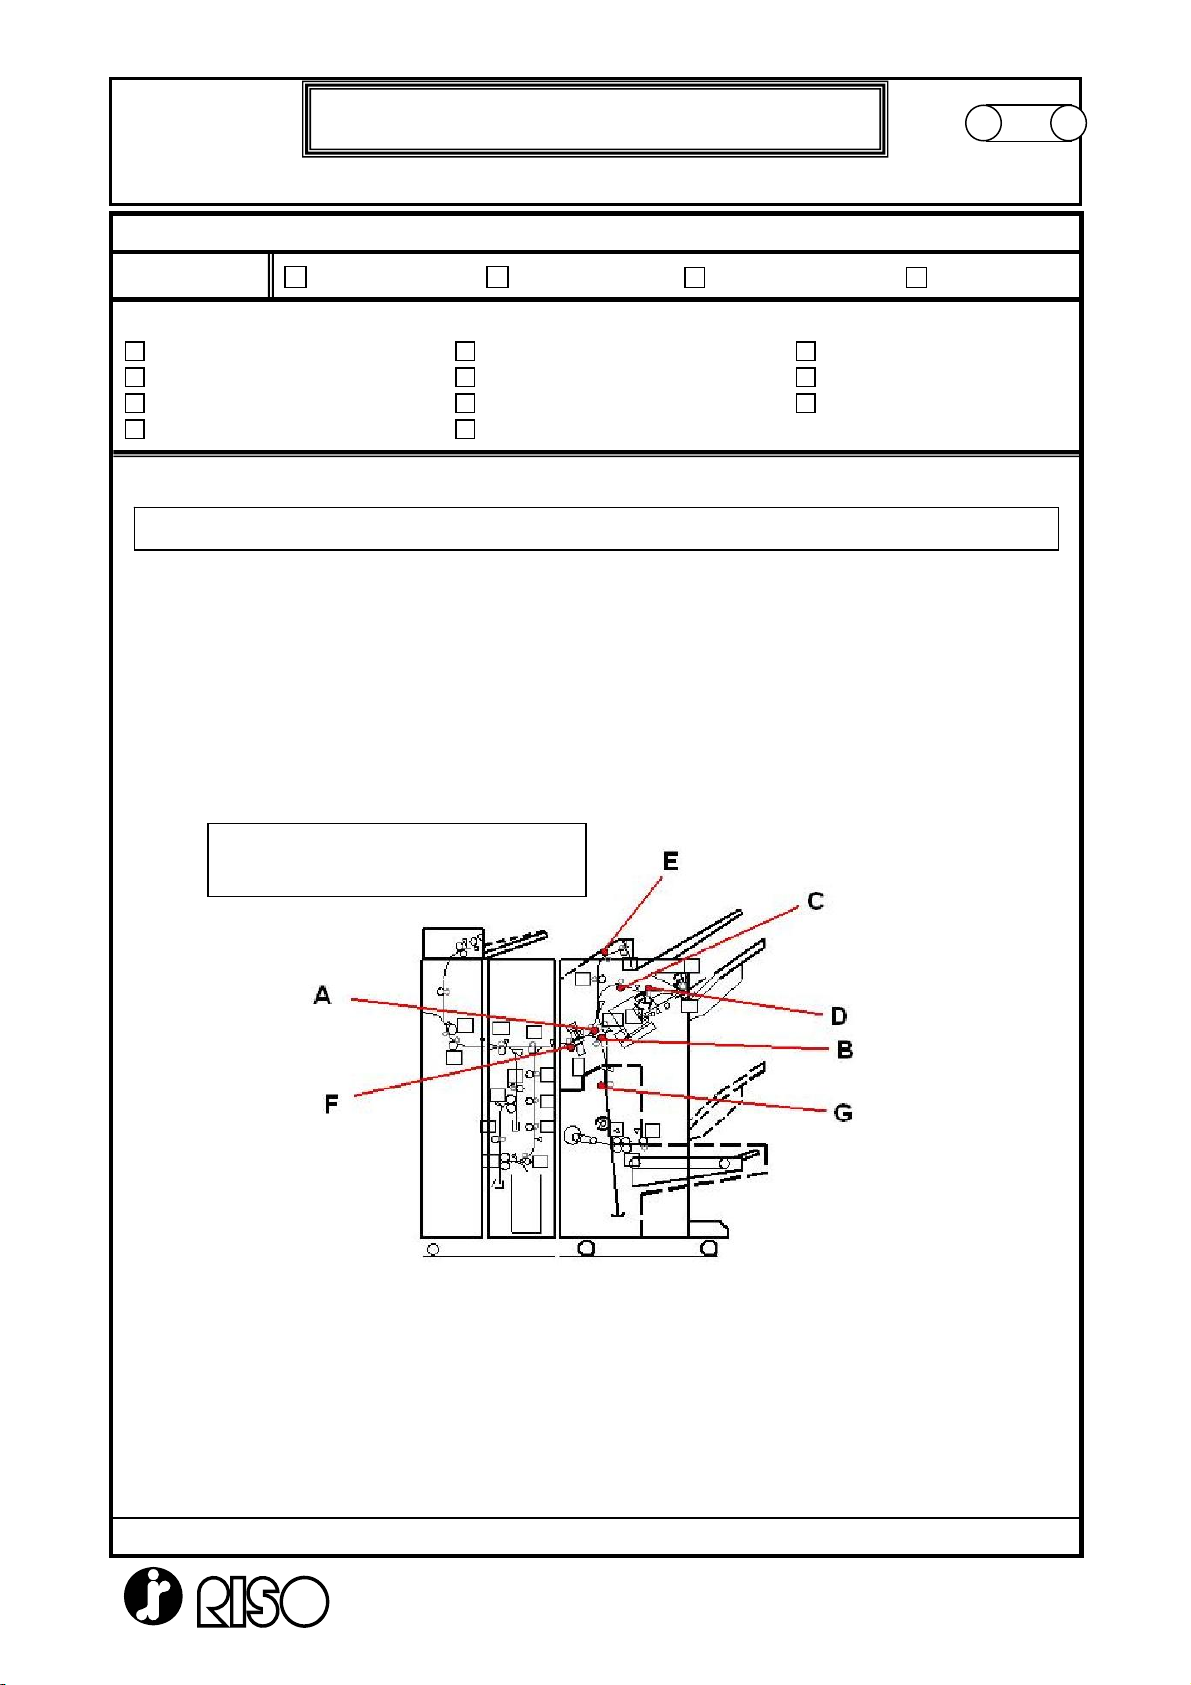
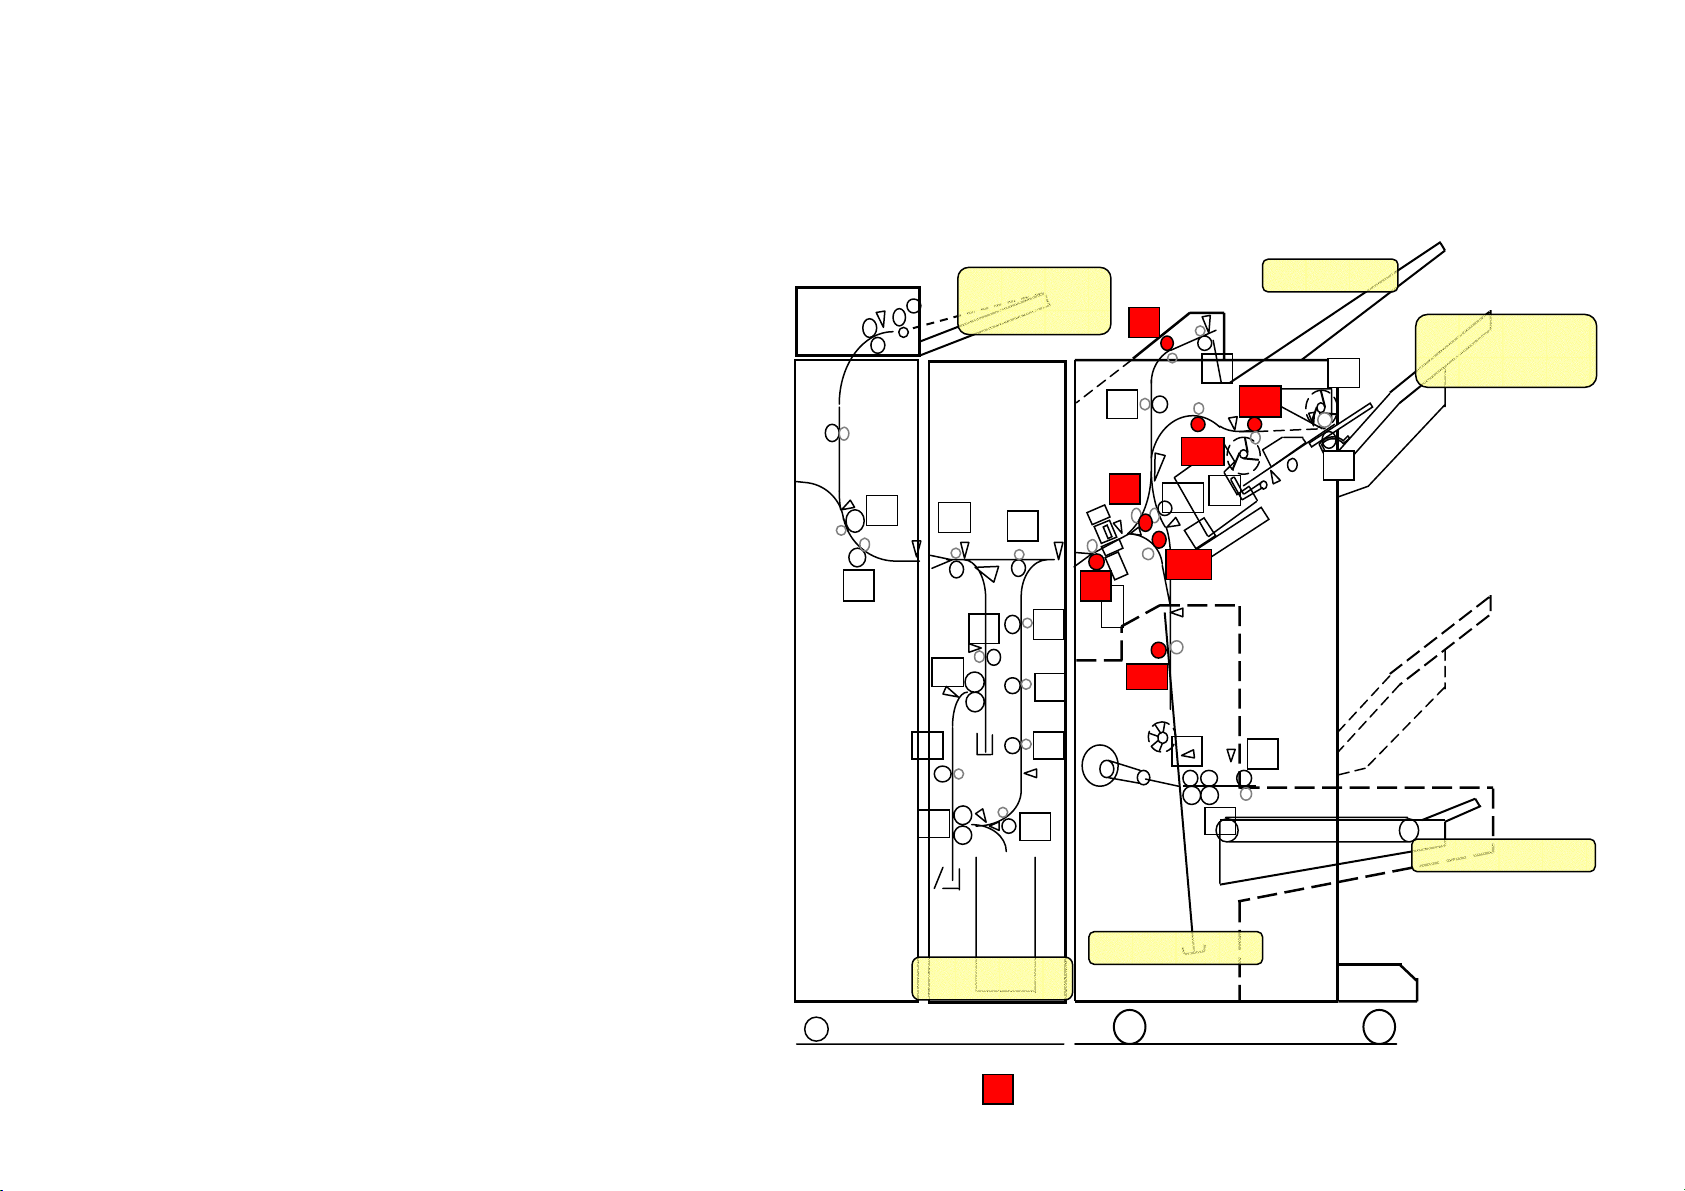
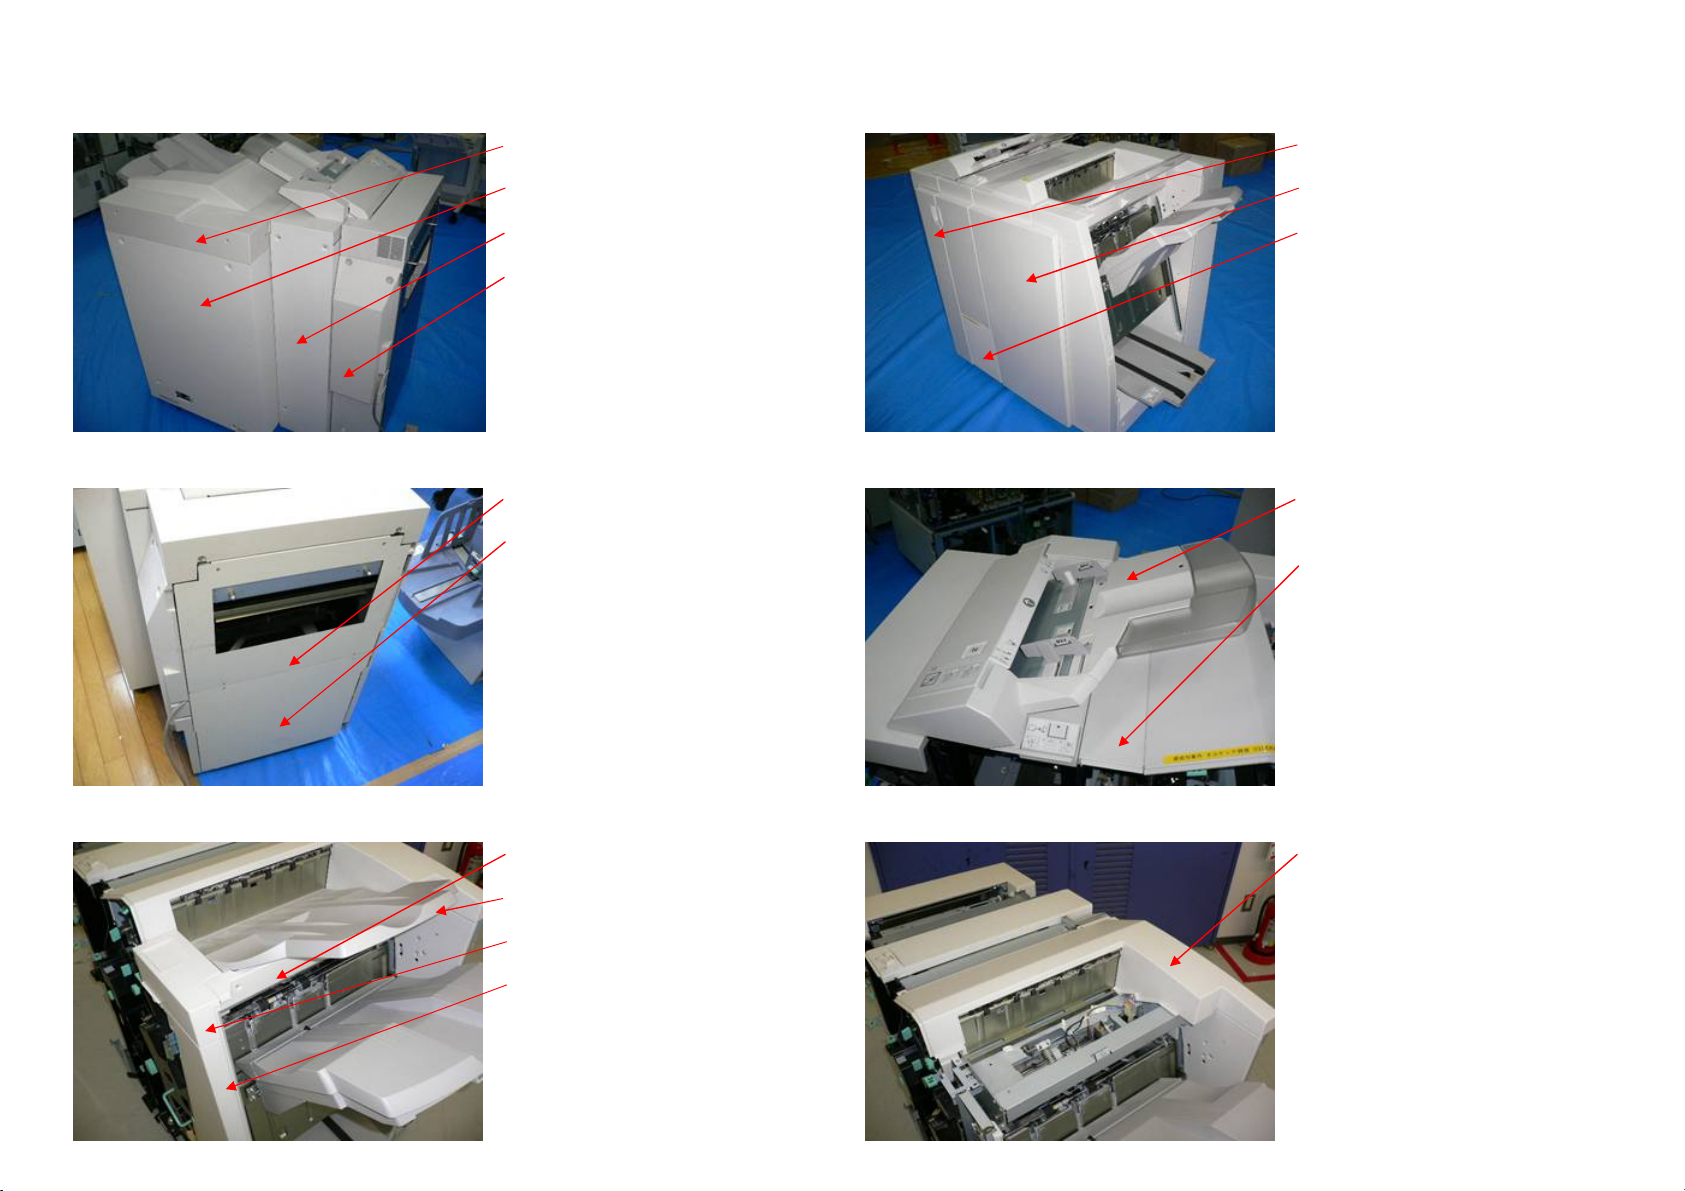
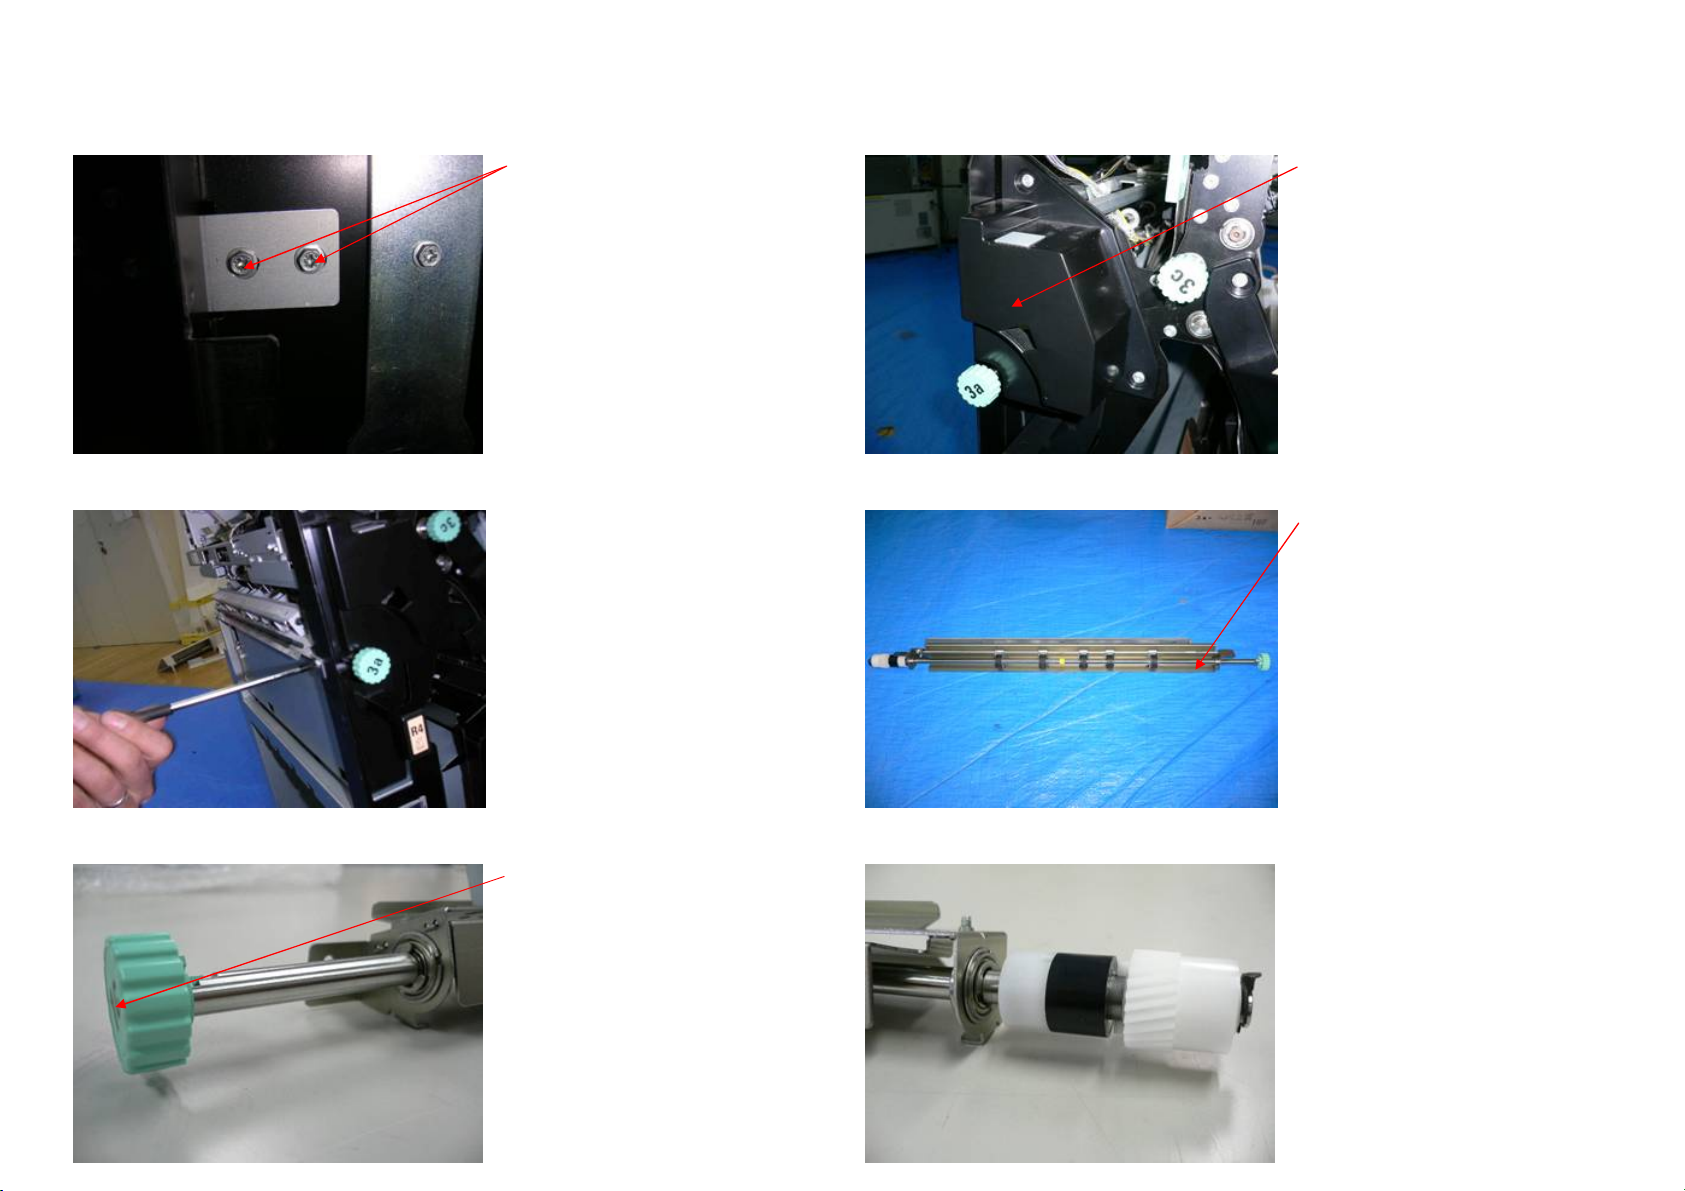
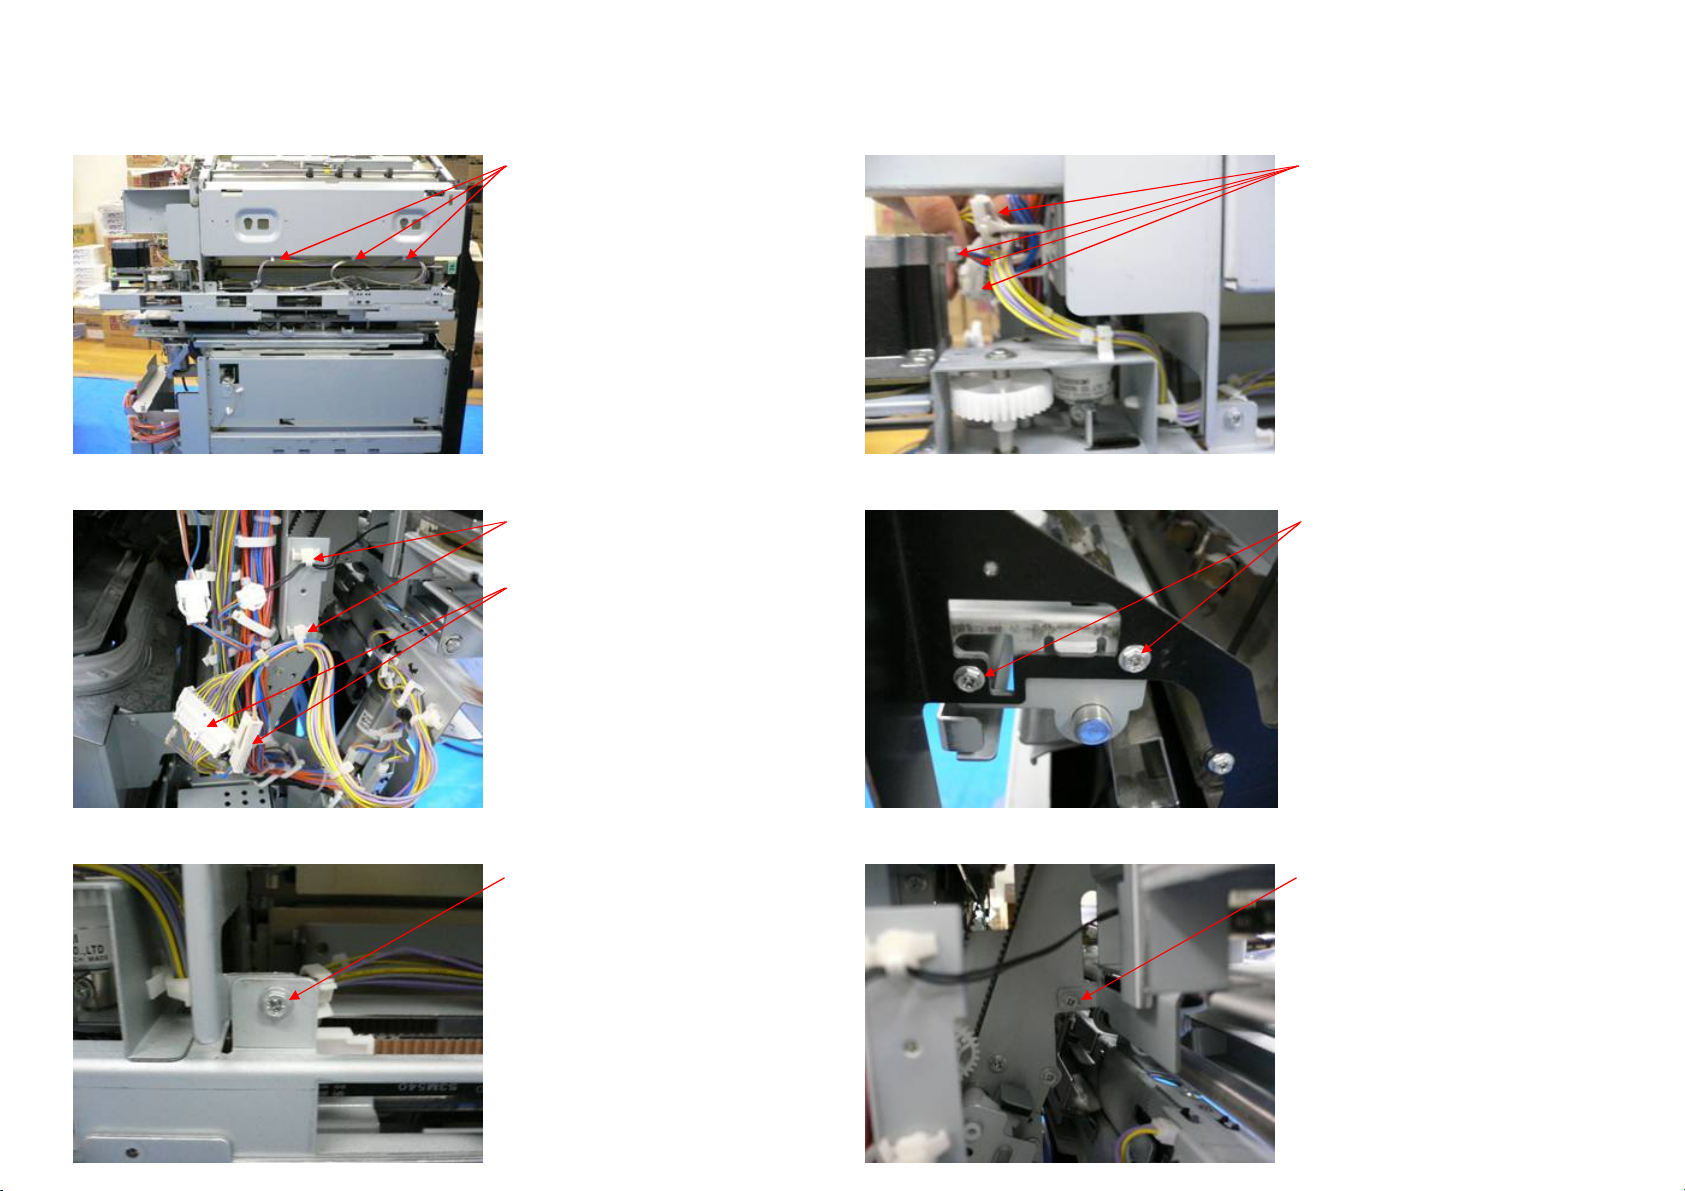
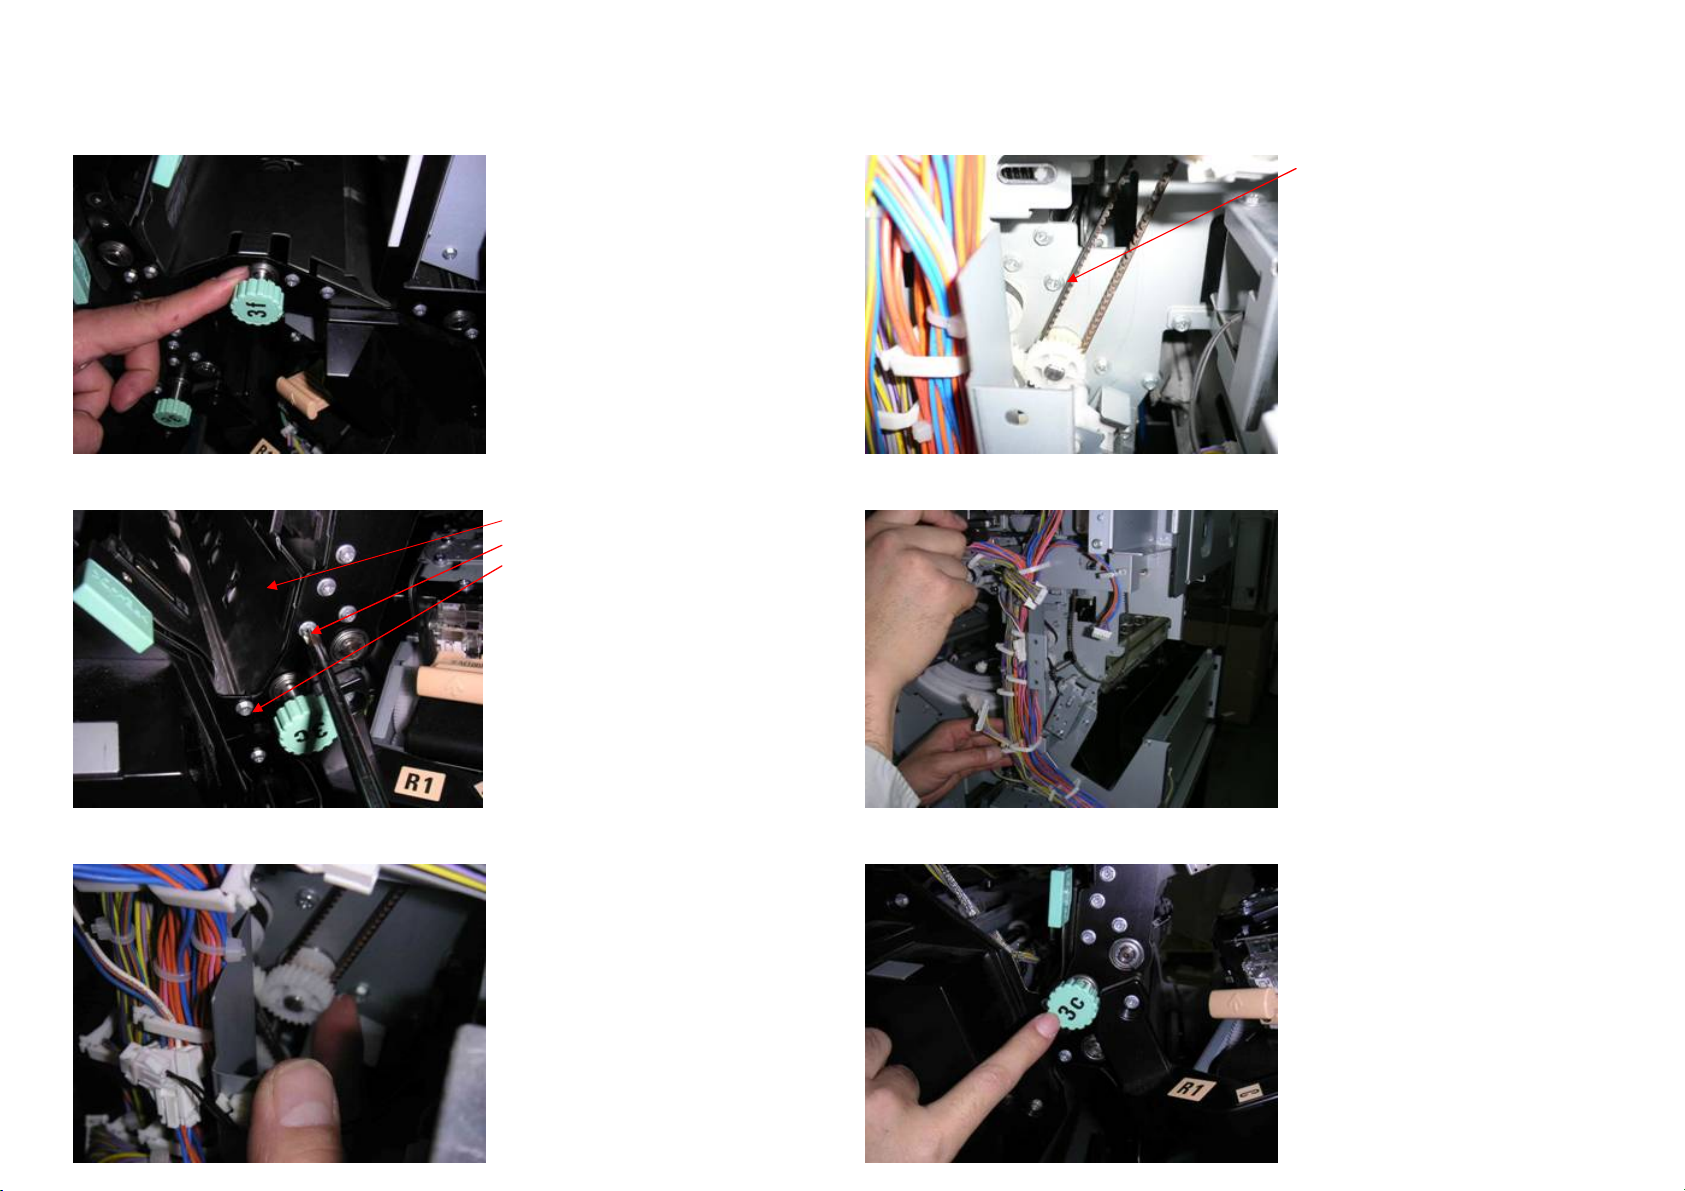
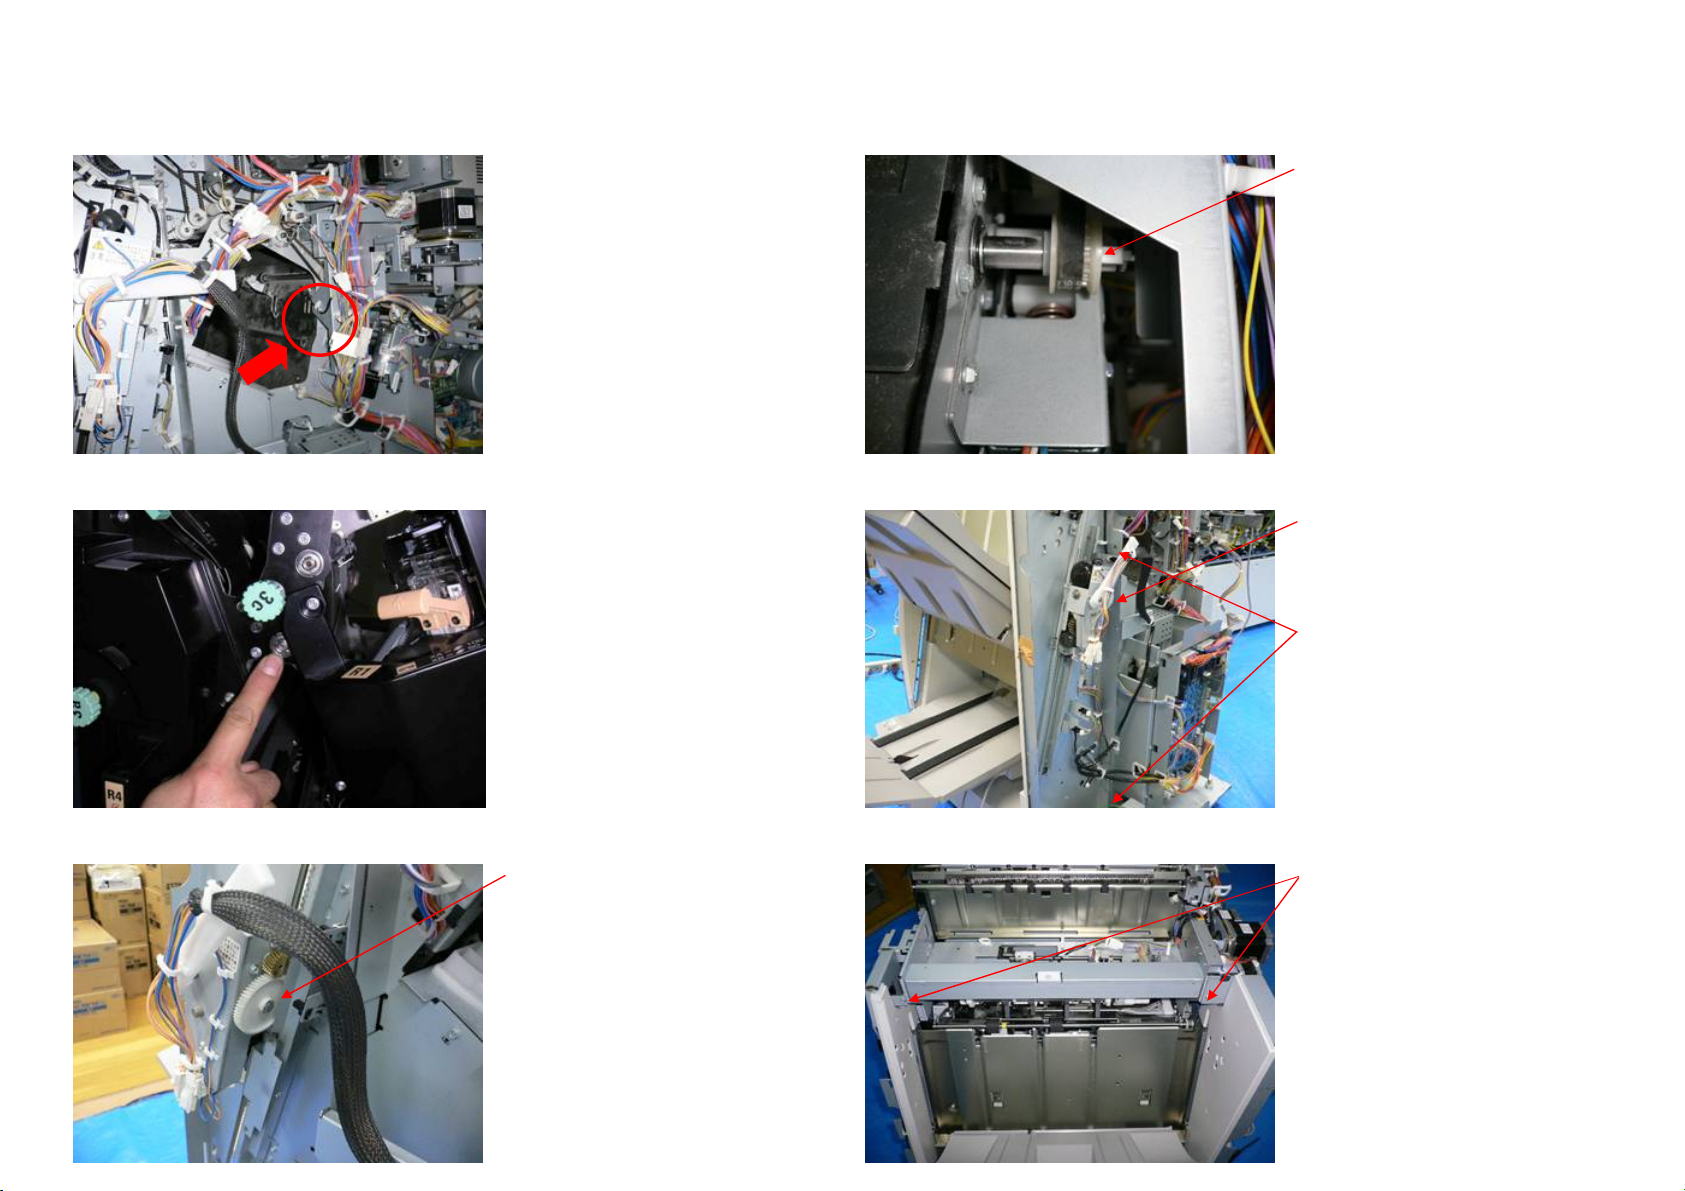
Attached: HC FINISHER Roller Replacing Procedure
Issued By Overseas Technical Sec., Riso Kagaku Corp.
HC Technical Bulletin
[Application Tips]
Please remind that a level of "ink-marks" will be still vary depending on paper type / type of
original / and type of finishing function.
There are two types of possible marks, Paper-feeding-marks and Paper-folding-marks.
1) Paper-feeding-marks:
This modification will be reduced "paper-feeding-marks" on the printed documents.
If you annoy "paper-feeding-marks" problem, please try to replace 7 rollers with the new type
rollers by following attached instruction of "HC FINISHER Roller Replacing Procedure".
(It will be takes about three (3) hours to replace the rollers.)
2) Paper-folding-marks:
Paper-folding-marks will be not removed completely by this modification.
There fore, slight roller marks may appear even though replacing the rollers.
Measures to reduce roller marks:
1. Use "RISO IJ Double-sided Matte Paper".
2. When making booklet, print the cover page in advance and dry it for 30 minutes.
Then set the cover pages into the Cover-sheet-tray (of the finisher), and print the inside
pages of the booklets. (Folding marks do not appear in the inside pages.)
We recommend you to check its performance on your side before installing new rollers on user's
machine.
[Applicable Serial Number]
The new type of rollers was already installed on production machine from following serial
number.
HC Finisher A 33130031 HC Finisher B 33140086
*HC Finisher A : For U.S.A. / HC Finisher B: For Europe & Asia