Roxell SparkCup User manual

02501427 *02501427*025-0821
Spark
cup
TM
User Guide
EN ENGLISH
Original User Guide

ROXELL - 025 - 1020SPARKcup- USER'S GUIDE -EUG
0
TABLE OF CONTENTS
GENERAL INFORMATION
WATER QUALITY 1...............................................................
OPERATOR'S GUIDE 3...........................................................
DIRECTIONS FOR OPERATING THE SYSTEM 5.....................................
TO CHANGE CUPS/VALVES 6.....................................................
CHECKING THE WATER SUPPLY 7................................................
SATELLITE DRINKER 7............................................................
TO INSTALL THE SATELLITE DRINKER 7...........................................
DISINFECTANTS AND PRODUCTS TO REMOVE ORGANIC POLLUTANTS 8...........
MANUAL FLUSHING (STANDARD) 10................................................
OPTIONAL: SEMI-AUTOMATIC FLUSHING 12.........................................
OPTIONAL: AUTOMATIC FLUSHING 14..............................................
TROUBLE SHOOTING GUIDE 16....................................................
HAND WINCH 18...................................................................
GENERAL SAFETY RULES 18.......................................................
TROUBLE SHOOTING GUIDE 19....................................................
MAINTENANCE INSTRUCTIONS 19..................................................
DECLARATION OF INCORPORATION OF PARTLY COMPLETED MACHINERY
EC-DECLARATION OF CONFORMITY

ROXELL - 0921
DISCLAIMER : The original, authoritative version of this manual is the English version produced by
ROXELL bv. Subsequent changes to any manual made by any third party have not been reviewed nor authenticated by
Roxell. Such changes may include, but are not limited to, translation into languages other than English, and additions to or
deletions from the original content. Roxell disclaims responsibility for any and all damages, injuries, warranty claims and/or
any other claims associated with such changes, inasmuch as such changes result in content that is different from the authoritat-
ive Roxell--published English version of the manual. For current product installation and operation information, please con-
tact the customer service and/or technical service departments of Roxell. Should you observe any questionable content in any
manual, please notify Roxell immediately in writing to: ROXELL bv -- Industrielaan 13, 9990 Maldegem -- Belgium.

General information
IMPORTANT: These instructions must be read, understood and all points observed by the user, the responsible and
operating personnel.
Obey the legal regulations and the applicable rules
This concerns, among other things, the European regulations and directives transposed into national legislation and/or
the laws, safety and accident prevention regulations that apply in the user's country.
During assembly, operation and maintenance of the installation the legal regulations concerned and the applicable
technical rules must be obeyed.
Intended use
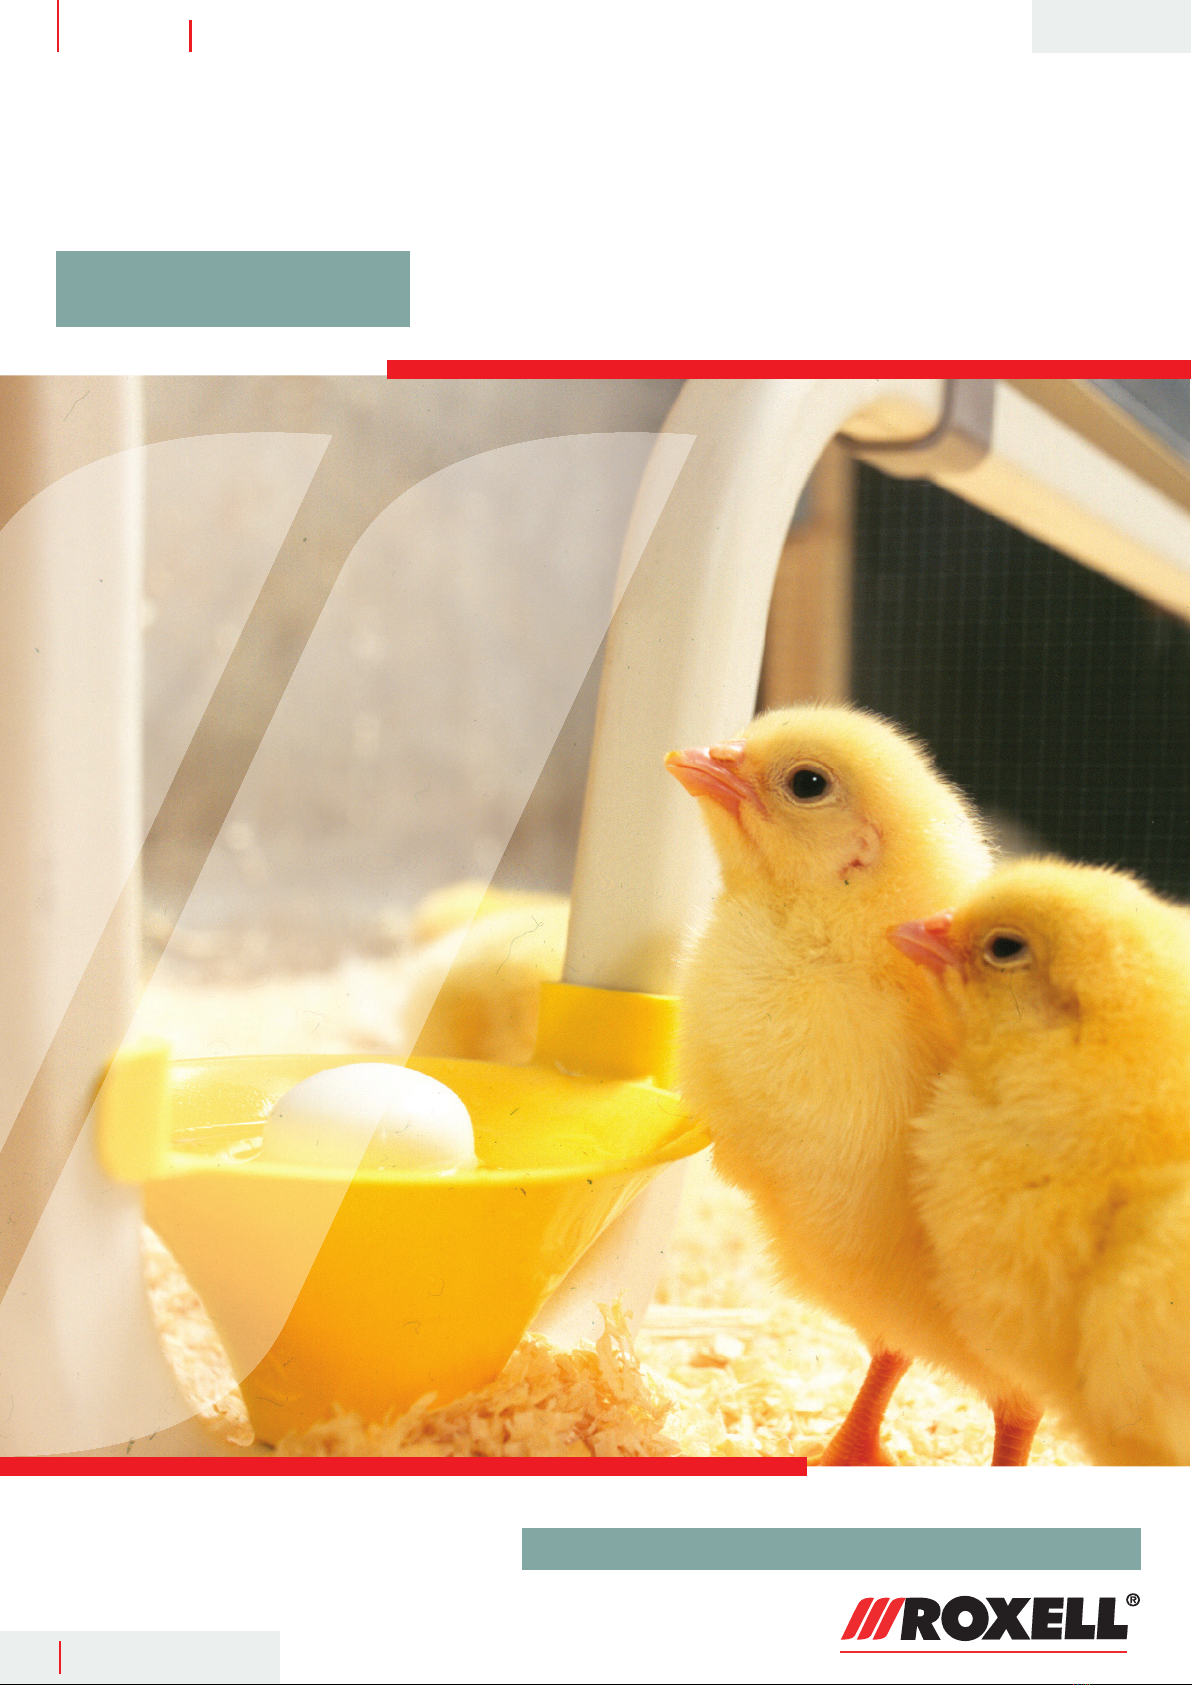
The installation has been designed solely for intensive livestock use and has been developed according to the applicable
rules of good workmanship. Extra loading of the product is therefore prohibited. Any other use is considered to be
improper use. The manufacturer is not responsible for damage resulting therefrom. The user bears sole responsibility. The
manufacturer can determine from the system data whether the product was used in accordance with the specified use.
Not-intended use
All use different than described in Intended Use is at the responsibility of the end user.
Liability
The (extended) warranty will not apply if any of the following has occurred: failure by the customer to inspect the
delivered goods and report visible defects within 8 days of delivery with respect to the products, improper handling,
transportation, modification or repair; accidents, defective or improper use; improper or defective assembly, installation,
connection or maintenance (having regard to Roxell’s most current assembly, installation, connection and maintenance
manuals); improper modifications or manipulations of the operating system, hardware or any other software of the
product by the customer; force majeure; negligence, lack of supervision or of maintenance on the part of customer;
normal wear and tear; use of cleansing agents and disinfectants that are excluded in Roxell’s most current use and
maintenance manuals; use of cleansing agents and disinfectants in violation with the instructions received from the
suppliers; or use of the products in an ATEX- surrounding.
The (extended) warranty shall not apply in the event of a defect caused either by materials or accessories supplied by or
services rendered by the customer; or by an intervention by a person or entity which is not authorized or qualified for
carrying out such intervention. Furthermore, the (extended) warranty will only apply if the products are used in livestock
houses and if all parts or components of the products are supplied by Roxell.
Roxell will not be liable for any damages caused due to improper or defective use, assembly, installation, connection or
maintenance of the products. In this respect, the customer expressly acknowledges that (i) all use, assembly, installation,
connection or maintenance must be done in accordance with Roxell’s most current assembly, installation, connection
and maintenance manuals and (ii) the electrical installation on which the products must be connected must be done
in accordance with applicable local legislation on electrical installations. Furthermore, the products must be tested
both mechanically and electrically by the customer in accordance with state of the art techniques and applicable local
legislation.
Personnel qualifications
User
The person who uses a function or operation of a product for their work or who works on the product. The user must
be able to read the instructions for use and fully understand them. The user has knowledge of the functioning and
construction of the installation.
page 1
Roxell – – 0821 – General information

page 2
Technically trained person
An expert who can assemble and maintain the installation (mechanically/electrically), and resolve malfunctions. On
the basis of his/her technical training and experience, he/she has sufficient knowledge to be able to assess activities,
recognize possible dangers and rectify dangerous situations.
Storage
Put all parts to be assembled in a room or at a location where the not yet assembled components are protected against
weather influences.
Transport
Depending on the size of the parts and according to local circumstances and local legislation, the parts of the machine
have to be transported with a forklift.
The forklift must be operated by a qualified person and in accordance with the rules of good workmanship. When lifting
the load, always check if the center of gravity of the load is stable.
Dismantling
Dismantle the installation and its components in accordance with the environmental legislation of the country or the
local authorities applicable at that time. All functioning products and exchange parts must be stored and disposed of in
accordance with the applicable environmental regulations.
Environmental information for customers in the European Union
The European legislation requires that equipment marked with this symbol on the product or
packaging must not be collected with unsorted household waste.
This symbol indicates that the waste electrical and electronic equipment (WEEE) cannot be disposed
of in the regular household waste. We highly recommend that you bring your product to an official
collection point so that an expert can remove the waste electrical and electronic equipment. Inform
yourself of local legislation on separate collection of waste electrical and electronic equipment.
Respect the local regulations and never dispose of the product together with household waste.
Information about waste disposal - electrical/electronic material for companies
1. In the European Union
If you have used the product for commercial purposes and you want to dispose of it, contact Roxell, who will give
you information about the return of the product. It is possible that you will have to pay a disposal charge for the
return and recycling. Small products (and small quantities) can be processed by the local collection agencies.
2. In other countries outside the European Union
If you want to dispose of this product, contact the local authorities for information concerning the correct
disposal procedure.
The level of noise emission
The noise level of the installation in operation does not exceed 70 dB(A).
– General information Roxell – – 0821

LOTOTO = Lock Out - Tag Out - Try Out
Before you begin: Everyone needs his own lock and tag (label), which can’t be removed by other persons. Inform all the persons who
are influenced by the procedure.
1To block
- Localize all sources of energy (electric, hydraulic, pneumatic).
- Switch off.
- Take the relevant installation or process out of operation and lock it against reuse. You can do this by placing a
padlock or other blocking mechanism (Lock Out).
2To mark
Attach a sign, label or sticker to the padlock or blocking mechanism to reveal the nature and the expected duration of
the work to other persons (Tag Out).
3To check
- Check if the source of energy is switched off.
- Remove any remaining energy.
- Check that the installation or process is actually safe (Try Out).
Use personal protective equipment
Ensure you wear personal protective equipment (gloves, dust masks...).
Illuminance - sufficient lighting
•A minimum illuminance of 200 lux is necessary during usage, maintenance and installation.
•Provide at the installation (portable) emergency lighting in case of power failure.
Electrical equipment, control panels, components and drive units
•To operate control panels, there must be at least 70 cm of free space.
•Control panels must always remain closed. The key of the control panel must be in possession of an authorized
person. Only an electrically trained person (see above) shall carry out maintenance activities inside the control
panels.
•The necessary measures must be taken by the user to keep out rats, mice and other vermin from the control panels.
•If electrical equipment, control panels, components and drive units are damaged, the system must be stopped
immediately!
•Electrical equipment, control panels, components and drive units should never be sprayed with water or other
liquid!
•Electrical equipment, control panels, components and drive units should never be covered with any material.
page 3
Roxell – – 0821 – General information

page 4
Information about the residual risks - used safety signs
There are three levels of danger, which you can recognize from the following signal words:
•DANGER
•WARNING
•CAUTION
The nature and source of the imminent danger and possible consequences of not obeying warnings is stated here!
Symbol Meaning
DANGER indicates a direct imminent danger that can result in a serious or even fatal accident if
the safety measures are not respected.
WARNING indicates a possible imminent danger that can result in a serious accident or
damage to the product if the safety measures are not respected.
CAUTION indicates possible, dangerous situations that can result in minor physical injury or
material damage if the safety measures are not respected.
This symbol refers to supporting information.
Allowed
Not allowed
This symbol will be used to draw your attention to matters that are of great importance for
your safety. It means: warning - follow the safety instructions. Disconnect the current and
read the safety rules. In short: be alert. Ignoring these instructions can cause serious injuries
or even death.
– General information Roxell – – 0821

Swii'Flo-USER'S GUIDE -EUGROXELL-022-1020
1
WATER QUALITY
Warning
The health of the animals depends on the quality of their daily drinking water.
The water quality depends on:
The phosphate, nitride, nitrite, chloride, iron, calcium and other concentrations.
The deposits in the lines.
The administration of medication.
Cleaning and disinfection.
Have the water checked at regular intervals!
Maximum allowable concentration:
Ammonia <1mg/l (3.78mg/GAL) Sulfates <100mg/l (378mg/GAL)
Chlorides < 200 mg/l (757mg/GAL) Iron < 0,2 mg/l (0.76mg/GAL)
Phosphates < 0,01 mg/l (0.038mg/GAL) Salt < 1 mg/l (3.78mg/GAL)
Manganese < 0,1 mg/l (0.38mg/GAL) pH-value 5-8
Nitrate < 0,25 mg/l (0.95mg/GAL) Hardness
(_DH)
<15
Nitrite < 0,1 mg/l (0.38mg/GAL)
Source: European Water Framework Directive 2000/60/EC
Phosphates/Nitrogens:
Algal growth:
Algae are organisms that use carbon dioxide as source of carbon for the production of new cell material. The
required energy is provided by sunlight.
Algae blooms occur in standing or slowly moving water, usually having a high phosphate and nitrogen load
(ammonia and nitrate).
Optimal growth temperature for algae:
18-45°C, pH value: 5-8.
Algae death due to lack of light and/or nutrients leads to mineralization by bacteria with oxygen consumption.
Impact on
water
pH increase due to large amounts of carbon dioxide that are extracted from the water.
Impact on
system
Cause: Loosened micro culture substances.
Effect: Valve/nipples leakages.
Action Remove deposits using stabilized hydrogen peroxide (H2O2) based products.
Nitrate/Nitrite:
Nitrate concentration > 0.25 mg/l: sandy soils with intensive livestock farming.
Ammonia concentration > 1 mg/l: in peaty soils.
Water from these soils usually has higher nitrite content. Unfit for consumption!
Impact on health
Danger
Direct consumption of nitrite is deadly!
Nitrate is converted to ammonia in the body. One of the intermediate compounds is
nitrite.
When the chemical reaction is not completed (for some time), death ensues.
Action Nitrate concentration ≤0.25 mg/l / Nitrite concentration ≤0.1 mg/l!

ROXELL - 022 - 1020
Swii'Flo-USER'S GUIDE -EUG
2
Iron:
When water is pumped to the surface, iron occurs in its soluble ferrous form.
The insoluble ferrous ions oxidize upon exposure to air or dissolved oxygen.
These and other chemical reactions cause insoluble gelatinous deposits.
Impact on
water
Hardly any impact on health.
Neutralizes the effectiveness of medication.
Alters the taste, resulting in decreased water consumption.
Impact on
system
Cause: Gelatinous compounds.
Effect: Harmful to nipples, electric water valves if used.
Action Eliminate the iron from the system if iron content > 0.2 mg/l!
Calcium:
Hardness:
Any deposits in the lines will usually remain there.
If a chemical reaction takes place between mineral substances present, some inorganic compounds can
serve as energy and nutrient source for the micro-organisms living in the water.
Impact on health Not harmful.
Alters the taste, resulting in decreased water consumption.
Impact on
system
Cause: Water becomes more conductive.
Effect: Corrosion and calcium deposits.
Action Soften the water.
Medication
Harmful
effects of
medication
Some substances in the medication may loosen the organic deposits in the lines.
Antibiotics: high risk of strong and rapid growth of moulds that use the sugar of some
medicines as nutrient, resulting in gelatinous deposits.
Impact on health Products lose their effectiveness.
Impact on
system
Cause: Some substances in the medication may loosen the organic deposits in the li
nes.
Effect: Nipple leakages.
Cause: Gelatinous deposits.
Effect: Obstructions.
Action Make sure lines are clean before administering medication.
Clean the drinking system at regular intervals.
Disinfect and flush properly after each medication.
Residues of cleaning agents may reduce the effectiveness of the medicines.
Cleaning and disinfection
Keep in mind the strength of the solutions and follow the supplier’s instructions for use!
Always read the instructions of cleaning agents and disinfectants!
Check whether the product may be used in an occupied house!
Be aware of the implications of the combined use of different types of cleaning agents and disinfectants!
Calcium and iron
deposits (inorganic)
Remove by using acid agents.
Bacteria and moulds Remove by using a chlorine-based disinfectant.
Organic
deposits
Remove by using an alkaline cleaning agent.
Clean and disinfect the lines at regular intervals. Most agents only work properly with regular cleaning.
Disinfect and flush properly after each medication.

SPARKcup- USER’S GUIDE - EUG
ROXELL - 025 - 0717
3
OPERATOR’S GUIDE
0717 02500569
1. BEFORE THE CHICKS ARRIVE
1. Take care to have a correct water pressure in the supply line : between 2,5
and 3 BAR Max. Use a central pressure restrictor.
The lines should meet the following requirements :
* Supply line up to the control panel : minimum 1” dia.
* Line between control panel and branch point of pressure regulators : between
1” and 11/2”dia. (according to specifications in the identikit).
* Branch lines in the house up to the pressure regulator : opaque water hose
of min. 3/4”dia.
2. Flush all the drinking lines. Make sure that you flush the lines long enough, i.e. at least
1minuteper10meterof drinking line.
3. Check the filter. Replace the filter cartridge if there is any difference between the water pressure before
and after the filter.
4. Install the conical float balls
5. Lower the lines. All cups must sink into the litter. Make sure that the cups are hanging vertically. Adjust
the suspension if necessary.
6. Adjust the pressure on the drinking lines between 0.15 and 0.25 BAR.
Replace the filter cartridge.
3Bar
IMPORTANT :
The HIGHER the water pressure, the LOWER the water level !
The LOWER the water pressure, the HIGHER the water level !
Pressures mentioned are indicative. The farmer's eye is the decisive factor !
Main point is that the user of a Sparkcup drinking system must judge the water level in the cups and adjust
the water pressure to get the desired water level.
ALWAYS CHECK DAILY WATER CONSUMPTION.
FLUSH DRINKING LINES EVERY WEEK (1MIN/ 10 M LINE).
FLUSH THE LINES PROPERLY AFTER ADMINISTRATING MEDICINES, VACCINES OR
CLEANING PRODUCTS.
GRADUALLY INCREASE HEIGHT OF DRINKING LINES AS ANIMALS GROW.

ROXELL - 025 - 0717
SPARKcup- USER'S GUIDE -EUG
4
TURKEYS
Very low water level (P = 0.2 bar)
0717 02500569
2. DURING THE CROP
BROILERS - BREEDERS & LAYERS REARING
SMALL CUP
* Day 1 => cup filled with water.
High water level (P = 0.2 bar)
* Day 6: => teach animals how to
touch float balls.
Low water level (P = 0.3- 0.5 bar)
* Day 8 -10 : => remove the float balls
Very low water level (P = 0.2 bar)
Week 2 : 0,3 Bar
Week 3 : 0,4 Bar
Week 4 : 0,6 Bar
Week 5 : 0,7 Bar
From week 6 : 0,7-0,8 Bar
BREEDERS & LAYERS IN PRODUCTION (>18
WEEKS)
MEDIUM CUP
* Day 1 =>cup filled with water
(manually).
High water level (P = 0.3 bar)
Very low water level (P = 0.3 bar)
Day 3 : 0,4 Bar
Day 4 : 0,5 Bar
Day 5 : 0,6 Bar
Day 6 : 0,7 Bar
Day 7 : 0,8 Bar
From day 8 : 0,9 Bar
SMALL CUP + BIG CUP
High water level (P = 0.2 bar)
* Week 2 => teach animals how to
touch float balls.
* Day 16-18 => remove the float balls
IN WEEK 6 : REPLACE THE SMALL CUPS WITH
BIG CUPS
(P = 0.3 - 0,4 bar)
Week 4 : 0,3 Bar
Week 5 : 0,4 Bar
Week 6 : 0,5 Bar
Week 7 : 0,7 Bar
Week 8 : 0,8 Bar
From week 20 : 0,9 Bar
* Week 1 => cup filled with water.
FOR DUCKS
SMALL CUP + BIG CUP
High water level (P = 0.2 bar)
* Day 2: => teach animals how to touch
float balls.
Very low water level (P = 0.2 bar)
for Peking ducks :Replacethe
small cups with big cups in week
4
(P = 0.3-0,4 bar)
Week 2 : 0,3 Bar
Week 3 : 0,4 Bar
Week 4 : 0,5 Bar
* Day 3 - 4: Remove float balls :
Peking ducks.
* Day 5 - 6: Remove float balls :
Muscovy ducks.
for Muscovy ducks :Replacethe
small cups with big cups in week 5
Week5:0,7Bar
* Day 1 => cup filled with water.
OPERATOR’S GUIDE

5
DIRECTIONS FOR OPERATING THE SYSTEM
DENSITY
Number of birds per cup
(Depends on the kind of animal and the climate.) Climate
Normal Warm
Broilers 60 35
Breeders 35 25
Commercial layers 40 30
Turkeysupto6weeks 60 35
Turkeys up to 13kg 40 30
Heavy turkeys >13kg 25 20
Ducks 40 30
BEFORE STARTING UP AND AFTER EACH FLOCK
-- Thoroughly flush the lines one after another. When flushing a line, keep other lines shut--off.
-- Have linesunderwater pressureforawhile andmakesure thatallvalvesclosecompletely.Ifthisisnotthecase, movethe
leaking valve to--and--fro until the valve shuts--off again. If not replace valve.
-- Check the water pressure and the water supply.
AFTER LITTERING
-- Put the float balls on the valves (only for day--old chicks).
-- Lower the lines into the litter (level). On places with a risk for perching (e.g. around heating sources) you can install an
antiperch bridge.
-- Have lines under water pressure (about 0,2 -- 0,3 bar). Cups will be filled up to about 5 -- 10 mm beneath the edge.
TIP:Itisveryimportanttohavebirdsequallyspreadoverthewholehouse.Youcani.e.putsomepaperunderneaththedrinking
lines with some feed on.
DURING THE GROWING PERIOD
1. Adjust water pressure at about 0,3 -- 0,5 bar upon arrival of the birds. This pressure will allow float balls to adjust water
level in the cups.
2. After 6 days, increase pressure to about 0,4 bar. Now the birds will learn how to operate the float balls and get used to the
higher resistance of the valve and to the lower water level.
3. After 4 -- 5 days, slightly winch up the lines (about 1 -- 2 cm) to keep cups free from litter.
4. Between the 8th and 10th day, you remove the float balls (always pro complete line). You can either remove them all at once or
half of the number of lines the first day, and the other half the second day. Lower the pressure a little up to approx. 0,2 -- 0,3 bar.
The water level is then gradually lowered until there is about 0,5 cm of water in the cup.
Removing the float balls too soon: birds will not get enough water.
Removing them too late: birds will spill water and the habituation after removing the float balls will be more difficult.
5. During the next days and weeks, gradually increase water pressure to 0,7 bar after 4 weeks, making sure that there is always
little water in the cups. Cups will clean themselves. Regularly check water level (about 0,5 cm) in a number of cups. For most
animals the normal water level is about 0,5 -- 1 cm. For turkeys this is about 1,5 -- 3 cm. Don’t set pressure too high: birds could
have difficulty in operating the valves. Check water consumption on the water meter.
6. Thoroughly flush the lines after each medication or vaccination during the flock.
7. From week 4 to the end of the growing period, the water pressure is kept on 0,6 -- 0,7 bar.
8. Duringthegrowingperiod,regularlywinchupthelinessothatduringthefirst4weeksthetopofthecupisatthesameheight
asthe backofthe birds. After 4weeks, winch uplines somewhatmoreso that thecupedge comesabout3cm above theback
of the birds.
REMARK: ALWAYS GRADUALLY ADJUST WATER PRESSURE AND HEIGHT OF LINES!
ATTENTION: ALWAYS KEEP HOUSE FROST--PROOF! ROXELL NV DOES NOT TAKE RESPONSIBIL-
ITY FOR DEFECTIVE CUPS OR SYSTEM IN FROSTY WEATHER.

ROXELL --025 -- 0511
SPARKcup -- USER'S GUIDE -- E U G
6
TO CHANGE CUPS/VALVES
TO DISASSEMBLE THE SMALL CUP
Remove the cup.
Figure 1.
TO DISASSEMBLE THE MEDIUM AND BIG CUP
12
Figure 2.
TO REPLACE THE VALVE
Remove the cup.
Take away the water pressure from the line.
Remove the valve manually or with the special
pliers.
Install a new sealing if necessary. Install a new
valve and replace the cup.
Figure 3.

SPARKcup- USER’S GUIDE INSTRUCTIONS FOR THE USER - EUG
ROXELL - 025 - 3919
7
CHECKING THE WATER SUPPLY
This simple test shows you if the water supply meets the specifications:
- Put a bucket of at least 10 litres underneath each water hose (before you connect the flexible water hose to
the pressure regulator) (pressure regulator in “flushing” position!).
- Open the water supply during 1 minute.
- If the water supply is OK, all buckets will hold 10 litres after 1 minute.
SATELLITE DRINKER
THE SATELLITE DRINKER is used together with the drinking lines to provide extra water when starting up
turkeychicks,i.e.duringthefirst5-10days.
Satellitesareoftenusedincombinationwiththeinfra-redheaters.
You can put up to 100 birds per cup, so that one satellite unit provides adequate water for maximum 500 tur-
keys.
OPERATION
Start with a water pressure of 0.2-0.3 bar on the drinking lines.
The pressure may vary according to circumstances such as length of the drinking line, feed pressure, water
consumption, etc.. Increase the pressure if cups get too full.
Depending upon the sort of birds, remove the satellites after 5-10 days.
After removing the satellites, they should be cleaned, disinfected and thoroughly flushed.
Before using them the next time, make sure that all valves perfectly close.
TO INSTALL THE SATELLITE DRINKER
2. Let the hose run over the suspension
tube in order to put less lateral force on
the connector.
Connector
3. Install there a hose connector and a cup. 4. Fix the waterhose to the connector
and tighten the clamp.
1. Remove the cup and the nipple from the Sparkcup drink-
ing line.

ROXELL --025 -- 0511
SPARKcup -- USER'S GUIDE -- E U G
8
DISINFECTANTS AND PRODUCTS TO REMOVE ORGANIC POLLUTANTS.
The following acids, marked ”A”, can be used in solution. Always rinse after using them!
NAME CHEM. FORMULA VALVE
Acetic acid C2H4O2 A
Acetic anhydride C4H6O3 A
Ammonia NH3 / NH4+ A
Ammoniumformate CH5NO2 A
Ascorbic acid C6H8O6 A
Citric acid C6H8O7 A
Coppersolution A
Fatty acids B
Formic acid CH2O2 A
Hydrochloric acid (cold) 37% HCl A
Hydrochloric acid (hot) 37% HCl B
Hydrogen peroxide (90%) H2O2 A
Lactic acid (cold) C3H6O3 A
Lactic acid (hot) C3H6O3 C
Maleic acid C4H4O4 A
Malic acid C4H6O5 A
Peracetic acid C2H4O3 B
Phosphoric acid H3PO4 A
Potassium hypochlorite (Bleaching water) KOCl A
Propionic acid C3H6O3 A
Sodium hypochlorite (Bleaching water) NaOCl A
Sulfuric acid (20% oleum) H2SO4 C
Sulfuric acid (conc) H2SO4 B
Sulphuric furic acid, sulfurous acid H2SO3 A
Vanillin/metoxybensoldehyde C8H8O3 A
LEGEND:
A = LITTLE INFLUENCE
B = MODERATE INFLUENCE
C = ADVISED AGAINST
Thislistisnotcomplete.Forproductsthatarenotmentionedonthelist,pleasecontactyoursupplierofthedisinfectants,orthe
Roxell Service Desk.

ROXELL - 025 - 2416
SPARKcup- USER'S GUIDE -EUG
10
MANUAL FLUSHING (STANDARD)
Flushing button on pressure
regulator
Figure 1.
Each Sparkcup drinking line has a standard manual flushing system. This allows flushing the water pipes at random.
Procedure :
1. Open the end ball valve.
2. Turn the flushing button in high position (complete ”flush”).
3. The water is sent through the lines under full incoming pressure.
Ideal flushing : an incoming pressure of 3 bar and a capacity of about 10 liters
per minute per line. Flush during 1 minute per 10 m line length.
4. Set back the flushing button in the normal position.
5. Shut off the end ball valve.
RESPECT THE PROCEDURE BELOW :
IF NOT, THE TOTAL SYSTEM IS UNNECESSARILY PUT UNDER
TOO HIGH PRESSURE WITH DAMAGE RISK !
Turn into flushing position
End ball valve
All lines can be flushed simultaneously when following the specifications for the right water supply.
With a low pressure water supply it is better to flush half of the lines or even line per line.
CAUTION

SPARKcup -- USER'S GUIDE -- E U G
ROXELL --025 -- 0511
11
Figure 8.
PR
CONDUIT LAYOUT FOR STANDARD FLUSHING, FRONTAL PRESSURE REGULATORS.
Flush
IN
OUT
PR
PR
PR
Pressure regulator
Figure 9.
Pressure regulator in the middle of the line :
maximum 2 lines can be flushed simultaneously.
Follow the same procedure as fig . First open both end ball valves!
CONDUIT LAYOUT FOR STANDARD FLUSHING, CENTRAL PRESSURE REGULATORS.
Flush
IN
OUT
Pressure regulator
OUT
PR
PR
PR
PR

ROXELL --025 -- 0511
SPARKcup -- USER'S GUIDE -- E U G
12
OPTIONAL : SEMI--AUTOMATIC FLUSHING
Figure 10.
Connect the end ball valves with a connector tube to the controlled cock.
The control box for semi--automatic flushing operates this cock.
CONDUIT LAYOUT FOR SEMI--AUTOMATIC FLUSHING, FRONTAL PRESSURE REGULATORS.
Control
box 230V
Flush
IN
OUT
Pressure regulator
PR
PR
PR
PR
Figure 11.
Pressure regulator in the middle of the line :
maximum 2 lines can be flushed simultaneously.
CONDUIT LAYOUT FOR SEMI--AUTOMATIC FLUSHING, CENTRAL PRESSURE REGULATORS.
Flush
IN
OUT
Pressure regulator
Control box 230V
OUT
PR
PR
PR
PR

SPARKcup -- USER'S GUIDE -- E U G
ROXELL --025 -- 0511
13
Figure 12.
To flush :
1. Turn the key contact to the ”I” position.
2. Push the green start button.
3. The red light goes on during one and a half minute (=time the con-
trolled cock needs to change position).
4. When the cock is completely open the green light goes on.
5. Only then set the flushing button on the pressure regulator on
flushing position.
After flushing :
1. Set back the flushing button back in the normal position.
2. Push the red stop button.
3. After about one and a half minute the end cock is shut off again.

ROXELL --025 -- 0511
SPARKcup -- USER'S GUIDE -- E U G
14
OPTIONAL : AUTOMATIC FLUSHING
Figure 13.
CONDUIT LAYOUT FOR AUTOMATIC FLUSHING, FRONTAL PRESSURE REGULATORS.
Flush
IN
OUT
Pressure regulator
Control
box 230V
PR
PR
PR
PR
Pressure regulator Pressure regulator
Figure 14.
1. Connect the lines one to another at the front and rear of the
house with the collector tube that is connected to a controlled
cock.
2. Set the flushing time on the time clock below.
Optimum flushing = 1 minute per 10m line length.
3. Put the selection button on A, B or A+B, according to the
house layout (yes or not divided).
4. Press the manual start button. The box will activate all valves
in the correct sequence and for the time programmed.
Table of contents
Other Roxell Farm Equipment manuals

Roxell
Roxell Discaflex User manual

Roxell
Roxell Vitoo User manual

Roxell
Roxell HaiKoo User manual

Roxell
Roxell Boozzter User manual

Roxell
Roxell KiXoo in line User manual

Roxell
Roxell LAICA User manual

Roxell
Roxell KOOZII 018 Series User manual

Roxell
Roxell CoMeo User manual

Roxell
Roxell Optimax User manual

Roxell
Roxell Vitoo In Line User manual
Popular Farm Equipment manuals by other brands

MacDon
MacDon R113 Quick Card User Guide

Hanskamp
Hanskamp PowerSpray Installation and operating instructions

COOPS & FEATHERS
COOPS & FEATHERS 250-72 Assembly instructions

E-Z FRAME
E-Z FRAME 8X12 quick start guide

Little Cottage
Little Cottage Berlin Chicken Coop Construction manual

Degelman
Degelman Pro-Till 33 Operator's & parts manual