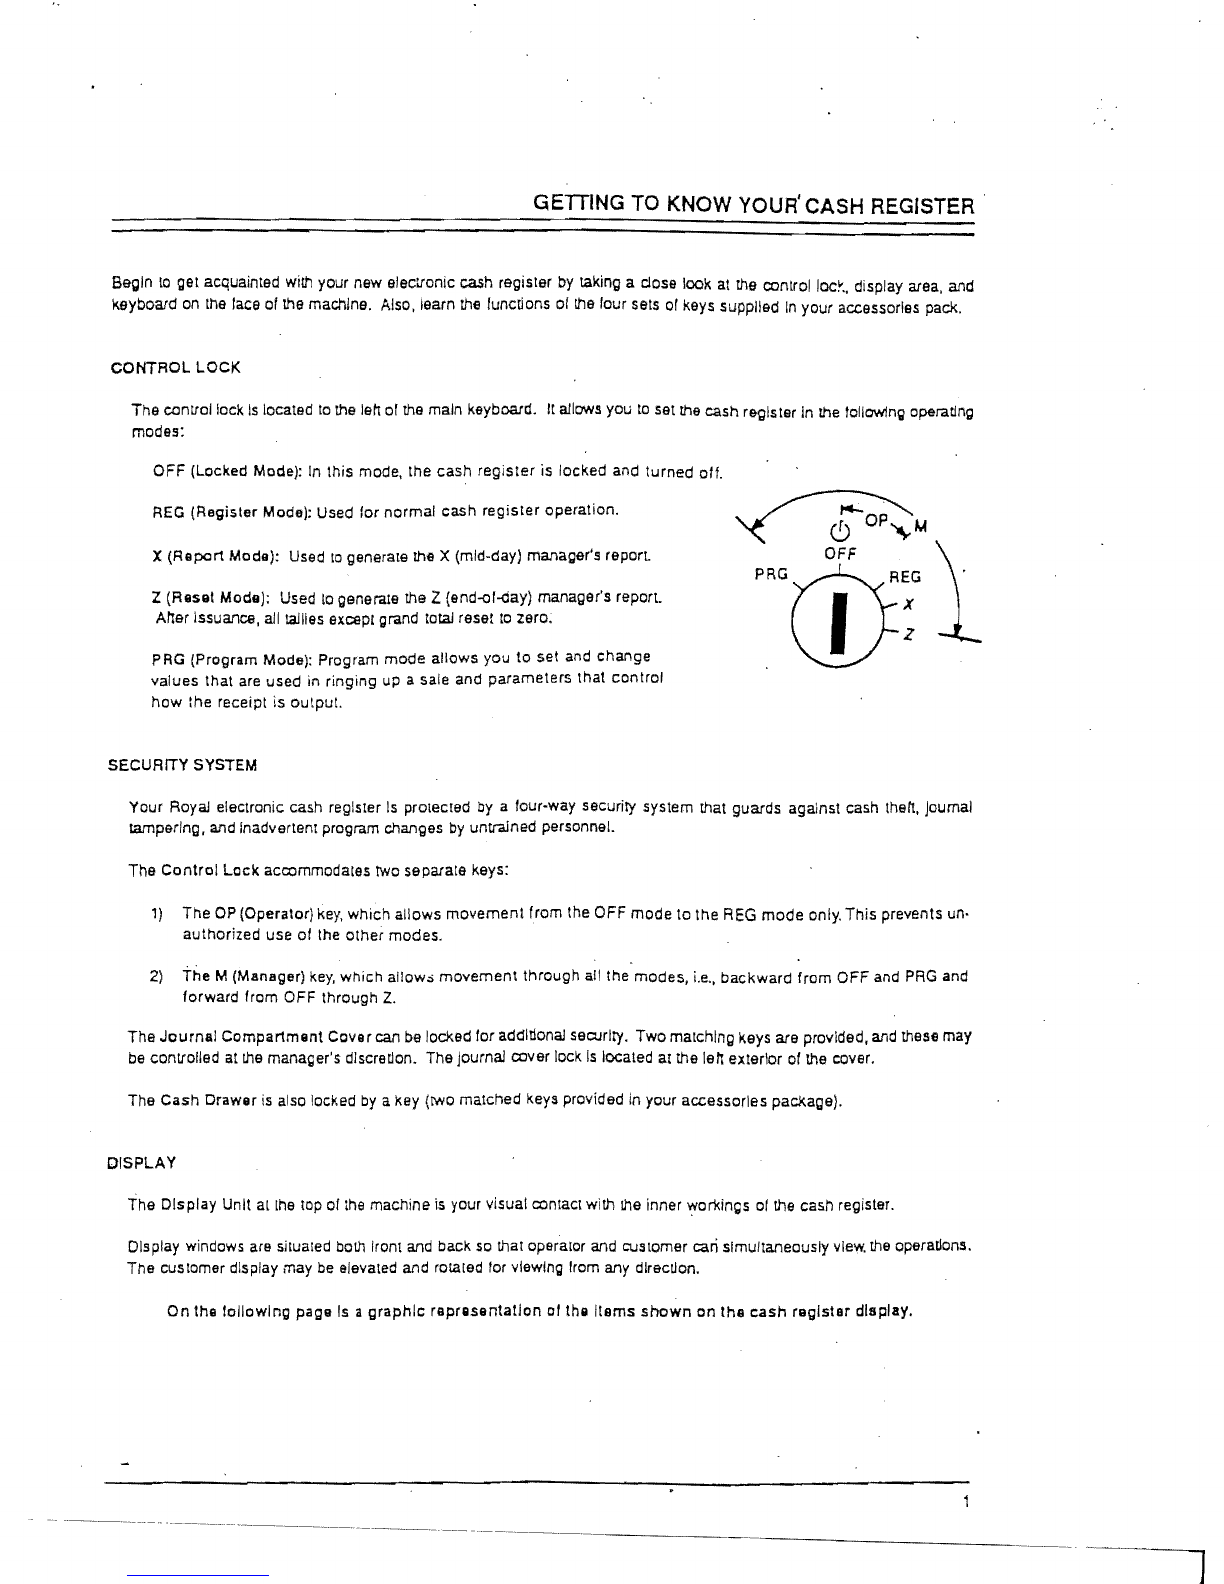
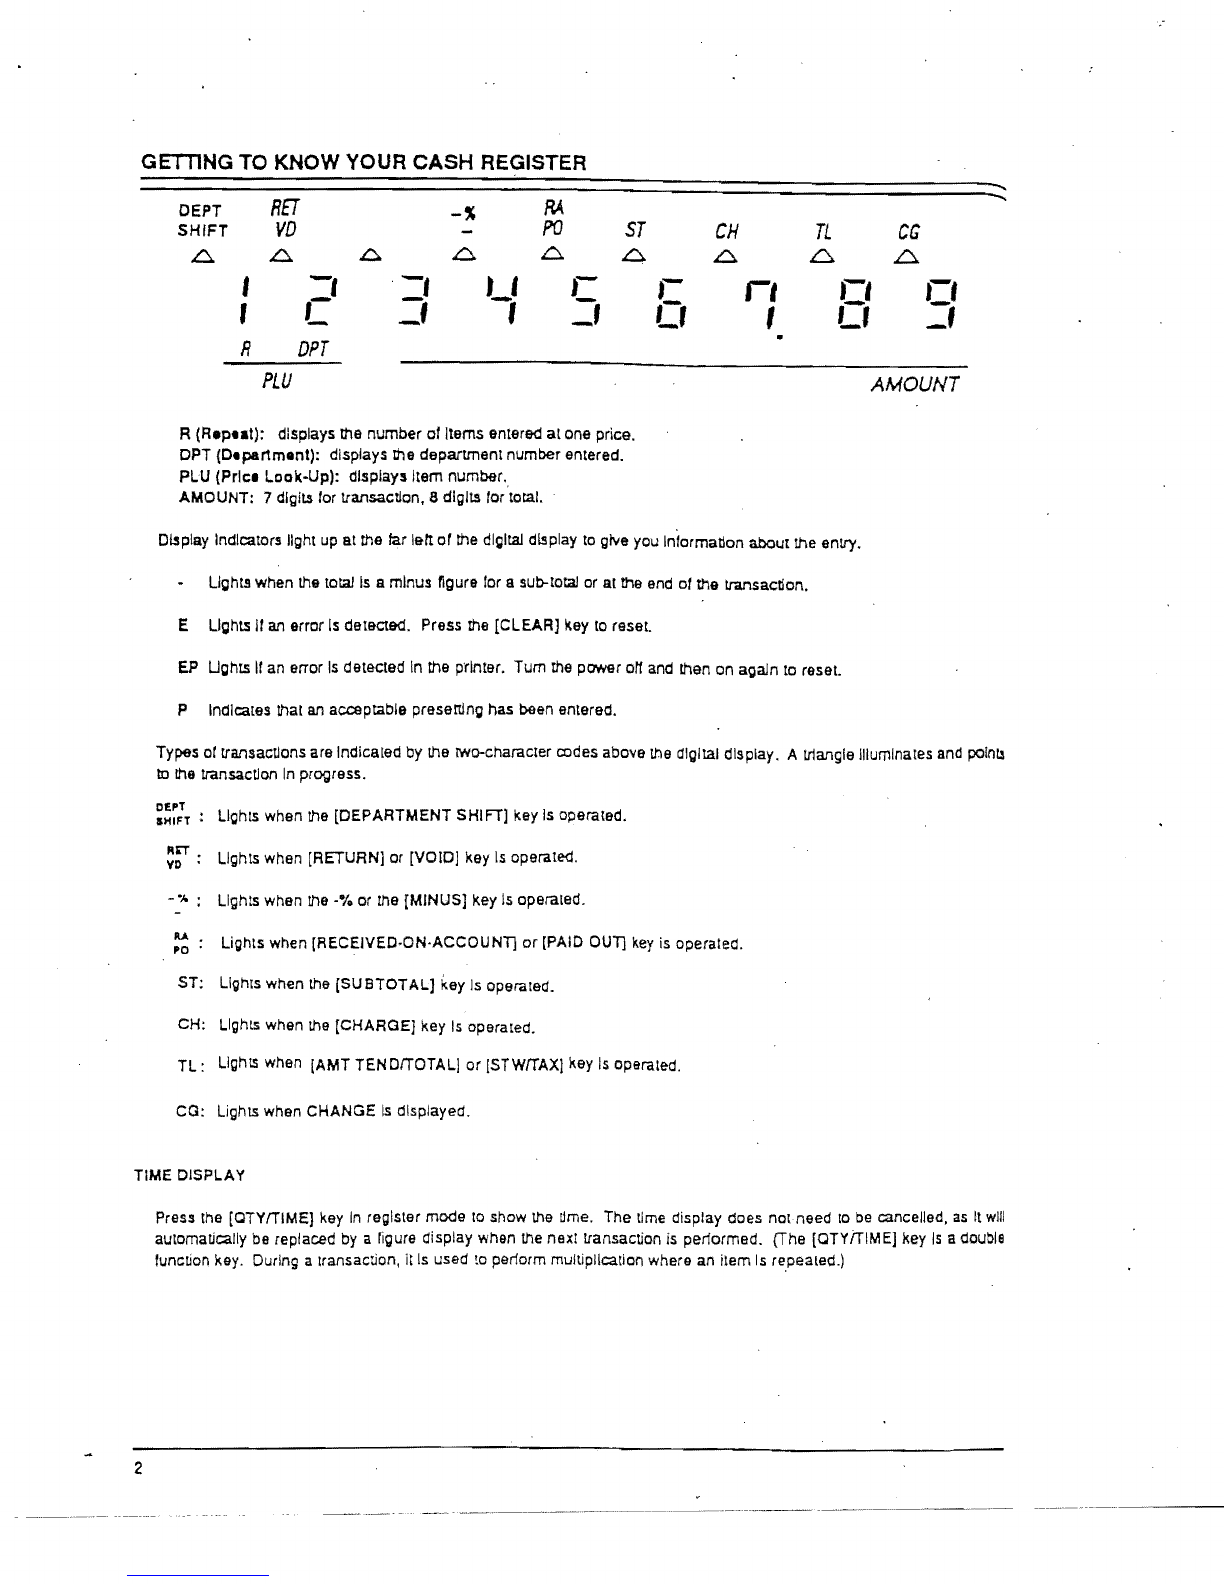
GETTING TO
KNOW
YOUR, CASH REGISTER
DETECTlNG
AND
CORRECTING
ERRORS
The E (error) display Illuminates ana a tone sounds when the machine detects an unacceptable keyboard entry.
The [CLEAR] key
Is
used
to
correct an error that has not been completed
or
primed on the tape. When this key
Is
pressed,
me
display clears ana
the
keyboard unlocks. You should determine whatcaused the error belore repeating and. correctJng
the transaction. You
may
also use the
[CLEAR]
key II you realize in mld-lfansactlon mat you halle made a mistake.
On rare occasions
an
error cannot be clearea
by
use
01
me
[CLEAR]
key.
If
this
ocOJrs, please reier
to
"Troubleshooting."
The [VOID] key corrects an error already printed on the tape. either from an entry
Just
completed
or
one made earlier.
To
lIold an entry just completed. simply
preS.!!
[VOIO] and the entry
is
reprinted with a
"VO"
symbollollowlng
the
amount. To
void an earlier entry. reenter the Incorrect transaction (exactly as originally emered and printed). then press [VOID]. The
error Is reprinted
on
the
tape with a
"VO"
notation following the amount.
lIIumlnanon
01
the
"EP"
on
the
display Indicatesthatthere
Is
aproblem with the primer. When
this
occurS, remolle
me
Journal
cover and examine the printer. Usually, an
"EP"
problem
Is
one Involving Jammed paper. You can correct
this
by manually
un-Jamming
the
paper and re-establlshlng the proper feeding
as
described
In
Sectlon 2.
To
dear
Ihe "EP" reading after
the
correction
Is
made. penorm a hall-system clear
a.s
described pn page 31.
INSTALLING THE PAPER ROLL
Belore beginning any programming or register operations, you will want
to
insert the paper roll Into
its
spadal compartmenT
under the Journal colier.
1.
First, plug in the machine and
turn
the
control
locK key to the
REG
(Register) mode.
2. Remolle
the
Journal
cover
(located at the top left
01
the machine)
by
turning the key
to
the unlock position, then
pulling the colier gently toward the back
01
me
machine. Once the fit-tabs
In
IronI and back are free, the cover can
be
lifted easily and temporarily put aside
In
a sale
place_
NOTE:
On
a new machine, both the paper roll (with its spindle) and the blacllJournal tape winder will probably
be
outside
01
the
machine, separately wrapped.
3.
Unwrap the
paper
roll. (Make sure the spindle
Is
Inserted.) You will see
Chat
\I
is
a double roll. The Inner paper
will wrap around the black winder spindle, while
me
oular roll leeds out
of
the machine as a customer copy.
4. Place the paper
roll
Into
lis
groolle
at
the larlower rear portion
01
the Journal compartment.
II
should nest here
comfortably
and
roll easily.
NOTE: The printer ribbon
Is
already inserted on a new machine. There
may
be
a piece of colored adhesille tape
Oller
the
spools,which should be removed. The paper should Iravel directly oller the printerribbon Into the stainless
steel paper slot directly
In
Iront
or
the ribbon spools
..
5.
Insert
both
portions
01
the
paper
downward
Into
the
paper
slol.
The paper
wlilinserr
more easily
II
you cuI
a dean edge and lold
It
back belore doing
the
Insertion.
6.
Advance
Ihe
paper, once II has entered
Ihepaper
slot, by pressing
the
[FEED] key on the keyboard.
It
Is
very
Important that you do not anempl
to
advance
the
paper
by
pulling
It.
7. Insert the black.
paper
winder
Into
ItI
greoves
at
Che
tOP
of the compartment
SO
that the smail drcular
nanga
Is
situale<!
at
the right.
NOTE: Although double paper roils are described here,
It
is also possible
to
use single paper rolls when either the
joumal
or
r9!JiSl9r tape
Is
not required.
5