manuals.online logo
Brands
  1. Home
  2. •
  3. Brands
  4. •
  5. RUD
  6. •
  7. Automobile Accessories
  8. •
  9. RUD easy2go Owner's manual

RUD easy2go Owner's manual

Main Guide
Betriebsanleitung · Fitting instructions · Mode d'emploi · Istruzioni per il montaggio · Gebruiksaanwijzing
Instrucciones de montaje · Instrukcja użytkowania · Οδηγίες χρήσης · Instructiuni de utilizare
2
11
3
4
10 8
9
7
2
4
3
1
6
5
3
4
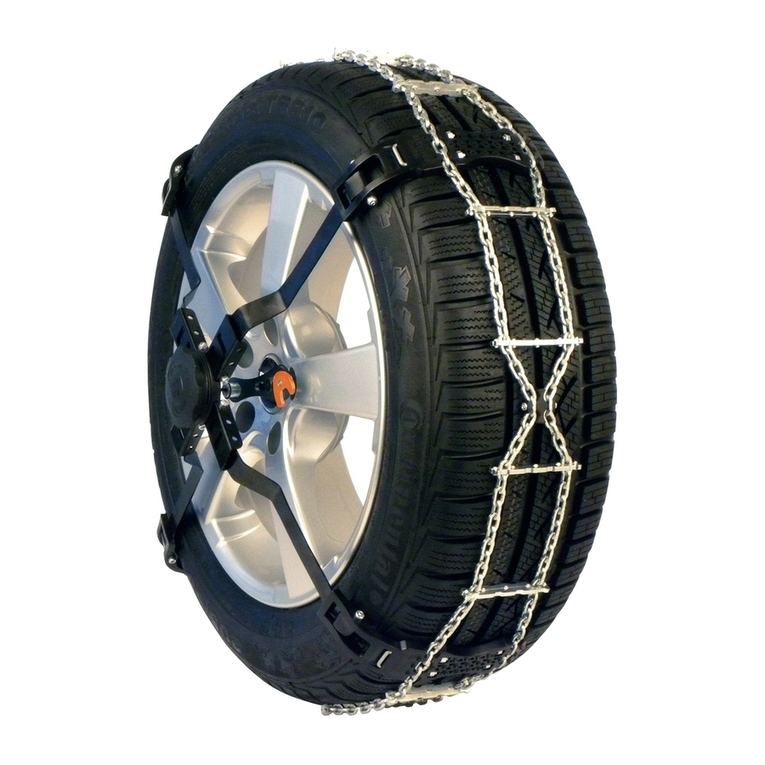
All the illustrations in this guide
show the RUD easy2go. However,
all the tting steps and instructions
also apply to the easy2go plus
model.
FITTING
All the steps are clearly summa-
rized again in the practical Quick
Guide. Its plastic foil also provides
something to kneel on while tting
the chains.
Do you own a four-wheel drive
vehicle? Its instruction manual will
state on which axle (front or back)
the snow chains should be tted.
A neatly laid out chain makes tting
easier.
Leading with the orange-coloured
ring end (1), pull your chain round
behind the wheel.
The ring (2) should then lie near
the back of the tyre.
Take both ends of the ring and pull
them up around the tyre tread.
D
Deutsch
GB
English
F
Français
I
Italiano
NL
Nederlands
E
Español
PL
Polski
GR
Ελληνας
RO
Român
5
Now, on the upper part of the
wheel, hook the orange hook (4)
into the eyelet (5). This is easier if
you pull the orange chain a little out
of the ratchet (6). To do this, press
the orange knob.
Slide the wire hoop over the tread
until it lies on the back of the tyre.
The back view on the right shows
the wire hoop lying correctly on the
inner sidewall of the tyre, which
cannot be seen from the front.
Now hook the connecting pieces
(3) together.
The close-up view on the right
shows how the wire hoop looks
when connected.
6
Now you just have to hook the two
eyelets (9) into the plastic hook of
the rubber tensioner (10).
Please ensure that the chain mesh
is lying evenly spread over the
outer sidewall of the tyre.
Your easy2go automatically re-
tightens during your journey.
Have a pleasant journey!
Now, on the lower part of the
wheel, hook the grey hook (7) into
the eyelet (8). Once again, this is
easier if you pull the orange chain
a little out of the ratchet. To do this,
press the knob.
D
Deutsch
GB
English
F
Français
I
Italiano
NL
Nederlands
E
Español
PL
Polski
GR
Ελληνας
RO
Român
7
REMOVAL
On a front-wheel drive, the orange
hook (4) should be about level with
the axle. It is easier to remove the
chain if you turn the hook-side of
the wheel outwards.
To remove the snow chains, park
your vehicle so that the wheel
comes to a halt with the orange
hook (4) in the position shown in
the diagram on the right. Then
unhook the two eyelets (9) from
the rubber tensioner (10).
Now release the tensioning chain.
To do this, press the release button
on the ratchet (6) and pull the chain
back. Repeat this step on the
second ratchet.
On a rear-wheel drive, the orange
hook (4) should be at the top.
8
Grasp the chain mesh (11) near the
orange hook and by the tensioning
device. Pull it to the centre of the
wheel. This brings the connector
(3) to the front. Open the connec-
tor.
You can now lay the snow chain
on the ground, and remove your
second chain from the other side of
the vehicle.
Then drive away from the chains.
Unhook the orange (4) and grey (7)
hooks.
If the chain does not move
outwards, shake it to loosen, and
make removal easier.
D
Deutsch
GB
English
F
Français
I
Italiano
NL
Nederlands
E
Español
PL
Polski
GR
Ελληνας
RO
Român
9
NOTES
There is a risk of the chain brea-
king when the links of the chain
mesh have worn below 50 percent.
Do not use chains which are more
than 50% worn – replace them.
Please ensure that your snow
chains are the right size for the
tyres tted to your vehicle. The
type-size designation on the tyres
must be identical with the size
stated on the chain packaging. For
example, there is a big difference
between 195/65-15 and 195-15.
We always accept our packaging
back via our sales network.
Snow chains must not be oiled.
Therefore, wash your chain in
warm water after use and allow
to dry.
RUD provides a repair and modi-
cation service. If necessary, return
the chain to RUD Ketten. You will
nd the address on the back of
your tting guide.
Do not drive at more than 50 kph
(30 mph) with snow chains.
This is the maximum speed per-
mitted under the trafc regulations
in Germany and other countries.
Ö-
Norm
50
Your easy2go, like all RUD snow
chains, fulls the Austrian stan-
dard, and so it is also approved for
use in Austria.
58
Mat.-Nr.: GI-M 188 92 99 684 · Text: Fritz Lorek · Grak: Volker Hildebrand
RUD Ketten ● Rieger & Dietz GmbH u. Co. KG
Friedensinsel ●73432 Aalen ●Germany
Tel.: +49 7361-504-0 ● Fax: +49 7361-504-1802
[email protected] ●www.rud.com

Other manuals for easy2go

1

This manual suits for next models

1

Other RUD Automobile Accessories manuals

RUD RUDinnov8 Hybrid Install guide

RUD

RUD RUDinnov8 Hybrid Install guide

RUD CENTRAX V 4717999 User manual

RUD

RUD CENTRAX V 4717999 User manual

RUD RUDmatic Install guide

RUD

RUD RUDmatic Install guide

RUD RUDmatic Maxi Install guide

RUD

RUD RUDmatic Maxi Install guide

RUD CENTRAX User manual

RUD

RUD CENTRAX User manual

RUD LRBS-FIX User manual

RUD

RUD LRBS-FIX User manual

RUD easy2go User manual

RUD

RUD easy2go User manual

RUD CENTRAX User manual

RUD

RUD CENTRAX User manual

RUD ARKTIS EASY 1 GO User manual

RUD

RUD ARKTIS EASY 1 GO User manual

RUD VLBS-U-LT User manual

RUD

RUD VLBS-U-LT User manual

RUD RUDmatic Classic Install guide

RUD

RUD RUDmatic Classic Install guide

RUD ARKTIS SCHNEEKETTEN T-POWER User manual

RUD

RUD ARKTIS SCHNEEKETTEN T-POWER User manual

RUD RUDmatic Hybrid User manual

RUD

RUD RUDmatic Hybrid User manual

RUD CENTRAX User manual

RUD

RUD CENTRAX User manual

Popular Automobile Accessories manuals by other brands

Thule TracRac SR manual

Thule

Thule TracRac SR manual

VBG Onspot Mounting instruction/Spare Parts List

VBG

VBG Onspot Mounting instruction/Spare Parts List

Peruzzo 709 instructions

Peruzzo

Peruzzo 709 instructions

Hook 140 602 manual

Hook

Hook 140 602 manual

Parrot CK3100 LCD installation manual

Parrot

Parrot CK3100 LCD installation manual

Vision X Cannon CTL-CPZ6 Series installation instructions

Vision X

Vision X Cannon CTL-CPZ6 Series installation instructions

Dakota Digital VHX-66C-CVL Instrument Installation

Dakota Digital

Dakota Digital VHX-66C-CVL Instrument Installation

Thule 2035 parts list

Thule

Thule 2035 parts list

Elinchrom ELB 1200 user manual

Elinchrom

Elinchrom ELB 1200 user manual

WeatherTech No Drill MudFlap installation instructions

WeatherTech

WeatherTech No Drill MudFlap installation instructions

Cruz 923-300 Assembly instructions

Cruz

Cruz 923-300 Assembly instructions

Yakima K999 manual

Yakima

Yakima K999 manual

iArmor EDGE IA-N002 quick start guide

iArmor

iArmor EDGE IA-N002 quick start guide

Axxess AXGMLN-10 installation instructions

Axxess

Axxess AXGMLN-10 installation instructions

Flash Cover MN024 installation manual

Flash Cover

Flash Cover MN024 installation manual

Firstech FTI-GMT3 quick start guide

Firstech

Firstech FTI-GMT3 quick start guide

BESAFE Baby Mirror XL2 quick start guide

BESAFE

BESAFE Baby Mirror XL2 quick start guide

Mobridge MOST25 DA Series manual

Mobridge

Mobridge MOST25 DA Series manual

manuals.online logo
manuals.online logoBrands
  • About & Mission
  • Contact us
  • Privacy Policy
  • Terms and Conditions

Copyright 2025 Manuals.Online. All Rights Reserved.