RUSTA 6257-0013 User manual

3.6 x2.5 m
4.5 x3.0 m
Terrace awning with motor
Terrassmarkis med motor / Terrassemarkise med motor /
Terrassenmarkise mit Motor / Terassimarkiisi moottorilla
Manual/Bruksanvisning/Gebrauchsanweisung/Käyttöohje
SEENG NO FIDE
Item no. 62570013--625701300201

ENG
SAFETY INSTRUCTIONS
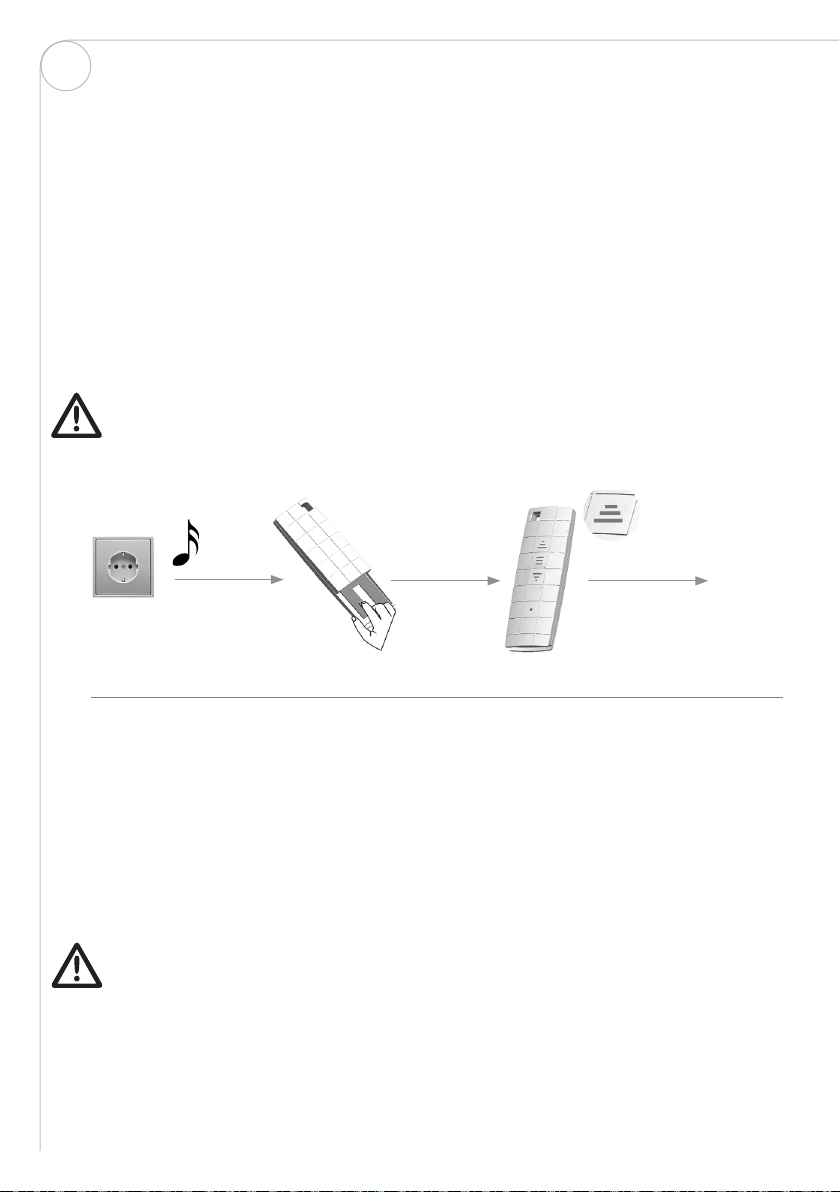
• The awning is mounted on the wall of a home and extended using a
remote control. The awning canopy provides protection from the sun
and privacy, and is not intended for use as rain cover. The awning is
intended for private use.
The awning is not intended for use by people (including
children) with reduced physical, sensory or mental capabilities
or who have limited experience and knowledge unless they are
supervised or instructed on how to use the microwave oven by
a person who is responsible for their safety. Children must be
supervised to ensure they do not play with the awning.
• Do not let children play with the awning.
• Check regularly to make sure that the awning is balanced and that
the power cord is not damaged.
• Damaged electrical cords must be replaced by an authorised
electrician. Do not use the awning if it is damaged in any way.
• Pull the plug out of the electrical outlet before performing main-
tenance work or before cleaning windows in the vicinity of the
awning.
• Do not place any kind of fire under the awning.
• Due to the risk of personal injury, do not make any modifications of
the awning’s design and construction.
WARNING!
If these instructions are not followed, an accident may
lead to serious personal injury or property damage.
2
ENG
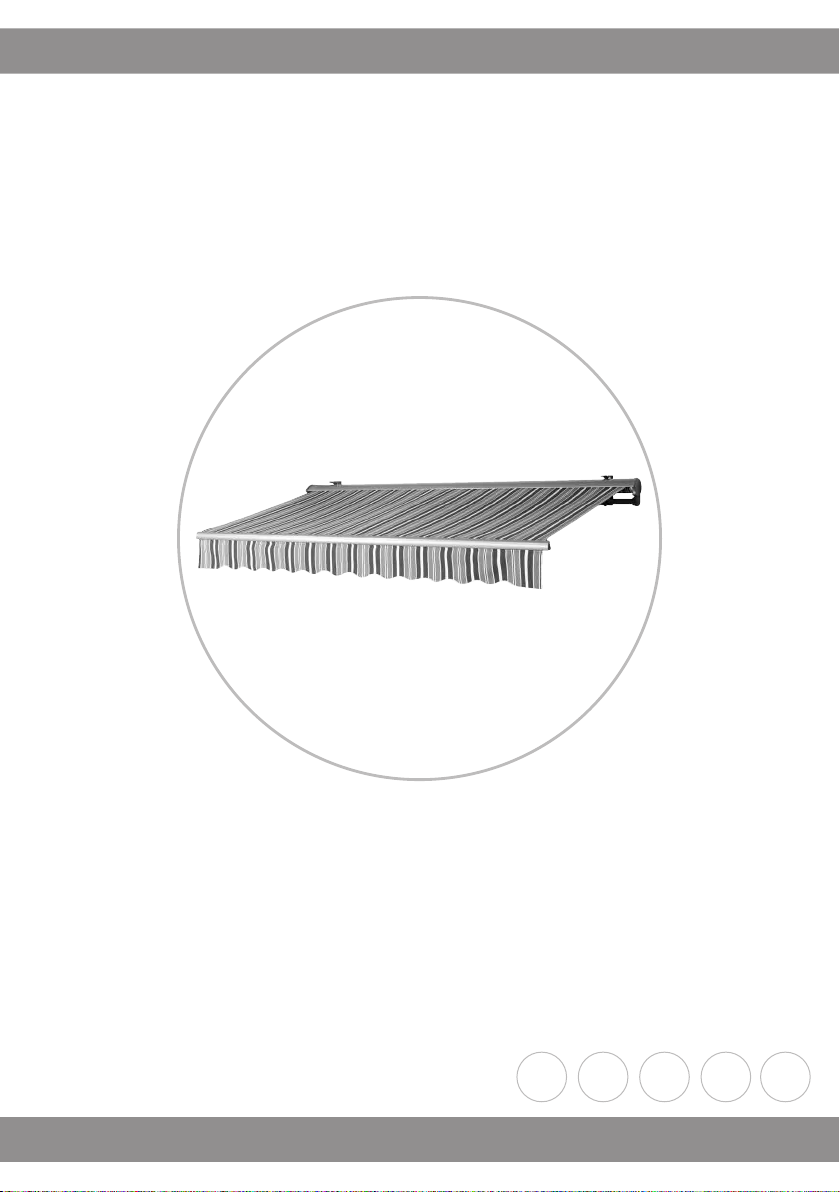
Thank you for choosing to
purchase a product from Rusta!
Read through the entire manual
before installation and use!
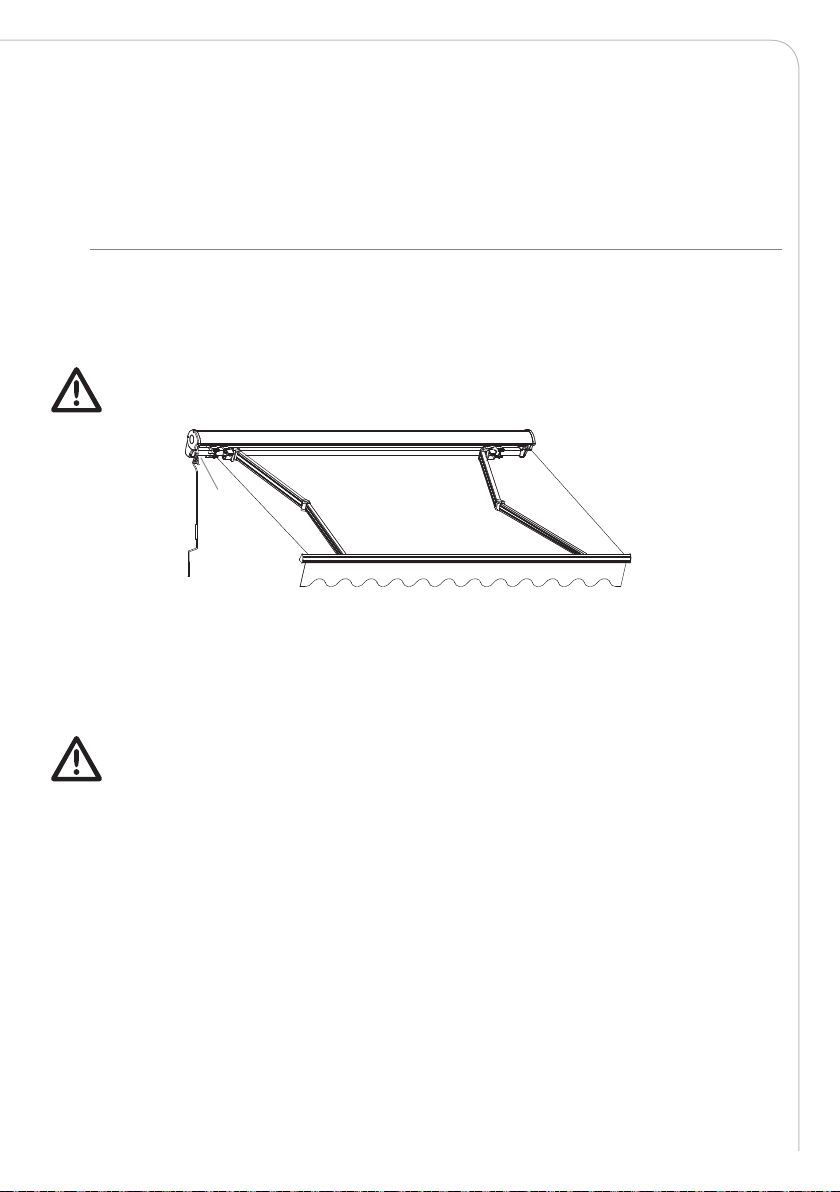
Terrace awning with motor 3.6x2.5 m 4.5x 3 m
Read the user manual carefully to make sure that the product is assembled, used and
maintained correctly, as described in the instructions in this user manual. Keep the user
manual for future reference.

• The control unit must be installed in a visible location.
• Technical skills are required for installation of the awning. Do not
install the awning yourself if you are uncertain as to how the awning
can be installed in the place where you intend to install it, if you do
not understand the user’s manual or parts thereof, if you do not have
the necessary tools or if you do not have the necessary skills. Contact
a qualified installer for assistance.
• The awning is large and heavy. Therefore, at least three adults are
required to move and to install the awning. Do not attempt to install
the awning on your own. If the awning falls down, it can cause severe
personal injury or extensive property damage.
• Keep children and pets at a safe distance when you install and adjust
the awning.
• Make sure that your hands are clean when you install the awning
otherwise the canopy and the frame can become dirty.
• Using the awning when there is frost can damage the awning.
• The awning must be fully rolled in when it rains or in strong wind.
• Climbing on the awning and hanging objects from the awning are
prohibited.
3

ENG
4.5x3 m
3.6x 2.5 m
Awning cassette x 1
Crank handle x 1
Wall brackets x 3
Remote control x 1
Adjustment tool
for motor settings
x 1
PACKAGE CONTENTS
• Make sure that all the parts were included in the package and that they are not
damaged. Do not install the awning if any parts are missing or damaged. Contact your
retailer.
NOTE! The bolts for wall mounting are not included. Consult with a professional to
determine which bolts are suitable for your wall.
The following tools are required for installation (not included):
Drill Measuring tape Box spanner Philips screwdriver Spirit level
DESCRIPTION Cassette
ValanceAwning front
Plug
Motor Arm
mount
Power cord 1.5 m
Canopy
4

ASSEMBLY
• At least 3 people should install the awning. Contact a professional installer if you are
wuncer-tain how to install the awning.
• Unpack all the parts and place them near the intended awning installation location.
Make sure all the parts are included.
• Make sure that there are no children or animals in the area in which the awning will
be installed.
• They can injure themselves on the awning parts or tools left lying around.
• Carefully unpack the awning from the package and remove all plastic guards and
plastic bags.
Be aware that the awning can suddenly extend while it is being unpacked.
• Remove the protective film before you install the awning. The film is intended to
protect the paint before the awning is installed.
• Place the awning in a location where it cannot be damaged or become dirty.
• Factor in the tilt angle of the awning when you determine the awning’s height.
We recommend a tilt angle of 14°.
• The awning can be mounted on the roof, but this requires installation by a professional
installer.
• Once the height has been determined, use a spirit level to mark the height with a line.
It is essential that line is straight.
• The holes for the wall mounts must align both vertically and horizontally.
• All wall brackets must be used. The wall brackets must be positioned near the arm
brackets and centred for 4.5x3m and 3.6x2.5m terrace awnings.
• Mark the locations for the drilled holes in the wall.
• Use a drill and bit suitable for your wall when drilling the holes. If you are uncertain
• which bit is suitable for your wall, consult with a professional.
• Fasten the wall brackets with bolts that are suitable for your wall. If you are uncertain
which bolts are suitable for your wall, consult with a professional.
Bracket Bracket
Chalk line
Ground
Door/
window
Ground
Height of awning
front
Height of fall
Bracket height
Tilt angle
Wall cross-section
5

ENG
MOUNTING THE AWNING ON THE WALL BRACKETS
• Unscrew the nuts and bolts in the wall brackets.
• Fasten the screw square beam in the wall brackets.
• Fasten the awning by tightening the bolts and nuts on the wall brackets.
• Tighten the nuts to ensure that the awning is secured on the wall mounts.
Electrical outlet Plug Brown
Blue
Yellow/Green
NOTE! Remove securing straps after installation, otherwise the awning can extend. Save
the straps for later use when storing the awning. Incorrectly positioning or installing
the awning can result in serious personal injury or property damage. Only install the
awning yourself if you fully understand the installation instructions and if your are
certain that the wall on which it will be mounted is suitable for this purpose. Contact a
qualified installer for assistance – for your own sake and for the sake of others.
ELECTRICAL CONNECTION
• The awning with remote control has an electric cord and plug. Connect the awning to a
grounded electrical outlet after it has been mounted on the wall brackets.
NOTE! The awning must be connected to an electrical outlet with protection
class IP44 or higher, otherwise there is a risk of electric shock. For yours and
others safety, we recommend that a earth fault breaker is installed. Improper
connection can cause serious damage to the remote control and/or motor.
Make sure that all connections are correct before the awning is used.
AWNING AS VIEWED FROM THE SIDE
Locking plate
Wall
cross-
section
Wall
cross-
section
6

USE
TILT ANGLE ADJUSTMENT
• The tilt angle is optimally pre-adjusted. However, the user can adjust the tilt angle
within the range of 14-30 degrees. A tilt angle of less than 14 degrees may not
be used, even if the design of the adjustment mechanism makes a smaller angle
possible.
When the adjustment screw has reached its end position, it may not be screwed in
any further. Do not force the screw! This can result in damage to the awning and
void the warranty.
• Extend the awning to one third of its full length before adjusting the angle.
• Loosen the lock nuts.
• Turn the adjustment screw clockwise to reduce the tilt angle. Turn anticlockwise to
increase the tilt angle.
• Tighten the lock nuts when the desired tilt angle has been adjusted.
• Repeat the process until both arms have been adjusted to the desired degree.
Adjustment
range
The front of the awning must always be horizontally aligned. The front of the awning
has a built-in spirit level for checking to ensure that both sides are at the exact same
level. The air bubble should be precisely in the centre of the spirit level.
Adjustment bolt Lock nuts
7

ENG
FUNCTION
The remote control and the awning are delivered synchronised. If synchronisation is
required, follow the steps below.
1. Pull the plug out of the electrical outlet.
2. Re-insert the plug into the electrical outlet. A few weak beeps will be heard from the
awning’s receiver.
3. Press P2 twice on the remote control (the button is beneath the battery cover, next to
the battery).
4. Press the up arrow once.
5. When you have done so, you will hear an additional low beep from the motorised
awning as confirmation that it is synchronised with the remote control.
NOTE! After you have inserted the plug into the electrical outlet, you must press the
the buttons as described above within six seconds. WARNING! When the settings
described above have been carried out, all earlier settings are deleted from the
motorised awning and the remote control.
Electrical outlet
A long noise is heard
Press P2 twice Press the up arrow once
The setting is OK
”Di di...” is heard
”Di di...” is heard
Noise from
motor
OPERATION BY REMOTE CONTROL
Press the down arrow on the remote control to extend the awning. Press the up arrow on
the remote control to retract the awning. Press the stop button to stop the extension or
retraction at the desired position.
The awning’s crank mechanism does not have a blocking device to limit the rotation of
the drum. Therefore, the awning canopy must always be properly retracted in order to
prevent damage to the canopy.
• The awning is intended as protection from the sun. It may not be used in heavy
winds, rain, hail or now. Immediately retract the awning in such conditions.
• Never let children play with the awning.
• Make sure that the awning canopy is taut. Turn anticlockwise until the awning
canopy is taut (if it is not taut when it has been extended).
Do not insert any objects, body parts, etc. in the awning when it is being
extended or retracted. Risk of pinching!
8

MANUAL OPERATION
Manual operation is used when the power is not connected. It does not work when the
power is connected.
WARNING: Exercise caution when operating manually. The awning can extend quickly
if the springs are weak or broken.
Manual operation may only be performed using the hand crane. Insert the hand crank’s
hook in the eye. Rotate clockwise to extend the awning canopy and anticlockwise to
retract it.
Manual operation is only intended as a reserve function to be used in the event of
a power failure. The awning should not normally be operated manually. Manual
operation over an extend time can damage the motor. The awning may not be
operated manually when the power is connected.
The awning’s valance can be easily removed if you prefer the awning without it.
MAINTENANCE
• Regular maintenance is important for safety purposes and for extending the service
life of the awning.
• Avoid stains on the awning. The awning should be clean and dry when retracted. If it is
retracted while it is wet, it should be extended as soon as possible in order to allow it
to dry.
• Check regularly to ensure that the awning’s wires are not damaged. Do not use the
awning if the wires are not in good condition.
• Check regularly to ensure that the wall brackets are securely fastened.
• Inspect the screws and nuts twice per year. Tighten them if they are loose.
• The front of the awning may not press against the supporting bar when it is
retracted. The awning can be damaged.
• Remove the hand crank from the crank regulator after the awning has been
adjusted and set it aside in a location that is not accessible to children in order to
prevent them from playing with the awning.
Crank
handle
Eye
9

ENG
ADJUSTING THE MOTOR CONTROLS
• The motor interval is set at the factory, in which case the awning requires no additional
adjustment. However, the user can adjust the interval with the assistance of a qualified
technician.
• In the following cases the motor requires minor adjustment:
– The awning does not extend properly.
– The awning canopy is loose.
– The motor does not stop automatically when the awning is fully retracted.
P1
P3
P2
P4
P5
• Do not use the awning if it is damaged or if it is not properly fastened. Contact an
authorised technician for repairs.
• Under normal circumstances it is not necessary to lubricated the moving parts of the
awning.
If lubrication is necessary, petroleum based lubricants may not be used.
• When lubricating, use a spray nozzle with tube. Thoroughly lubricate the area between
the end of the supporting bar and the bracket. Avoid spraying the awning canopy.
10

• Insert the Adjustment Tool (P1) into the Upper limited adjustment hole (P3).
• Turn clockwise to bring the canopy closer to the roller and anticlockwise to increase
the distance from the supporting bar.
• Insert the Adjustment Tool (P1) into the Lower limited adjustment hole (P5).
• Turn clockwise to extend the canopy further and anticlockwise to extend it less.
• Wait 30 minutes before restarting if the motor does not function after the adjustment.
• The motor shall not be overloaded or used too frequently – this will aect the motors
service life.
• Keep the motor away from water or other liquid.
WARNING! Make sure that the awning’s canopy extends and retracts from the upper
edge of the roller and not from the lower edge.
P1 Adjustment tool for motor controls
P2 The direction of ”open” the awning
P3 ”+” Increase the ”open” distance
”-” Reduce the ”open” distance
P4 The direction of ”close” the awning
P5 ”+” Increase the ”close” distance
”-” Reduce the ”close” distance
P1
P5
P4
P2 P3
”close”
”open”
11

ENG
RIGHT WRONG
Canopy Canopy
CLEANING
• Dust and dirt accumulate on the frame over time. Therefore, it is important to clean
the awning regularly to maintain an attractive appearance.
• A gentle spray cleaner or a mixture of water and cleanser can be used on the frame
and then wiped clean.
• Under normal circumstances it is not necessary to lubricated the moving parts of the
awning.
• Carefully clean the canopy with a mild cleanser diluted with cold or lukewarm water.
Never use alkaline or acidic cleansers. Only use natural soap. Let the canopy hang
outdoors to dry completely. Do not use a hair dryer or another type of heated device
for drying.
• Do not use high pressure washer for cleaning as this will damage the canopys
impregnation.
STORAGE
• If the awning will not be used for an extended time, we recommend removing it from
the brackets and storing it in a suitable location.
NOTE! At least 3 adults are required for removal.
• Make sure that the canopy is dry before the awning is put in storage.
• Fold the awning in completely.
• Fasten the arms of the awning so that they do not extend. The awning can be damaged
if this happens. Use the safety belts which were used to tie the arms down on delivery.
NOTE! The safety instructions must also be complied with during removal.
• Store the awning in a dry and safe place where it is not accessible to children.
12

IMPORTANT INFORMATION ABOUT THE MATERIAL
• Technical awning fabrics made from acrylic, despite the precise manufacturing process,
have characteristics such as fold and wrinkle marks that can be taken for defects. These
characteristics are impossible to avoid completely, and are visible as streaks or waves
on the fabric. They do not aect the function of the awning fabric or its service life, and
do not constitute grounds for complaint. Colour deviations may occur.
• The acrylic canopy has a significantly longer life and better quality that awning
canopies made of polyester and other common materials.
Voltage 230V~50Hz
Output 230W
Recommended tilt angle At least 14 degrees
Protection Class Class I
Moisture resistance, Motor IPX4 (can be left in the rain. However, an earth fault breaker
is recommended for all use of electrical devices outdoors).
Noise level Less than 70dB (A)
REMOTE CONTROL
Voltage 12V
Signal frequency 433,92MHz±100KHz
Signal strength 10mW
Range Up to 100m outdoors and 15m indoors
TECHNICAL DATA
13
RIGHT OF COMPLAINT
By law the product must be returned to the place of purchase along with the original
receipt in the event of a complaint. The user is liable for any damage to the product that
is caused by not using the product for its intended purpose or by not following this user
manual correctly. The right of complaint will not apply in these instances.
INFORMATION ABOUT HAZARDOUS WASTE
Used products should be handled separately from
household waste. They should be taken for recycling in
accordance with local rules for waste management.

SÄKERHETSFÖRESKRIFTER
• Markiser monteras på husvägg och fälls ut med hjälp av fjärrkontroll.
Markisväven ger skydd mot solen och avskärmning och är inte avsedd
att användas som regnskydd. Markisen är avsedd för privatbruk.
Markisen är inte avsedd att användas av personer (inklusive
barn) med nedsatt fysisk, sensorisk eller mental förmåga eller
bristfällig erfarenhet och kunskap, såvida de inte övervakas eller
får instruktioner angående hur makisen ska användas av en person
som ansvarar för deras säkerhet. Barn måste övervakas för att
säkerställa att de inte leker med markisen.
• Låt inte barn leka med fjärrkontrollen.
• Kontrollera regelbundet att markisens balans är justerad och att
elkabeln inte är skadad. Skadad elkabel måste bytas ut av en behörig
elektriker. Använd inte markisen om den på något sätt är skadad.
• Dra ut stickproppen ur eluttaget innan du utför underhållsarbeten
eller innan du putsar fönster i markisens närhet.
• På grund av risk för personskada, ändra ingenting på markisens
utformning och konstruktion.
• Styranordningen måste installeras på synlig plats.
• Placera inte öppen eld, t ex en grill, under markisen.
VARNING!
Om föreskriften inte efterföljs kan en olycka leda till
allvarlig person- eller egendomsskada.
14
Tack för att du valt att
köpa en produkt från Rusta!
Läs igenom hela bruksanvisningen
innan montering och användning!
SE
Terrassmarkis med motor 3,6x2,5 m 4,5x 3 m
Läs bruksanvisningen noggrant och se till att produkten installeras, används och under-
hålls på rätt sätt enligt instruktionerna. Spara bruksanvisningen för senare bruk.

• Det krävs tekniska kunskaper för at montera markisen. Montera inte
markisen själv om du är osäker på om markisen kan monteras på
platsen där du önskar, om du inte förstår bruksanvisningen eller delar
av den, om du inte har nödvändiga verktyg eller om du inte har nöd-
vändiga tekniska kunskaper. Kontakta behörig montör för att få hjälp.
• Markisen är stor och tung. Därför behövs det minst tre vuxna personer
för att flytta och montera markisen. Försök inte montera markisen på
egen hand. Om markisen ramlar ned, kan den orsaka allvarlig person-
skada eller omfattande materiella skador.
• Håll barn och husdjur på avstånd när du monterar och justerar markisen.
• Se till att händerna är rena vid montering, annars kan duken och ramen
bli smutsig.
• Användning vid frost kan skada markisen.
• Markisen måste rullas in helt när det regnar eller är stark vind.
• Det är förbjudet att klättra upp på markisen eller hänga upp saker
i markisen.
4,5x 3 m
3,6x 2,5 m
Markiskassett x 1
Vevhandtag x 1
Väggfäste x 3
Fjärrkontroll x 1
Justeringsverktyg
för motorreglage
x 1
FÖRPACKNINGENS INNEHÅLL
• Kontrollera att alla delar är med i förpackningen och att de är inte är skadade. Montera
inte markisen om någon del saknas eller är skadad, kontakta din återförsäljare.
OBS! Bultar till väggfästena medföljer ej. Rådgör med fackman om vilka bultar som
passar just din vägg.
15

SE
MONTERING
• Man bör vara minst 3 personer när man monterar markisen. Kontakta fackman om du
är osäker på hur man monterar markisen.
• Plocka upp alla delar och lägg dem nära där markisen ska monteras. Kontrollera att
inga delar saknas.
• Se till att barn och husdjur inte vistas i närheten av platsen där markisen kommer att
monteras. De kan skada sig på utlagda delar eller verktyg.
• Packa försiktigt upp markisen ur förpackningen och ta bort alla plastskydd och
plastpåsar.
Var medveten om att markisen plötsligt kan fällas ut under uppackning.
• Avlägsna skyddsfilmen innan du monterar markisen. Filmen är avsedd att skydda
färgen innan markisen monteras.
• Placera markisen på en plats där den inte kan skadas eller smutsas ned.
• Ta hänsyn till markisens lutningsvinkel när du bestämmer markisens höjd.
Vi rekommenderar en lutningsvinkel på 14°.
För montering behöver du följande verktyg (medföljer ej):
Borrmaskin Måttband Hylsnyckel Stjärnskruvmejsel Vattenpass
BESKRIVNING
Kassett
KappaMarkisfront
Stickpropp
Motor
Armfäste
Elkabel 1,5 m
Markisväv
16

Kritlinje
Mark
Dörr/
fönster
• Markisen kan monteras i tak, men då måste en fackman anlitas.
• När höjden är bestämd, använd ett vattenpass för att markera höjden med en linje.
Det är viktigt att linjen är rak.
• Hålen för väggfästena måste linjera med varandra både horisontellt och vertikalt.
• Alla väggfästena ska användas. Väggfästena ska placeras nära armfästena samt i
mitten för 4,5x3m och 3,6x2,5m terrassmarkis.
• Markera borrhålen på väggen.
• Använd borr och borrmaskin anpassade efter din vägg när du borrar hålen. Är du
osäker på vilken borr som är rätt för din vägg, rådgör med fackman.
• Skruva fast väggfästena med bultar som är anpassade för din vägg. Är du osäker på
vilka bultar som passar din vägg, rådgör med fackman.
Fäste Fäste
Mark
Markisfrontens
höjd
Fallhöjd
Fästenas höjd
Lutningsvinkel
Vägg tvärsnitt
17

SE
MONTERING AV MARKIS I VÄGGFÄSTENA
• Skruva bort muttrarna och bultarna i väggfästena.
• Fäst den kvadratiska balken i väggfästena.
• Lås markisen genom att skruva fast bultarna och muttrarna på väggfästena.
• Dra åt muttrarna för att säkerställa att markisen är ordentligt låst vid väggfästena.
Eluttag Stickpropp Brun
Blå
Gul/grön
OBS! Avlägsna säkerhetsremmen efter montering, annars kan markisen inte
fällas ut. Spara remmen, den kan användas vid förvaring av markisen. Att placera
eller montera markisen på fel sätt kan leda till allvarlig personskada eller skada
på egendom. Montera endast markisen på egen hand om du fullständigt förstår
monteringsanvisningarna och när du är säker på att den vägg som ska tjäna som
underlag är lämplig för detta ändamål. Kontakta en behörig montör för att få hjälp –
för din och andras säkerhet.
STRÖMANSLUTNING
Markisen med fjärrkontroll har en elkabel och en stickpropp. Anslut markisen till ett
jordat eluttag efter att den har monterats på väggkonsolerna.
Markisen ska anslutas till ett eluttag med skyddsklass IP44 eller högre, annars
finns det risk för elstöt. För din och andras säkerhet rekommenderar vi att en
jordfelsbrytare installeras. Felaktig anslutning kan orsaka allvarlig skada på
fjärrkontrollen och/eller motorn. Kontrollera att alla anslutningar är korrekta innan
markisen börjar användas.
MARKISEN SEDD FRÅN SIDAN
Vägg
tvärsnitt Vägg
tvärsnitt
18

ANVÄNDNING
JUSTERING AV LUTNINGSVINKEL
• Lutningsvinkeln är optimalt förinställd. Användaren kan dock justera lutningsvinkeln
i intervallet 14–30 grader. Mindre än 14 graders lutningsvinkel ska inte användas
även om justeringsmekanismens konstruktion möjliggör mindre vinkel.
När justeringsskruven har nått sitt slutläge, får den inte fortsätta vridas. Tvinga inte
skruven! Det kan leda till skada på markisen vilket påverkar garantin.
• Rulla ut markisen till en tredjedel av dess fulla längd innan vinkeln justeras.
• Lossa på säkerhetsmuttrarna.
• Vrid justeringsskruven medurs för att minska lutningsvinkeln. Vrid moturs för att
öka lutnings- vinkeln.
• Dra åt säkerhetsmuttrarna när önskad lutningsvinkel har ställts in.
• Gör på samma sätt tills båda armarna har justerats i önskad grad.
Markisfronten ska alltid vara i horisontellt läge. Markisfronten har ett inbyggt vattenpass
för att kunna kontrollera att båda sidor är på exakt samma nivå. Luftbubblan ska vara
exakt i mitten av vattenpasset.
Justerings-
område
Justeringsskruv Säkerhetsmutter
19

SE
FUNKTION
Fjärrkontrollen och markisen levereras synkroniserade. Om synkronisering behöver
göras, följ steg nedan.
1. Dra ut stickproppen till motormarkisen ur eluttaget.
2. Stoppa stickproppen i eluttaget igen. Några svaga pip hörs från motormarkisens mottagare.
3. Tryck på P2 på fjärrkontrollen två gånger (knappen sitter under batteriluckan bredvid
batteriet).
4. Tryck en gång på pil upp.
5. När detta är gjort hör du ytterligare några svaga pip från motormarkisen som
bekräftelse på att den är synkroniserad med fjärrkontrollen.
VARNING! Efter att du har stoppat stickproppen i eluttaget måste du göra
ovanstående knapp- tryckningar inom 6 sekunder. När ovanstående inställningar
görs, raderas alla tidigare inställningar för motormarkisen och fjärrkontrollen.
Eluttag
Ett långt ljud hörs
Tryck på P2 två gånger Tryck på pil upp en gång
Inställningen är OK
”Di di…” hörs
”Di di…” hörs
Ljud från
motor
MANÖVRERING MED FJÄRRKONTROLL
Tryck på knappen pil ner på fjärrkontrollen för att fälla ut markisen. Tryck på knappen pil
upp för att fälla in markisen. Tryck på stopp- knappen för att stoppa ut- resp infällningen i
önskat läge. Markisens vevmekanism har ingen spärr som begränsar valsrörets rotation.
Markisväven måste därför alltid vara ordentligt infälld för att undvika skador på väven.
• Markisen är endast avsedd som skydd mot solen. Den ska inte användas vid
stark vind, regn, hagel eller snö. Fäll omedelbart in markisen vid sådana
väderförhållanden.Låt aldrig barn leka med markisen.
• Se till att markisväven är spänd. Vrid moturs tills marksiväven är spänd (ifall
den inte är spänd när den har fällts ut).
• Stoppa inte in några föremål eller kroppsdelar, t ex händer, i markisen när den
fälls ut eller in. Klämrisk!
• Markisfronten får vid infällning inte trycka mot bärröret. Markisen kan skadas.
• Ta bort vevhandtaget från vevreglaget efter att markisen har justerats och lägg
undan det på ett ställe som barn inte kan nå, för att undvika att de leker med
markisen.
20
Other manuals for 6257-0013
1
This manual suits for next models
1
Table of contents
Languages:
Other RUSTA Accessories manuals

RUSTA
RUSTA 604013560102 User manual

RUSTA
RUSTA 759013000202 User manual

RUSTA
RUSTA 62561120 User manual

RUSTA
RUSTA 604013750101 User manual

RUSTA
RUSTA MALTA User manual

RUSTA
RUSTA 6257-0013 User manual

RUSTA
RUSTA 308015190101 User manual

RUSTA
RUSTA 922011980201 User manual

RUSTA
RUSTA 922011980101 User manual