manuals.online logo
Brands
  1. Home
  2. •
  3. Brands
  4. •
  5. Salus
  6. •
  7. Thermostat
  8. •
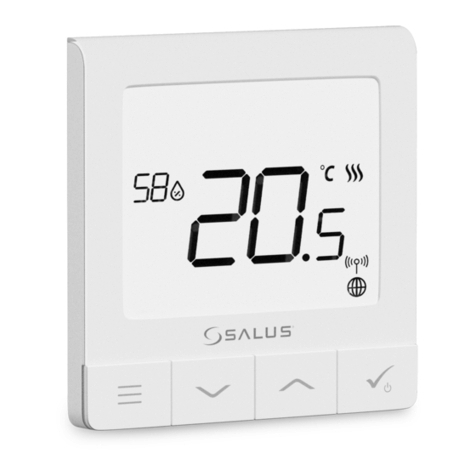
  9. Salus RT310i User manual

Salus RT310i User manual

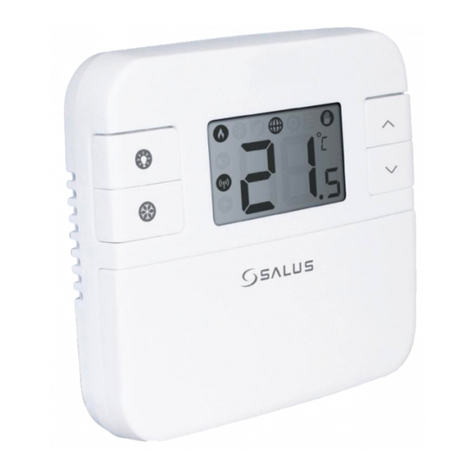
RT310i Smartphone Controlled
Programmable Thermostat
Quick Guide
Head Oce
SALUS Controls plc
SALUS House
Dodworth Business Park South,
Whinby Road,
Dodworth, Barnsley S75 3SP, UK.
T: +44 (0) 1226 323961
E: [email protected]
DE / NL / FR:
[email protected]
tel: +49 6108 8258515
DK: [email protected]
Tel: (+45) 53534499
UK: [email protected]
tel: +44 (0) 1226 323961
For PDF Installation guide please go to
www.salus-manuals.com
www.salus-controls.com
SALUS Controls is a member of the Computime Group
Maintaining a policy of continuous product development SALUS Controls plc reserve the right to
change specification, design and materials of products listed in this brochure without prior notice.
EN App functions EN Frost ModeGE App Funktionen GE Frostschutz
FR Fonctions de l’Appli FR Le Mode Hors-gelNL App funties NL Vorst modus
EN Holiday Mode GE Urlaubsmodus
FR Le Mode Vacances NL Vakantie modus
EN Pairing Process GE Verbindungsmodus
FR Appairage NL Pairing proces
EN Testing Process GE Testmodus
FR Test NL Test proces
Holiday Mode
There are 3 program settings. 1. Schedule (7 days, 5-2 days and 24 hours),
2. Manual and 3. O.
Es gibt 3 Programmeinstellungen. 1. Programm ( 7Tage, 5-2Tage und
24Stunden) 2. Manuell und 3. Aus.
Il y a 3 modes de réglages. 1. Programmation (7 jours, 5-2 jours et 24
heures) 2. Manuel et 3. Eteint
Er zijn 3 programmas beschikbaar 1. programma (7 dagen, 5-2 dagen en
24 uur) 2. handmatig en 3. uit
Schedule Mode
All
Set one schedule for the entire
week (each day the same).
Ein Programm für die ganze
Woche einstellen ( täglich das
gleiche)
Régler un programme pour
toute la semaine (chaque jour
indentique)
Programmeer voor de gehele
week (elke dag hetzelfde)
Set a schedule for the working
days and for the weekend.
Programm für Arbeitstage und
Wochenende einstellen.
Régler un programme pour
les jours ouvrés et pour le
weekend
Programmeer voor werkdagen
en voor het weekend
Set a daily schedule
(each day dierent).
Programm für Einzeltage
( jeden Tag unterschiedlich)
einstellen
Régler un programme
quotidien ( chaque jour
diérent)
Programmeer per dag
(iedere dag verschillend)
5/2 Individual
In Manual Mode you will permanently override
the schedule. Exit Manual Mode by switching to
Schedule or turning o the thermostat.
Im manuellen Modus wird das Programm
dauerhaft überschrieben. Verlassen Sie den
manuellen Modus indem Sie das Programm
aktivieren oder Ausschalten.
En Mode Manuel, vous gelez le programme.Quittez
le mode manuel en basculant sur Programmation
ou en éteignant le thermostat.
Handmatige kunt u van het programma afwijken.
Verlaat handmatig door programma te kiezen of
uit te schakelen.
If the internet connection is lost the thermostat will follow the schedule. If it was
in Frost Mode you can disable the Frost function from the device and continue
following the schedule (see Frost Mode section of the guide).
Wenn Sie die Internetverbindung verlieren wird das Thermostat seinem Programm
folgen. Wenn dieser im Frostschutz war kann dieses am Gerät deaktiviert werden
damit dieser dem Programm wieder folgt ( sehen Sie hierzu Frostschutz Modus in
der Anleitung)
Si la connection internet est interrompue, le thermostat suivra le programme. S’il
était en Mode Hors-gel, vous pouvez désactiver la fonction hors-gel et il suivra
alors le programme (voir la section Mode Hors-gel dans le guide).
Indien er geen internetverbinding is, dan volgt de thermostaat het programma.
U kunt de vorst modus verlaten als het daarop staat om het programma te volgen.
(zie vort modus in de handleiding)
Frost Mode Frost protection temperature can be set between 5.0C and
9.0C. To turn on Frost Mode activate O Mode or Holiday Mode via the App.
Frostschutz Temperatur kann zwischen 5 C bis 9 C eingestellt werden. Um
diesen zu aktiveiren wählen Sie Urlaubsmodus oder Aus über die App)
La température du Mode Hors-gel peut être réglée entre 5°C et 9°C. Pour
activer le Mode Hors-gel, activez le Mode Eteint ou Vacances via l’appli.
Vorst modus vorst protectie temperatuur kan worden gezet tussen 5.0°C en 9.0°C.
Om de vorst modus te activeren, kies O modus of vakantie modus via de App.
Frost Mode can also be de-activated or activated on the device, by pressing the
frost button once. Below are instructions for how to turn it ON/OFF.
Vorst modus kan ook worden gedeactiveerd of geactiveerd op het apparaat,
door de vorst knop in te drukken. Zie hieronder voor instructies. On/O.
Der Frostschutz kann auch über das Gerät aktiviert und deaktiviert werden, indem
sie die Frosttaste einmal betätigen. Unten sehen Sie wie An/Aus. gestellt wird.
Le Mode Hors-gel peut aussi être Desactivé ou Activé sur l’appareil en pressant sur
le boutton hors-gel. Les instructions expliquant comment l’Activer/Eteindre sont
expliquées plus bas.
ON
OFF
Holiday Mode Select the period for this function. Frost Mode temperature
will be activated during this period.
Urlaubsmodus, wählen Sie den Zeitraum für diese Funktion aus. Frostschtz
wird während diesem Zeitraum aktiviert.
Le Mode Vacances selectionne la période pour cette fonction. Le Mode
Hors-gel sera activé durant cette période.
Vakantie modus selecteer de periode voor deze functie. Vorst modus
temperatuur wordt geactiveerd gedurende deze periode.
After the Holiday Mode ends, the thermostat will follow the previous
setting (Schedule, Manual or O.)
Nachdem der Urlaubsmodus endet wird das Thermostat der vorheringen
Einstellung wieder folgen. ( Porgramm, Manuell oder Aus)
A la n de la période du Mode Vacances, le thermostat reprendra le réglage
précédent (Programmation, Manuel ou Eteint).
Nadat de vakantie modus eindigt, schakelt de thermostaat over op vorig
programma. (programma, handmatig of uit)
Pairing Process Press the button for 3 sec.Wait 9 min or if the red light goes
steady, press the pairing button again for 3 sec.
Pairing Vorgang, Drücken sie die Taste für 3 Sek. Warten Sie 9 min oder bis
das Rote Licht dauerhaft leuchtet, drücken Sie erneut die Pairing Taste für 3 Sek.
Appairage. Pressez le boutton pendant 3 sec. Attendre 9 min. ou si la lumière
rouge ne bouge pas, pressez à nouveau le boutton pendant 3 sec.
Pairing proces druk de knop 3 seconden in. Wacht 9 minuten of indien het
rode lampje brandt, druk de pairing knop nog eens 3 seconden in.
ON
AUTO
ON
AUTO
OFF
MANUAL
3S
3S
Testing Process Press the button once to test the connection. If the devices
are paired the ON and AUTO LEDs will both ash. You can wait 9 min for the
process to end or can press the button again to stop.
Test Vorgang, Drücken Sie die Taste einmal um die Verbindung zu testen.
Wenn die Geräte verbunden sind werden die LED bei ON und Auto aufblinken.
Sie können 9 Min warten bis der Vorgang beendet ist oder die Taste erneut
drücken um zu beenden.
Test. Pressez le boutton une fois pour tester la connection. Si les appareils
sont appairés, les LEDs ON et AUTO vont clignoter tous les deux. Vous pouvez
attendre 9 min. que le process s’achève ou vous pouvez presser le bouton à
nouveau pour le stopper.
Test proces, druk de knop eenmaal om de verbinding te testen. Indien de
apparaten verbonden zijn zal ON en AUTO LEDS knipperen. U kunt 9 minuten
wachten of het proces beëindigen door nogmaals op de knop te drukken.
ON
AUTO
OFF
MANUAL
ON
AUTO
OFF
MANUAL
TEST/PAIRING
TEST/PAIRING TEST/PAIRING
TEST/PAIRING
TEST/PAIRING TEST/PAIRING
RT310i Schnellanleitung
RT310i Korte Handleiding
RT310i Quick Guide
Guide Rapide RT310i
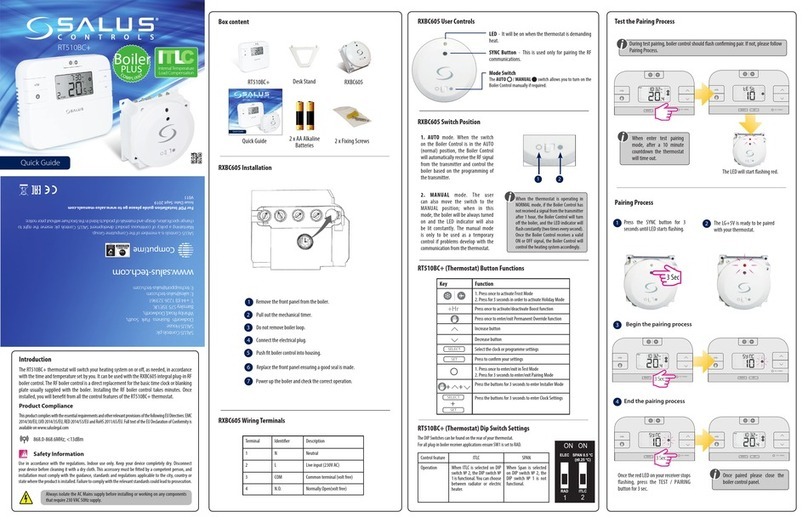
Introduction
The SALUS RT310i is a Smart phone controlled
programmable thermostat. The RT310i
thermostat will switch your heating system
on or o, as needed, in accordance with the
temperature set by you, locally on the deviceor
remotely using the dedicated app.
Go to www.salus-manuals.com for the full PDF
version of the manual.
Product Compliance
EU Directives: 2014/30/EU, 2014/35/EU,
2014/53/EU and 2011/65/EU. Please check
www.saluslegal.com for the full information.
Safety Information
For indoor use only.
Keep your device completely dry.
This product must be installed by a competent
person and in accordance with all the EU and
national regulations.
Introduction
Le RT310i de SALUS est un thermostat
programmable pilotable par votre
Smartphone. Le thermostat RT310i activera
ou désactivera votre système de chauage,
comme voulu, selon la température que vous
aurez choisi, directement sur l’appareil ou à
distance via l’Appli. Rendez-vou sur www.
salus-manuals.com pour obtenir la version PDF
complète du manuel.
Conformité produit
Directives 2014/30/EU, 2014/35/EU,
2014/53/EU and 2011/65/EU.Merci d’aller
sur www.saluslegal.com pour de plus amples
informations.
Information liées à la sécurité
Pour usage interieur exclusivement. Conserver
votre appareil à l’abris de l’humidité. The
produit doit être installé par une personne
compétente et en respectant toutes les
réglementation EU et nationales.
Introduction
Einleitung Der RT310i ist ein Smartphone
geregelter programmierbarer Thermostat.
Der RT310 Thermostat kann Ihr Heizsystem
nach Bedarf und in Zusammenspiel ihrer
eingestellten Temperaturen, an und aus
schalten. Entweder lokal am Gerät oder über
die App. Besuchen sie www.salus-manuals.
com für eine PDF Versionder Anleitung.
Product Compliance
EU-Richtlinien: 2014/30/EU, 2014/35/EU, 2014/53/
EU und 2011/65/EU. Vollständige Informationen
nden Sie unter ww w.saluslegal.com.
Sicherheitsinformationen
Nur für eine Verwendung in Innenräumen.
Halten Sie Ihr Gerät vollständig trocken.
Dieses Produkt muss von einer fachlich
geeigneten Person gemäß sämtlicher EU- und
nationalen Richtlinien installiert werden.
Introductie
De SALUS RT310i is een per smartphone te
bedienen thermostaat. De RT310i thermostaat
schakelt uw verwarming aan of uit, naar
de gewenste temperatuur. Dat kan met de
thermostaat of met de App. Ga naar www.
salus-manuals.com voor de uitgebreide
handleiding in PDF.
Product Compliance EU voorschriften
2014/30/EU, 2014/35/EU, 2014/53/EU
and 2011/65/EU. Bezoek www.saluslegal.com
voor gedetailleerde informatie.
Veiligheidsinformatie Alleen voor
binnenshuis te gebruiken
Houdt uw apparaat helemaal droog. Dit
product moet door een bekwaarm vakman
worden geïnstalleerd in overeenstemming met
de Europese en nationale wet en regelgeving.
Always isolate the AC Mains supply before installing or working on any
components that require 230 VAC 50Hz supply.
Das Gerät muss vor der Installation oder Arbeiten an Komponenten, die
230 VAC 50 Hz benötigen, vom Stromnetz getrennt werden.
Toujours couper au préalable l’alimentation électrique générale avant
d’installer ou de manipuler n’importe quel élément utilisant une
alimentation en 230VAC 50HZ.
Zorg dat er geen stroom op het apparaat met 230 VAC 50Hz staat indien
u het installeert of er aan werkt.
The thermostat is pre-set from factory in Manual Mode allowing you to set
the desired temperature. This is the default working mode if not connect-
ed to the internet during installation.
Der Thermostat ist werksseitig auf manuell eingestellt damit Sie Ihre
gewünschte Temperatur einstellen können. Das ist die Werkseinstellung
wenn keine Internetverbinung während der Installation besteht.
Le thermostat est préréglé en usine en Mode Manuel vous permettant
de régler la température de consigne souhaitée. C’est le mode de
fonctionnement par défaut s’il n’y a pas de connection durant l’installation.
De thermostaat is voor ingesteld van fabrieksinstelling naar handmatige
instelling zodat u de gewenste temperatuur kunt kiezen. Dit is een
standaard instelling als u er mee werkt zonder internet verbinding.
1. RT310iRX 3. iTG310
Connect the gateway to your router. Gateway is online when the green LED is on.
Verbinden Sie das Gateway mit dem Router. Das Gateway ist online wenn die grüne
LED leuchtet.
Connectez la passerelle à votre Box. La passerelle est en ligne lorsque le LED vert est allumé.
Verbind de gateway met uw router. Gateway is online als het licht groen is.
TEST/PAIRING
1
2
3
4
5
EN Turn on the LCD backlight.
GE Schaltet die Hintergrundbeleuchtung ein
NL Zet het LCD backlight aan
FR Allume le rétroéclairage
1
EN
Turn On/O the Frost Mode
.
GE Frotschschutz An/Aus
NL Zet aan/uit vorst modus
FR Active/désactive le Mode Hors-gel
2
EN
Increase button
.
GE Erhöhen Taste
NL omhoog knop
FR Boutton d’augmentation
3
EN
Decrease button
.
GE Senken Taste
NL omlaag knop
FR Boutton de baisse
4
EN
Test Mode/ Pairing Mode
GE Testmodus / Verbindungsmodus
NL Test modus/ pairing modus
FR Mode Test / Mode Appairage
5
RT310i App
Features available only on the App:
- Temperature format - Schedule/Manual/O Mode
- Clock format - Holiday Mode
- Time zone - Frost Mode*
- Daylight Saving Time
- Heating or Cooling Mode
* Also available on the device
-Temperatur Format - Programm /Manuell /Aus Modus
- Zeit Format - Urlaubsmodus - Zeitzone
- Sommer/Winterzeit - Heizen oder Kühlenmodus
- Frostschutz*
* Auch auf dem Gerä verfügbar
Toepassingen die alleen op de App beschikbaar zijn:
- Temperatuur format - programma/handmatig/O Modus.
- Klok format - Vakantie modus - Tijd zone - Vorst Modus*
- Daglicht bespaar tijd - Verwarmen en koelen modus
*Ook op de App beschikbaar
Funktionen die nur auf der App verfügbar sind:
- Format de Température - Programmation/Manuel/Eteint
- Format d’horloge - Mode Vacances
- Fuseau horaire - Mode Hors-gel*
- Mode éco lumière du jour
- Mode chauage ou refroidissement
* aussi disponible sur l’appareil
Fonctions disponibles seulement dans l’Appl:
Download the RT310i App, create
an account and register your device.
Follow the on screen instructions to
complete all the steps.
Laden Sie Sich die RT310i App
herunter, erstellen Sie ein Konto und
registrieren ihr Gerät. Folgen Sie den
Bildschirmanweisungen um alle
Schritte abzuschliessen.
Téléchargez l’Aplli RT310i, créer un
compte et enregistez votre appareil.
Suivre les instructions à l’écran pour
exécuter toutes étapes.
Download de RT310i, maak een
account en registreer uw apparaat.
Volg de instructies op het scherm en
doorloop alle stappen.
1
2
Sie werden eine Bestätigungsemail
erhalten. Klicken sie auf den Link
um ihr Konto zu bestätigen.
You will receive an email of
conrmation. Click the link on the
email to conrm your account.
U ontvangt een bevestigings Email.
Klik de link in de Email om te
bevestigen.
Vous recevrez un e-mail de
conrmation. Cliquez sur le lien
dans l’e-mail pour comrmer votre
compte.
Time and Date settings Zeit und Datums Einstellung
Réglages Date et Heure Tijd en datum instellingen
Choose the temperature and clock format. Set your time zone, daylight saving
settings and the mode (heat/cool). Time and date will be set automatically
once connected to the internet.Time zone needs to be set manually.
Heat Mode is used for controlling a heating boiler.
Cool Mode is used for controlling a cooling device.
Wählen SieTemperatur und Uhrzeitformat. Stellen sie Ihre Zeitzone, Sommer/
Winterzeit und den Modus (Heizen/Kühlen) ein. Zeit und Datum stellen sich
automatisch ein sobald eine Internetverbindung vorhanden ist. Zeitzonen
müssen manuell eingestellt werden. Heizmodus wird für die Steuerung
der Heizungsboiler verwendet, Kühlmodus wird für die Steuerung von
Kühlgeräten verwendet.
Choisir le format de température et d’horloge. Réglez votre fuseau horaire,
économie lumière du jour et le mode (Chauage/rafraichissement). Heure et
la date seront mises à jour dès la connection sur internet. Le fuseau horaire est
à paramétrer manuellement.
Le Mode Chauage est utilisé pour contrôler une chaudière.
Le Mode Raaichissement est utilisé avec une appareil de refroidissement.
Kies de temperatuur en de klok format. Stel uw tijdzone in, daglicht
bespaar instelling en de modus (verwarm/koel). Tijd en datum worden
automatisch gezet als het verbonden is met internet. De tijdzone moet u
handmatig instellen.
Verwarm modus wordt gebruikt om het verwarmen van de boiler te regelen.
Koel modus is om een koelapparaat te bedienen.
EN Button Functions GE Tasten Funktionen
FR Fonctions de boutton NL Knop functies
EN Registration GE Registrierung
FR Enregistrement NL Registratie
EN Registration GE Registrierung
FR Enregistrement NL Registratie
EN Device Settings Via the App
FR Réglages de l’appareil via l’Appli
GE Geräteeinstellung über die App
NL Apparaat instellingen via de App
ON
AUTO
OFF
MANUAL
Wire up the receiver according to the diagram and switch it on before inserting the batteries into the
thermostat.
Verkabeln Sie den Empfänger gemäß dem Schaltplan und schalten diesen ein.
Câbler le recepteur selon le diagramme et allumez le.
Bedraad de ontvanger volgens schema en zet deze aan.
NO
COM
L
N
Switch Terminal Schaltkontakt Commutateur Schakel de
terminal
Common
Terminal Gemeinsamer
Kontakt Borne
commune gewone
terminal
Main Live
(230V)
Phase
(230V)
Phase
(230V)
Voeding
(230V)
Main Neutral Nullleiter Neutre Neutraal
The thermostat and the receiver are pre-paired from factory.
Der Thermostat und Empfänger sind werksseitig bereits verbunden.
Le thermostat et le recepteur sont pre-appairés en usine.
De thermostaat en de ontvanger zijn reeds gepaired in de fabriek.
i
NO COM L N
S R T
SRT00000000 - 00
Before inserting the batteries, please make a note of your SRT number and register
your device on the app.
Ehe Sie die Batterien einlegen notieren Sie sich bitte die SRT Nummer und
registrieren Sie Ihr Gerät auf der App
Avant d’insérer les piles, merci de noter le numéro de série (SRT) et d’enregistrer
votre appareil sur l’Appli.
Voordatu de batterijen er in stopt, noteer uw SRT nummer en registreer uw apparaat
in de App.
1. 2.
INSTALLATION - STEP 1
2. RT310iTX
INSTALLATION - STEP 2
INSTALLATION - STEP 3
Other manuals for RT310i

2

Other Salus Thermostat manuals

Salus ERT 52 User manual

Salus

Salus ERT 52 User manual

Salus RT510 User manual

Salus

Salus RT510 User manual

Salus RT310TX User manual

Salus

Salus RT310TX User manual

Salus RT500 User manual

Salus

Salus RT500 User manual

Salus RT510BC+ User manual

Salus

Salus RT510BC+ User manual

Salus HTRP230V User manual

Salus

Salus HTRP230V User manual

Salus RT510 User manual

Salus

Salus RT510 User manual

Salus ST320 User manual

Salus

Salus ST320 User manual

Salus ERT30 User manual

Salus

Salus ERT30 User manual

Salus ST621TX User manual

Salus

Salus ST621TX User manual

Salus RT310i User manual

Salus

Salus RT310i User manual

Salus TH-3 User manual

Salus

Salus TH-3 User manual

Salus RT510 User manual

Salus

Salus RT510 User manual

Salus VS20WRF User manual

Salus

Salus VS20WRF User manual

Salus iT500 User manual

Salus

Salus iT500 User manual

Salus RT310RF User manual

Salus

Salus RT310RF User manual

Salus RT520RF User manual

Salus

Salus RT520RF User manual

Salus RT300RF User manual

Salus

Salus RT300RF User manual

Salus RT200 User manual

Salus

Salus RT200 User manual

Salus SQ605RF User manual

Salus

Salus SQ605RF User manual

Salus CT100 User manual

Salus

Salus CT100 User manual

Salus ERT50 User manual

Salus

Salus ERT50 User manual

Salus 091FLRF User manual

Salus

Salus 091FLRF User manual

Salus iT500BM User guide

Salus

Salus iT500BM User guide

Popular Thermostat manuals by other brands

ATTACK OT80 manual

ATTACK

ATTACK OT80 manual

Pro1 Technologies T721i Product installation guide

Pro1 Technologies

Pro1 Technologies T721i Product installation guide

Heatmiser Touch manual

Heatmiser

Heatmiser Touch manual

MILL Convection WiFi Series Assembly and instruction manual

MILL

MILL Convection WiFi Series Assembly and instruction manual

White Rodgers 1F89-211 Installation and operation instructions

White Rodgers

White Rodgers 1F89-211 Installation and operation instructions

HOTOWELL HTW-WF06 Series manual

HOTOWELL

HOTOWELL HTW-WF06 Series manual

Habitat HTE-01 Operation manual

Habitat

Habitat HTE-01 Operation manual

industrie technik DBTV instructions

industrie technik

industrie technik DBTV instructions

FIBARO Heat Controller Quick Manuals. Warranty Terms

FIBARO

FIBARO Heat Controller Quick Manuals. Warranty Terms

POLA HP52 Handbook

POLA

POLA HP52 Handbook

NPower Smartpower quick start guide

NPower

NPower Smartpower quick start guide

Plugwise Koen quick start

Plugwise

Plugwise Koen quick start

Mod-tronic Series 40T Specifications-installation and operating instructions

Mod-tronic

Mod-tronic Series 40T Specifications-installation and operating instructions

Honeywell FocusPRO TH5110D installation guide

Honeywell

Honeywell FocusPRO TH5110D installation guide

Danfoss ECtemp 130 installation guide

Danfoss

Danfoss ECtemp 130 installation guide

Travis Industries SKU 99300689 instructions

Travis Industries

Travis Industries SKU 99300689 instructions

Riello BeSMART quick start guide

Riello

Riello BeSMART quick start guide

ABB 3292A-A10301 Series Instructions for installation and use

ABB

ABB 3292A-A10301 Series Instructions for installation and use

manuals.online logo
manuals.online logoBrands
  • About & Mission
  • Contact us
  • Privacy Policy
  • Terms and Conditions

Copyright 2025 Manuals.Online. All Rights Reserved.