manuals.online logo
Brands
  1. Home
  2. •
  3. Brands
  4. •
  5. Sanhua
  6. •
  7. Control Unit
  8. •
  9. Sanhua RFKH Series User manual

Sanhua RFKH Series User manual

INSTRUCTIONS
Copyright © SANHUA 2016 1 II-RFKH-MU-R1611
Subject to change without notice
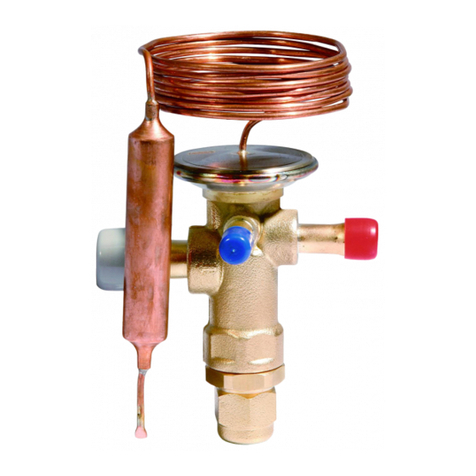
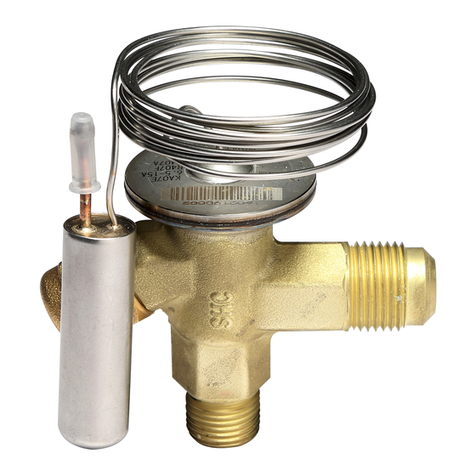
THERMOSTATIC EXPANSION VALVE series RFKH
Applica le to fluids and refrigerants of GROUP 2 according to Directive 2014/68/EU or GROUP A1 according
to ANSI-ASHRAE 34-2010.
Temperature allowed range: -40°C to +70°C (-40°F to +158°F)
Design Pressure (PS): 46 ar (667 psi)
2
3
4
5
1
All manuals and user guides at all-guides.com
all-guides.com
INSTRUCTIONS
Copyright © SANHUA 2016 2 II-RFKH-MU-R1611
Subject to change without notice
Table 2
Type
MOP
Range o t
o
-40°C to +10°C
Range o t
o
-60°C to -25°C
SH=SuperHeat
Factory setting
-
5 K
5 K
√
4 K
4 K
∆
∆∆
∆
SH / 360° *
* SH variation or each turn
RFK
H
01
-
3.6 K
-
RFK
H
01
√
3.6 K
8 K
RFK
H
02
-
4 K
-
RFK
H
02
√
4 K
-
RFK
H
03
-
3 K
-
RFK
H
03
√
3 K
7 K
RFKH04
-
5 K
-
RFKH04
√
5 K
-
RFKH05
-
5 K
-
RFKH05
√
5 K
-
RFKH07
-
4
K
-
RFKH0
7
√
4
K
-
7
6
8
8a
9.0~10.1lb
6.75
~
7.9
lb
2.25
~
3.6
lb
2.25
~
3.6
lb
All manuals and user guides at all-guides.com
INSTRUCTIONS
Copyright © SANHUA 2016 3 II-RFKH-MU-R1611
Subject to change without notice
ACTION English Français Deutsch Italiano Español Russian Chinese
1
Fix the ul on
the pipe (suction
line) using a
clamp as shown
in the picture
Fixer le ul e sur la
ligne d’aspiration en
utilisant un collier
comme montré sur
le schéma
Thermofühler mit
einer Schelle gemäß
Bild am
Saugleitungsrohr
efestigen.
Fissare il ul o sul
tu o della linea di
aspirazione usando
un morsetto come in
figura
Fijar el ul o en el
tu o de la línea de
aspiración usando
una a razadera
como en la figura.
Используя
фиксирующую
ленту, установите
термобаллон на
трубу.
使用如图中
所示的螺丝
钳固定在管
路上(吸气
管路)
2
Respect the
correct installing
position in the
plant admitted
for the
thermostatic
expansion valve
(TEV).
Evaporators with
liquid
distri utors need
TEV with
external
equalization
(fig.A)
Positionner
correctement la
vanne d’expansion
thermostatique
dans l’installation.
Les évaporateurs
avec distri uteurs
ont esoin de TEV
avec égalisation
externe
Korrekte Ein aulage
des
thermostatischen
Expansionsventiles
(TEV) innerhal der
Anlage eachten.
Verdampfer mit
Flüssigkeitsverteiler
enötigen TEV mit
externem
Druckausgleich
Rispettare la corretta
posizione di
installazione
nell’impianto
ammessa per la
valvola di espansione
termostatica (TEV).
Gli evaporatori con
distri utore di liquido
necessitano di una
TEV con
equalizzazione
esterna
Respetar la posición
correcta de
instalación en el
equipo admitido
por la válvula de
expansión
termostática (TEV).
Los evaporadores
con distri uidor de
líquido necesitan
una TEV con
igualación externa
Выбирайте
правильное
расположение
ТРВ в
холодильной
системе. Для
испарителей с
распределителем
жидкости
применяйте ТРВ с
внешним
выравниванием.
注意正确的
安装位置在
机组上 蒸
发器带有分
液器要求膨
胀阀外平衡
连接(图
A
)
3
Install the ul
on the suction
line according to
the position
shown in the
picture. Respect
the minimum
length L (vertical
distance
etween the
valve and the
liquid
distri utor). It
must e L > 7 x D
(D= pipe
diameter). Install
the ul e close
to the
evaporator (from
3 to 6 in.)
Installer le ul e sur
la ligne d’aspiration
selon la position
indiquée sur le
schéma. Respecter
la distance
minimum L
(distance verticale
entre la vanne et le
distri uteur). Elle
doit respecter la
règle L > 7xD (où D
est le diamètre du
tu e cuivre).
Installer le ul e
près de
l’évaporateur (de 3
à 6 pouces)
Thermofühler gemäß
Bild an der
Saugleitung
efestigen.
Minimalen A stand L
einhalten (vertikaler
A stand zwischen
Ventil und
Flüssigkeitsverteiler).
Es muss L > 7 x D (D=
Rohrdurchmesser)
eingehalten werden.
Den Fühler nahe am
Verdampfer
montieren (von 3 is
6 in.; von 75 is
150mm)
Installare il ul o
sulla linea di
aspirazione secondo
la posizione mostrata
in figura. Rispettare la
lunghezza minima L
(distanza verticale fra
la valvola e il
distri utore di
liquido). Deve essere
L > 7 x D (D=
diametro del tu o).
Installare il ul o
vicino all’evaporatore
(da 3 a 6 pollici)
Instalar el ul o en
la línea de
aspiración según la
posición mostrada
en la figura.
Respetar la longitud
mínima L (Distancia
vertical entre la
válvula y el
distri uidor de
líquido). De e ser
L>7 x D(D=
diámetro) del
tu o). Poner el tu o
cerca de la salida
del evaporador ( de
3 a 6 pulgadas)
Установите
термобаллон на
линию
всасывания как
указано на
рисунке, с учетом
минимального
расстояния от
ТРВ до
распределителя
жидкости (L > 7 x
D, где D-диаметр
трубки).
Рекомендуемое
расстояние до
испарителя от 3
до 6 дюймов..
按照图示位
置将螺栓安
装在吸气管
路上 注意
最小长度
L
(阀和分液
器之间的垂
直距离)
L
必须大于
7
倍
D
(
D
为
管路直径)
感温包靠近
蒸发器(从
3
到
6
)
4
SOLDER
VERSION: Braze
inlet, outlet and
(if present)
external
equalization
connections of
TEV using
specific alloy
(SilFos 15). Use a
wet rag on the
valve during the
razing process
VERSION A BRASER:
Braser les
connections
d’entrée, de sortie
et (si présent)
d’égalisation
externe en utilisant
un alliage spécifique
(type SilFos 15).
Placer un chiffon
mouillé sur le corps
de la vanne pendant
le rasage.
LÖTVERSION:
Eingang, Ausgang
und (falls
vorhanden) externen
Ausgleich einlöten
unter Verwendung
spezieller Legierung
(SilFos 15). Während
des Lötvorgangs das
Ventil mit nassem
Lappen umwickeln.
VERSIONE A
SALDARE: Brasare le
connessioni di
ingresso, uscita e (se
presente) di
equalizzazione
usando una lega
specifica (SilFos 15).
Usare uno straccio
agnato sulla valvola
durante il processo di
rasatura.
VERSION SOLDAR:
Soldar las
conexiones de
entrada, salida y (si
presente) de la
igualación usando
una aleación
específica (SilFos
15). Poner un paño
húmedo encima de
la válvula durante el
proceso de
soldadura.
ПАТРУБКИ ПОД
ПАЙКУ:
При пайке
патрубков
(входного,
выходного и, при
наличии,
внешнего
выравнивания)
пользуйтесь
припоем (SilFos
15). Защитите
вентиль от
перегрева
мокрой ветошью.
焊接类型:
使用特殊合
金(
SilFos
15
)焊接进
口 出口和
外平衡管
(如果
有) 焊接
过程中使用
湿布保护
5
THREAD
VERSION: Braze
the inlet
connection to a
solder adaptor
using specific
alloy (SilFos 15).
Insert into the
ody valve the
internal orifice
VERSION A VISSER:
Braser la connection
d’entrée à un
adaptateur à souder
en utilisant un
alliage spécifique
(type SilFos 15).
Insérer l’orifice
interne dans le
corps de la vanne.
GEWINDEVERSION:
Eingangsver indung
mit einem
Lötadapter verlöten
unter Verwendung
spezieller Legierung
(SilFos 15). Die
interne Düse in das
Ventilgehäuse
einfügen.
VERSIONE AD
AVVITARE Brasare la
connessione di
ingresso ad un
adattatore a saldare
usando una lega
specifica (SilFos 15).
Inserire nel corpo
valvola l’orificio
interno.
VERSION ROSCAR:
Soldar la conexión
roscada a un
adaptador a soldar
usando una
aleación específica
(SilFos 15).
Introducir el orificio
interno en el
cuerpo de la
válvula.
РЕЗЬБОВЫЕ
ПАТРУБКИ:
При пайке
переходника
пользуйтесь
припоем (SilFos
15). Установите
клапанный узел в
корпус клапана.
螺纹类型:
将焊接接头
与进口段用
特殊合金
(
SilFos
15
)将阀芯
插入阀体中
6
Tighten the
adaptor to the
thread
connection
respecting the
torque values.
ATTENTION: use
the two
wrenches.
Serrer l’adaptateur
sur la connection
vissée en respectant
les valeurs de
couples.
ATTENTION : Utiliser
2 clés de serrage.
Den Adapter mit der
Gewindever indung
efestigen unter
Berücksichtigung der
Drehmomente.
ACHTUNG : Zwei
Schlüssel enutzen.
Serrare l’adattatore
alla connessione
filettata rispettando i
valori di coppia
riportati.
ATTENZIONE: usare le
due chiavi.
Ajustar el
adaptador a la
conexión roscada
repetando los
valores de Par de
Ajuste.
ATENCION: Usar las
dos llaves.
Затяните гайку
переходника не
превышая
допустимого
усилия.
ВНИМАНИЕ:
используйте два
гаечных ключа.
将接头与螺
纹连接端拧
紧注意扭
矩 注意:
使用两个扳
手
All manuals and user guides at all-guides.com
INSTRUCTIONS
Copyright © SANHUA 2016 4 II-RFKH-MU-R1611
Subject to change without notice
Nominal Capacity: RFKH, Temperature Range -40…+10°C (+14…+104°F)
Table 3
a
Ori ice
Number
Nominal Capacity
1)
[ kW ] Valve Ori ice
Model
Valve Ori ice
Part Number
R22 R407C
2)
R404A
R507A R134a R410A R407F
2)
R407A
2)
0X 1,0 1,0 0,7 0,69 1,3 1,0 RFKH-023-0X RFK-24097
0 1,9 2,1 1,4 1,2 2,5 1,8 RFKH-023-00 RFK-24098
1 3,8 4,0 2,8 2,1 5,0 3,7 RFKH-023-01 RFK-24099
2 5,1 5,4 4,0 2,7 6,2 5,1 RFKH-023-02 RFK-24100
3 8,6 9,2 6,8 4,4 11,2 8,6 RFKH-023-03 RFK-24101
4 13,2 13,9 10,8 6,5 17,0 13,4 RFKH-023-04 RFK-24102
5 18,1 18,5 14,1 8,6 21,3 17,6 RFKH-023-05 RFK-24103
6 21,3 22,1 16,8 10,3 26,8 21,2 RFKH-023-06 RFK-24104
7
After the TEV
installation,
check that: the
temperature of
thermo head (t2)
must e igger
than the
evaporator
outlet
temperature (t1
= temperature
measured y the
ul )
Après avoir installé
la vanne, vérifier
que la température
d’entrée de
l’évaporateur (t2)
est supérieure à la
température de
sortie de
l’évaporateur (t1
mesurée par le
ul e)
Nach Installation des
TEV sicherstellen,
dass die
Thermokopftempera
tur (t2) höher ist als
die Verdam-
pferaustrittstempera
tur (t1 = vom Fühler
gemessene
Temperatur).
Dopo l’installazione
della TEV controllare
che: la temperatura di
ingresso
all’evaporatore (t2)
deve essere maggiore
della temperatura di
uscita
dall’evaporatore (t1 =
temperatura misurata
dal ul o)
Después de la
instalación de la
TEV, compro ar
que: la temperatura
de la ca eza de la
válvula (t2) ha de
ser mayor que la
temperatura de
salida (t1 =
temperatura
medida por el
ul o).
После установки
ТРВ
удостоверьтесь,
что температура
термоголовки
(t2) выше
температуры на
выходе из
испарителя
(t1=температура
термобаллона).
当阀安装完
成后 检查
热力头的温
度(
t2
)必
须高于蒸发
器出口温度
(
t1
为感
温包测量温
度)
8
Factory
presetting of TEV
(with or without
MOP) is just
provided on
standard
products. It is
possi le to
customize the
superheat value
(∆Tsh ) setting:
Le préréglage
d’usine des TEV
(avec ou sans MOP)
est uniquement
effectué sur les
composants
standards. Il est
possi le de
personnaliser la
valeur de
désurchauffe
(∆Tsh)
Werkseinstellung
von TEV (mit oder
ohne MOP) wird nur
ei
Standardprodukten
vorgenommen.
Kundenspezifische
Einstellung der
Ü erhitzung (∆Tsh)
ist möglich :
Nei prodotti standard
è fornito un pre-
settaggio di fa rica
della TEV (con o senza
MOP). E’ possi ile
personalizzare il
settaggio del
surriscaldamento
∆Tsh:
El producto
estándar de la TEV (
con o sin MOP)
lleva un ajuste de
fá rica. Es posi le
personalizar el
ajuste del
supercalentamiento
∆Tsh:
ТРВ (с МОР и без
МОР)
поставляется с
заводской
настройкой
перегрева.
Величину
перегрева (∆Tsh )
можно изменить:
TEV
出厂设
置(有或无
MOP
功
能)仅对标
准品提供。
可以自定义
过热度值
(∆Tsh )
8a
Using a
screwdriver turn
in
counterclockwise
the regulation
screw until the
stop position.
A l’aide d’un
tournevis, tourner
dans le sens inverse
des aiguilles d’une
montre la vis de
régulation jusqu’à la
utée.
Mit einem
Schrau endreher die
Einstellschrau e
gegen den
Uhrzeigersinn is
zum Anschlag
drehen.
Usando un cacciavite
girare in senso
antiorario la vite di
regolazione fino alla
posizione di stop.
Con un
destornillador girar
en sentido
contrario del reloj
el tronillo de
regulación hasta la
posición de fin.
Отверткой
поверните
регулировочный
винт против
часовой стрелки
до упора.
用螺丝刀逆
时针转动螺
钉到关闭位
置
8
Turn the
regulation screw
in clockwise until
the desired ∆Tsh
value (see ta le
2 for details)
Tourner la vis de
régulation dans le
sens des aiguilles
d’une montre
jusqu’à la valeur
désirée (∆Tsh). Se
référer à la ta le 2
pour les détails.
Die Einstellschrau e
im Uhrzeigersinn
drehen, is die
gewünschte
Ü erhitzung ∆Tsh
erreicht wird (Siehe
Ta .2 für Details)
Girare in senso orario
la vite di regolazione
fino al
raggiungimento del
valore richiesto di
∆Tsh (vedi ta ella 2
per dettagli)
Girar el tornillo de
regulación en el
sentido del reloj
hasta el valor
deseado (ver Ta la
2 para detalles) del
∆Tsh
Вращением
регулировочного
винта по часовой
стрелке
установите
требуемый
перегрев ∆Tsh
(см. Табл. 2).
用螺丝刀顺
时针拧紧螺
钉到需要的
过热度
∆Tsh
(具
体见表
2
)
All manuals and user guides at all-guides.com
INSTRUCTIONS
Copyright © SANHUA 2016 5 II-RFKH-MU-R1611
Subject to change without notice
Table 3
b
Ori ice
Number
Nominal Capacity
1)
[ tons ] Valve Ori ice
Model
Valve Ori ice
Part Number
R22 R407C
2)
R404A
R507A R134a R410A R407F
2)
R407A
2)
0X 0,29 0,29 0,20 0,20 0,37 0,29 RFKH-023-0X RFK-24097
0 0,54 0,60 0,40 0,34 0,71 0,51 RFKH-023-00 RFK-24098
1 1,09 1,14 0,80 0,60 1,43 1,06 RFKH-023-01 RFK-24099
2 1,46 1,54 1,14 0,77 1,77 1,46 RFKH-023-02 RFK-24100
3 2,46 2,63 1,94 1,26 3,20 2,46 RFKH-023-03 RFK-24101
4 3,77 3,97 3,09 1,86 4,86 3,83 RFKH-023-04 RFK-24102
5 5,17 5,29 4,03 2,46 6,09 5,03 RFKH-023-05 RFK-24103
6 6,09 6,31 4,80 2,94 7,66 6,06 RFKH-023-06 RFK-24104
Note: 1) Nominal working conditions: Condensing temperature: 38°C (100°F); evaporating temperature
+4,4°C (40°F); Liquid temperature 37°C (98°F)
2) R407C data ased on dew point conditions
All manuals and user guides at all-guides.com

This manual suits for next models

6

Other Sanhua Control Unit manuals

Sanhua RFKA Series User manual

Sanhua

Sanhua RFKA Series User manual

Sanhua SBV Series User manual

Sanhua

Sanhua SBV Series User manual

Sanhua RFGD Series User manual

Sanhua

Sanhua RFGD Series User manual
Sanhua RFGB Series User manual

Sanhua

Sanhua RFGB Series User manual

Sanhua PEV0 User manual

Sanhua

Sanhua PEV0 User manual

Sanhua TXV Series Manual

Sanhua

Sanhua TXV Series Manual

Sanhua MDF Series User manual

Sanhua

Sanhua MDF Series User manual

Sanhua RFGD Series User manual

Sanhua

Sanhua RFGD Series User manual

Sanhua RFGD Series User manual

Sanhua

Sanhua RFGD Series User manual

Sanhua SBV Series User manual

Sanhua

Sanhua SBV Series User manual

Sanhua LPF Series User manual

Sanhua

Sanhua LPF Series User manual
Sanhua PS01 Series User manual

Sanhua

Sanhua PS01 Series User manual

Sanhua LPF Series User manual

Sanhua

Sanhua LPF Series User manual

Sanhua VPF Series User manual

Sanhua

Sanhua VPF Series User manual

Sanhua RFKH Series User manual

Sanhua

Sanhua RFKH Series User manual

Sanhua RFGB Series User manual

Sanhua

Sanhua RFGB Series User manual

Sanhua DPF-R Series User manual

Sanhua

Sanhua DPF-R Series User manual

Sanhua MDF Series User manual

Sanhua

Sanhua MDF Series User manual

Sanhua DPF Series User manual

Sanhua

Sanhua DPF Series User manual

Sanhua RFKA Series User manual

Sanhua

Sanhua RFKA Series User manual

Sanhua SBV Series User manual

Sanhua

Sanhua SBV Series User manual
Sanhua RFGB Series User manual

Sanhua

Sanhua RFGB Series User manual

Sanhua RFKH series User manual

Sanhua

Sanhua RFKH series User manual

Sanhua RFKA Series User manual

Sanhua

Sanhua RFKA Series User manual
Popular Control Unit manuals by other brands

Siemens ZAM-180 installation instructions

Siemens

Siemens ZAM-180 installation instructions

Siemens SINUMERIK 880 Programming guide

Siemens

Siemens SINUMERIK 880 Programming guide

ROOTECH ACCURA 2300 Series user guide

ROOTECH

ROOTECH ACCURA 2300 Series user guide

Nice OTA 30 Installation instructions manual

Nice

Nice OTA 30 Installation instructions manual

VLT 670 Series Installation, operating,  & maintenance instructions

VLT

VLT 670 Series Installation, operating, & maintenance instructions

M-system EtherCAT R7I4DECT-1-PA8A instruction manual

M-system

M-system EtherCAT R7I4DECT-1-PA8A instruction manual

Genebre V Series Installation, operation and maintenance manual

Genebre

Genebre V Series Installation, operation and maintenance manual

Juniper JCS 1200 manual

Juniper

Juniper JCS 1200 manual

Infineon SMU IR Alarm 1 manual

Infineon

Infineon SMU IR Alarm 1 manual

GESTRA NRS 1-40.1 installation instructions

GESTRA

GESTRA NRS 1-40.1 installation instructions

Danfoss RLV-X instructions

Danfoss

Danfoss RLV-X instructions

WURM FKV003 quick start guide

WURM

WURM FKV003 quick start guide

VIPA TM-E 900-1E640 manual

VIPA

VIPA TM-E 900-1E640 manual

Ludl Electronic Products MAC 2000 Configuration manual

Ludl Electronic Products

Ludl Electronic Products MAC 2000 Configuration manual

HPE G2 R5000 Product End-of-Life Disassembly Instructions

HPE

HPE G2 R5000 Product End-of-Life Disassembly Instructions

jablotron JA-153E manual

jablotron

jablotron JA-153E manual

Texas Instruments SimpleLink CC3100MOD user guide

Texas Instruments

Texas Instruments SimpleLink CC3100MOD user guide

SSS Siedle ZDS 601-0 Product information

SSS Siedle

SSS Siedle ZDS 601-0 Product information

manuals.online logo
manuals.online logoBrands
  • About & Mission
  • Contact us
  • Privacy Policy
  • Terms and Conditions

Copyright 2025 Manuals.Online. All Rights Reserved.