manuals.online logo
Brands
  1. Home
  2. •
  3. Brands
  4. •
  5. Sanhua
  6. •
  7. Control Unit
  8. •
  9. Sanhua DPF-R Series User manual

Sanhua DPF-R Series User manual

INSTRUCTIONS
Copyright © SANHUA 2021 1 II-DPF-R-EN-R2101
Subject to change without notice
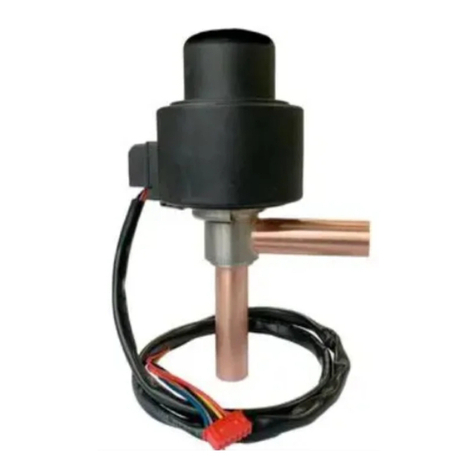
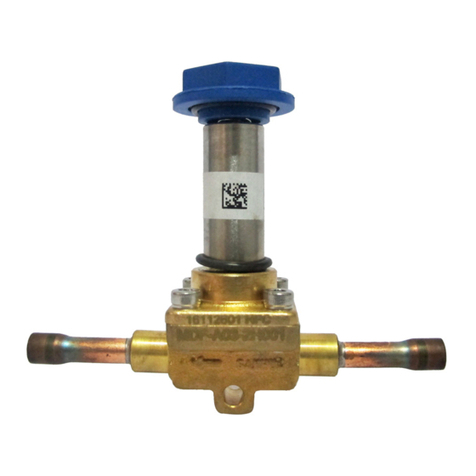
CO2 ELECTRONIC EXPANSION VALVE DPF-R series
Applicable to fluids and refrigerants of GROUP 2 according to Directive 2014/68/EU
Medium temperature (TS): -30°C to +80°C (-22°F to +176°F)
Design Pressure (PS): 140bar (2030.5psi)
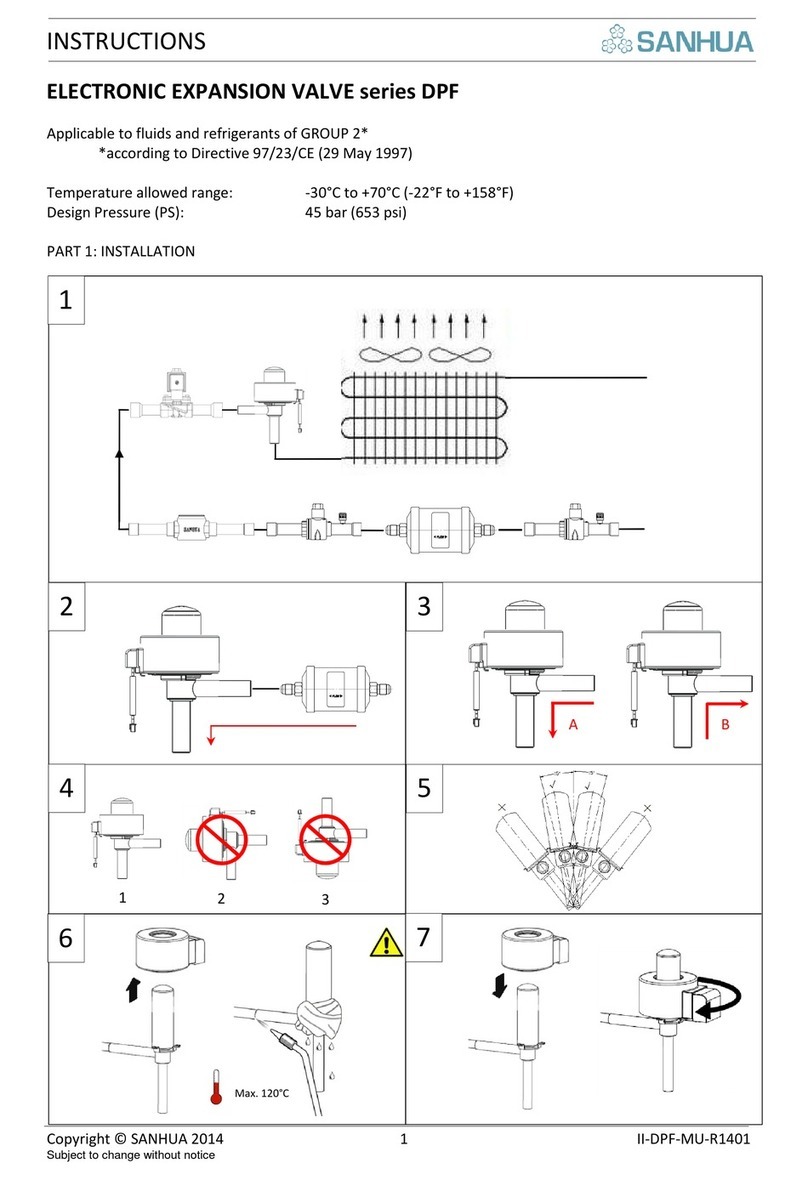
PART 1: INSTALLATION
`
1
2
3
5
6
7
Max. 120°C(248°F)
1
2
3
A
4
INSTRUCTIONS
Copyright © SANHUA 2021 2 II-DPF-R-EN-R2101
Subject to change without notice
PART 2: ELECTRICAL CONNECTION
CABLE
EXCITATION
1
2
3
4
5
6
7
8
A
ON
ON
OFF
OFF
OFF
OFF
OFF
ON
B
OFF
ON
ON
ON
OFF
OFF
OFF
OFF
A
OFF
OFF
OFF
ON
ON
ON
OFF
OFF
B
OFF
OFF
OFF
OFF
OFF
ON
ON
ON
COLOR OF CABLES
A
ORANGE
B
RED
YELLOW
BLACK
COM
GREY
ACTION
English
Français
Deutsch
Italiano
Español
Русский
Chinese
1
Respect the
indicated installation
position into the
refrigerant circuit of
the valve and of the
sensors required for
the calculation of
superheat.
Respecter la position
d’installation dans le
circuit frigorifique et
utilisez les capteurs
adéquats pour calculer
convenablement la
surchauffe.
Die vorgesehene
Einbauposition des
Ventils und der
Sensoren im
Kältemittelkreislauf zur
Ermittlung der
Kältemittelüberhitzung
beachten.
Rispettarenelcircuito
frigorifero la
posizioned’installazi
oneindicata per la
valvola e per
isensoririchiesti per
ilcalcolo del
surriscaldamento.
Respetar la
posiciónindicada en
la
instalaciónfrigorífica
para la válvula y para
los sensores que se
requieren para el
cálculo del sobre-
recalentamiento.
Устанавливайте
вентиль и
датчики для
определения
перегрева в
указанную часть
холодильной
установки.
注意在制
冷环路指
示位置进
行安装并
采用传感
器计算过
热度
2
Install a filter drier
before the inlet of
the valve.
Installer un filtre
déshydrateur avant le
détendeur.
Vor das Ventil ist ein
Filtertrockner zu
installieren
Installare un filtro
deidratatore
all’ingresso della
valvola EEV
Instale un filtro
secador antes de la
entrada de la
válvula.
Установите фильтр
осушитель перед
входом клапана
在阀的进口
前安装干燥
过滤器
3
Unidirectional,
Flow direction refer
to direction “A”..
Détendeur
unidirectionnel.
Respecter le sens de
circulation du fluide
« A ».
Uni-direktionale Filter
in Richtung „A“ (Bild3)
verbauen
Unidirezionale: il
flusso corretto deve
seguire l’indicazione
della freccia “A” in
figura
Unidireccional, la
dirección del flujo se
refiere a la dirección
"A".
Однопоточный,
направление
потока согласно А
单向流通,
流体流动方
向如箭头所
示,
4
Respect the
indicated mounting
position (pos.1). It is
Respecter les positions de
montage préconisées
(pos. 1). Il n’est pas
Die erlaubte
Einbaulage (Pos.1)
beachten. Das Ventil
Rispettare la
posizione di
montaggioindicata
Respetar la posición
del montajeindicada
(pos.1).
Допустимо
устанавливать
вентиль в поз.1.
注意指示的
安 装 位 置
(图片 1)
8
Table 1
9
M
B
A
COM
M
A
B
A
B
INSTRUCTIONS
Copyright © SANHUA 2021 3 II-DPF-R-EN-R2101
Subject to change without notice
prohibited
installation with
stator pointed
downwards (pos.2
and 3).
permis d’installer le
détendeur « tête en bas »
comme la pos.2 et pos.3
darf nicht kopfüber
eingebaut werden
(Pos. 2 und 3).
(pos.1). E’
proibital’installazion
e con lo
statorerivolto verso
il basso (pos.2 e 3).
Estáprohibida la
instalación con el
estatorvueltohaciaa
bajo (pos.2 y 3)
Поз. 2 и 3 со
статором вниз
недопустимы.
不允许定子
朝下
5
It is admitted a
tolerance of ±15° for
the coil as regards
the vertical axis, as
shown in the
picture.
Il est autorisé une
inclinaison de +/- 15° de
l’axe de la bobine par
rapport à la verticale
comme montré sur le
schéma.
Die Ventilachse darf
um ±15° gegen die
Vertikale geneigt sein,
wie im Bild gezeigt.
E’ ammessa una
tolleranza di ±15°
dellabobina rispetto
all’asseverticale,
come mostrato in
figura.
Se admite una
tolerancia del ±15°
de la bobinarespecto
al eje vertical, como
se muestra en la
figura.
Допускается
отклонение оси
катушки от
вертикали не более
±15°.
允许线圈垂
直轴线偏差
度在±15°内
6
Before the brazing
process, remove the
coil if it is just
installed on the
valve body. Braze
the two valve
connections using
specific alloy (SilFos
15). Use a wet rag
on the valve during
the brazing process
Avant le brasage, retirer
la bobine si celle-ci est
présente. Braser les tubes
en utilisant un alliage
spécifique (type SilFos
15). Placer un chiffon
mouillé sur le corps du
détendeur pendant le
brasage.
Vor dem Einlöten die
Spule vom Ventilkörper
abnehmen. Einlöten
des Ventils unter
Verwendung spezieller
Legierung (SilFos 15).
Während des
Lötvorgangs das Ventil
mitnassemLappenumw
ickeln.
Prima del processo
di
brasaturarimuovere
la bobina se
giàinstallatasulcorpo
valvola. Brasare le
due
connessionidellavalv
olausando una
legaspecifica (SilFos
15).
Usareunostracciobag
natosullavalvoladura
nteilprocesso di
brasatura.
Antes del proceso de
soldaduraquitar la
bobinasiestáinstalad
a en el cuerpo de la
válvula. Soldar las
dos conexiones de la
válvulausando una
aleaciónespecífica
(SilFos 15). Usar un
pañohúmedosobre
la válvuladurante el
proceso de
soldadura.
Перед установкой
вентиля снимите
катушку. При пайке
патрубков
пользуйтесь
припоем (SilFos 15).
Защитите вентиль
от перегрева
мокрой ветошью.
在焊接前移
除线圈,采
用特殊合金
(推荐 SilFos
15) 焊 接 过
程中使用湿
布覆盖阀体
上
7
Install the coil on the
valve body. Turn the
coil to fix it
correctly.
Installer la bobine sur le
corps du détendeur.
Tourner la bobine
jusqu’au point d’accroche
pour la fixer
correctement sur le
détendeur.
Die Spule auf den
Ventilkörper
aufstecken. Zur
Fixierung die Spule
drehen.
Installare la
bobinasulcorpovalvo
la. Ruotare la bobina
per
fissarlacorrettament
e.
Instalar la
bobinasobre el
cuerpo de la válvula.
Girar la bobina para
fijarlacorrectamente
.
Установитекатушку
навентиль.
Зафиксируйте
катушку, повернув
ее как указано на
рисунке.
将线圈安装
在阀体上。
转动线圈固
定在正确位
置。
8a
The coil connector
presents 5 wires:
cables COM( grey )
must be connected
to the positive pole.
The coil rated
voltage is DC12V ±
10%
La bobine possède 5 fils :
le fil COM (gris) doit être
connecté au pôle positif.
La tension d’alimentation
de la bobine est 12VDC±
10%
Der Spulenstecker hat
5 Drähte: Die Kabel
COM (grau) müssen an
den Pluspol
angeschlossen werden.
Die Nennspannung der
Spule beträgt DC12V ±
10%
Il connettoredella
bobina presenta 5
fili: i cavi COM
(grigio)
devonoesserecollega
ti al polo positivo.
La tensione
nominale della
bobina è DC12V ±
10%
El conector de la
bobina presenta 5
cables: los cables
COM (gris) deben
conectarse al polo
positivo.
La tensión nominal
de la bobina es
DC12V ± 10%
Подключение
катушки через 5
проводов: провод
СОМ (общий,
серый) должен
быть постоянно
подключен («+»).
Питание катушки
12 В постоянного
тока ± 10%
线圈有 5根
引线:引线
COM( 灰色)
必须连接正
极 , 线 圈 额
定 电 压 为
DC12V± 10%
8b
Give 0 pulse to
adjust the starting
point. When the
valve is completely
close re-set the
starting point to Ø1
phase excitation
using the following
method:
Keep the coil de-
energized, then
energize it and
charge 560 pulses to
close valve.
During control
process: current
open position plus 8
pulse in closing
direction.
Paramétrer 0 pulse pour
ajuster le point de départ.
Lorsque le détendeur est
complètement fermé, re-
paramétrer le point de
départ avec la phase
d’excitation Ø1en
utilisant la méthode
suivante : Gardez la
bobine non alimentée,
ensuite alimentez la et
appliquez 560 pulses
pour fermer le
détendeur.
Pendant le process de
contrôle : Rajoutez 8
pulses pour fermer le
détendeur.
0 Puls aufgeben zum
Justieren des
Startwertes. Wenn das
Ventil ganz geschlossen
ist, den Startwert zu
Ø1 Phasenansteuerung
zurücksetzen unter
Verwendung folgender
Methode: Die Spule
stromlos lassen, dann
bestromen und 560
Pulse zum Schliessen
aufgeben. Während
des Regelprozesses:
Aktuelle
Öffnungsposition plus
8 Pulse in
Schließrichtung
aufgeben.
Dare 0 impulsi per
regolare il punto di
partenza. Quando la
valvola è
completamente
chiusa resettare il
punto di partenza
alla fase di
eccitazione Ø1
usando il seguente
metodo: Tenere la
bobina diseccitata,
quindi eccitarla e
caricarla di 560
impulsi per chiudere
la valvola. Durante
ilprocesso di
controllo:
Pulsar 0 para ajustar
el punto de
arranque. Cuando la
válvulaestácompleta
-
mentecerradaresete
ar el punto de
arranque a la fase de
excitación Ø1
usando el
siguientemétodo:
Tener la
bobinadesconectada
, luegodarlecorriente
y cargarla a 560
pulsos para cerrar la
válvula. Durante el
proceso de control
Подайте 0 импульс
для для установки
начальной
позиции. При
полностью
закрытом вентиле
переустановите
начальную точку на
Ø1 фазу
следующим
образом:
подключите
питание к
обесточенной
катушке и подайте
560 импульсов для
закрытия вентиля.
При перенастройке
подайте 8
импульсов для
закрытия вентиля.
调节初始位
置在 0脉冲
下。当阀完
全关死的时
候,根据以
下原理 Ø1
相励磁,重
新设置初始
位置:开始
线 圈 不 通
电,之后通
560 个 脉 冲
将阀关死。
控 制 过 程
中:在阀关
到0脉冲时
再额外通 8
个脉冲关闭
操作
8c
To open the valve
use excitation steps
(table 1) from
position 1 to
position 8
Pour ouvrir le détendeur,
utiliser la table
d’excitation 1 (table 1) de
la position 1 à 8
Zum Öffnen des Ventils
die
Ansteuerungsschritte
(Tab.1) von Pos. 1 nach
Pos. 8 aufgeben.
Per aprire la
valvolausaregliimpul
si di eccitazione
(tabella 1)
dallaposizione 1
allaposizione 8
Para abrir la
válvulausar los
pulsos de excitación
(tabla 1) de la
posición 1 a la 8.
Для открытия
вентиля
используете
импульсы (табл. 1)
от позиции 1 до
позиции 8.
开阀激励步
骤(表 1)
从步骤 1到
8
8d
To close the valve
use excitation steps
(table 1) from
position 8 to
position 1
Pour fermer le
détendeur, utiliser la
table d’excitation 1 (table
1) de la position 8 à 1
Zum Schließen des
Ventils die
Ansteuerungsschritte
(Tab.1) von Pos. 8 nach
Pos. 1 aufgeben.
Per chiudere la
valvolausaregliimpul
si di eccitazione
(tabella 1)
dallaposizione 8
allaposizione 1
Para cerrar la
válvulausar los
pulsos de excitación
(tabla 1) de la
posición 8 a la 1.
Для закрытия
вентиля
используете
импульсы (табл. 1)
от позиции 8 до
позиции 1.
关阀激励步
骤(表 1)
从步骤 8到
1
8e
Stepping motor with
permanent magnets
has self-
maintenance, and it
doesn’t need
Le moteur pas à pas avec
aimants permanents à un
phénomène d’auto
maintien et n’a donc pas
besoin d’être alimenté
Der Schrittmotor mit
Permanentmagnet hat
eine Selbst-Haltung
und benötigt keine
Bestromung zum
Il motorepassopasso
con
magnetipermanenti
ha una funzione di
auto mantenimento,
El motor de pasos
con
imánpermanentetie
ne una función de
automanteni-miento
Шаговый
элекродвигатель с
постоянным
магнитом
самофиксируется и
步进电机带
有永磁铁具
有自保持能
力,保持开
INSTRUCTIONS
Copyright © SANHUA 2021 4 II-DPF-R-EN-R2101
Subject to change without notice
energize for keeping
open
pour laisser le détendeur
ouvert.
Halten der Position.
e non necessita di
energia per
mantenersi in
posizione.
y no necesitaenergia
para mantenerse en
posición.
не требует подачи
питания для того,
чтобы оставаться в
открытом
состоянии.
阀不需要通
电
9
ATTENTION: Don’t
connect power
supply to the
electrical coil when
it is not mounted
into the valve
ATTENTION: Ne pas
alimenter la bobine si elle
n’est pas montée sur
l’induit du détendeur.
ACHTUING: Die Spule
nicht bestromen, wenn
sie nicht auf dem
Ventilkörper montiert
ist.
ATTENZIONE: Non
alimentare con
tensione la
bobinaelettricaquan
doquesta non è
montatasullavalvola
ATENCION: No
alimentar la
bobinaeléctrica con
tensióncuandoésta
no
estámontadasobre
la válvula.
ВНИМАНИЕ: Не
подключайте
катушку в сеть до
установки на
вентиль.
注意:当线
圈没有安装
在阀体上时
不要对线圈
进行通电

Other Sanhua Control Unit manuals

Sanhua RFKA Series User manual

Sanhua

Sanhua RFKA Series User manual

Sanhua PS01 Series User manual

Sanhua

Sanhua PS01 Series User manual

Sanhua VPF Series User manual

Sanhua

Sanhua VPF Series User manual

Sanhua MDF Series User manual

Sanhua

Sanhua MDF Series User manual

Sanhua DPF Series User manual

Sanhua

Sanhua DPF Series User manual

Sanhua RFGD Series User manual

Sanhua

Sanhua RFGD Series User manual

Sanhua RFGB Series User manual

Sanhua

Sanhua RFGB Series User manual

Sanhua RFKH series User manual

Sanhua

Sanhua RFKH series User manual

Sanhua MDF Series User manual

Sanhua

Sanhua MDF Series User manual

Sanhua RFGB Series User manual

Sanhua

Sanhua RFGB Series User manual

Sanhua TXV Series Manual

Sanhua

Sanhua TXV Series Manual

Sanhua RFGD Series User manual

Sanhua

Sanhua RFGD Series User manual

Sanhua LPF Series User manual

Sanhua

Sanhua LPF Series User manual

Sanhua RFKA Series User manual

Sanhua

Sanhua RFKA Series User manual

Sanhua SBV Series User manual

Sanhua

Sanhua SBV Series User manual

Sanhua RFKA Series User manual

Sanhua

Sanhua RFKA Series User manual

Sanhua RFKH Series User manual

Sanhua

Sanhua RFKH Series User manual

Sanhua PEV0 User manual

Sanhua

Sanhua PEV0 User manual

Sanhua SBV Series User manual

Sanhua

Sanhua SBV Series User manual

Sanhua LPF Series User manual

Sanhua

Sanhua LPF Series User manual

Sanhua SBV Series User manual

Sanhua

Sanhua SBV Series User manual

Sanhua RFGB Series User manual

Sanhua

Sanhua RFGB Series User manual

Sanhua RFGD Series User manual

Sanhua

Sanhua RFGD Series User manual

Sanhua RFKH Series User manual

Sanhua

Sanhua RFKH Series User manual

Popular Control Unit manuals by other brands

resideo Braukmann BA295D-3/4WH installation instructions

resideo

resideo Braukmann BA295D-3/4WH installation instructions

Allen-Bradley 193-DNENCAT user manual

Allen-Bradley

Allen-Bradley 193-DNENCAT user manual

VBK technology Uniquom manual

VBK technology

VBK technology Uniquom manual

Delabie TEMPOMATIC installation manual

Delabie

Delabie TEMPOMATIC installation manual

AUREL RX-8MR50++ instruction manual

AUREL

AUREL RX-8MR50++ instruction manual

Taylor Valve Technology 8200 Series user manual

Taylor Valve Technology

Taylor Valve Technology 8200 Series user manual

Power Electronics ProfiPower SD700 Type 1 manual

Power Electronics

Power Electronics ProfiPower SD700 Type 1 manual

Honeywell Braukmann D06G manual

Honeywell

Honeywell Braukmann D06G manual

Codman Neuro DePuy Synthes CERTAS Plus manual

Codman Neuro

Codman Neuro DePuy Synthes CERTAS Plus manual

Stollmann BlueMod+B20 user guide

Stollmann

Stollmann BlueMod+B20 user guide

Girard Systems 98GCK-16 manual

Girard Systems

Girard Systems 98GCK-16 manual

Mitsubishi Heavy Industries SC-SL2N-E installation manual

Mitsubishi Heavy Industries

Mitsubishi Heavy Industries SC-SL2N-E installation manual

Armstrong 880A Series instructions

Armstrong

Armstrong 880A Series instructions

Realtek UWB BG13 HMC user guide

Realtek

Realtek UWB BG13 HMC user guide

Monacor ATT-135/SI quick guide

Monacor

Monacor ATT-135/SI quick guide

Lenze E94AYAE-SM301 Mounting instructions

Lenze

Lenze E94AYAE-SM301 Mounting instructions

Allen-Bradley ControlNet 1786-RPFS installation instructions

Allen-Bradley

Allen-Bradley ControlNet 1786-RPFS installation instructions

Leviton 73A00-3ZB Installation instructions and user guide

Leviton

Leviton 73A00-3ZB Installation instructions and user guide

manuals.online logo
manuals.online logoBrands
  • About & Mission
  • Contact us
  • Privacy Policy
  • Terms and Conditions

Copyright 2025 Manuals.Online. All Rights Reserved.